Apple Wallet Pass Provisioning for Visitors
Overview
This section details the step-by-step workflow for provisioning Apple Wallet passes to visitors. It covers the necessary prerequisites, configuration within the HID Origo agent, the visitor invitation process, and the visitor's steps to add the pass to their Apple Wallet.
The process involves master data synchronization, badge type and template configuration, enabling mobile readiness at the location level, and email/SMS notifications. The pass is automatically removed upon visitor checkout.
-
The HID Origo Agent must be configured in the HID Visitor Manager (HID VM). Refer to the HID Origo Agent Setup Guide for more information.
-
Master data synchronization is enabled.
-
The administrator must have procured the correct quantity of HID Mobile ID credentials.
Verifying the Master Data Sync
To verify that the master data sync was successful, follow the steps below:
-
Log in to the HID VM as a Visitor Administrator.
-
Navigate to App Launcher > Admin modules > Badge Types in the left navigation panel.
-
Choose Pass Templates from the top right corner drop-down menu. The page lists the pass templates broadcasted from HID Origo.
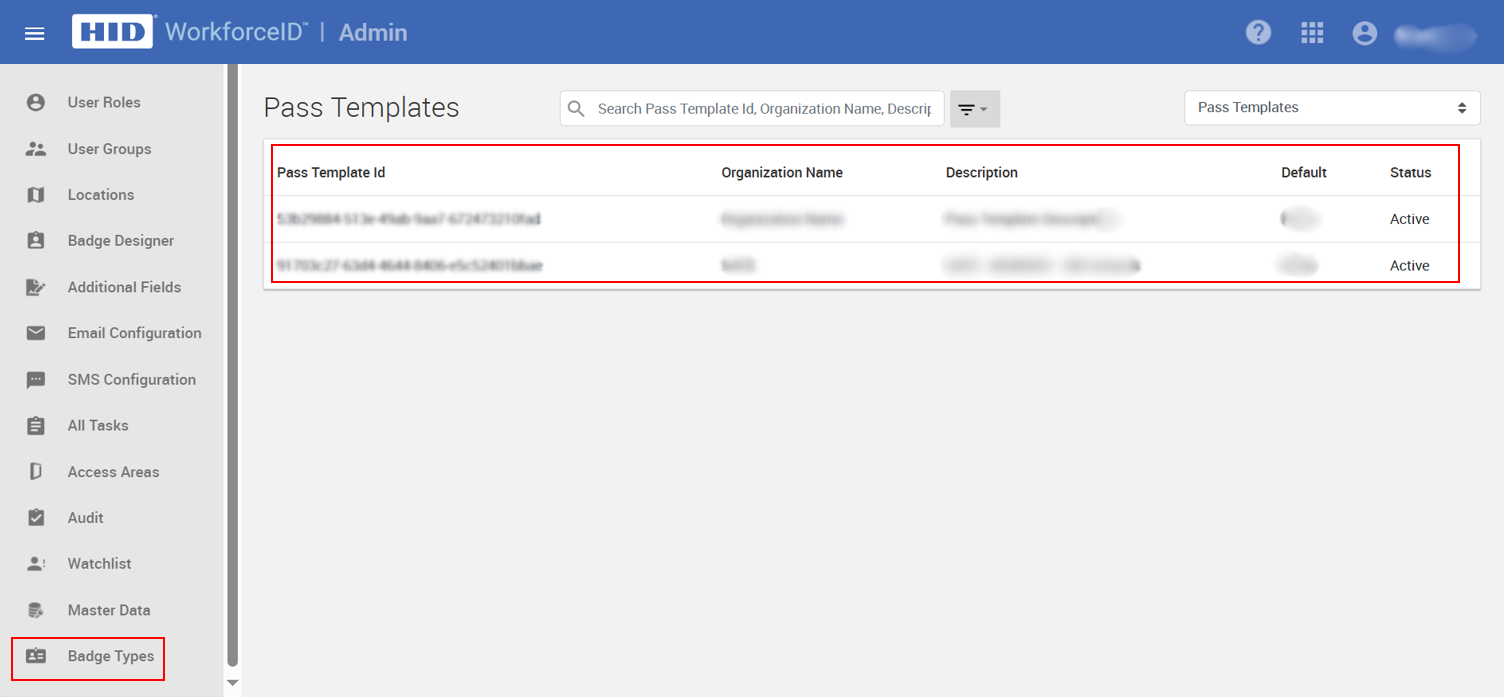
For each pass template, there is a corresponding credential template.
The listing of pass templates and their corresponding credential templates indicates that the master data sync from HID Origo to HID VM was successful.
Configuration
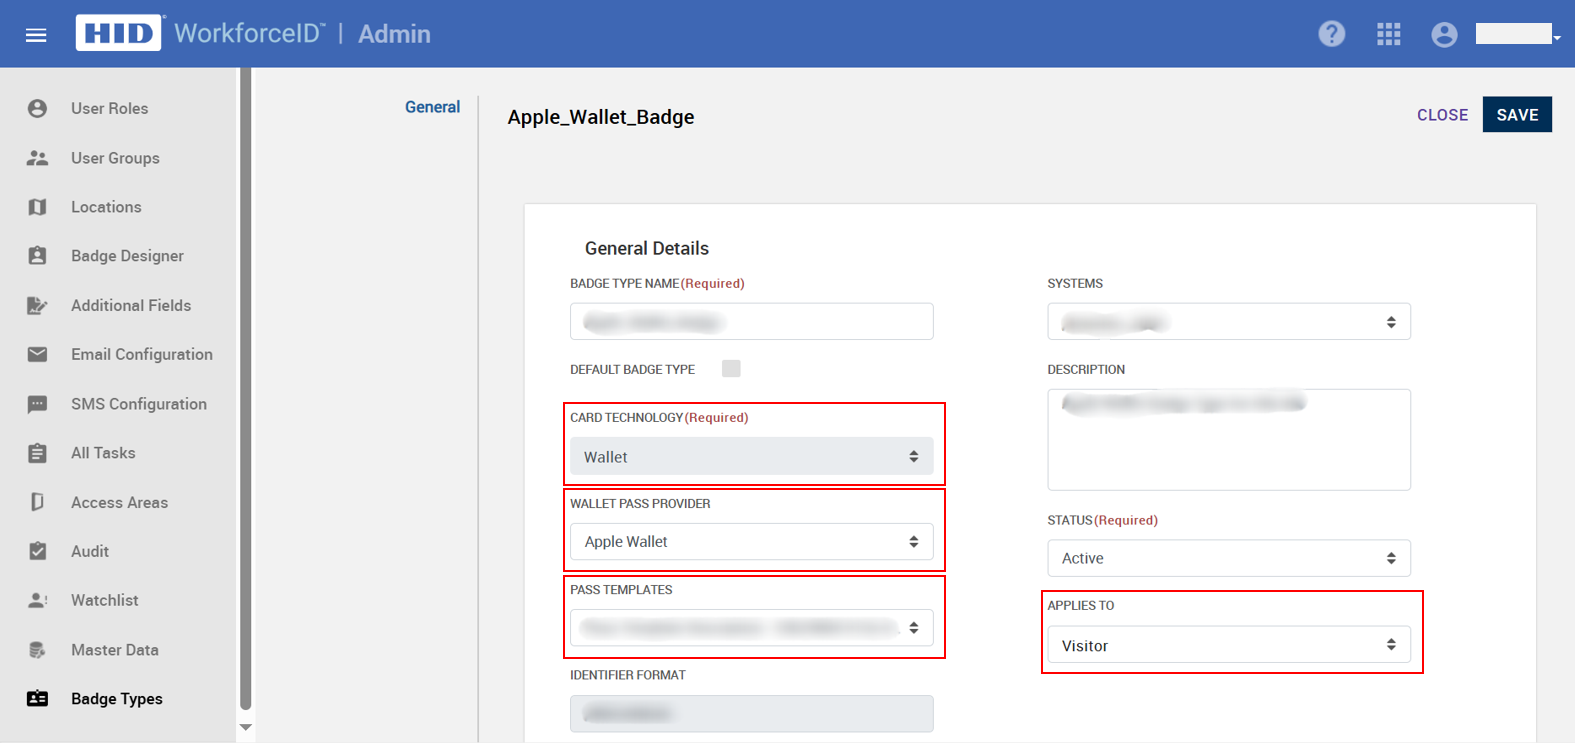
Creating Badge Type for Apple Wallet Pass
Creating a Badge Type for Apple Wallet Pass
-
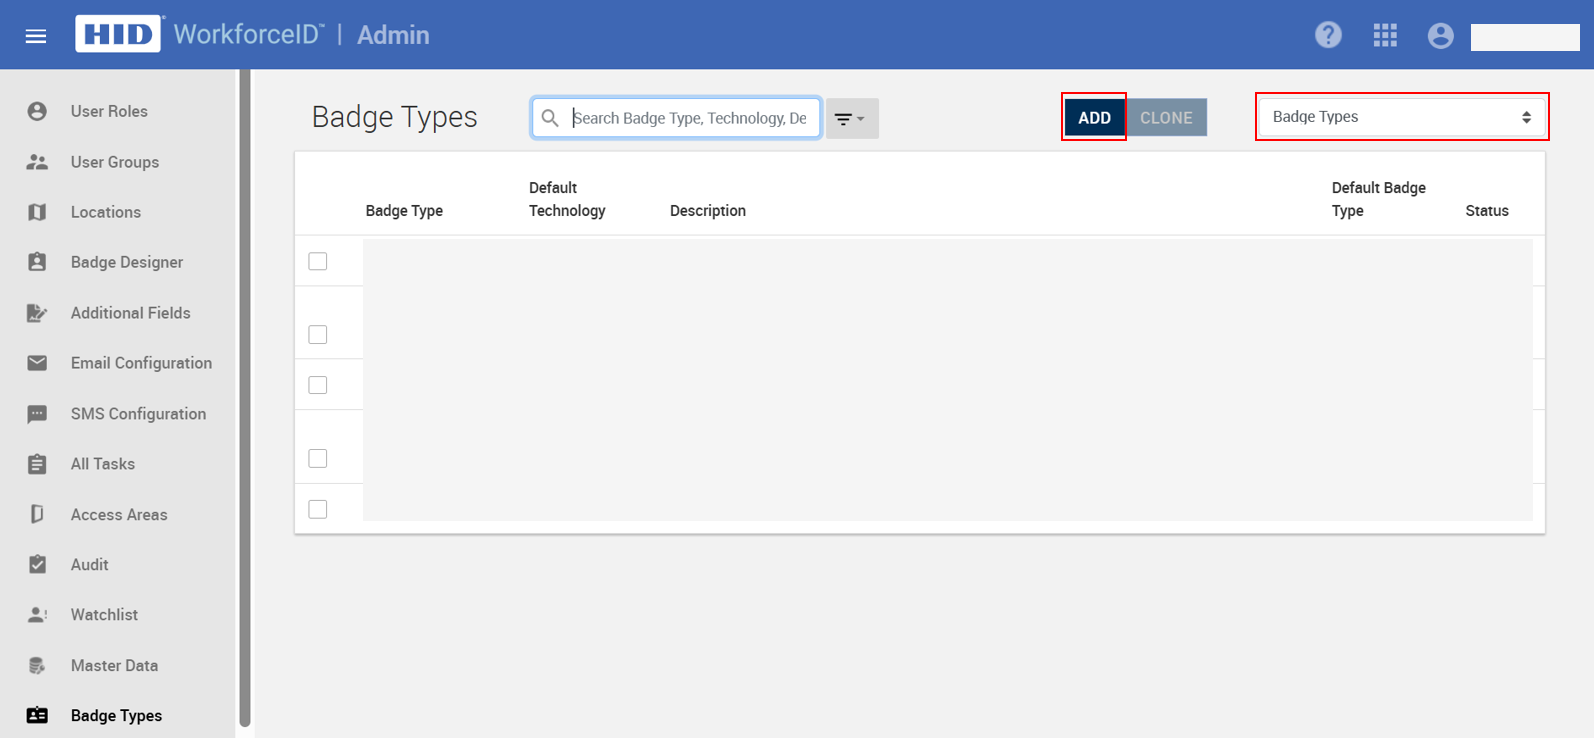
Navigate to App Launcher > Admin modules > Badge Types in the left navigation panel.
-
Choose Badge Types from the top right corner drop-down menu.
-
Click ADD to create a badge type for an Apple Wallet Pass.
-
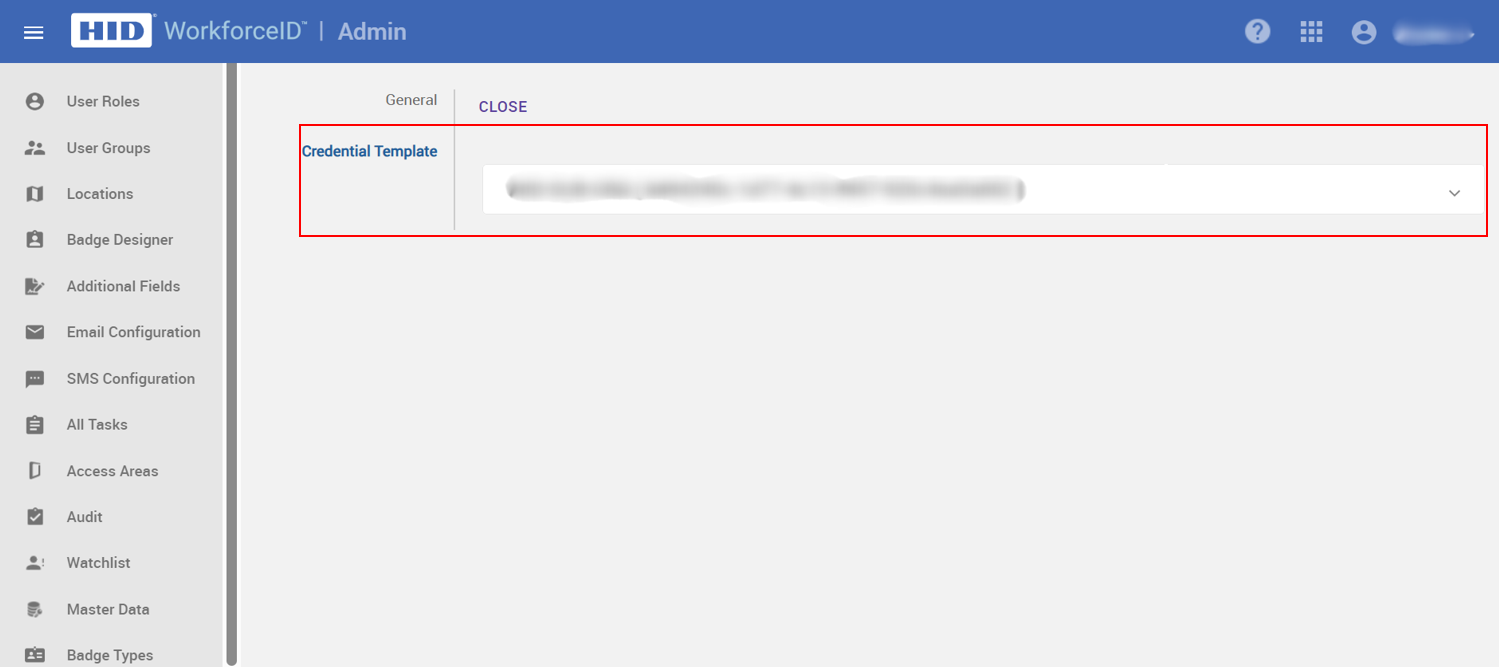
Enter the necessary details, including:
-
Card technology: Set this to "Wallet." This will automatically set the Wallet Pass Provider field to "Apple Wallet" by default.
-
Pass template: Choose a pass template.
-
Applies to: Set this field to "Visitor."
-
5. Click SAVE.
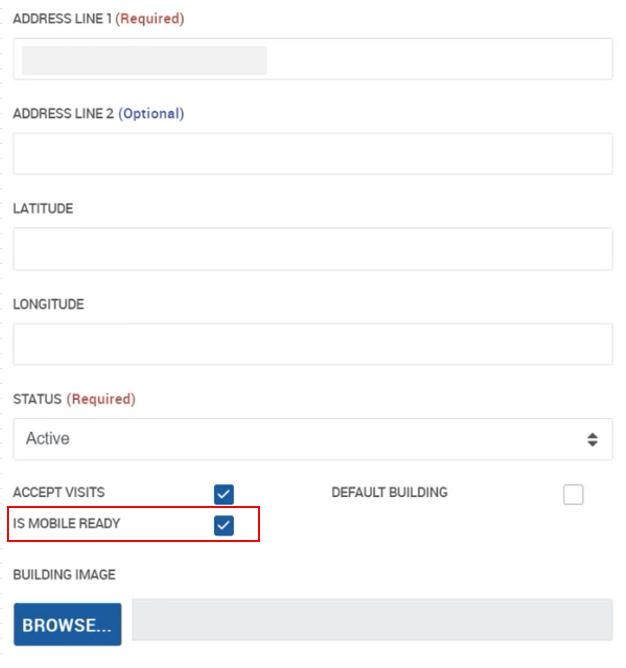
Enabling "isMobileReady" Setting for a Building
-
Navigate to App Launcher > Admin module > Locations in the left navigation panel.
-
Select the desired locations, navigate to Buildings tab.
-
Select the building and enable the isMobileReady setting.
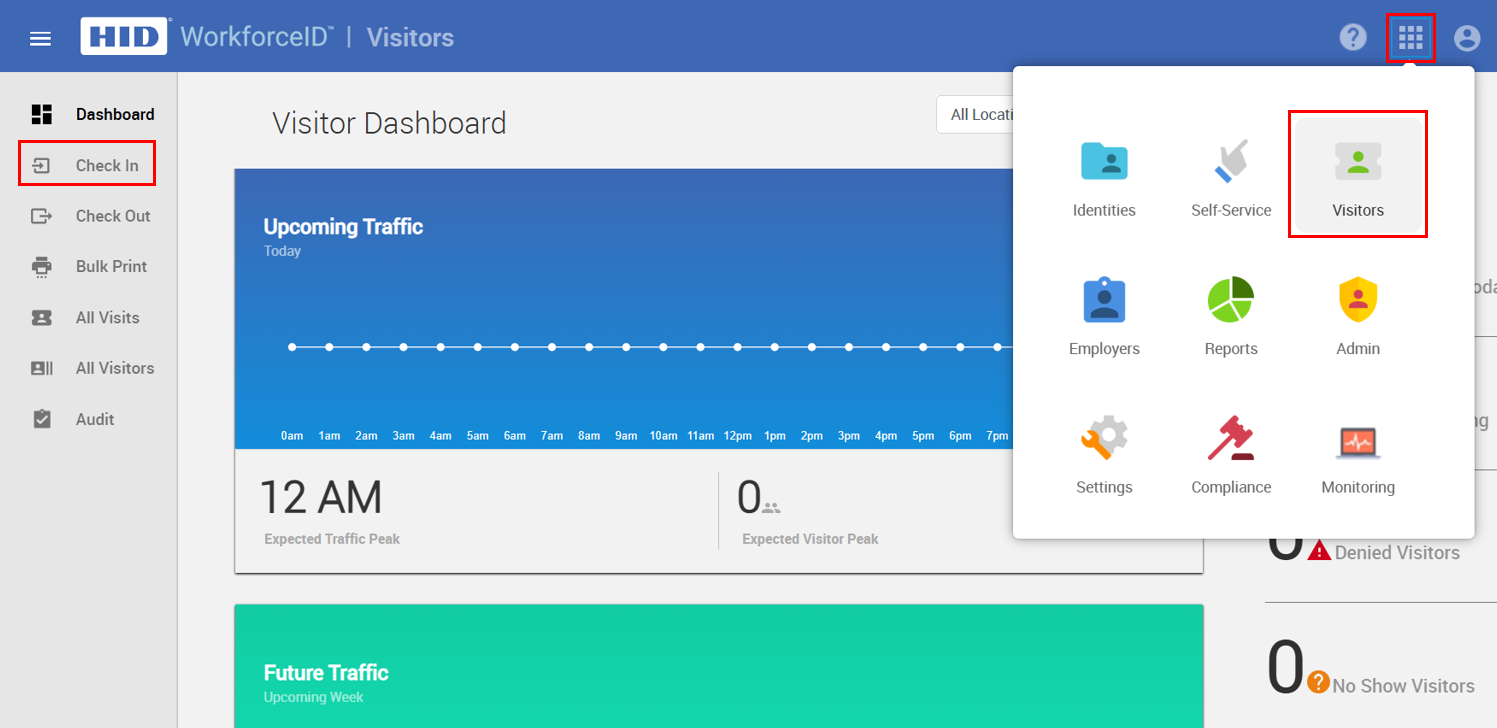
Hosting a Visit
-
Navigate to App Launcher > Visitors module > Check In in the left navigation panel.
-
Click WALK-IN VISIT.

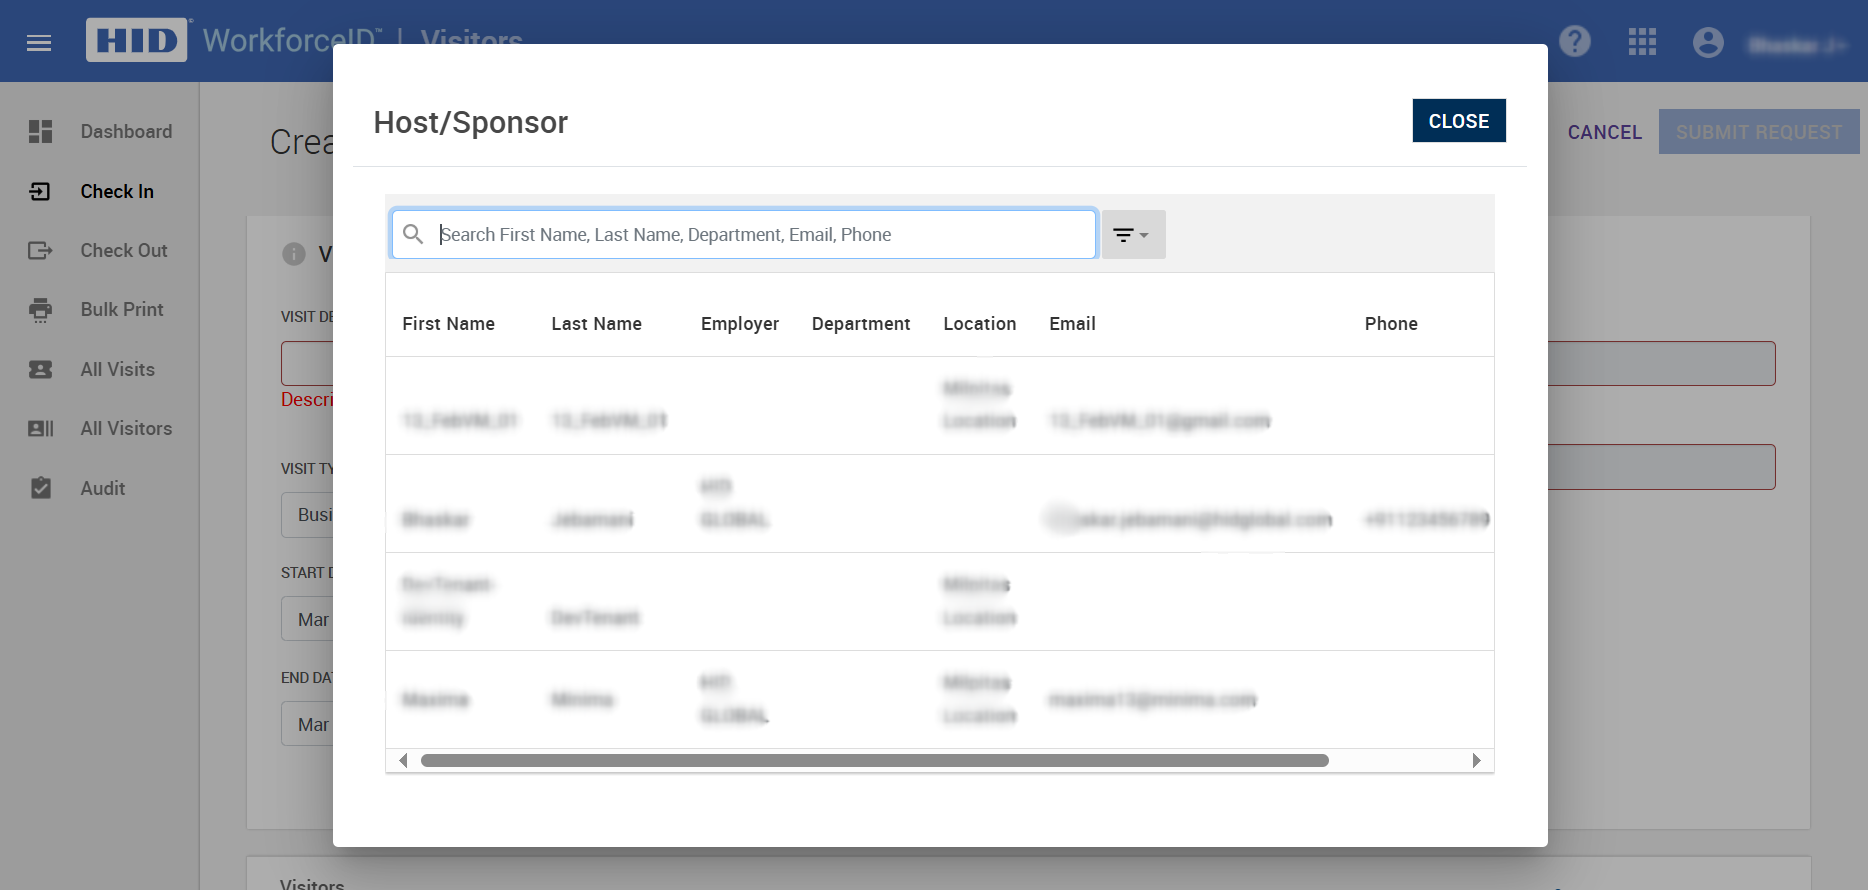
The HOST/Sponsor dialog box will open. Choose a host from the available list.
-
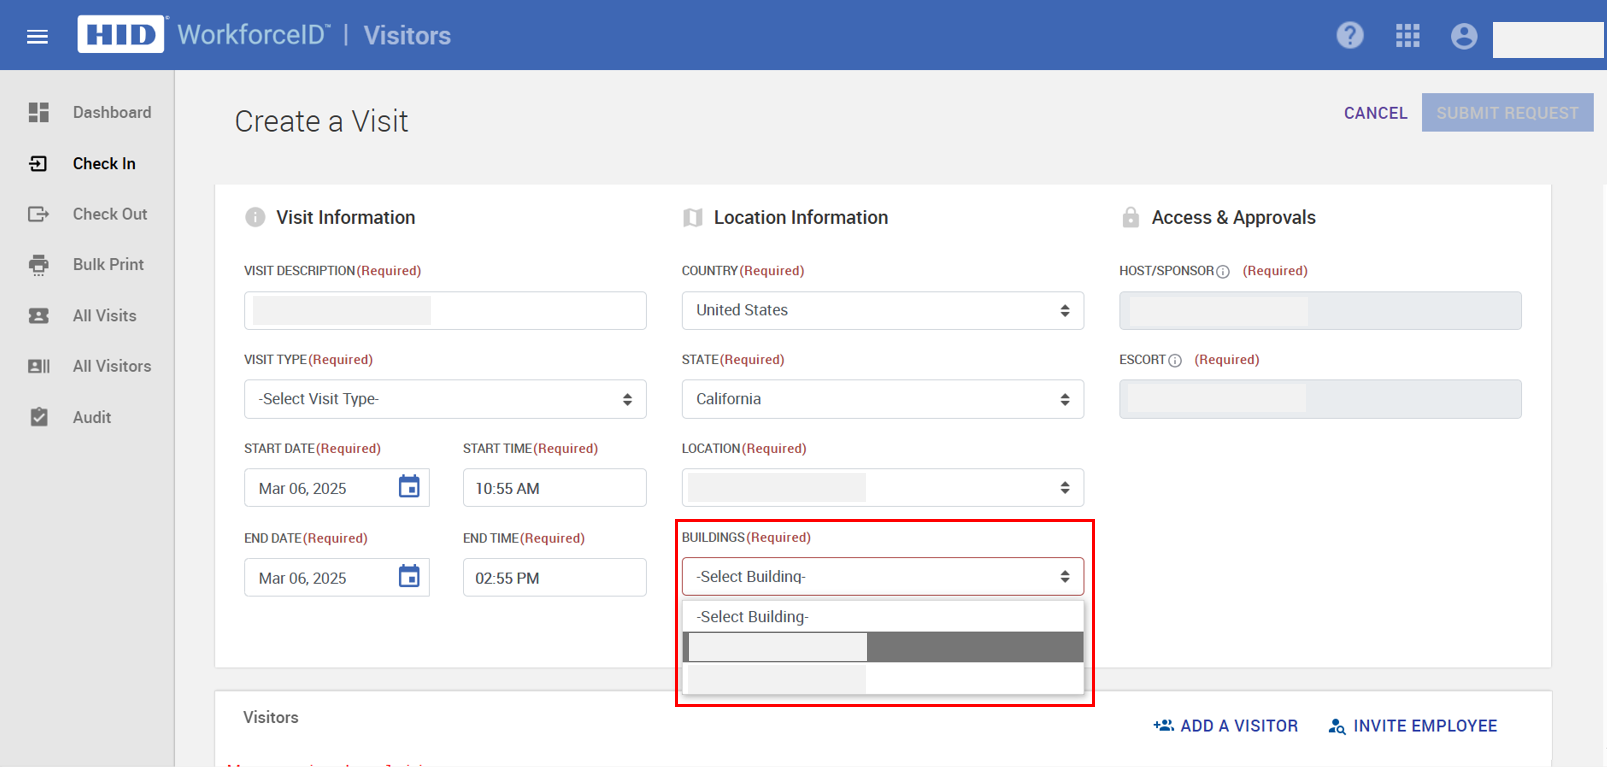
In the Location Information section, in the BUILDINGS field, select the building from the drop-down menu where isMobileReady is enabled.
-
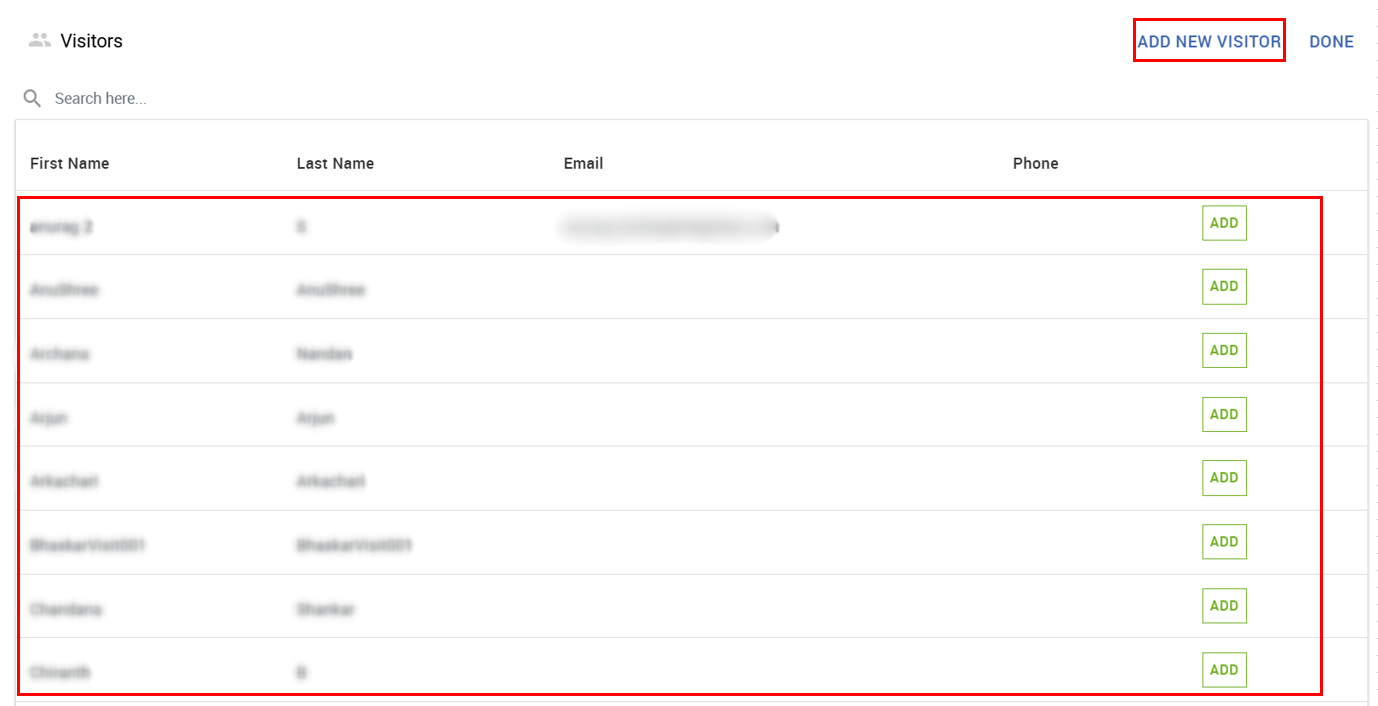
In the Visitors section, click ADD A VISITOR. The visitors dialog box will open, displaying a list of visitors.
-
Select a visitor from the list, or
-
Create a new visitor by clicking ADD NEW VISITOR, adding the required details, and then clicking DONE.
-
-
Once the visitor is added to the Visitor section, click SUBMIT REQUEST.

-
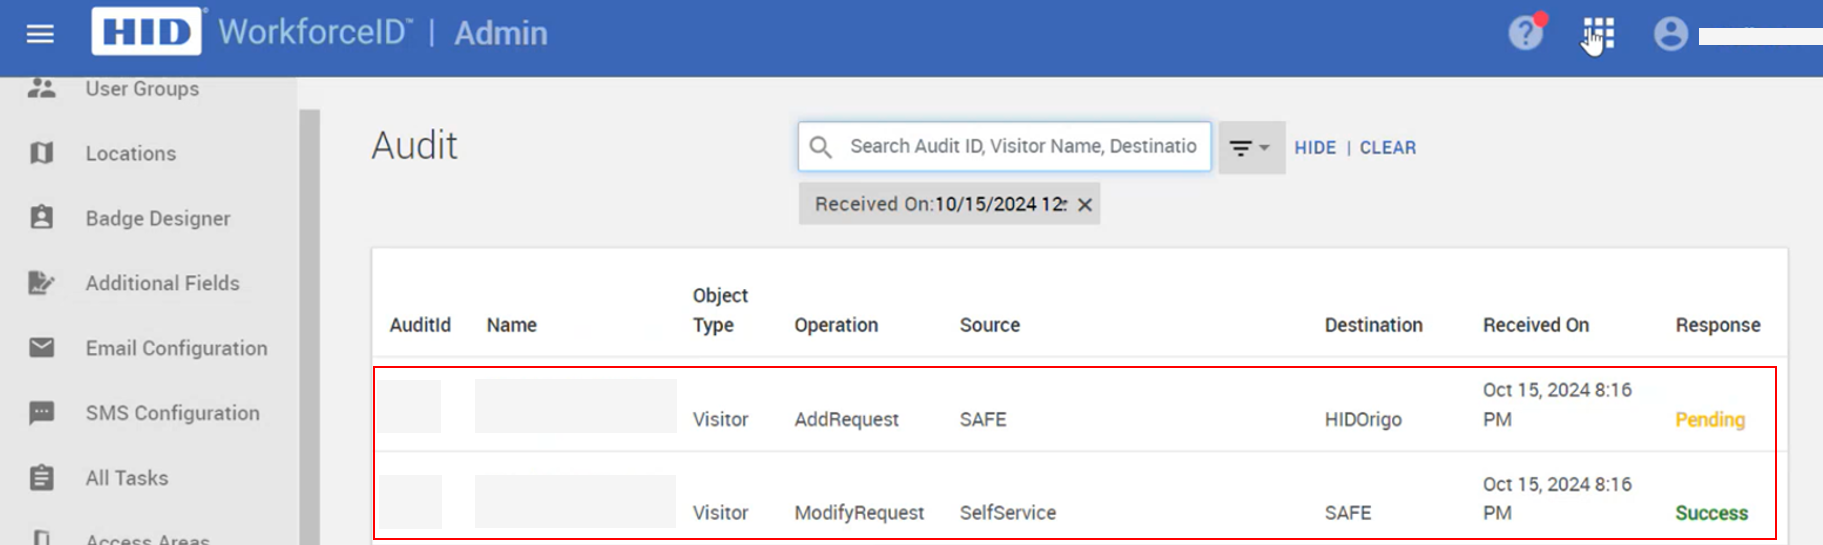
Upon successful visit submission, the broadcast will happen from HID VM to HID Origo. A Wallet invitation notification email will be triggered to the visitor.
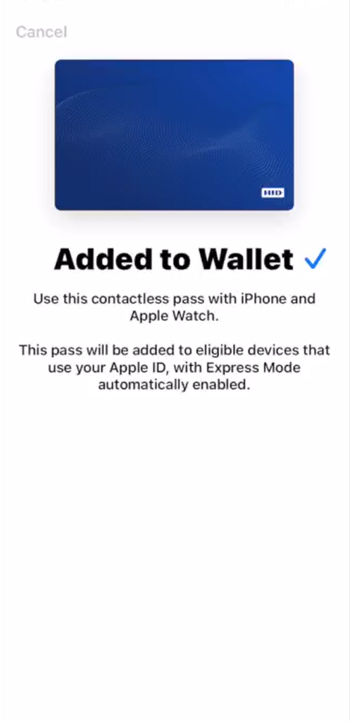
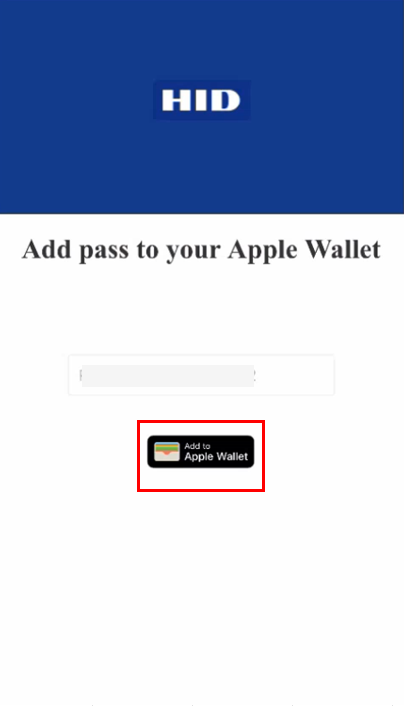
Adding Visitor Pass to the Wallet
-
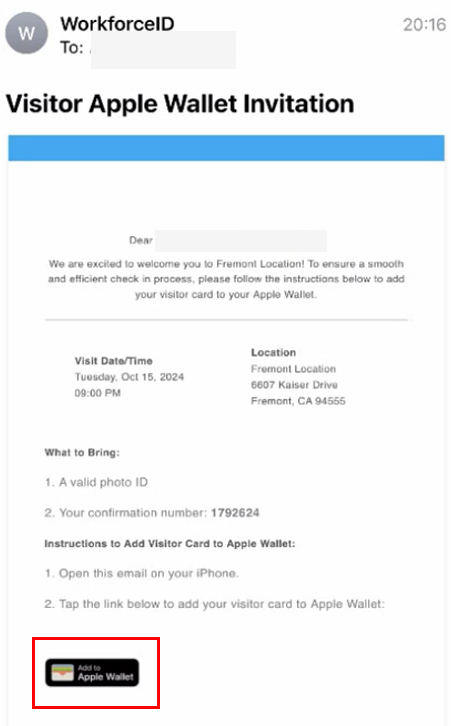
The visitor receives an email with the Add to Apple Wallet button.
-
The visitor taps the Add to Apple Wallet button and is redirected to a page where the invitation code is pre-filled. They tap the Add to Apple Wallet button again.
-
The visitor authenticates with their iCloud account.
-
The iCloud account lists available devices (Apple Watch, mobile, etc.)
-
The visitor selects a device.
-
The wallet pass is added to the visitor's mobile wallet.