Configuring Password Authentication Policies
A password authentication policy is a template containing predefined parameters enforced during authentication, such as password lengths or constraints.
Password authentication policy have several parameters that includes Username Constraints, Password Constraints, and Password Validity.
To learn more about password authentication policies, see Authentication Policies in the HID Authentication Service.
Creating New Password Authentication Policy
It is recommended that you create a new password authentication policy based on a default policy.
The predefined authentication policies comply with the following recommendations in the NIST SP 800-63B-3 guidelines concerning digital identity:
Minimum Length – 8 characters
Maximum Length – 128 characters
Note: After cloning the authentication policy, the administrator will be able to configure password of minimum and maximum length constraints from 1 to 128 characters.Restrictions:
No constraints in the range of characters allowed.
No requirement to mix different character types.
Must not be a previous password.
Must not be include user attributes.
Must not be contain black-listed words.
Must not be a sequence.
- Validity of password (after creation/update) – 1825 days.
To create a new password authentication policy, follow the below steps:
-
Click Settings
 icon in the left navigation bar to open the Settings page.
 -
Click Authentication Polices on the Settings page, then you can see list of Authentication policies.

-
Click ADD POLICY, then Add Policy pop-up window appears.
-
From the drop-down menu, choose a standard password authentication policy to replicate for the newly created authentication policy and click PROCEED.
See Authentication Policies in the HID Authentication Service for more information.

-
Authentication Policy Details page opens.

Edit the main information for your Password Authentication policy based on your requirement:
Policy name – should be unique for ease of administration.
Policy description - a description for your password authentication policy. Content is free-format
-
Then proceed to define Username Constraints, Password Constraints, and Password Validity settings.
Define Username Constraints settings
This section describes the Username Constraints parameters. These constraints enforced when a user name is created.

| Parameters | Constraints | Description |
|---|---|---|
| Minimum length | Numeric value | Minimum number of characters for the user name. |
| Maximum length | Numeric value | Maximum number of characters for the user name. |
| Minimum number of different characters | Numeric value |
User name must contain at least the same number of different characters as the number specified in this field. For example, if 3 is specified as the number in this field, aa11 is not valid, while Aa11 could be valid. Make sure you understand the relationship between the Case-sensitive and Different characters constraints. In a string of lowercase characters, uppercase characters are “different”. |
| Characters range | No constraint | All characters allowed, including special characters. |
| Only numeric | Only numbers allowed, no punctuation, no characters, and no spaces. | |
| Only alphabetic | Only letters allowed, no punctuation, no numbers, and no spaces | |
| Numeric OR alphabetic | Contain only numeric, or only letters, or combination of numbers and letters allowed, no punctuation, and no spaces. | |
| Numeric AND alphabetic | Must have a combination of letters and numbers, no punctuation, and no spaces. |
Define Password Constraints settings
This section describes the Password Constraints parameters. These constraints enforced when a Password is created.

| Parameters | Constraints | Description |
|---|---|---|
| Minimum length | Numeric value | Minimum number of characters for the password. |
| Maximum length | Numeric value | Maximum number of characters for the password. |
| Minimum number of different characters | Numeric value |
Password must contain at least the same number of different characters as the number specified in this field. For example, if 3 is specified as the number in this field, aa11 is not valid, while Aa11 could be valid. Make sure you understand the relationship between the Case-sensitive and Different characters constraints. In a string of lowercase characters, uppercase characters are “different”. |
| Characters range | No constraint | All characters allowed, including special characters. |
| Only numeric | Only numbers allowed, no punctuation, no characters, and no spaces. | |
| Only alphabetic | Only letters allowed, no punctuation, no numbers, and no spaces | |
| Numeric OR alphabetic | Contain only numeric, or only letters, or combination of numbers and letters allowed, no punctuation, and no spaces. | |
| Numeric AND alphabetic | Must have a combination of letters and numbers, no punctuation, and no spaces. | |
| With at least | One numeric character | Contain at least one numeric character. |
| One lowercase character | Contain at least one lowercase character. | |
| One uppercase character | Contain at least one uppercase character. | |
| One special character | Contain at least one special character. | |
| Forbidden values | Any previous password | Previous passwords are saved and compared against new password submissions. |
| Contain username or is a user attribute | New password submissions are compared against user attribute values specified for that user. | |
| Black-listed word |
Must not contain black-listed words. The passwords are compared against a black list containing commonly-used, expected, or compromised words. This list includes:
|
|
| Not in sequence | Password must not consist of a series of numbers or letters (for example, 1234, abcd). | |
| Case-sensitive verification | - |
Enable if the password should be case-sensitive. Make sure you understand the relationship between the Case-sensitive and Different characters constraints. In a string of lowercase characters, uppercase characters are “different”. |
| Change password after expiry | Numeric value |
Enables an operator to log on with a password beyond the password’s expiration date. However, the user is requested to change the password immediately. The number entered in the field specifies the number of times the user can enter the existing expired password in an attempt to change it before being denied further access. |
Define Password Validity Settings
This section describes the Password Validity parameters.

| Parameters | Description |
|---|---|
| Valid days after creation |
The expiration period of an authentication record, as a number of days, starting from the date of creation of the authentication record. To apply the new expiration period to the new authentication records, edit this field. |
| Valid days after update |
The expiration period of an authentication record when the password is changed, starting from the date the password is changed. |
| Session invalidity timeout (sec) | Time (in seconds) after which an idle session is automatically terminated. The value should be lower than that set for the global Session Timeout parameter. |
| Session timeout (sec) | The maximum period (in seconds) that a user authenticated via this authentication policy can sustain their session before being prompted to re-authenticate by logging on again. |
| Disabled time reset (sec) |
This value enables the auto-unblock feature. If an password is blocked for any reason (for example, it reached the maximum authentication count), it’s possible to unblock the password (if you have set this to a value other than -1). For example, if you configure the value to be 120 seconds (two minutes), then by setting Disabled time reset, it will automatically unblock the password when the user tries to authenticate after two minutes. |
| Authenticator expiration |
If enabled, then you can define the number of times a user can authenticate using a password before the password expires. It corresponds to the maximum number of successful authentications allowed. |
| Disable authenticator after failed attempts | The maximum number of successive failed attempts by a user to log on using an incorrect password before the password is locked. |
Click SAVE to save the settings. After saving, the newly created password authentication policy is added into the authentication policies list.
Viewing Password Authentication Policy
You can view password authentication policies by following the below steps:
-
Click Settings
in the left navigation bar to open the Settings page. -
Click Authentication Polices on the Settings page, then you can see list of authentication policies.
-
From the list of authentication policies, choose and click on the row of a password authentication policy you want to view.
(or) you can also click on "View Authentication Policy" shown in the action menu (
 ) of a password authentication policy.
-
Authentication Policy Details page opens and details are as shown below.

Fields Description Policy name The name of the password authentication policy.
Policy description The description for the password authentication policy. Policy ID An identifier or code for the password authentication policy. -
You can also view other settings of your password authentication policy by clicking on Username Constraints, Password Constraints, and Password Validity tabs.
-
Click RETURN to return to the list of authentication policies page.
Note:If required,
-
Click EDIT to edit a password authentication policy. Refer to Editing Password Authentication Policy.
-
Click DELETE to delete a password authentication policy. Refer to Deleting Password Authentication Policy.
-
Editing Password Authentication Policy
When required, you can edit a customized password authentication policy by following the below steps:
-
Click Settings
in the left navigation bar to open the Settings page. -
Click Authentication Polices on the Settings page, then you can see list of authentication policies.
-
From the list of authentication policies, choose a password authentication policy you want to edit.
Click on "Edit Authentication Policy" shown in the action menu (
) or click EDIT on the view page of that policy.
-
Authentication Policy Details edit page opens, do the required changes for policy name, policy description and parameters of Username Constraints, Password Constraints, and Password Validity tabs.

-
Click SAVE to update the changes.
Deleting Password Authentication Policy
-
You cannot delete the default password authentication policies. For those default policies, EDIT or DELETE button will not be present.
-
You cannot delete policies which are assigned to users or devices.
To delete a customized password authentication policy, follow the below steps:
-
Click Settings
in the left navigation bar to open the Settings page. -
Click Authentication Polices on the Settings page, then you can see list of Authentication policies.
-
From the list of authentication policies, choose a password authentication policy you want to delete.
Click on "Delete Authentication Policy" shown in the action menu (
) or click DELETE on the view page of that policy.
-
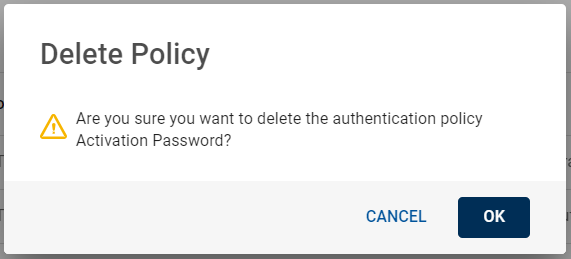
A Delete Policy confirmation dialog box appears, click OK to confirm the deletion.