Creating New Customized Brand
To create a new custom brand, follow the below steps:
-
Click Settings
 in the left navigation bar to open the Settings page.
 -
Click Customize Brand & Content on the Settings page to open Customize Brand & Content page. You can see default brand in this page.
-
Click Add New Brand, then it will redirect to Add Brand page.

-
Then proceed to Layout settings.
 Define Layout Settings
Note: The default brand's orientation, background color, background image, and logo will be automatically displayed in the Customization tab.
Define Layout Settings
Note: The default brand's orientation, background color, background image, and logo will be automatically displayed in the Customization tab.You can display your brand or a custom look during authentication service sign-in with Layout settings.
Set the below shown fields to customize the brand based on your requirement:
-
For Right Orientation:
The "Authentication Service Sign In” box is in the right side of the login screen. This is the default orientation when you open the customization tab.

-
For Center Orientation:
The "Authentication Service Sign In” box is in the center of the login screen. The below shown image is the default background image.

-
For Left Orientation:
The "Authentication Service Sign In” box is in the left side of the login screen.

Define the following layout fields:
Note: The customization made will be automatically displayed in the preview section.-
Brand name: Enter the name for the brand. This text field is mandatory, and it is allowed alphanumeric characters.
-
Orientation: Choose any one of the orientation (Right, Center, and Left) for “Authentication Service Sign In” box based on the requirement.
-
Background color: For Left and Right orientation, click on the color boxes and select the colors from the color palette to set the background color.
You can also enter the color code in the text boxes to set the background color.
Note:The gradient background color will be displayed diagonally from bottom left corner to towards top right corner of the HID authentication service.
-
First color box: To select the color for bottom left corner.
-
Second color box: To select the color for top right corner.
-
-
Background image (For Center orientation): Click BROWSE IMAGE to upload an image by selecting a file from your system's file explorer to set the background image.
Note:-
The maximum size of 500 KB and 1920 x 1080 pixels (width x height) is allowed.
-
The supported file formats are .png, .svg and .jpg.
-
-
Logo: Click BROWSE LOGO to upload a logo by selecting a file from your system's file explorer.
Note:-
The maximum size of 50 KB and 102 x 40 pixels (width x height) is allowed.
-
The supported file formats are .png and .svg.
-
-
-
Then proceed to Content settings.
Define Content Settings
You can customize the content displayed on the authentication service sign-in page using the Content settings to bring the content as per your requirement.
By default, the authenticators are added to the content list page (shown on the left side of the screenshot below) when cloning and creating a new customized brand. If required, you can modify the authentication service sign-in page content or keep the default content.
Content for "English" and "French" languages are available by default. You can edit the content of these default languages for all the sections of the new authentication service as per your requirement.
Note: By default, the selected language is "English" when you click Content tab.
The table below summarises the sections of the sign-in page and its content customization.
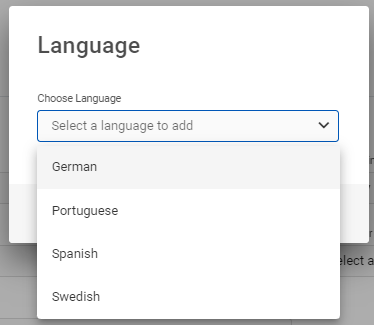
Sections Description Login Screen You can edit the service & application name, user name, button name, and copyright information. Consent You can edit the consent message and buttons that appears when you sign in for the first time. Error Messages You can edit the content related to login error messages. Static Password You can edit the password related content such as tooltip, change/forgot/reset password. One-Time Password You can edit the content related to OTP name, tooltip and its message. Push Authentication You can edit the content related to push authentication name, tooltip, and its error & timeout messages. Activation Code You can edit the content related to activation code name, tooltip, OTP receiving methods via SMS/Email, and its error message. Out of Band You can edit the content related to Out of Band (OBB) name, tooltip, OTP messages and its receiving methods via SMS/Email. LDAP Password You can edit the content related to LDAP corporate password name, tooltip, error message, and expiry warning message. Passkey Authenticator You can edit the content related to Passkey authenticator name, tooltip, instructions, error messages, and enrollment information. Contactless Card You can edit the content related to Contactless Card name, tooltip, messages, error messages, enrollment, authentication, and authentication device client information. PIN You can edit the content related to PIN authentication, forgot PIN, temporary PIN, change PIN and its tooltips, error messages, and field label. Apart from the default languages "English" and "French", you can also add the following four languages with ADD LANGUAGE.
-
German
-
Portuguese
-
Spanish
-
Swedish
Choose a language from the drop-down and click PROCEED to add the language. Once the language is added, you can fill all the fields of the sign-in page sections.
-
-
Click SAVE to save the settings. After saving, the newly created custom brand is added into the brand list.


