Customizing Email Templates
Modify an Existing Email Template
Administrators can customize and modify default email templates and use them to notify visitors, hosts and more. Follow the steps below to modify the templates:
-
Select Admin from the Application grid.
-
Navigate to the Email Configuration > Email Templates.
-
Select the email template that you would like to customize.
-
The email templates form will open in read-only mode, click on CUSTOMIZE to edit the templates.
-
Edit the email template as required and click SAVE.
-
After saving, the customized template is saved in the database and set as default. The template ID will remain the same.
Things To Keep In Mind While Editing HTML Email:
-
Customize the Name and the Subject content by editing the text.
-
Set the Status of the Template as Active to use the template.
-
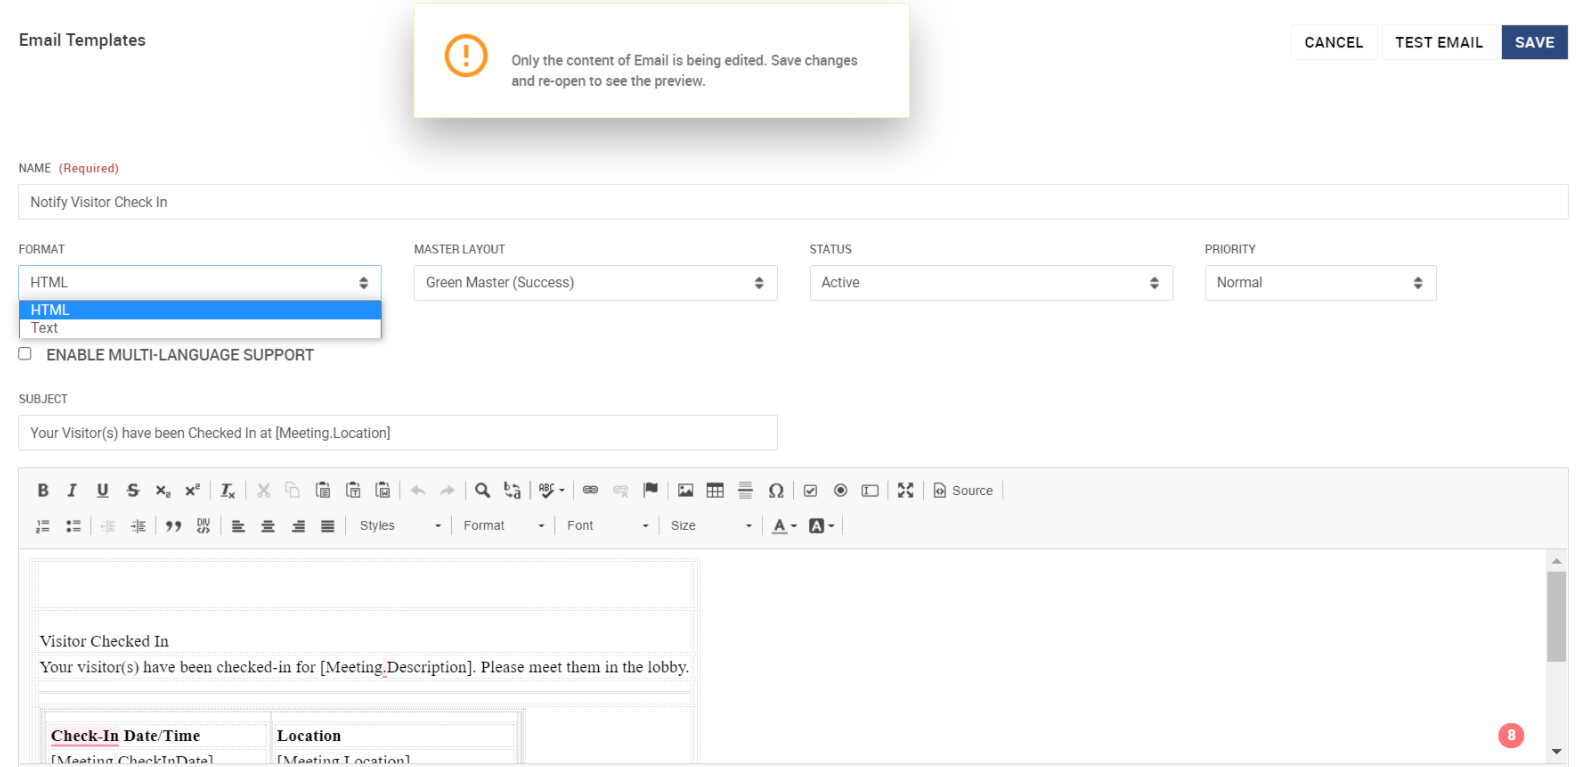
Select a template Format: Text or HTML. Choose the format from the drop-down in which email has to be sent ( HTML format or Text format).
Associate Email template with the Master Template
-
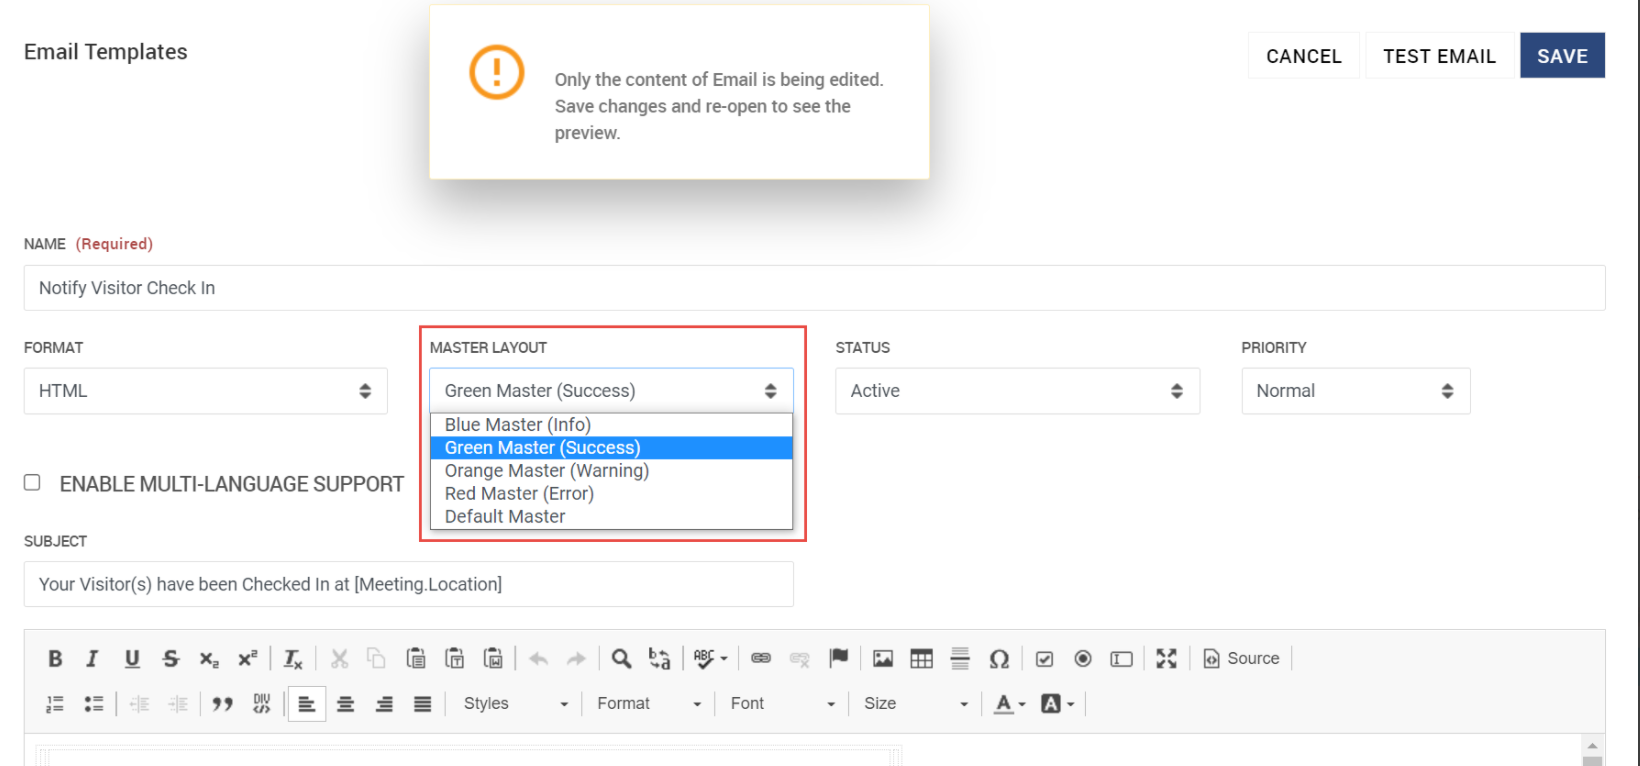
Select the desired Master Template from the drop-down it will inherit all the designs from the Master template.
-
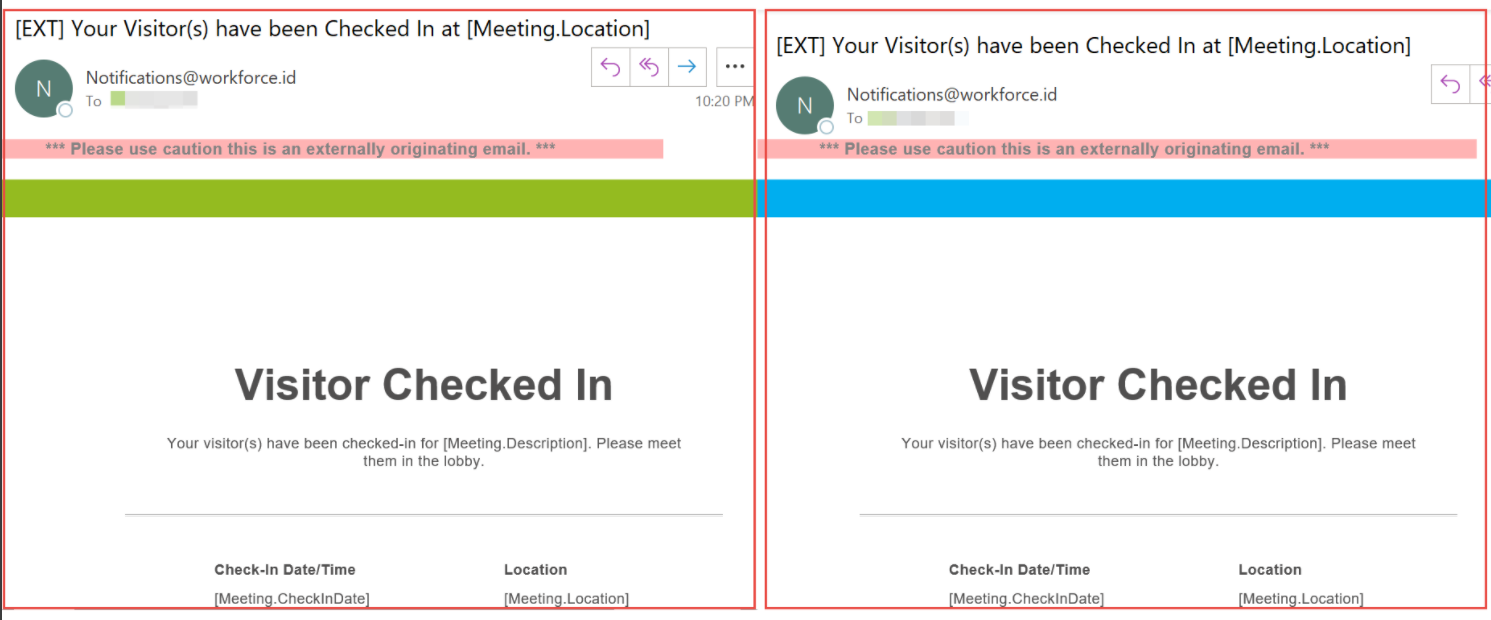
The below example show the email template when the master layout is changed:
Maximize/Minimize the email body
-
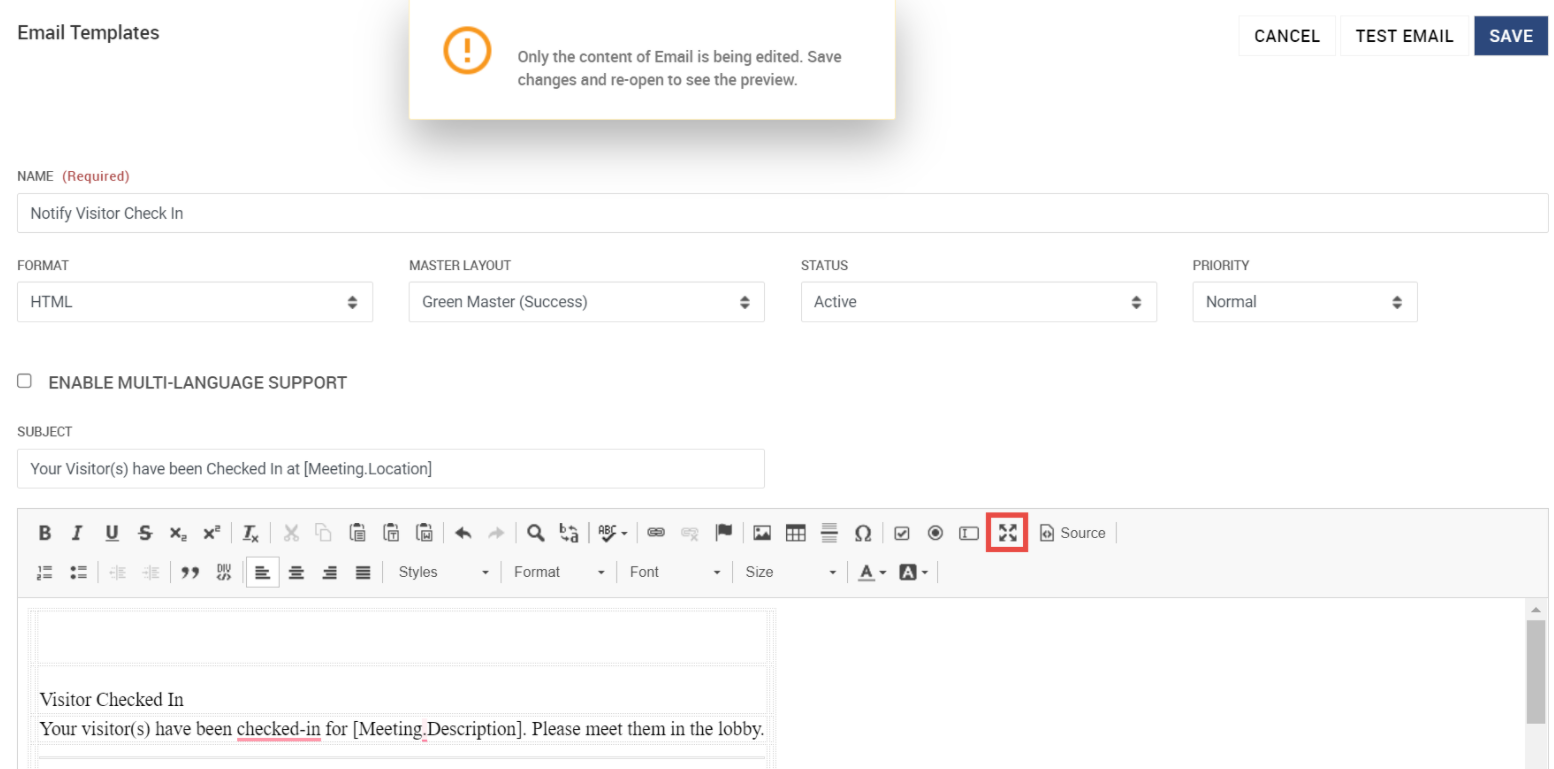
To customize the content of the email, use the arrow editor to maximize/minimize the template.
Update the content of the email
You can customize the content of the email in the editor. The following actions can be performed inside the email content:
-
Format the text, edit existing text, add new text
-
Change heading and subheadings
-
Insert a paragraph
-
Insert or remove special content such as images, barcodes, etc.
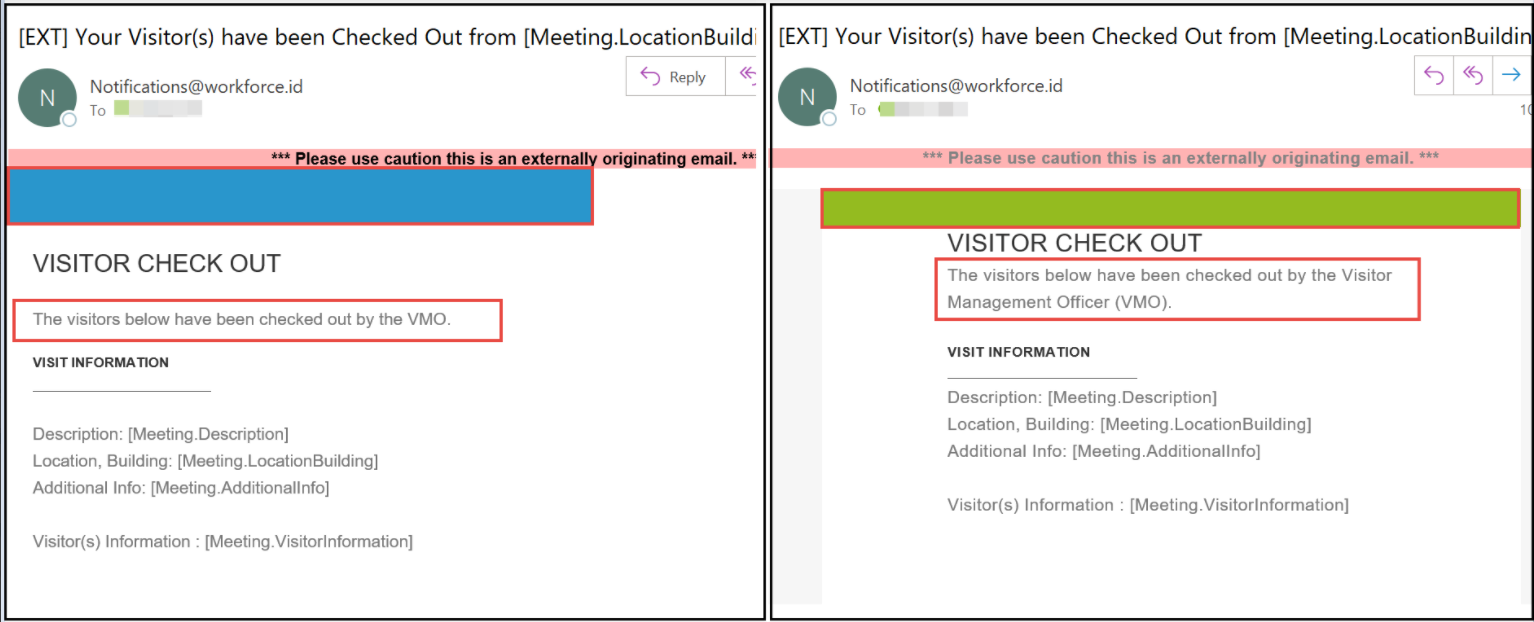
The below image shows the default and customized email templates. They differ in header bar width, color, text and format:
-
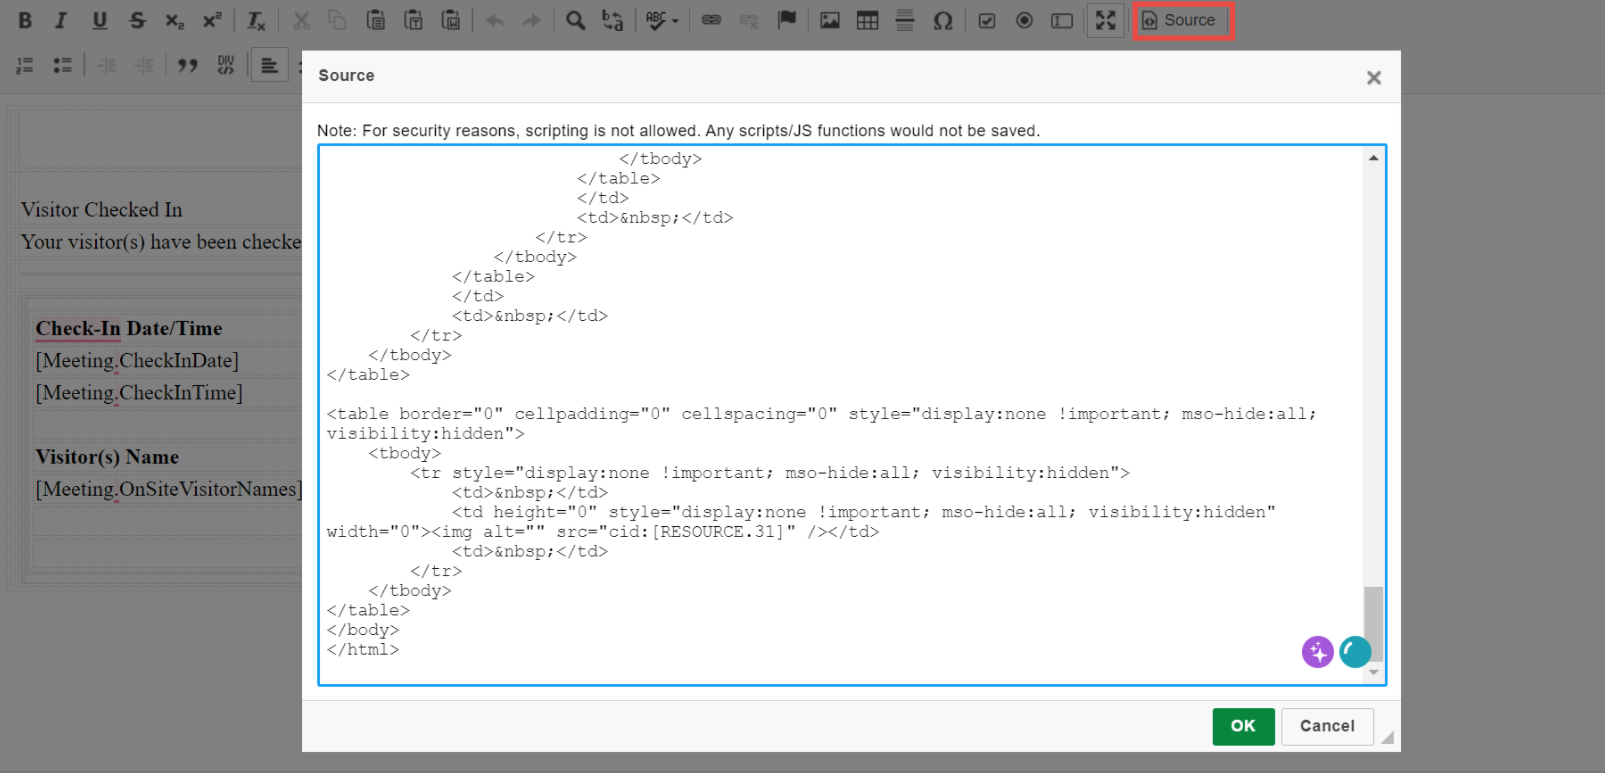
Click on the Source button to view and edit the template in HTML Format.
After customizing your email template, test it to ensure that it works in different email applications. Make sure the email arrives in the inbox exactly as you intended by using the TEST EMAIL feature to test it in the client/browser/OS of your choice.


