Configuring Honeywell Vuquest 3330G ID Scan
1. Download the Honeywell Vuquest3330G Components
-
Click on the following hyperlink or copy the hyperlink and paste it into the Web browser address bar and Sign In to the below link with valid credentials.
https://hsmftp.honeywell.com
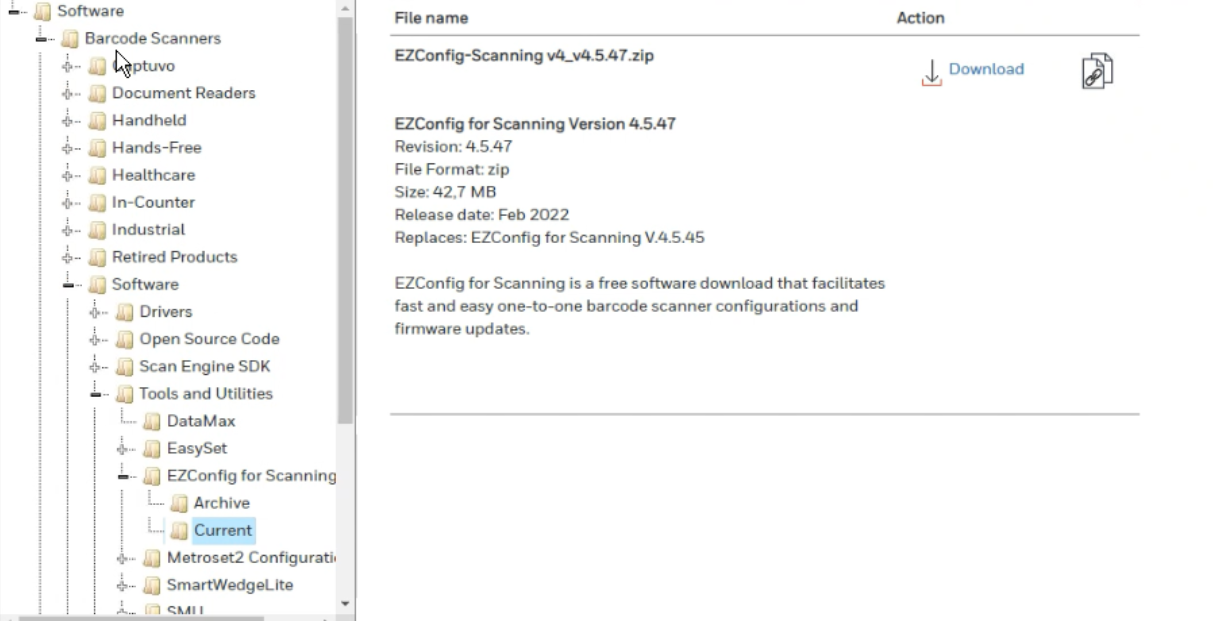
1.1 Download and Install EZConfig for Scanning Version 4.5.XX
-
Click on the Software folder and navigate to Barcode Scanners > Software > Tools and Utilities > EZConfig for Scanning > Current.
-
Download the latest file EZConfig for Scanning Version 4.5.XX.
-
Locate the compressed EZConfig for Scanning, Version 4.5 folder.
-
To extract all files or folders, right-click the compressed folder, and then click Extract All. In the Compressed (zipped) Folders Extraction Wizard, specify where you want to store the extracted files.
-
Double click on the .exe file.
-
Follow the installation instructions.
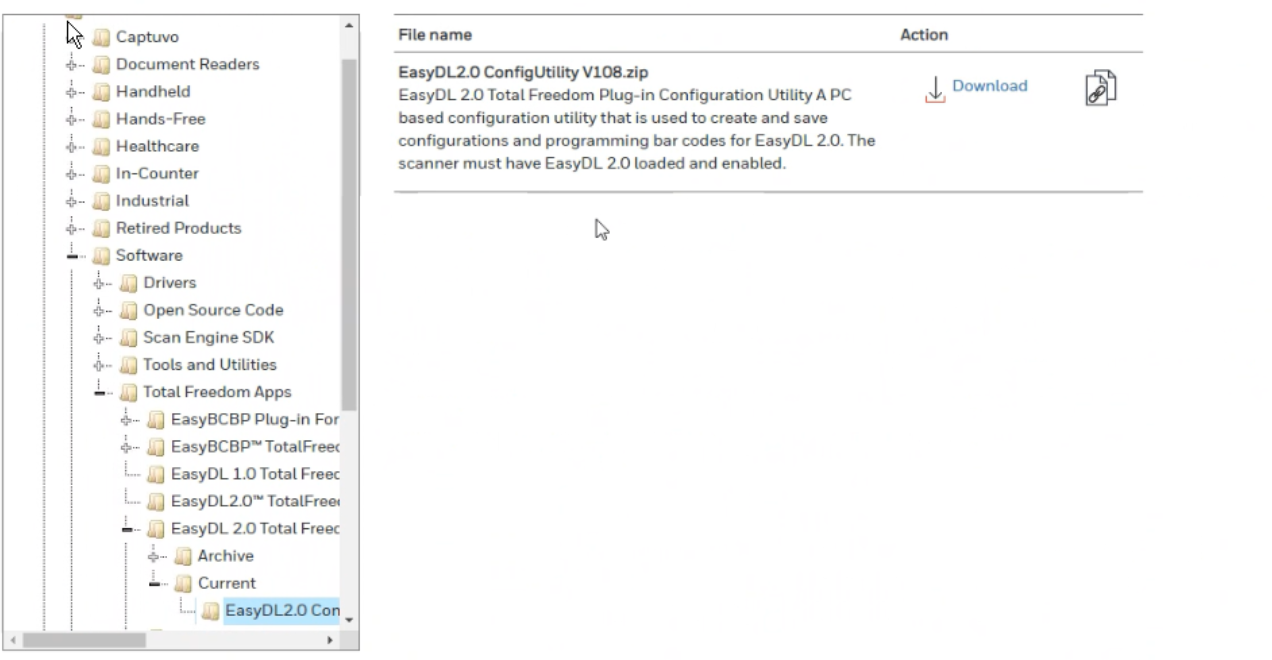
1.2 Download and Update EasyDL2.0™ Total Freedom Plug-in
-
Navigate to the Software > Total Freedom Apps folder > EasyDL2.0 Total Freedom Plug-In and download EasyDL 2.0 Total Freedom Plug-in Configuration Utility file.
-
Locate the compressed EasyDL2.0™ Total Freedom Plug-in folder.
-
To extract all files or folders, right-click the compressed folder, and then click Extract All. In the Compressed (zipped) Folders Extraction Wizard, specify where you want to store the extracted files.
-
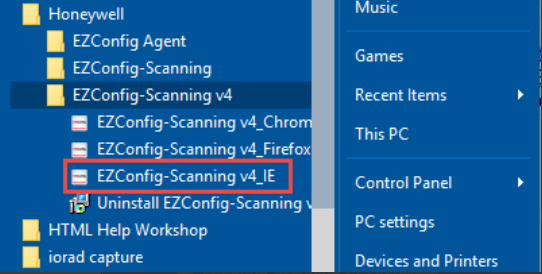
Click on Start > All Programs > Honeywell > EZConfig – Scanning V4.
-
Multiple options are available, select EZConfig – Scanning v4_IE to open the utility on Internet Explorer or Chrome.
-
Click on ‘Allow Blocked Content’ on the Active X Warning Bar to proceed. This popup will come only in the Internet Explorer browser.

-
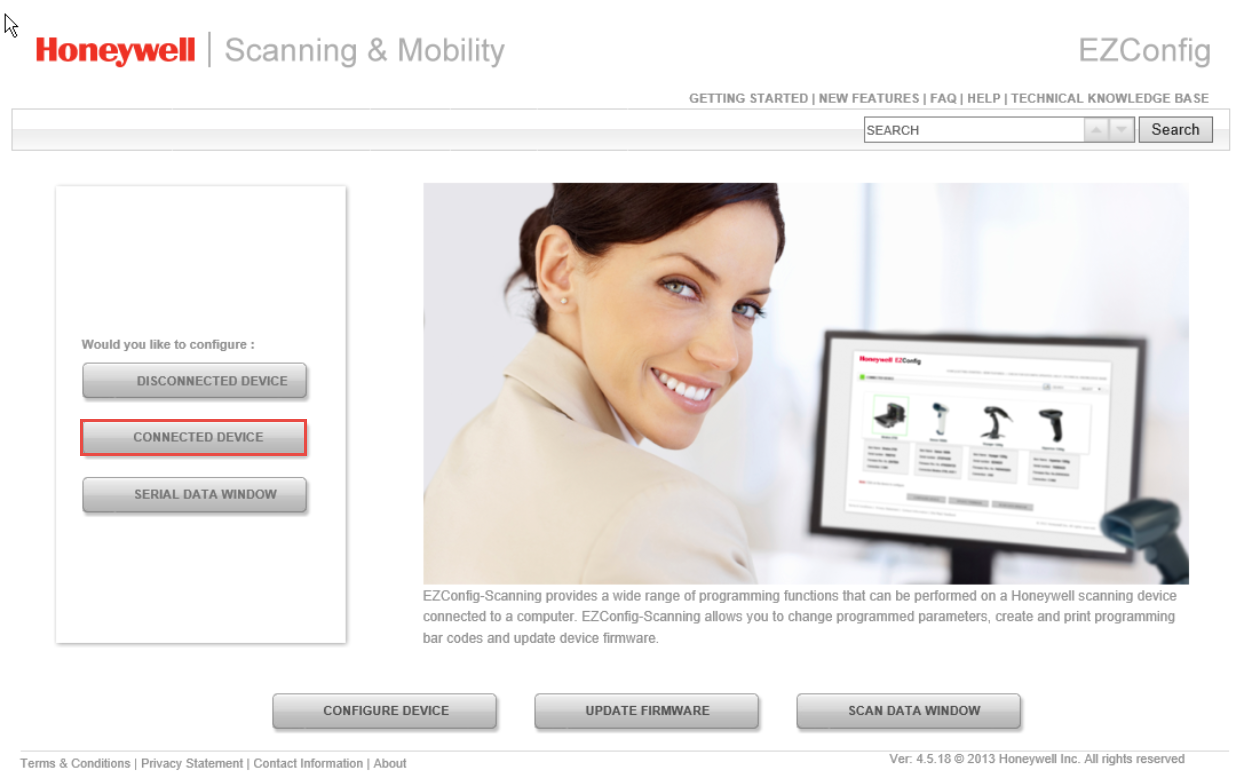
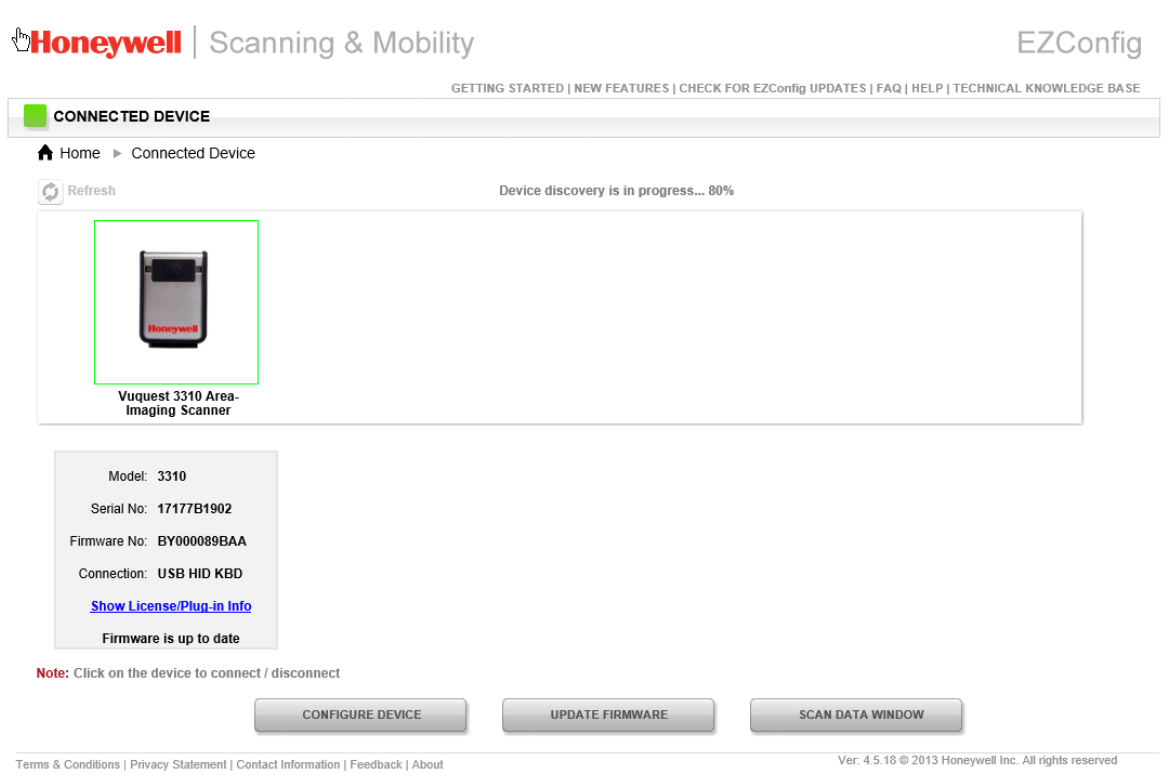
Connect the Scanning Device and click on ‘Connect to Device’.
-
Click on Update firmware then select the *.moc file in the EasyDL2.0™ Total Freedom Plug-in folder and click on Update Device.

2. DL Parsing License Key setup
The EZDL Parsing Software is enabled by using key provided by the OEM that is uniquely issued to the corresponding scanner serial number.
-
Launch the EZConfig Utility. Note - Allow blocked Content on IE browser.
-
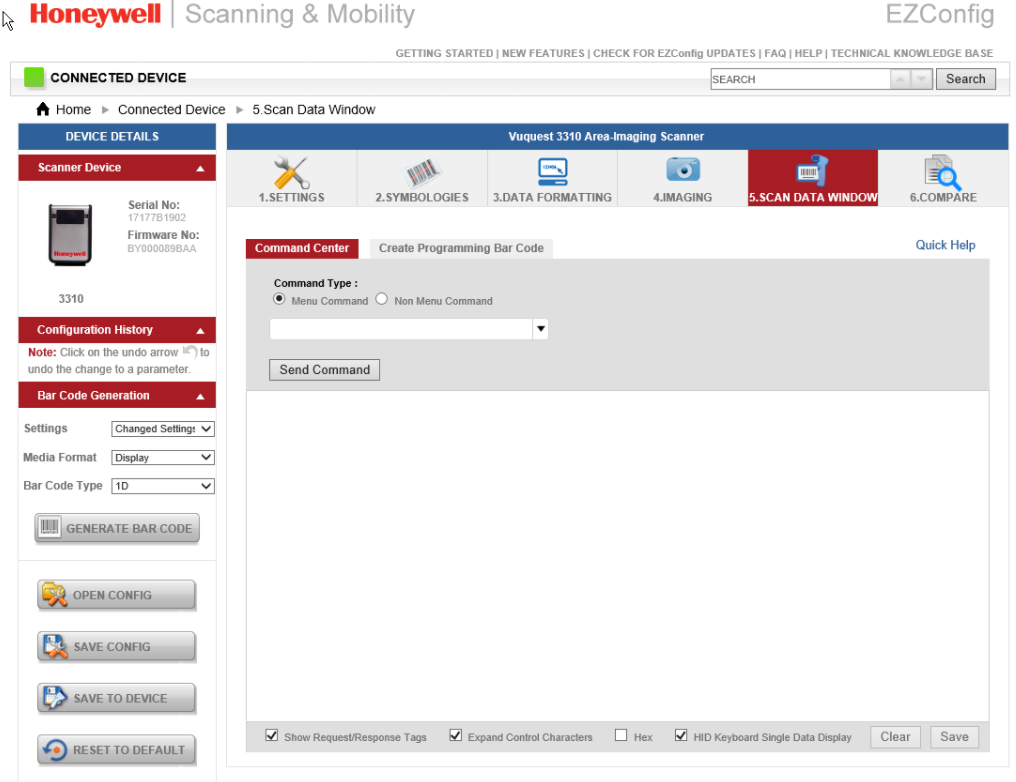
Click on the Scan Data Window.
-
Use a valid US driver’s license, scan the PDF 417 2D barcode on the back of the DL. The first, middle, and last name on the DL should appear with random “X”s throughout the Scan Data Window.
-
Locate the QR code in the PDF format that was provided for this Exact Scanner, the Serial number of the device must match the one on the page
-
Using this specific QR code fold paper so that the scanner only hits that one. The scanner should blink and may emit a brief chirp to confirm the correct read.
-
Test a Valid US driver’s license and verify that the names appear without any random “X”
3. Activate Honeywell Scanner
Honeywell Scanner will be used to scan the ID Cards like “DL or State ID” to get the visitor information available on ID cards as 2D barcode. Honeywell scanner needs to be configured to send data starting with “~” and each field will be separated by “||” and at the end, we will need to have Carriage Return.
The Honeywell Scanner is configured to read the following information from the DL in the chronological order
-
First Name
-
Last/Family Name
-
ID Number
-
Expiration Date
-
ID Issuer / Country Identification
-
State
-
Date of Birth
-
Issue Date
Use the QR code below to activate your Honeywell scanner to read the data on the DL.
If you want to configure the Honeywell Scanner to read other fields apart from the above fields refer ID Scan / Honeywell Scanner Additional Configuration options
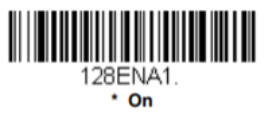
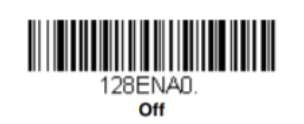
3.1 Scan the barcode to turn ON and OFF the Code 128
-
Connect the Honeywell Vuquest3310 scanner to the USB port of your computer.
-
Scan the below symbol to turn on the Code 128.
-
Scan the below symbol to turn off the Code 128.
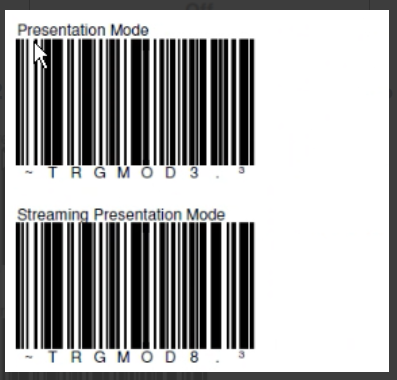
3.2 Turn ON / OFF Presentation Mode ( To Turn Red Light ON and OFF)
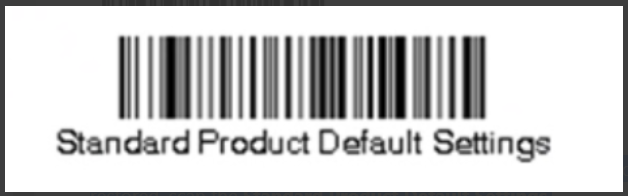
3.3 Reset Honeywell Scanner Settings
If you aren't sure what programming options are in your device or you have changed some options and want the factory settings restored, scan the Standard Product Default Settings.