Wi-Fi Agent Setup Guide
Introduction
About this Documents
The HID Visitor Manager Wifi Agent documentation aims to provide information and instructions for configuring the HID Visitor Manager Wifi Agent for integration with the on prem Wifi System (Aradial). It uses a combination of high-level feature descriptions, representative screen images and specific sequences to perform configuration and integration of HID Visitor Manager with Wifi System (Aradial).
Summary of Agent Functionality
The agent, once configured, communicates with the Wifi System (Aradial) to provide Wi-Fi credentials for visitors on the premises.
Intended Audience
It is expected that this guide will be used by administrative and technical staff during the integration of HID Visitor Manager with the Wifi Agent. To get the most from this guide, the readers should have an understanding and familiarity of:
-
The local computer environment at the site where Wifi System (Aradial) is installed.
-
HID Visitor Manager, agents and Wifi System (Aradial) and its components.
Pre-Requisites
-
Wifi System (Aradial) is installed and running properly.
-
Wifi System (Aradial) add-on enabled for the tenant on HID Visitor Manager.
-
Operator account has all the privileges to log into Wifi System (Aradial).
System Requirements
Operating System: Windows 10, Windows Server 2016 Standard, or Windows Server 2019 Standard.
The OS must be synchronized with a valid NTP server.
RAM: 4 GB
Processor: Intel Core i3 @ 1.00 GHz
Hard Drive Space: 5 GB
Software: Microsoft .Net Framework 4.8 (Click here to download).
Installation
This section describes the procedures for downloading, installing, and uninstalling the WorkforceID Agents in the desktop/server environment.
Download the Installer
-
Login to HID Visitor Manager application as Visitor Administrator.
-
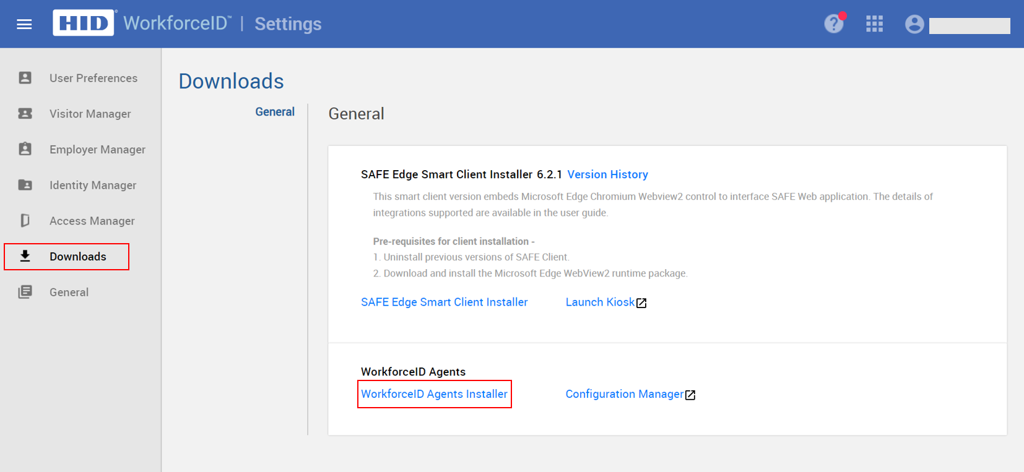
Navigate to Settings module > Downloads.
-
Click the WorkforceID Agents Installer to download the HID Visitor Manager agent installer.
-
Copy the downloaded file (OnPremAgentSetup.zip) to the OnPrem server where you intend to run the agent.
Launch the Installer Application
Follow the below steps to install the HID Visitor Manager Wifi Agent:
-
Launch the installer application (OnPremAgentSetup.zip). The HID Global – Agent Setup wizard appears. Click the Next button to continue.
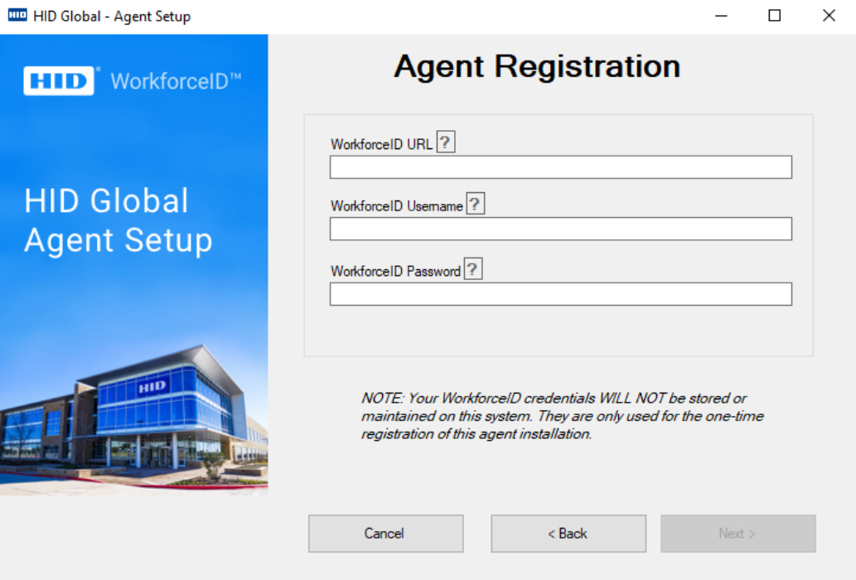
-
Enter the operator-specific WorkforceID URL, WorkforceID Username, and WorkforceID Password provided to log in to the tenant. Then, click the Next button to continue.
-
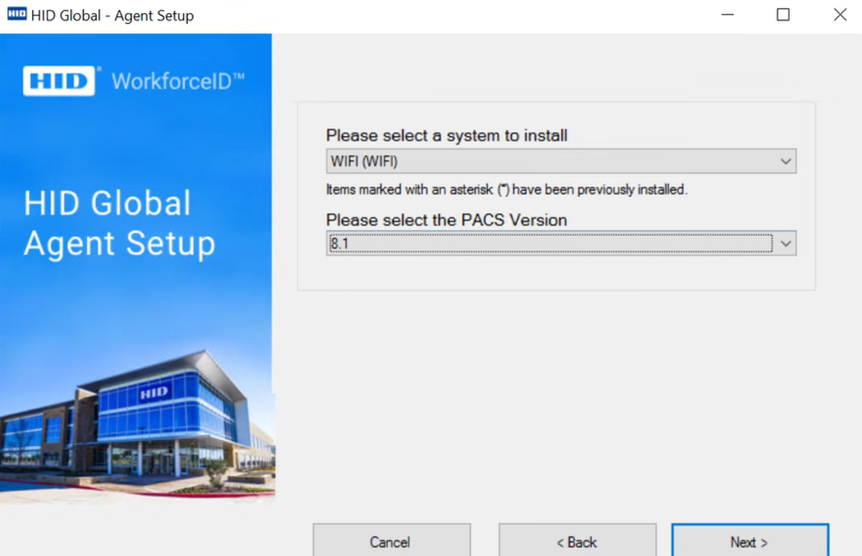
Select WIFI (WIFI) system and PACS version from the appropriate drop-down menus.
-
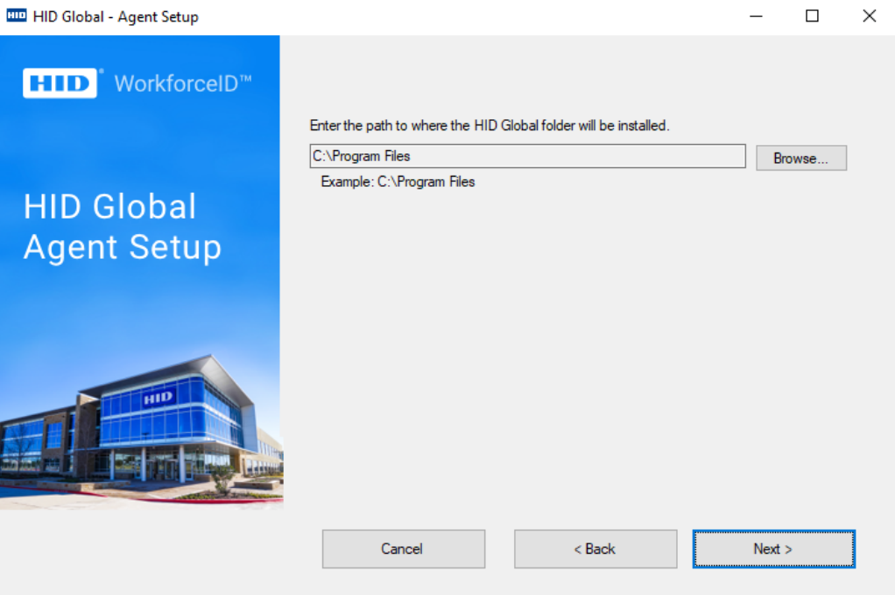
Select an installation path for the agent files. Then, click Next to begin installation.
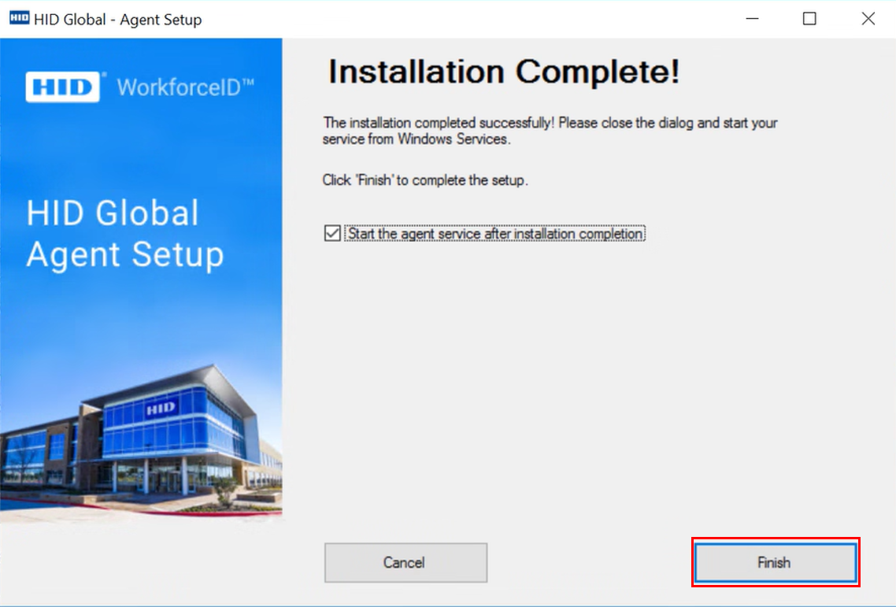
When all the above steps are completed, you will see the following screen, indicating successful installation. Click Finish.
Uninstallation
File Cleanup
To uninstall the OnPrem agent, one must simply delete the entirety of the installed agent folder from the file system at the path where the agent was originally installed.
Windows Service Cleanup
To remove the windows service from the OnPrem system where the agent was installed, you must do the following:
-
As an administrator, open up a command prompt cmd.exe
-
Run the command:
Copysc delete <<service name>> -
Refresh (or re-open) the windows services dialog to see the service removed.
Deletion of Folder
Remove Folder from C:\Program Files\HID Global\SAFE\WIFI
Agent logs can be found at C:\ProgramData\HID Global\SAFE\Common\Logs\WIFIAgentLog
Configuration
This section describes how to configure the WiFi agent in the HID Visitor Manager application.
Launch the System Configuration Manager
-
Login to HID Visitor Manager as the Visitor Administrator using your tenant ID credentials.
-
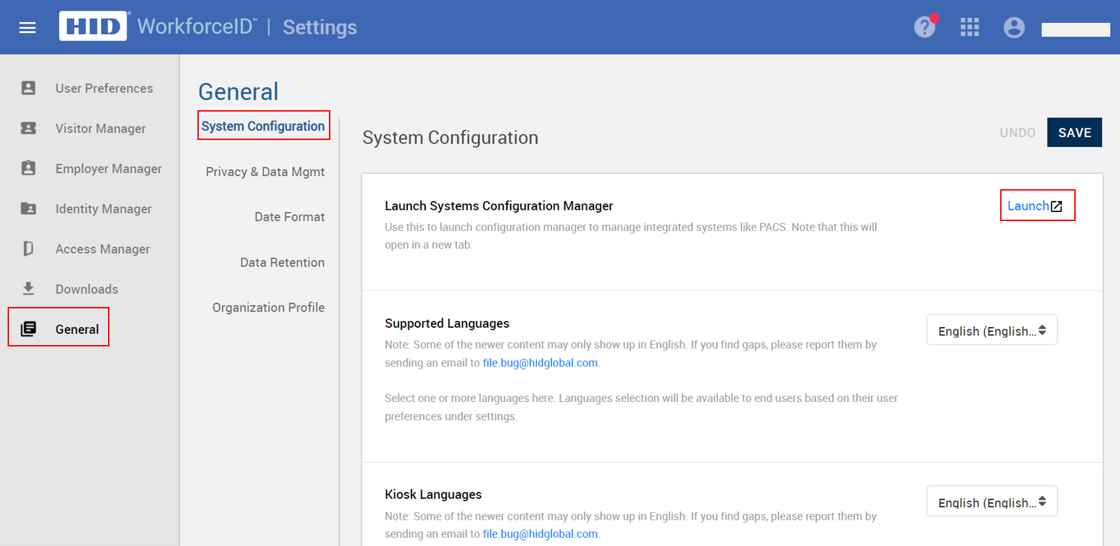
Click on the waffle icon, then go to Settings module > General tab.
-
The System Configuration page appears. Launch the Systems Configuration Manager by clicking the Launch link.
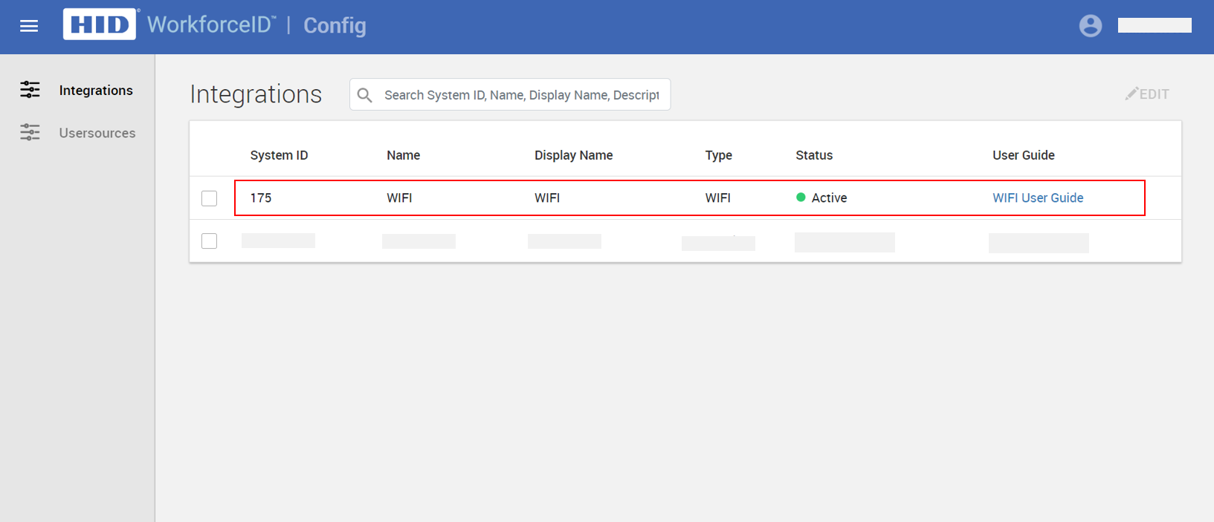
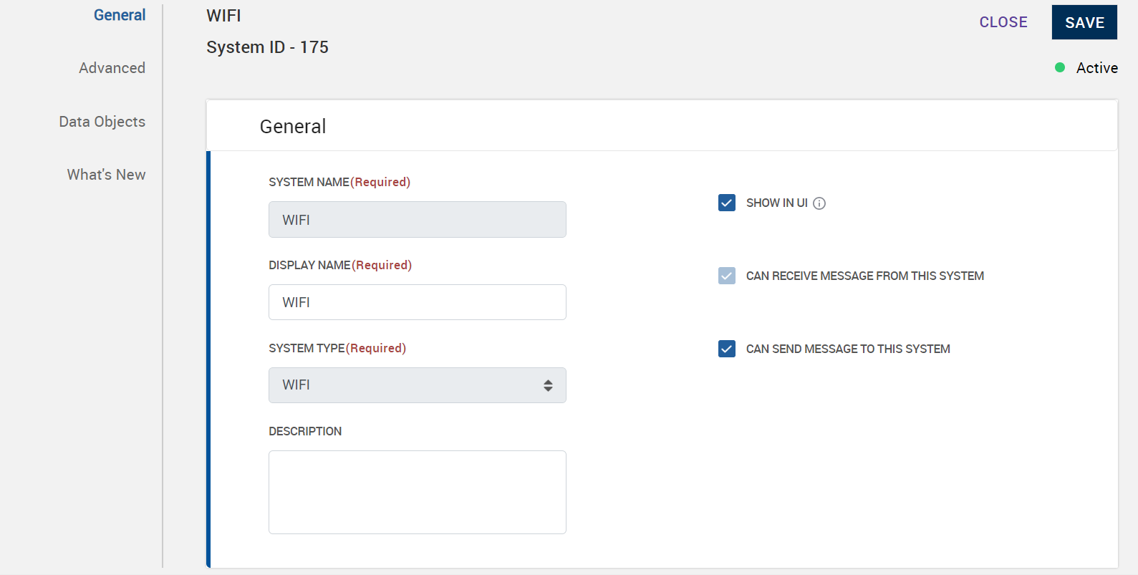
Clicking the launch button opens a new window called HID Visitor Manager Config. The integrations page appears with a list of all agents. Click the WIFI agent to start configuring it.
Configure the Wifi Agent
General tab:
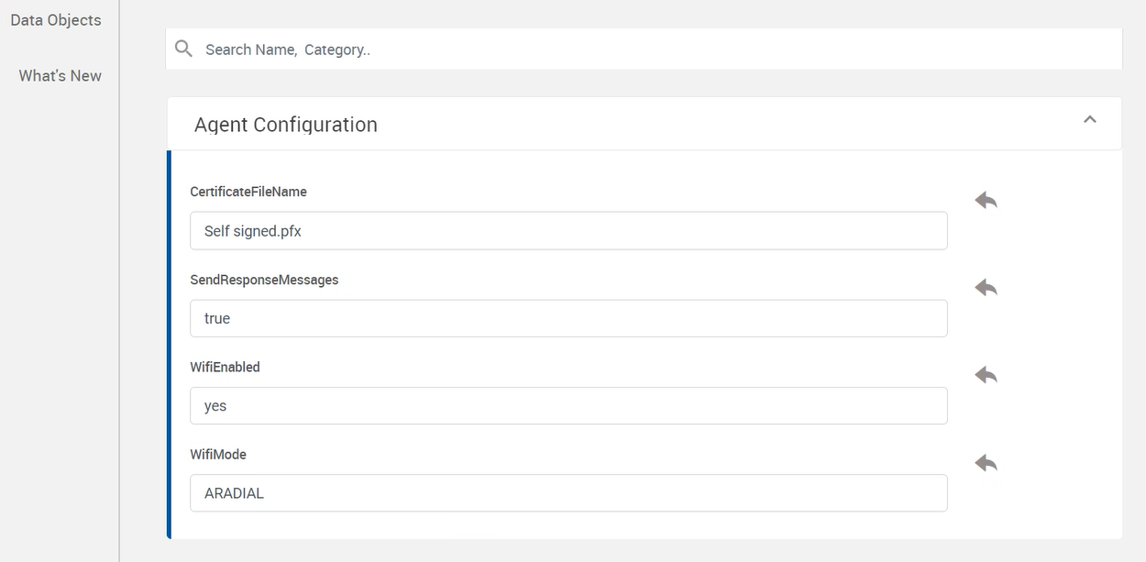
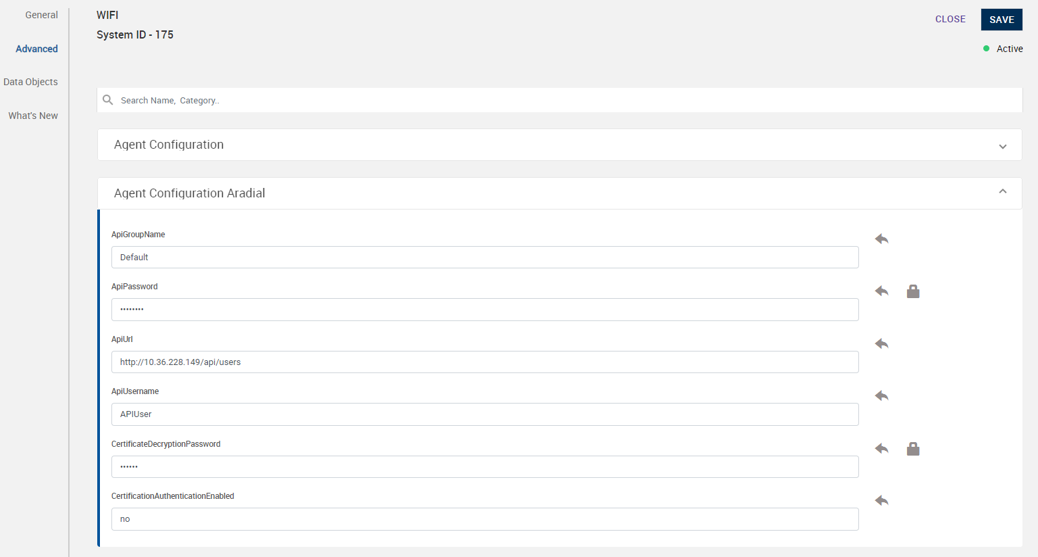
Advanced tab:
-
CertificateFileName – The path to the certificate file. Sets the certificate value using the specified file. Example: "Self Signed.pfx". this file needs to be replaced manually in the installed folder (C:\Program Files\HID Global\SAFE\WIFI). This parameter applicable only when CertificationAuthenticationEnabled config is set to Yes.
-
WifiEnabled – Enables or disables Wifi. Set to "yes" to enable.
-
WifiMode – Sets the Wifi mode. Example: "ARADIAL"
Start the Agent Service
After configuring your Wifi agent in the HID Visitor Manager Configuration app, you are ready to start the agent service.
-
Open the Services panel:
-
Press and hold the Windows key, then press the R key.
-
In the Run window that appears, type services.msc and press Enter.
-
-
Locate the WorkforceID Wifi Agent service in the Services panel. Click Start.
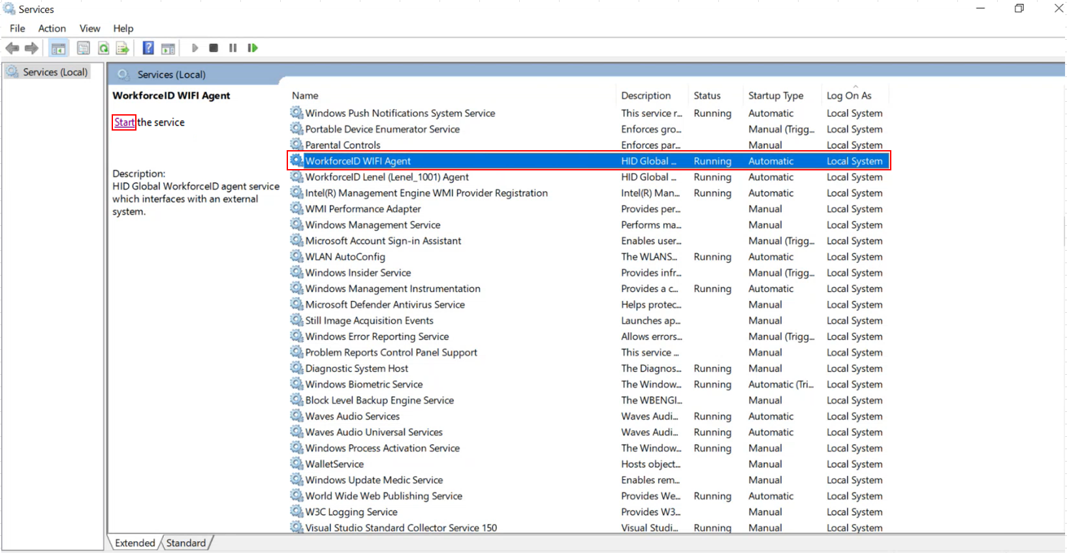
Any Wifi configuration change on the HID Visitor Manager Configuration App requires a Wifi Agent Service restart to take effect.
Agent Verification
This section provides testing scenarios to check whether the configured agent is functioning properly. The testing verifies that when a visitor admin hosts a visit, the visitor receives the Wifi credentials, and these credentials are broadcast to the Wifi system (Aradial) during check-in.
This section demonstrates Wifi provisioning and de-provisioning for Walk-In visits. However, it also applies to Scheduled and Kiosk Scheduled visits.
Enable Wifi for Location
-
Navigate to Admin module > Locations.
-
Select the location where you want to provide Wifi credentials to visitors.
-
Go to the Preferences tab.
-
Enable the configurations highlighted in the red box (as shown in the image below).
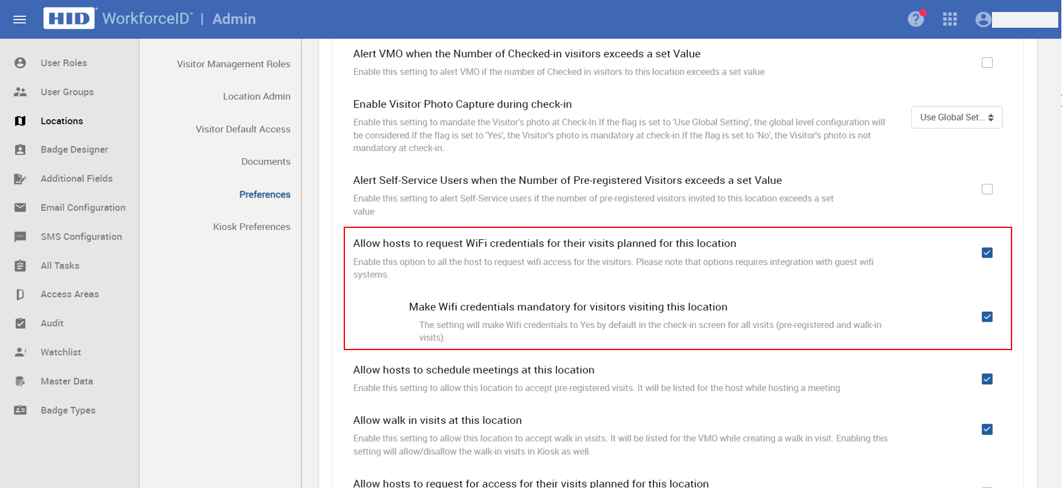
-
Click SAVE.
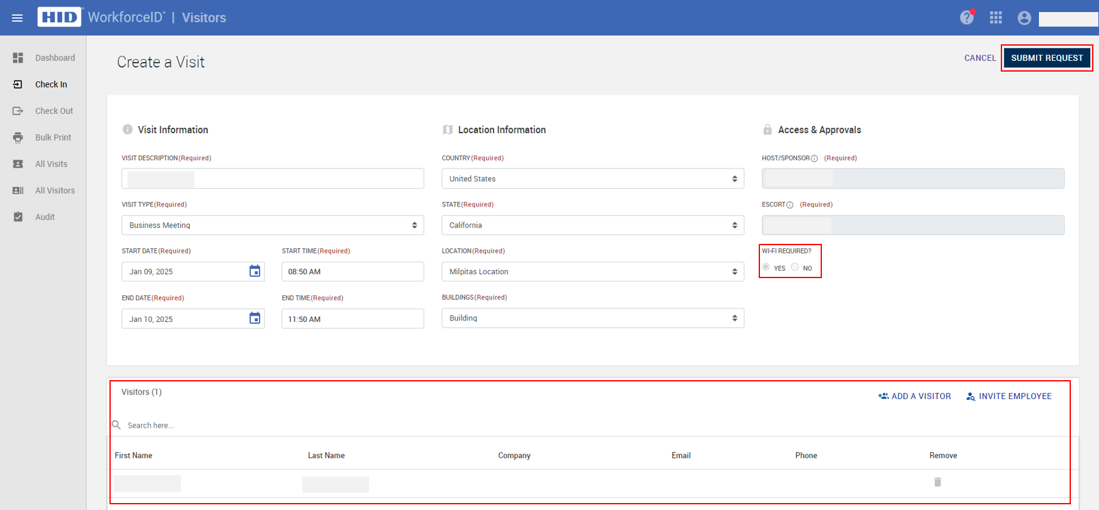
Wifi Provisioning
-
Log in to HID Visitor Manager as a Visitor Administrator.
-
Navigate to Visitors module > Check In.
-
Click the WALK-IN VISIT button on the top right corner.
-
Add a host and a visitor in the Visitors section. Then, click the SUBMIT REQUEST button.
-
On the visitor's Check In page, the visitor administrator can view the Wifi credentials (as shown below). The system broadcasts these Wifi credentials to the Wifi System (Aradial).
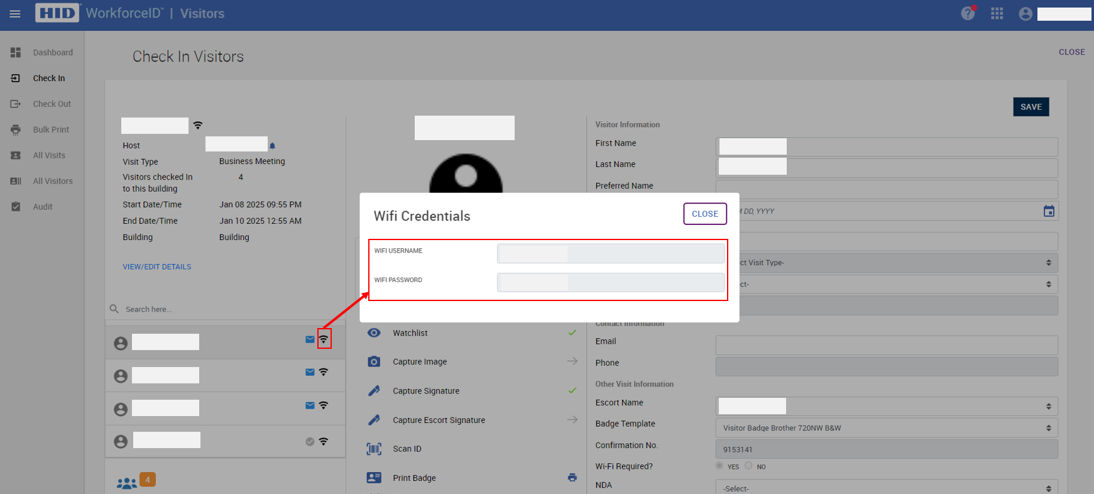
-
Once the visitor admin checks in the visitor, The system broadcasts these Wifi credentials to the Wifi System (Aradial).
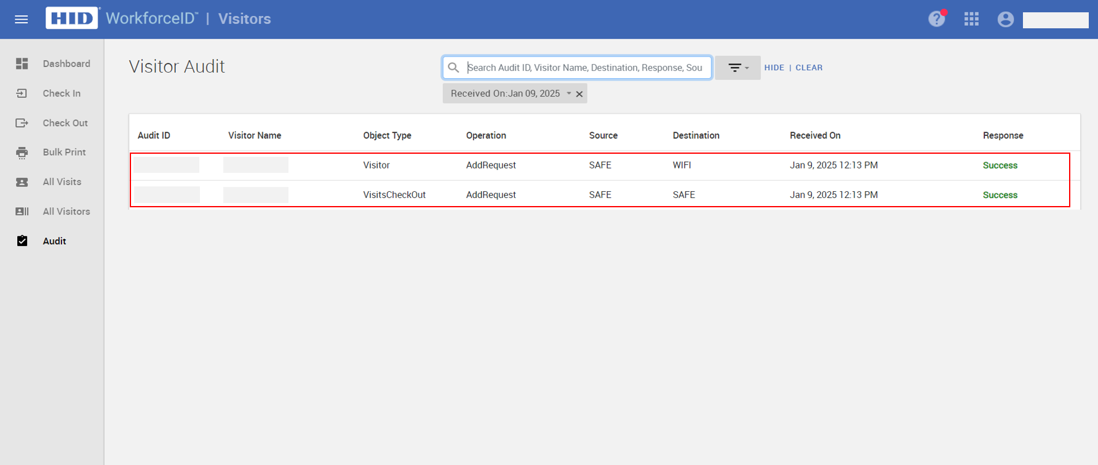
Audit Log:
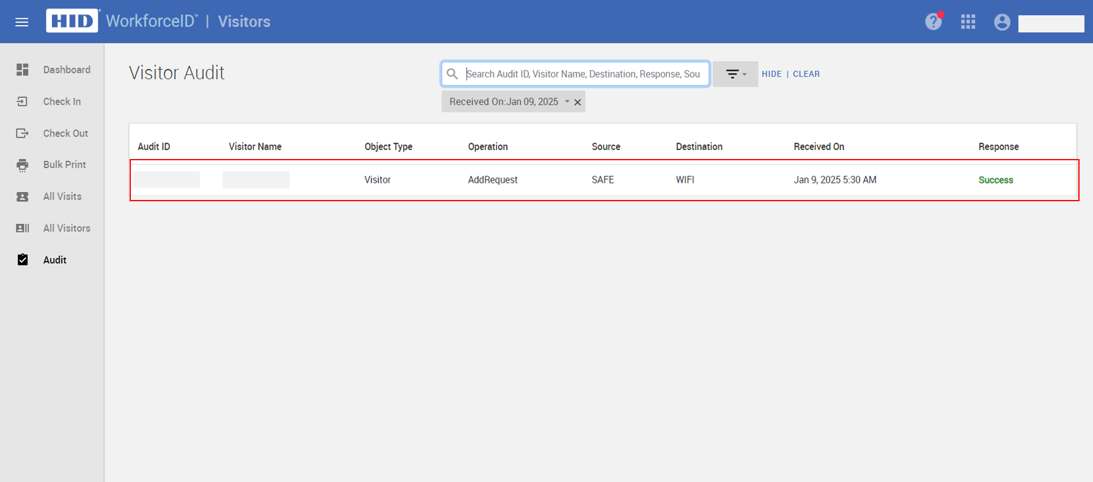
Wifi De-provisioning
During visitor check-out, Wifi credentials will be automatically removed from the Wifi system (Aradial), but not from the HID Visitor Manager.
Audit Log:
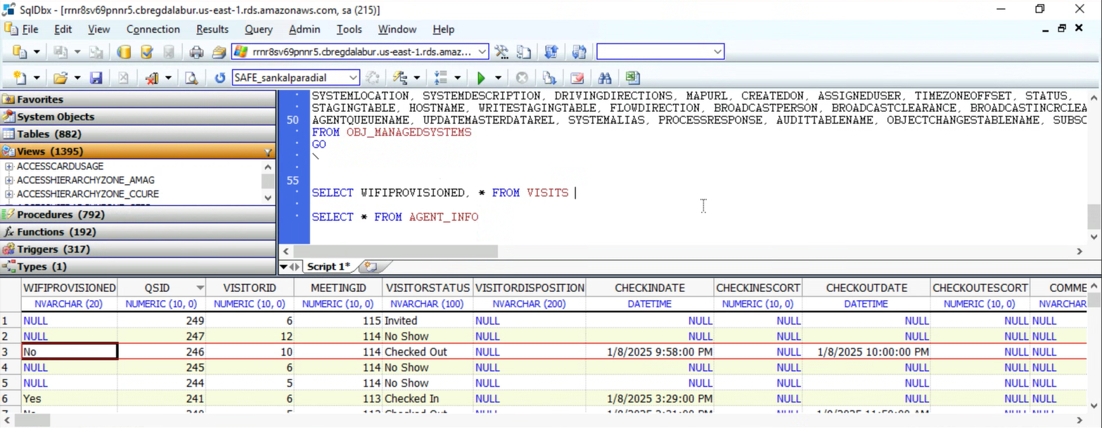
During check-in, the WIFIPROVISIONED flag in VISITS object is set to Yes; during checkout, it is set as No.