Installation
To enable users to use smart cards and keys for authentication on managed ChromeOS devices:
-
Force install the Smart Card Connector app for users in your organizational unit, and set the Smart Card Connector policy to allow connections from the ActivClient for ChromeOS extension.
-
Force install the ActivClient for ChromeOS extension for users in your organizational unit.
See the following sections for more detailed instructions.
Force Installing and Configuring the Smart Card Connector
-
Sign in to the Google Admin Console using your administrator account.
-
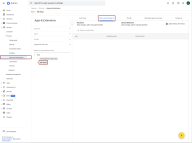
In the menu on the left, select Devices > Chrome > Apps & Extensions.
-
Select the appropriate organizational unit and then open the Users and browsers tab.
-
Hover over the yellow "plus" button
 at the bottom-right corner of the screen to display the menu:
 -
Click the "waffle"
 icon (Add Chrome app or extension by ID).
 -
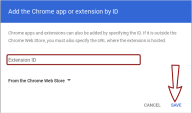
Enter the Smart Card Connector Extension ID: khpfeaanjngmcnplbdlpegiifgpfgdco and then click Save.
-
The Smart Card Connector will appear in the list of apps.
-
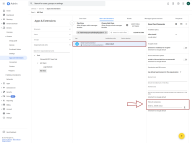
In the Smart Card Connector settings pane on the right, enter the following JSON into the Policy for extensions field, replacing ExtensionID with the ID of the ActivClient for ChromeOS extension, which you can find on the HID ActivID Customer Portal (access available to customers with an active ActivClient Advanced license).
Copy{"force_allowed_client_app_ids":{"Value":["ExtensionID"]}}
The Smart Card Connector app is now configured.
Force Installing the ActivClient for ChromeOS Extension
-
If you are not already signed in, sign in to the Google Admin Console using your administrator account.
-
In the left navigation panel, select Devices > Chrome > Apps & Extensions.
-
Select the appropriate organizational unit and then open the Users and browsers tab.
-
Hover over the yellow "plus" button
 at the bottom-right corner of the screen to display the menu:
 -
Click the "waffle"
 icon Add Chrome app or extension by ID.
 -
Enter the ActivClient for ChromeOS Extension ID, which you can find on the HID ActivID Customer Portal (access available to customers with an active ActivClient Advanced license), and click Save.
-
The ActivClient for ChromeOS extension will appear in the list of apps.
-
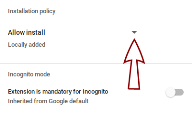
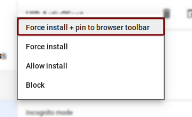
In the HID ActivClient settings on the right, click the Installation policy dropdown and select Force install+pin to browser toolbar.
This will add the HID ActivClient icon to the user's browser toolbar:
The ActivClient for ChromeOS extension is now configured and ready to enable users to authenticate to websites using their tokens.
What’s Next?
For more information on using the Smart Card Connector extension with the ActivClient for ChromeOS, see Using the ActivClient for ChromeOS.

