Configure a Gate
Fundamental Gate Settings
- In the tree in the left pane, select Servers.
- Double-click to expand the tree. All connected servers are displayed in the tree.
- Double-click on a server name. All its gates are displayed below it in the tree. In addition, the server icon and its gate icons display in the pane at the top of the Administration Console.
-
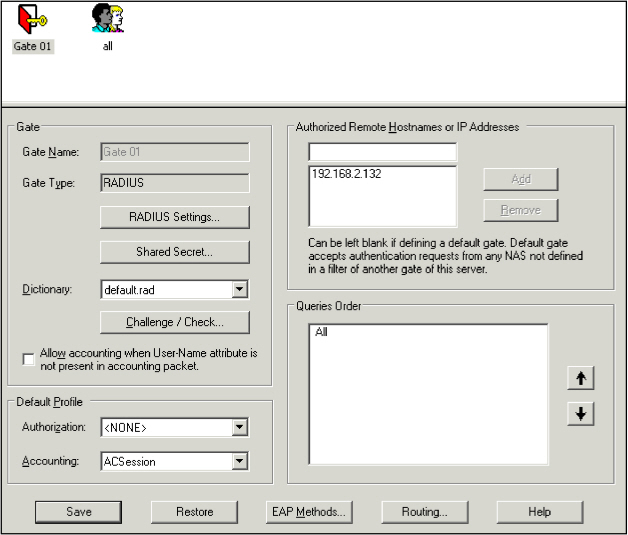
You can select a gate in the tree, or you can select the gate icon that is displayed in the pane at the top of the Administration Console. The gate screen is displayed in the Administration Console:
-
The gate icon (and any existing user group icons) appear in the pane at the top of the Administration Console. In the example above, the gate is a RADIUS gate. The screen options reflect that. Different options appear if your gate is a TACACS+ gate.
The Gate name, Gate type, Dictionary, Default profile, and Authorized remote IP names or addresses fields display the values you specified when you created the gate. Except for the gate name and type, you can change these values at any time.
- Once you have finished modifying the gate's configuration, click Save.
Protocol-specific Gate Settings
The following topics discuss RADIUS and TACACS+ settings, how to use the Shared Secret and Challenge / Check options, the Queries Order section of the screen, and the Routing option.
-
If your server uses RADIUS, a RADIUS settings option is displayed on the dialog box.
-
If your server uses TACACS+, a TACACS+ option is displayed on the dialog box
Follow the appropriate steps for the protocol your server uses.
RADIUS Settings
-
Click RADIUS settings.
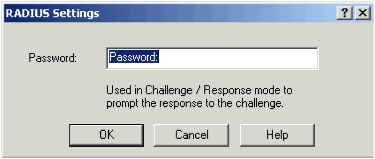
- In the Password field, enter the text string to display for use in challenge/response mode.
Routers and VPNs use this string when displaying information in a terminal window.
- Click OK.
TACACS+ Settings
-
Click TACACS+ Settings.
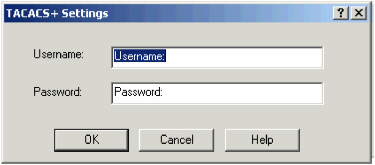
- In the Username field, enter the text to be displayed to prompt the user to enter their username.
- In the Password field, enter the text to be displayed to prompt the user to enter their password.
- Click OK.
RADIUS and TACACS+ Shared Secret Settings
There are two types of shared secrets:
- AAA Server uses the RADIUS (or TACACS+) shared secret to encrypt between the NAS and the AAA Server authentication server.
- You can assign a RADIUS (or TACACS+) shared secret at every gate. Otherwise, the server secret is used.
-
If you changed the shared secret on the AAA Server authentication server side, click on either RADIUS or the TACACS+ Shared Secret.
Use this feature when you want to guarantee the highest level of security for your own gates and system, especially if there are partner, client or other "foreign" networks and servers connected to your server.
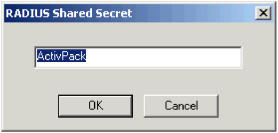
An appropriate protocol-specific dialog box is displayed (see the illustrations below).
For RADIUS Shared Secret:
For TACACS+ Shared Secret:
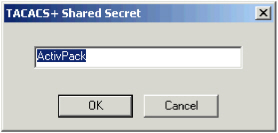
- The shared secret is set to a default (ActivPack), unless you modify it.
Modify the appropriate shared secret for your system, then click OK.
Note: The maximum length of the secret is 24 characters and special characters are allowed.
Challenge/Check Settings
-
Click Challenge/Check to set the challenge/response and reciprocal authentication parameters.
If you are using the AAA Client for RAS, this information must match the connection script. See your client software user documentation for details.
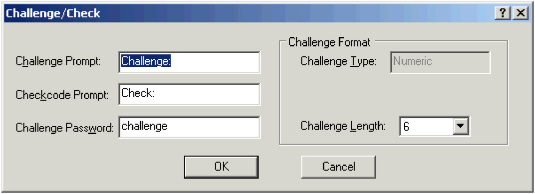
- In the Challenge prompt field, specify the keyword to display immediately prior to the challenge.
-
In the Checkcode prompt field, specify the keyword to display immediately prior to the check code (for a reciprocal authentication).
The check code is dynamic data sent by the server so that the client can check that the user is connected to the correct server. You cannot use this check code prompt with ActivIDtokens.
- In the Challenge password field, specify the keyword to send to the authentication server requesting that it send a challenge back. AAA Server uses this keyword (string) to generate a challenge. If you change it, be sure that you update your NAS and/or client.
- In the Challenge type field, specify the type of challenge (numeric or hexadecimal). You cannot use a hexadecimal challenge with ActivID Tokens or ActivID Keychain tokens.
- In the Challenge length field, specify the length of the challenge (the longer the challenge, the longer the time required to generate the response).
-
Click OK.
- To configure the gate routing settings, see Configure the Routing Settings.
- To configure the gate wireless (EAP) settings, see Configure the Gate Wireless (EAP) Settings.


