Install ActivID ActivClient
-
Run the ActivClient MSI installer from the ActivClient product folder of the distribution package.
The setup detects the platform type and starts the relevant ActivClient installation wizard.
The Welcome page is displayed.
-
Click Next.
The License Agreement page is displayed.
-
Accept the license agreement and click Next.
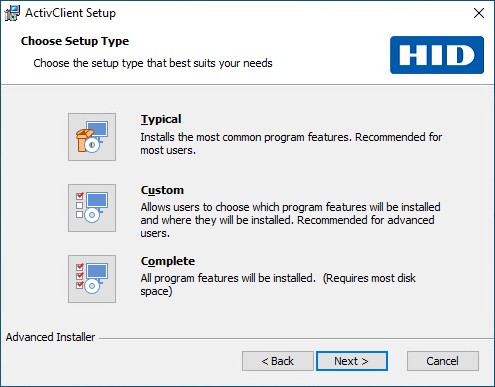
The Setup Type page is displayed.
-
Leave the setup type at the default setting (Typical) and click Next.
Note: If you want to customize the feature installation, select Custom (see Customize ActivID ActivClient During Installation). -
Click Install.
The Setup Progress page is displayed. The progress might take several minutes.
-
Once the setup is completed, the Completed page is displayed. Click Finish.
-
Select the Show the readme file option to automatically view the ActivClient Readme file.
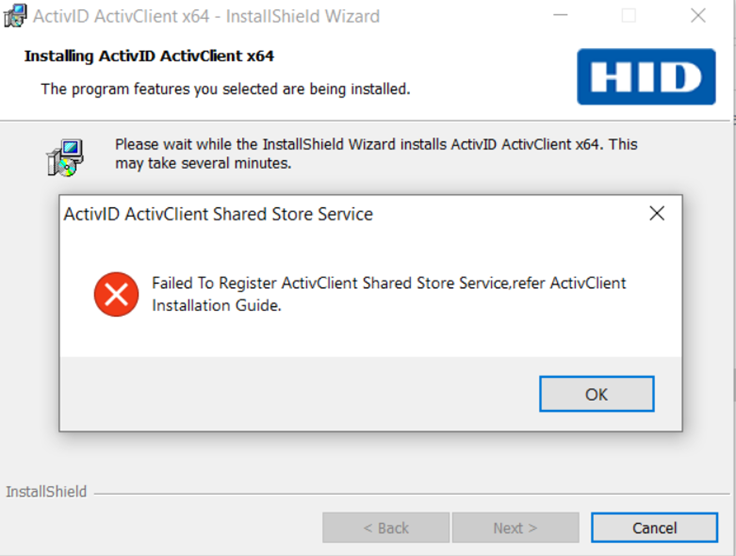
Installation Errors and Work Around
ActivClient Shared Stored Service Error
To avoid the ActivClient Shared Stored Service Error, follow the steps listed below:
-
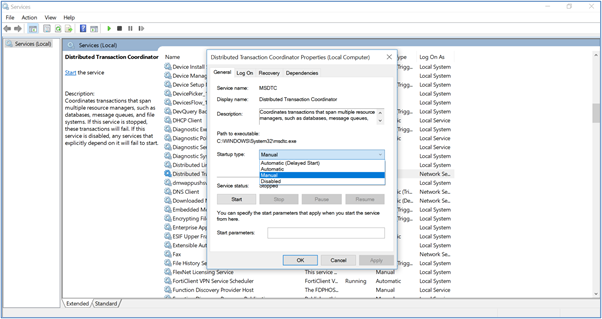
Make sure MSTDC is running on the machine.
Go to: Services >> Distributed Transaction Coordinator >> Startup Type (should be either Manual/Automatic).
-
If Startup Type is disabled, right-click and select Properties >> General tab and set Startup Type to either Manual/Automatic. Start the services.
-
If the error is not resolved, collect the installation logs using the following command and share it with HID Tech Support. For example, with the ActivClient 8.2 installer, the command will look like this:
msiexec /i "ActivClient-8.2.0.msi" /L*V C:\logspath
Next step - Post-Installation Steps


