Configuring RADIUS Support
This page describes how to manage support for an RFE component installed on an ActivID Appliance.
You should configure at least one channel with a RADIUS channel policy and, optionally, with Authorization Profile Selection Rules and LDAP fallback enabled.
You can also configure a combination of one or more of the following elements:
-
External RADIUS Servers
-
RADIUS Realm Proxy policy(ies)
-
Authorization Profile(s):
-
Check Before Profile(s)
-
Send After Profile(s)
-
Configure an External RADIUS Server
A server listens to authentication, authorization and accounting requests coming from the Access Controllers (such as routers, remote access servers, or firewalls) on the RADIUS ports.
Routing enables the ActivID Appliance to redirect a user’s request directly to an external RADIUS authentication server, based on specific circumstances. This is particularly useful when migrating from an existing RADIUS-based service to the ActivID Appliance.
Create an External RADIUS Server
-
Log on to the ActivID Management Console.
-
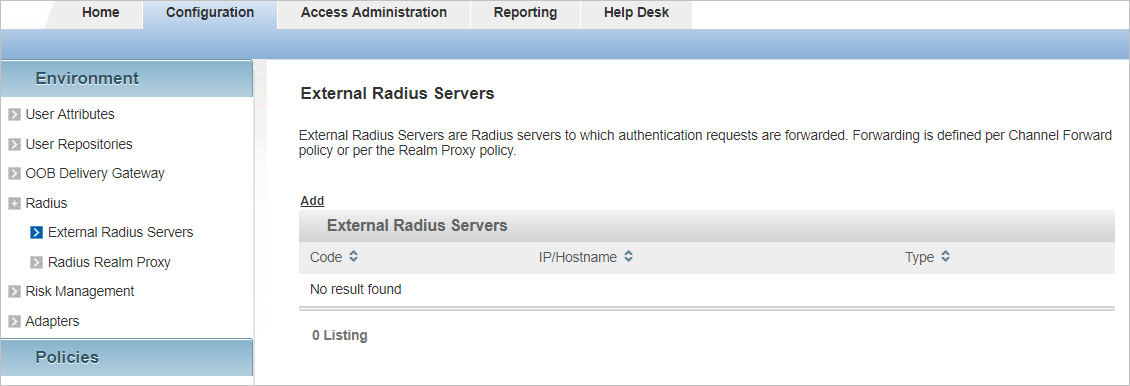
In the Configuration tab, under Environment, click Radius and then External Radius Servers.
-
Click Add.
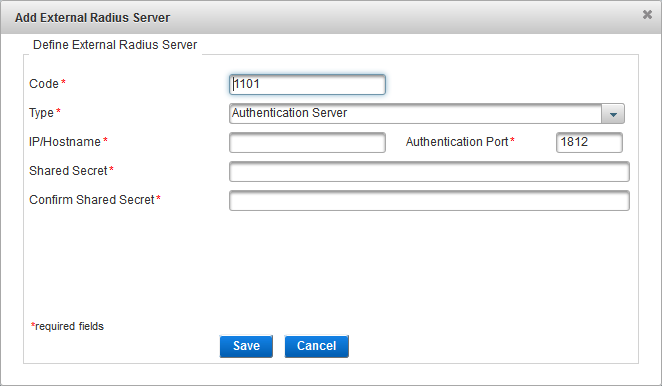
The Code is generated automatically and you can change it to something more meaningful if required. This code must be unique.
Note: The server Type is set to Authentication Server and cannot be changed. -
Enter the IP address or hostname of the external server.
-
Enter the number of the port on which the server listens for authentication requests (by default, this is 1812).
-
Enter and confirm the RADIUS Shared Secret and click Save.
The Shared secret encrypts the information exchanges between the
-
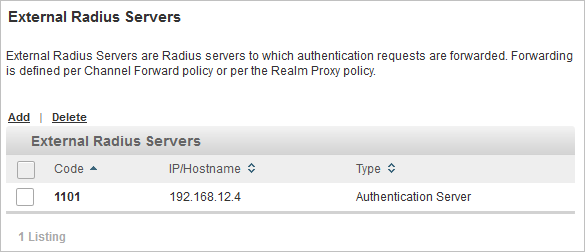
When the success message is displayed, click Close to return to the External Radius Servers page.
The new external server is now displayed in the list of configured servers.
Edit an External RADIUS Server
-
In the Configuration tab, under Environment, click Radius and then External Radius Servers.
-
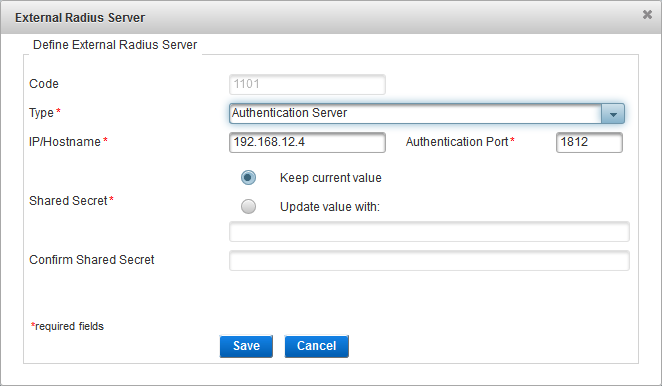
Click on the Code of the server you want to edit.
-
Edit the server configuration as required.
Note: You cannot change the Code. -
If you want to change the Shared Secret, select Update value with and then enter and confirm the new secret.
-
Click Save to apply your changes.
Delete an External RADIUS Server
-
In the Configuration tab, under Environment, click Radius and then External Radius Servers.
-
Select the checkbox for the server you want to remove and click Delete.
-
Click Yes to confirm the removal.
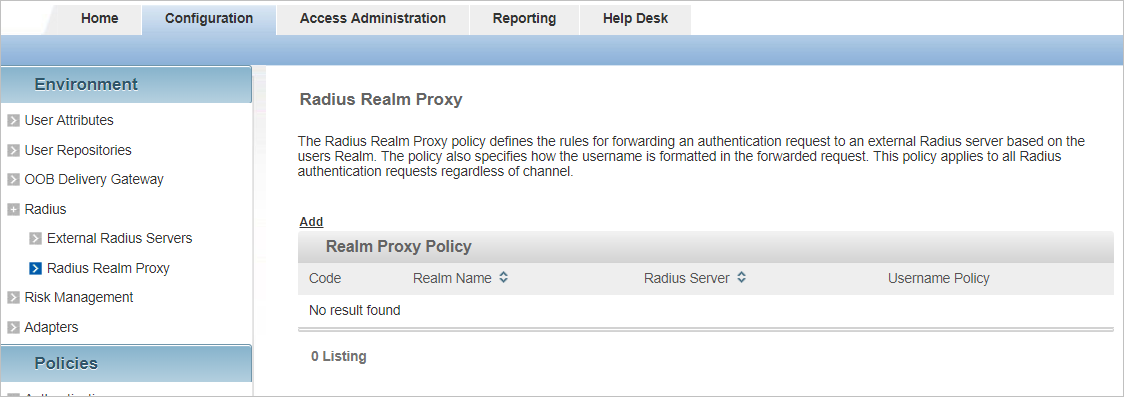
Configure the RADIUS Realm Proxy Policy
The RADIUS Realm Proxy policy defines how authentication requests are forwarded to external servers depending on the user’s domain (realm) and the configuration of domain parameters.
This service permits you to manage multiple realms (user domains) through a single (or multiple) authentication server(s).
-
“Realm” refers to a user’s domain.
Groups of users are associated with specific domains (for example, domain1.com\User1, domain1.com\User2, domain1.com\User3).
-
“Proxy” refers to a single point of contact (or “broker”) that dispatches authentication requests from users of a domain not handled by the ActivID Appliance to the external RADIUS server configured for that domain.
The policy also specifies the format of the username in the forwarded request.
ActivID Appliance alone does not permit a user from a given domain (@Domain1) to connect through another domain (@Domain2). The Realm Proxy service routes (forwards) authentication requests to the correct server(s), for companies who want to manage users (located in various network domains) who need to connect from one domain to another.
To determine where to route packets making up an incoming authentication request, the Realm Proxy service parses the “user realm” from the authentication request in order to determine where to route the incoming packet(s).
The Realm Proxy retrieves the realm from the “User-Name” RADIUS attribute. This attribute must therefore contain the user ID as well as the realm, separated by a special character (for example, jsmith@comnet where “jsmith” is the User ID, “@” is the separator, and “comnet” is the “realm”).
If the Realm Proxy simply routed every RADIUS request to the authentication server without parsing the packet(s), the authentication server would not know from which Network Access Server (NAS) the request originated. The ActivID Appliance will consider that every request originates from the Realm Proxy, unless the Realm Proxy:
-
Uses the “proxy-state” RADIUS attribute, where it stores the original IP address of the sender, and
-
Adds it to the request
When the server receives a request (and the Realm Proxy has added the “proxy-state” RADIUS attribute), the ActivID Appliance retrieves the original NAS parameters to determine the channel used.
The Realm Proxy only manages domain routing when the authentication request it receives cannot be executed locally
Realm Proxy policies are independent of the ActivID Appliance domains
Therefore, make sure that you do not to redefine redundant proxies in different ActivID Appliance domains.
These steps are performed using the ActivID Management Console
Create a RADIUS Realm Proxy Policy
-
In the Configuration tab, under Environment, click Radius and then Radius Realm Proxy.
-
Click Add.
-
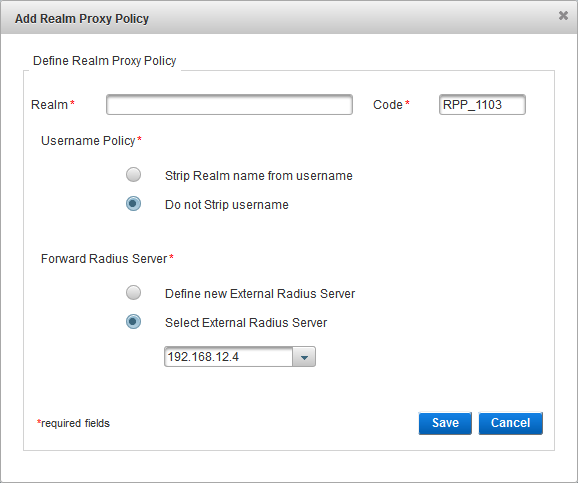
Enter the name of the Realm.
Note: This must be the exact name of the realm. -
You can also change Code if necessary. This code must be unique.
-
Under Username Policy, select whether or not the realm should be stripped from the username before forwarding the authentication request.
-
Define or select the external RADIUS server to which the authentication requests are forwarded.
-
If you choose to define a new server, the Save button changes to Next. Click Next and follow the instructions in Create an External RADIUS Server.
-
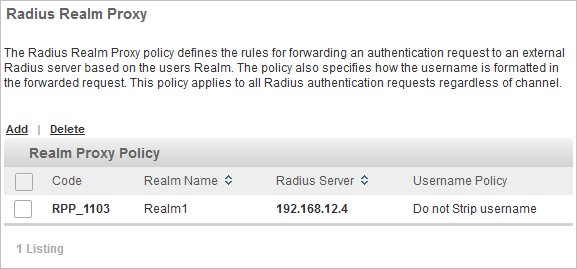
Click Save and, when the success message is displayed, click Close.
The New Realm Proxy Policy is displayed in the list.
-
Select the checkbox to apply the policy to your RFE configuration.
Edit a RADIUS Realm Proxy Policy
-
In the Configuration tab, under Environment, click Radius and then Radius Realm Proxy.
-
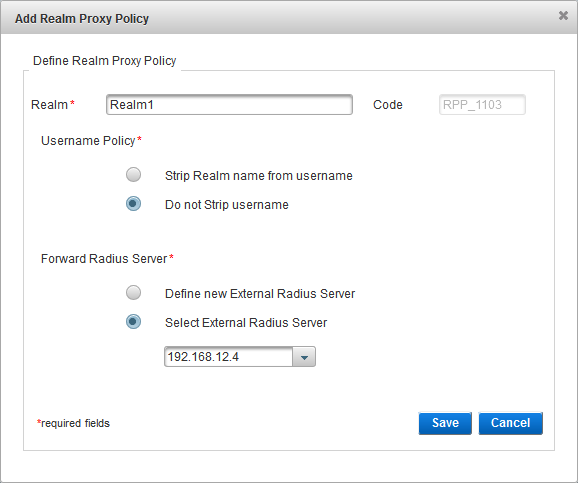
Click on the Code of the policy you want to edit.
-
Edit the policy configuration as required (see Create a RADIUS Realm Proxy Policy).
Note: You cannot change the Code. -
Click Save to apply your changes.
Delete a RADIUS Realm Proxy Policy
-
In the Configuration tab, under Environment, click Radius and then Radius Realm Proxy.
-
Select the checkbox for the policy you want to remove and click Delete.
-
Click Yes to confirm the removal.
See also:


