Creating the VM using Microsoft Hyper-V
This section describes how to create the virtual ActivID Appliance using Microsoft Hyper-V.
The ActivID-Appliance_8.0.0.492.iso media is available
The Microsoft virtualization software requirements are:
Hyper-V v10.0.x on either Microsoft Windows 10 Enterprise, Windows Server 2012 or Windows Server 2016.
Hyper-V host Windows version 9.0
Configure a Virtual Switch
If you do not have an existing external virtual switch for the virtual machine network adapter, you must create one as follows:
-
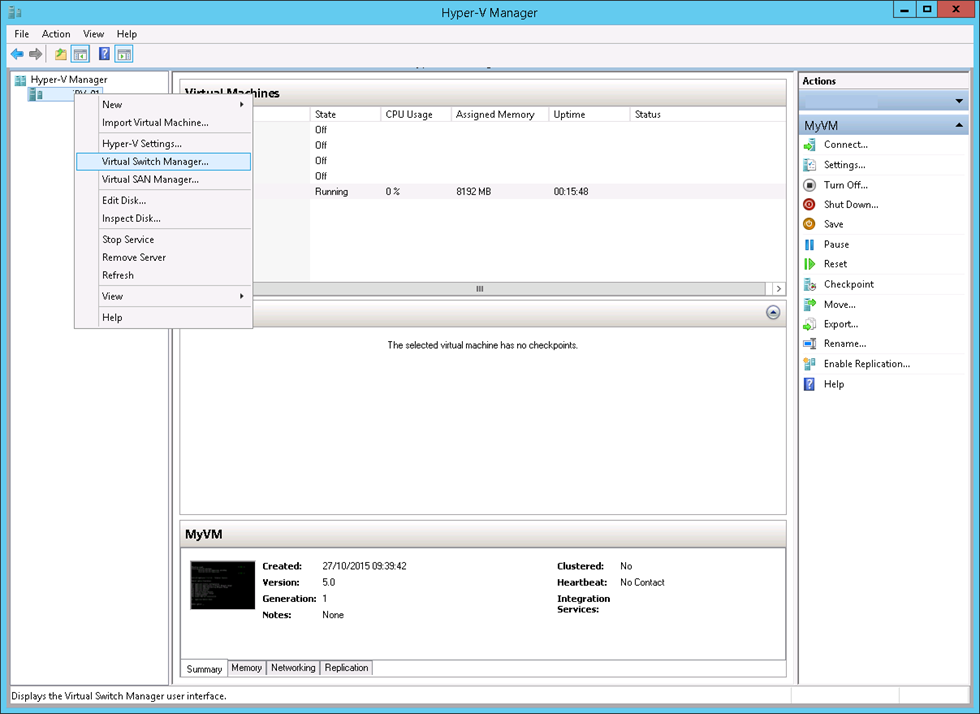
Open the Hyper-V Manager.
-
In the left panel, right-click on your server and select Virtual Switch Manager.
-
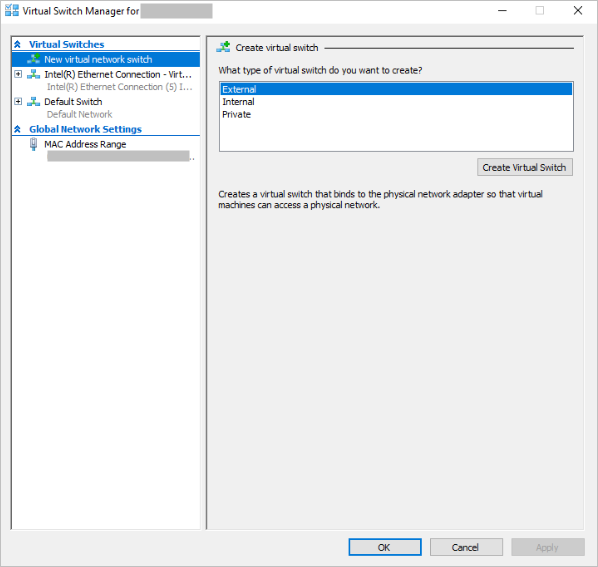
In the left panel, select New virtual network switch and then, in the right panel, select External as the type and click Create Virtual Switch.
Note: In a test environment, it is recommended that you use an internal network.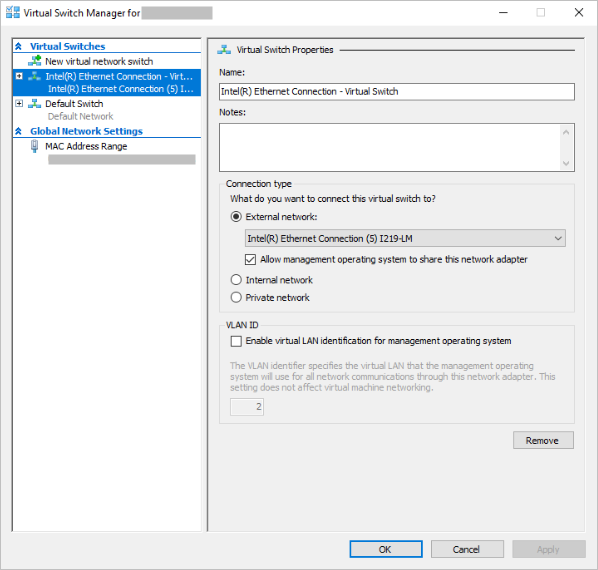
-
In the switch properties, make sure External network is selected as the Connection type and that it is attached to the correct network card, and then click OK.
Create the Virtual Appliance
-
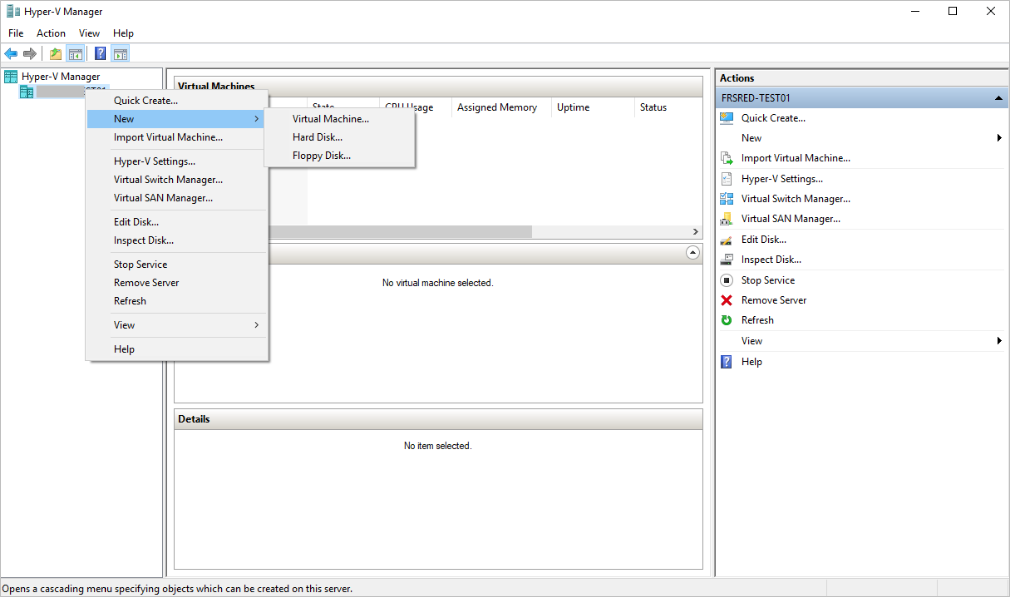
Open the Hyper-V Manager.
-
In the left panel, right-click on the server and select New, and then Virtual Machine....
-
In the wizard welcome page, click Next.
-
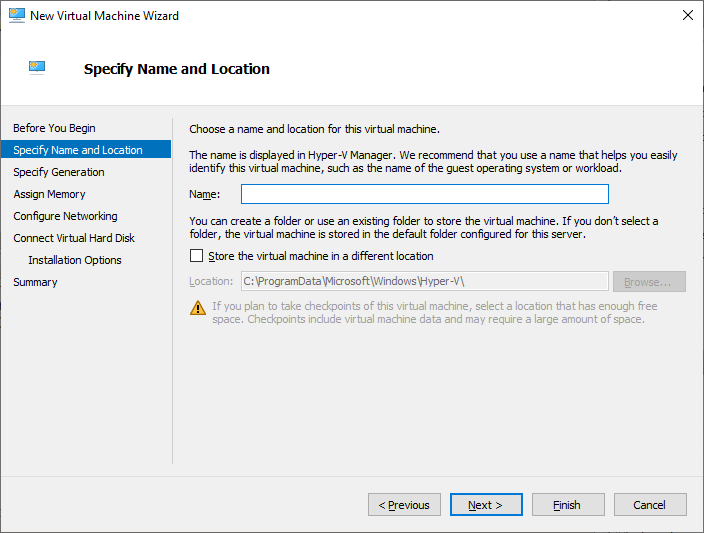
Enter a Name for your virtual machine and click Next.
-
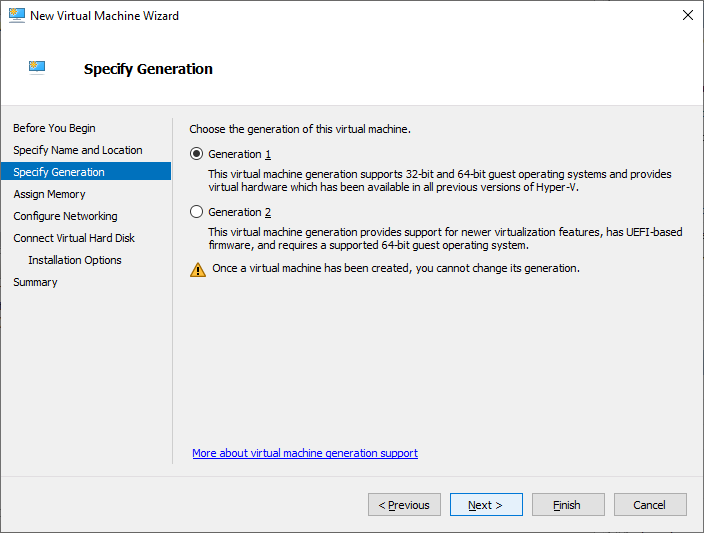
In the Specify Generation page, select Generation 1 and click Next.
Note: A Generation 1 virtual machine includes IDE controllers as well as SCSI controllers. The SCSI drives are not bootable because the virtual SCSI controller cannot be loaded before the OS kernel.It also includes the Legacy Network Adapter which is the only network adapter that can be used as a boot device.
The emulated hardware's firmware is a BIOS in which you can set the order of boot devices.
-
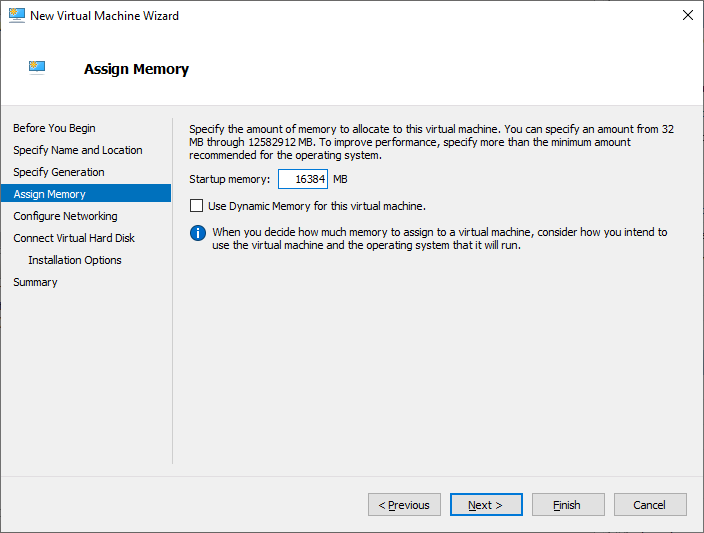
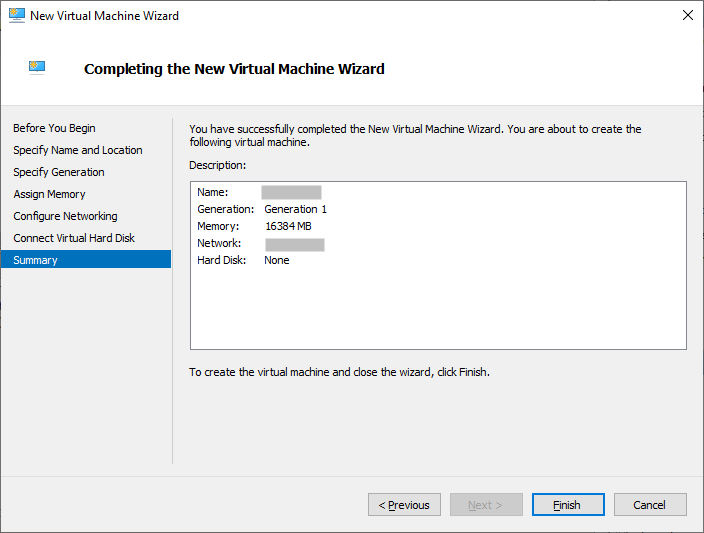
In the Assign Memory page, enter 16384 (MB) as the memory required by the virtual appliance.
-
Clear the Use Dynamic Memory for… option and click Next.
-
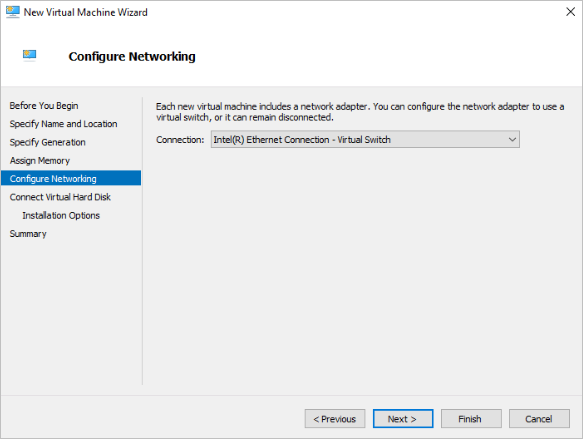
In the Configure Network page, from the drop-down list, select the virtual switch you created in the previous section and click Next.
-
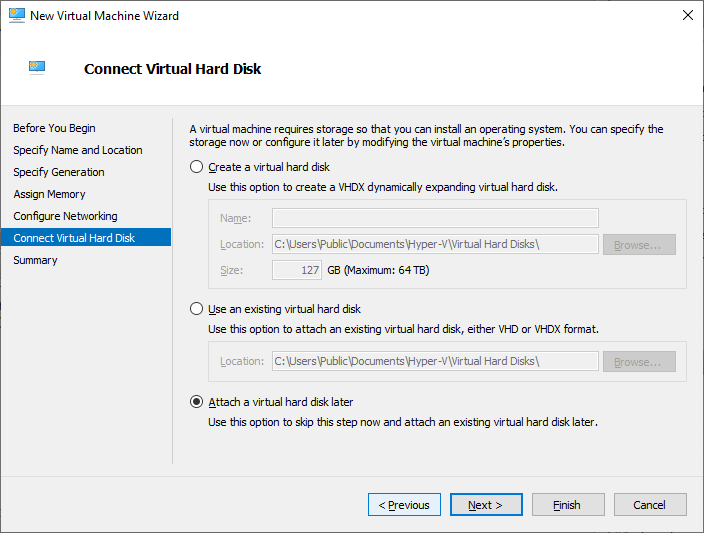
In the Connect Virtual Hard Disk page, select Attach a virtual disk later and click Next.
-
Verify that the Summary is correct and click Finish.
Configuring the Virtual Appliance
To configure the virtual machine for ActivID Appliance, you need to:
-
-
BIOS
-
CPU
-
Hard drives
-
-
Install the ActivID Appliance on the virtual machine
Configure the VM Settings
-
Open the Hyper-V Manager.
-
In the list of Virtual Machines, right-click on your machine and select Settings.
-
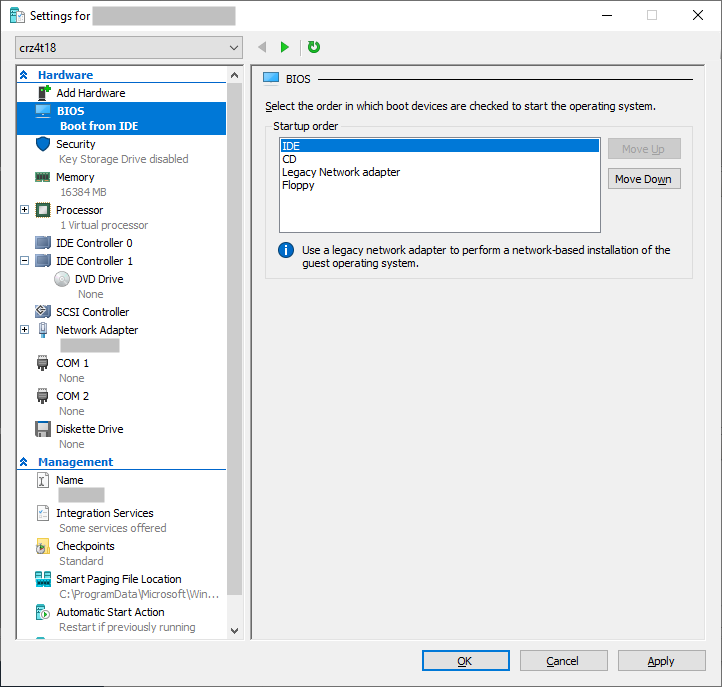
In the left panel, select BIOS and set the boot order by moving IDE to the first position, and then CD to the second.
In this configuration:
-
At the first boot, the CD will be loaded because the IDE disks are empty
-
After installation, the machine will boot on the correct IDE disk
-
-
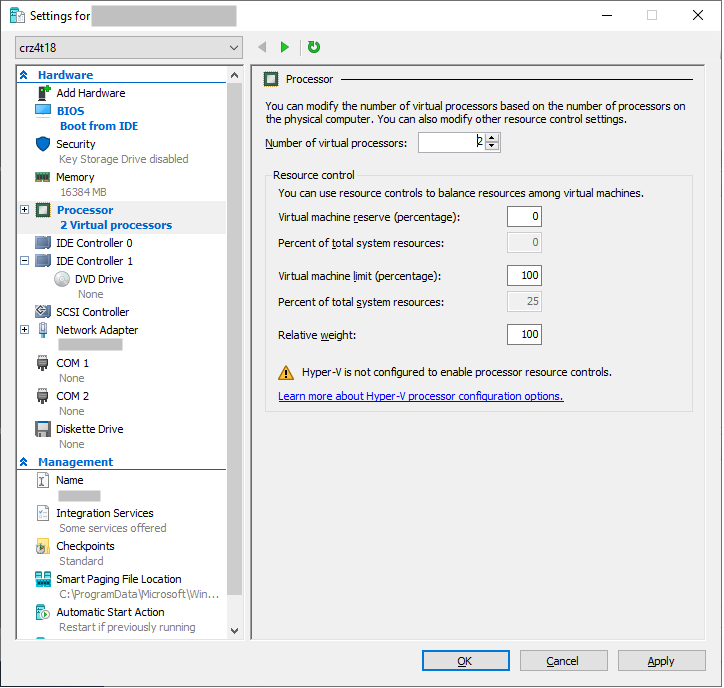
In the left panel, select Processor and set the Number of virtual processors to 2.
-
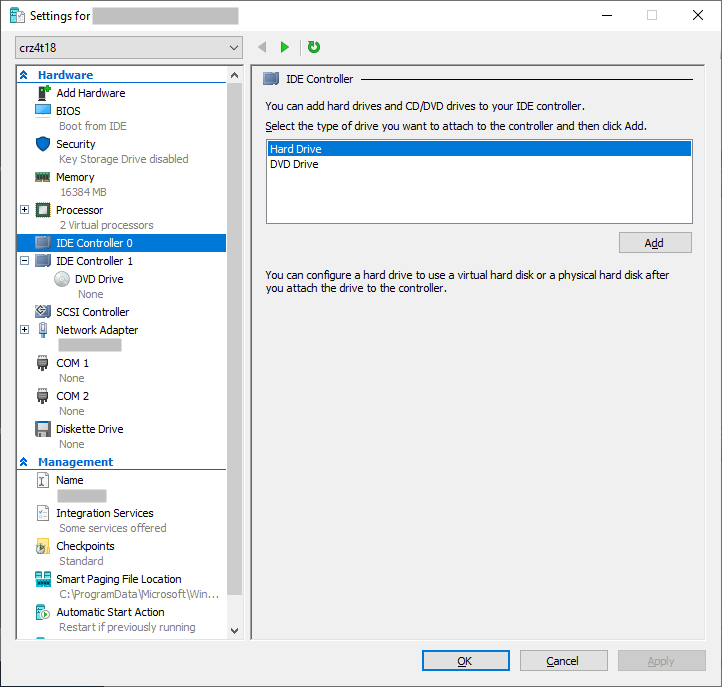
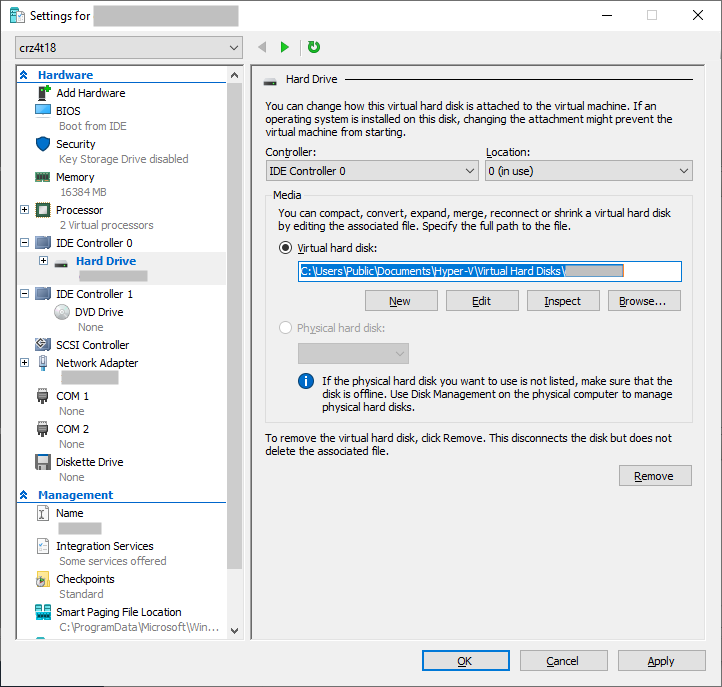
In the left panel, select IDE Controller 0 and then Hard Drive as the type of drive, and click Add.
Your new hard drive should be allocated to IDE Controller 0, with Location 0 (as illustrated above).
-
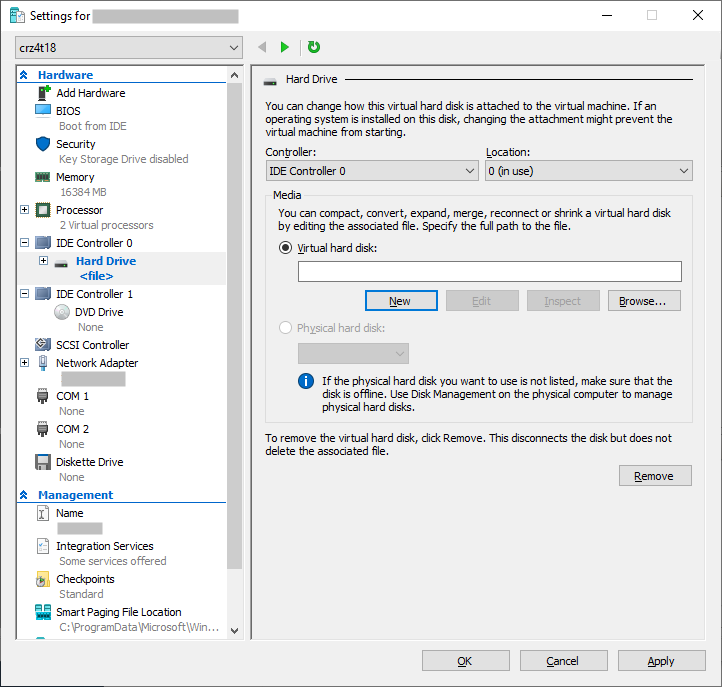
Click New to create a new disk and, in the wizard, click Next.
-
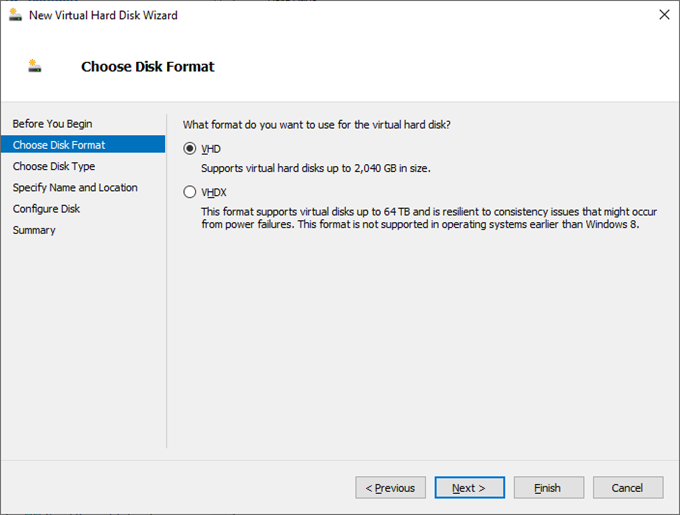
Select VHD as the disk format and click Next.
-
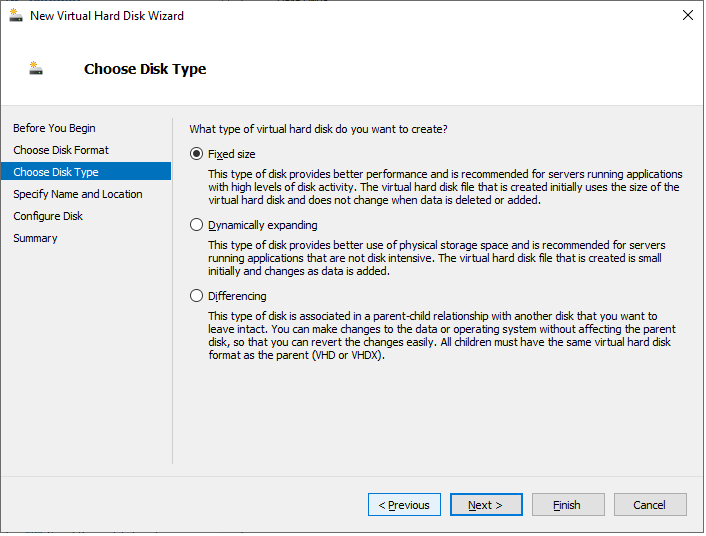
Select Fixed size as the virtual disk type and click Next.
-
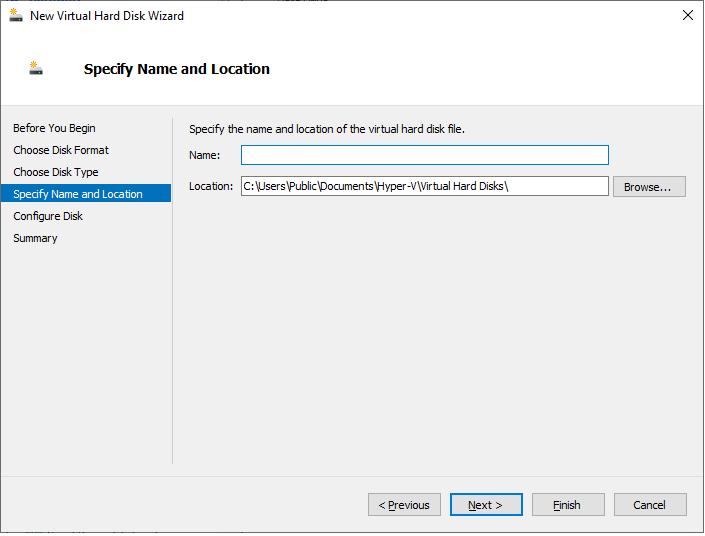
Enter a Name for the disk and select a Location, and then click Next.
-
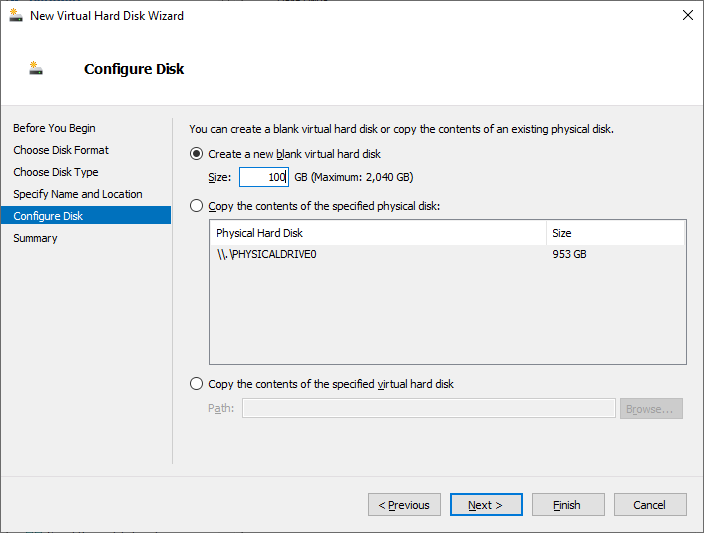
Select to Create a new blank virtual hard disk and set the disk size to 100 (GB), and complete the wizard instructions.
-
Select IDE Controller 0 again and repeat steps 5 and onwards to add a second hard drive in the IDE Controller 0 (allocated to Location 1).
Important: Before proceeding, make sure that you have created two drives.IDE Controller 0 should have two hard drives, where the second hard drive is allocated to Location 1.
-
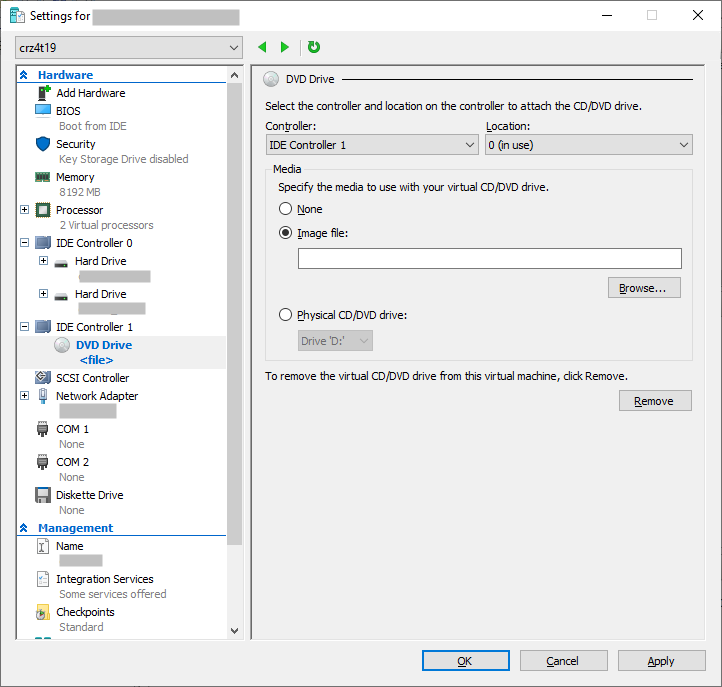
In the left panel, select IDE Controller 1 and then DVD Drive as the disk type.
-
Under Media, select Image file and then browse to the ActivID-Appliance_8.0.0.492.iso.
-
Click Apply and then OK to save your configuration.
An initial automatic checkpoint is created for this VM (Initial).
Install the ActivID Appliance
-
In the Hyper-V Manager, start the virtual machine.
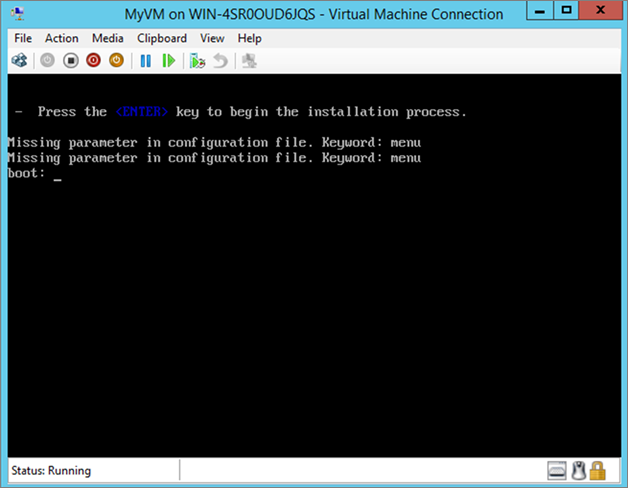
-
Press ENTER.
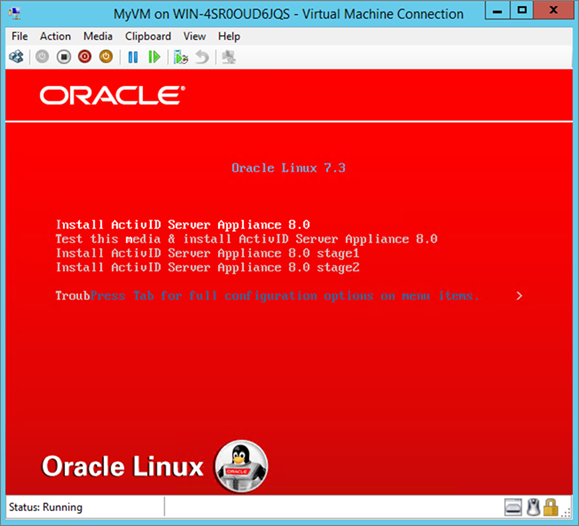
-
Select Install ActivID Server Appliance 8.0 (the first option) to launch the installation.
During the installation process, the virtual machine restarts once.
When the installation is finished, the virtual machine shuts down.
-
Create a new checkpoint (for example, First install).
Your VM is now ready for initial configuration.


