Preparing a Thales HSM for the ActivID Appliance
Install and configure your Thales Luna Network HSM (refer to the technical documentation provided with your HSM)
For optimal performance, it is recommended using the latest Thales Luna HSM firmware version available (the minimum supported version is v7.8.7), which is compatible with the Thales Luna HSM Client 10.7.2 embedded within ActivID Appliance 8.7.
Make sure you know the:
HSM admin user's password as it will be required to configure the Thales Luna HSM Client
HSM Crypto Officer's password as it will be required to generate the keys and certificates
Create an HSM partition for the ActivID Appliance
You will generate the keys and certificates required for the ActivID Appliance in this partition as described below.
Make sure you have a license for the Thales Luna HSM Client
Install and Configure the Thales Luna HSM Client
The Thales Luna HSM client is used to generate the keys and certificates required for the ActivID Appliance.
-
Download and install the latest Thales Luna HSM client from the Thales Support Portal.
For illustration purposes, this procedure uses the client distribution for Microsoft® Windows®.
-
To establish a Network Trust Link between the your Thales Luna HSM client and the HSM, open a Windows command prompt as an Administrator.
-
Go to the Thales Luna HSM client folder:
By default, C:\Program Files\SafeNet\LunaClient
-
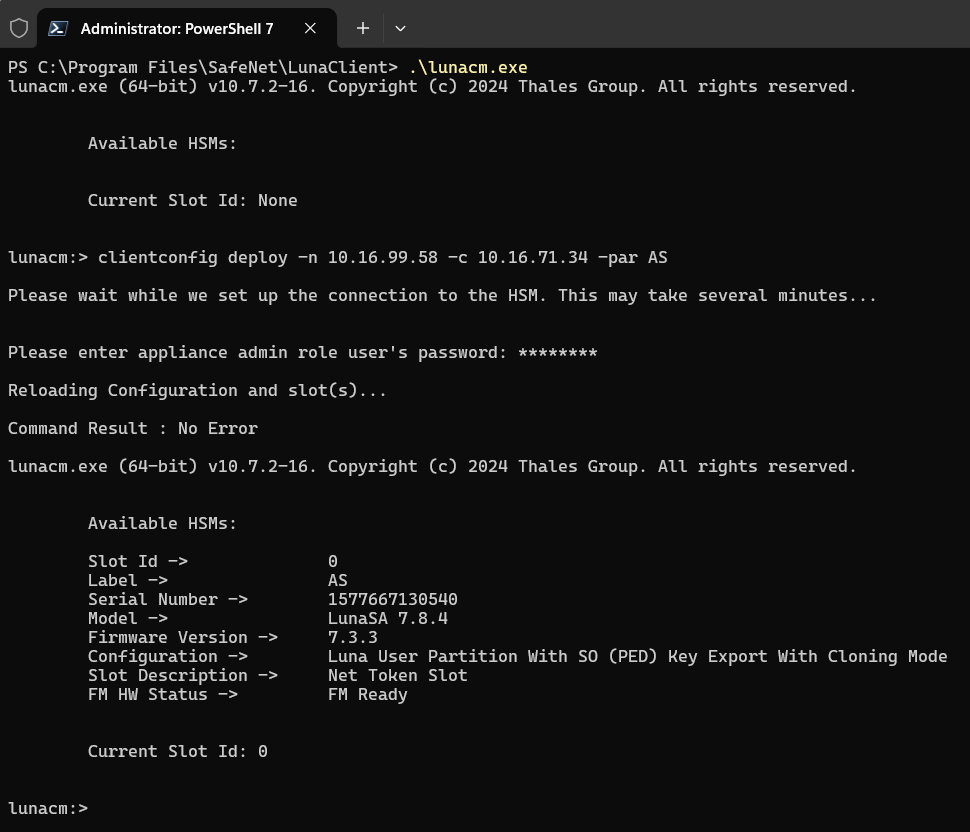
Launch the lunacm tool and use clientconfig deploy command to configure the NTLS connection as follows:
Copyclientconfig deploy -n <HSM_IP> -c <HOST_IP_OF_WINDOWS_LUNA_CLIENT> -par <ACTIVID_APPLIANCE_PARTITION_NAME>You are prompted for the HSM admin user's password to complete the operation.
For further information about the clientconfig deploy option, go to the Thales documentation.
Generate the ActivID Appliance Keys in the HSM
BEFORE you can migrate to an external HSM and add ActivID security domains, you must generate the HSM encryption keys that protect the sensitive information in the ActivID databases and assure database integrity.
These keys are used for all security domains defined in the ActivID Appliance.
The keys are managed in consistent set of five AES-256 symmetric keys with specific roles and naming convention for the key aliases:
<PREFIX>.<Key Role Type>.<version>
Where:
-
<PREFIX> – to make sure that the names remain unique, a specific prefix 'HID-IA-4T’ is used for all the ActivID Appliance key aliases
This prefix is not configurable.
-
<Key Role Type> – is mandatory and is part of the key set
-
<Version> – number version of the key (increment with renewal)
Based on this convention, the default key set (shared by all domains) that you need to generate using the HSM tools is:
| Key Role | Key Type | Alias – shared | Key Usage | Key Role |
|---|---|---|---|---|
|
AUDIT |
AES 256 |
HID-IA-4T.AUDIT.1 |
Signature | Audit signature |
|
CREDS |
AES 256 |
HID-IA-4T.CREDS.1 |
Encryption | User credentials encryption (replaces the des and DeviceSecretsKey keys of previous versions of the ActivID Appliance) |
|
DSIGN |
AES 256 |
HID-IA-4T.DSIGN.1 |
Signature | Database row integrity signature |
|
SESSION |
AES 256 |
HID-IA-4T.SESSION.1 |
Encryption | ALSI sessions encryption/decryption |
|
SYS |
AES 256 |
HID-IA-4T.SYS.1 |
Encryption | System credentials encryption/decryption (adapter parameters, replaces the ParameterValueKey key of previous versions of the ActivID Appliance) |
Therefore, when the HSM keys are created or renewed using a manual process (using HSM dependent tools), it is recommended that you always use the uppercase key aliases.
You can generate these keys using the Thales ckdemo tool (for other options, go to the Thales documentation).
-
Open a Windows command prompt as an Administrator.
-
Go to the Thales Luna HSM client folder:
C:\Program Files\SafeNet\LunaClient
-
Run the ckdemo command:
-
Enter 1 to select the (1) Open command.
-
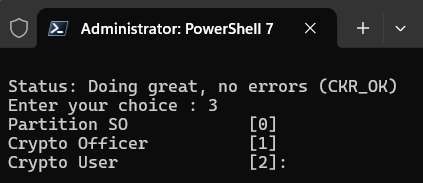
Enter 3 to select the (3) Login command.
-
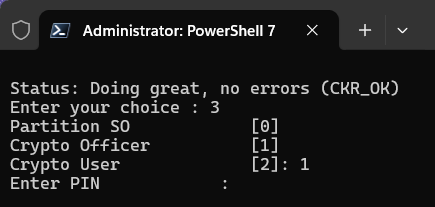
Enter 1 to select the Crypto Officer [1] option.
-
Enter the PIN for the Crypto Officer.
-
Apply the following process to create each of the ActivID Appliance keys detailed above:
-
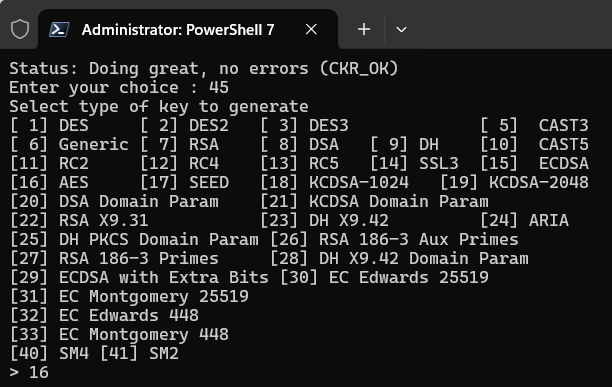
Enter 45 to select the (45) Simple Generate Key command.
-
Enter 16 to select the [16] AES option.
-
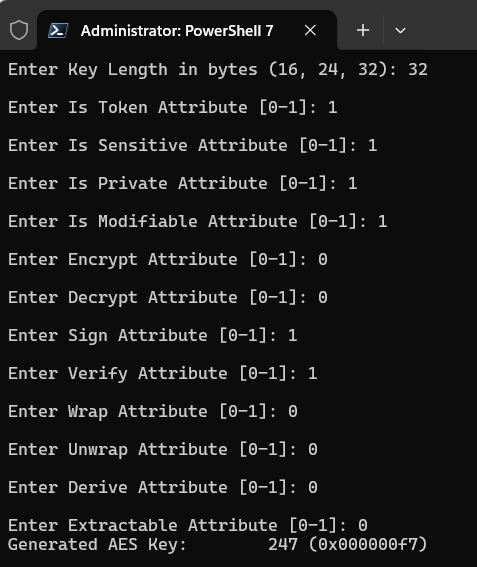
Enter the following PKCS#11 attribute values depending on the usage (encryption or signature) of the ActivID Appliance key you are creating:
PKCS#11 label Attribute Value for signing key Value for encryption key Description Key Type AES AES Advanced Encryption Standard (AES) symmetric algorithm for block ciphers. Key Length in bytes (16, 24, 32) 32 32 AES-256 CKA_TOKEN Is Token Attribute [0-1] 1 1 Identifies whether the object is a token object or a session object. CKA_SENSITIVE Is Sensitive Attribute [0-1] 1 1 This attribute specifies that the key object cannot be extracted from the token in the clear. CKA_PRIVATE Is Private Attribute [0-1] 1 1 Indicates if a user may not access the object until the user has been authenticated to the token. CKA_MODIFIABLE Is Modifiable Attribute [0-1] 1 1 Determines whether or not an object is read-only. CKA_ENCRYPT Encrypt Attribute [0-1] 0 1 Indicates if key supports encryption.
0 For signing keys (AUDIT, DSIGN)
1 For encryption keys (CREDS, SESSION, SYS)
CKA_DECRYPT Decrypt Attribute[0-1] 0 1 Indicates if key supports decryption.
0 For signing keys (AUDIT, DSIGN)
1 For encryption keys (CREDS, SESSION, SYS)
CKA_SIGN Sign Attribute [0-1] 1 0 Indicates if key supports signatures.
1 For signing keys (AUDIT, DSIGN)
0 For encryption keys (CREDS, SESSION, SYS)
CKA_VERIFY Verify Attribute [0-1] 1 0 Indicates if key supports verification.
1 For signing keys (AUDIT, DSIGN)
0 For encryption keys (CREDS, SESSION, SYS)
CKA_WRAP Wrap Attribute [0-1] 0 0 Indicates whether the key supports wrapping.
The customer must choose the value according to his deployment
CKA_UNWRAP Unwrap Attribute [0-1] 0 0 Indicates if a given key can be used to unwrap encrypted key material.
The customer must choose the value according to his deployment
CKA_DERIVE Derive Attribute[0-1] 0 0 Indicates if it is possible to derive other keys from the key. CKA_EXTRACTABLE Extractable Attribute [0-1] 0 0 Specify that the key may be extracted from the token in an encrypted (for example, wrapped) form.
The customer must choose the value according to his deployment
For example, for the AUDIT signing key:
-
Enter 25 to select the (25) Set attribute command.
-
Enter the object number corresponding to the AES key generated above.
-
Enter 1 to select the (1) Add attribute option.
-
Enter 3 to select 3 - CKA_LABEL option and enter the ActivID Appliance key alias label (for example, HID-IA-4T.AUDIT.1).

-
Enter 0 to select the (0) Accept Template option.

-
Enter 27 to select (27) Display Object command to check the details of the key created.
-
-
To list all ActivID Appliance keys you created, enter 27 to select the (27) Display Object command and enter 0 to display all available objects.
Generate the ActivID Appliance IDP Keys and Certificates in the HSM
For each ActivID security domain, the following RSA-2048 key/certificate pairs should be generated in the HSM for SAML support:
| Key Type | Key Size | PKCS#11 Certificate Label (aliases) | Certificate Key Usage | Certificate Purpose |
|---|---|---|---|---|
| RSA | 2048 | IDP_CERT_SIGNATURE_<domain> | Digital Signature | ActivID Appliance IDP signature |
| RSA | 2048 | IDP_CERT_ENCRYPTION_<domain> |
Key Encipherment and Data Encipherment |
ActivID Appliance IDP encryption |
If they are incorrect, the appliance will not be able to use the HSM and it will not function properly.
Generate the RSA Key Pair
Generate an asymmetric RSA key pair on the HSM for each ActivID Appliance security domain.
-
Open a Windows command prompt as an Administrator.
-
Go to the Thales Luna HSM client folder:
C:\Program Files\SafeNet\LunaClient
-
Launch the cmu generatekeypair command with the following parameter values:
Note: You will be prompted for the HSM Crypto Officer's password.Parameter Key pair for the IDP signature certificate Key pair for the IDP encryption certificate -keytype rsa rsa -mech pkcs pkcs -modulusBits 2048 2048 -publicExp 65537 65537 -sign 1 1 -verify 1 1 -encrypt 0 1 -decrypt 0 1 -label IDP_CERT_SIGNATURE_<domain> IDP_CERT_ENCRYPTION_<domain> For further information about the cmu generatekeypair option, go to the Thales documentation.
For example:
For an IDP signature certificate
./cmu generatekeypair -keytype=rsa -mech=pkcs -modulusBits=2048 -publicExp=65537 -sign=1 -verify=1 -encrypt=0 -decrypt=0 -label=IDP_CERT_SIGNATURE_ONLINEBANK

For an IDP encryption certificate
./cmu generatekeypair -keytype=rsa -mech=pkcs -modulusBits=2048 -publicExp=65537 -sign=1 -verify=1 -encrypt=1 -decrypt=1 -label=IDP_CERT_ENCRYPTION_ONLINEBANK

Generate the IDP Certificates
Depending on your deployment, generate the IDP signature and encryption certificates for your security domains:
-
If the certificates are self-signed, then generate them directly from the HSM
-
If the certificates are CA-signed, then generate and import the required CA certificates
Generate a Self-Signed Certificate
Generate the IDP self-signed certificates on the HSM for each ActivID Appliance security domain.
-
Open a Windows command prompt as an Administrator.
-
Go to the Thales Luna HSM client folder:
C:\Program Files\SafeNet\LunaClient
-
Launch the cmu selfsigncertificate command with following parameter values:
Note: You will be prompted for the HSM Crypto Officer's password.Parameter For IDP signature certificate For IDP encryption certificate -sha256withrsa -privatehandle <private_handle_of_the_rsa_key> : obtained at RSA key creation <private_handle_of_the_rsa_key> : obtained at RSA key creation -publichandle <public_handle_of_the_rsa_key> : obtained at RSA key creation <public_handle_of_the_rsa_key> : obtained at RSA key creation -startDate <yyyymmdd> <yyyymmdd> -endDate <yyyymmdd> <yyyymmdd> -serialNum <8-hexa-digits> <8-hexa-digits> -O "HID Global" "HID Global" -OU <domain> <domain> -CN "ActivID IDP Signature" "ActivID IDP Encryption" -keyusage digitalSignature dataencipherment,keyencipherment -label IDP_CERT_SIGNATURE_<domain> IDP_CERT_ENCRYPTION_<domain> For further information about the cmu selfsigncertificate option, go to the Thales documentation.
For example:
For an IDP signature certificate
./cmu selfsigncertificate -sha256withrsa -O="HID Global" -OU=ONLINEBANK -CN="ActivID IDP Signature" -keyusage=digitalSignature -label=IDP_CERT_SIGNATURE_ONLINEBANK -privatehandle=186 -publichandle=230 -startDate=20241028 -endDate=20261028 -serialNum=01000001For an IDP encryption certificate
./cmu selfsigncertificate -sha256withrsa -O="HID Global" -OU=ONLINEBANK -CN="ActivID IDP Encryption" -keyusage="dataencipherment,keyencipherment" -label=IDP_CERT_ENCRYPTION_ONLINEBANK -privatehandle=236 -publichandle=203 -startDate=20241028 -endDate=20261028 -serialNum=02000001Generate a CA-Signed Certificate
Generate the IDP CA-signed certificates on the HSM for each ActivID Appliance security domain.
-
Open a Windows command prompt as an Administrator.
-
Go to the Thales Luna HSM client folder
C:\Program Files\SafeNet\LunaClient
-
Launch the cmu requestcertificate command with the following parameter values:
Note: You will be prompted for the HSM Crypto Officer's password.Parameter For IDP signature certificate For IDP encryption certificate -sha256withrsa -privatehandle <private_handle_of_the_rsa_key> : obtained at RSA key creation <private_handle_of_the_rsa_key> : obtained at RSA key creation -publichandle <public_handle_of_the_rsa_key> : obtained at RSA key creation <public_handle_of_the_rsa_key> : obtained at RSA key creation -outputFile "<certificate_request_filename>" "<certificate_request_filename>" -O "HID Global" "HID Global" -OU <domain> <domain> -CN "ActivID IDP Signature" "ActivID IDP Encryption" For further information about the cmu requestcertificate option, go to the Thales documentation.
For example:
CopyFor an IDP signature certificate
./cmu requestcertificate -sha256withrsa -privatehandle=76 -publichandle=75 -O="HID Global" -OU=EGOV -CN="ActivID IDP Signature" -outputFile="C:\temp\egov_idp_sign_cert_request.req"CopyFor an IDP encryption certificate
./cmu requestcertificate -sha256withrsa -privatehandle=80 -publichandle=79 -O="HID Global" -OU=EGOV -CN="ActivID IDP Encryption" -outputFile="C:\temp\egov_idp_enc_cert_request.req" -
Generate the IDP certificates on your CA based on the certificate requests generated above.
-
Import the IDP CA-signed certificates on to the HSM using the cmu import command with the following parameter values:
Note: You will be prompted for the HSM Crypto Officer's password.Parameter For IDP signature certificate For IDP encryption certificate -inputFile <certificate_filename.pem> : obtained at previous step <certificate_filename.pem> : obtained at previous step -label IDP_CERT_SIGNATURE_<domain> IDP_CERT_ENCRYPTION_<domain> For further information about the cmu import option, go to the Thales documentation.
For example:
For an IDP signature certificate
./cmu import -inputFile="C:\temp\IDP_CERT_SIGNATURE_EGOV.pem" -label IDP_CERT_SIGNATURE_EGOVFor an IDP encryption certificate
./cmu import -inputFile="C:\temp\IDP_CERT_ENCRYPTION_EGOV.pem" -label IDP_CERT_ENCRYPTION_EGOVRenewing an IDP Certificate
To renew an IDP certificate, the data related to this certificate (key pair and certificate) should be removed from the HSM before creating the new data.
Next step:
