Troubleshooting an External HSM
Troubleshooting an Entrust HSM
It is strongly recommended that you always maintain, in a secure location, an up-to-date backup of the RFS /opt/nfast/kmdata/local directory as well as the security world administrator cards.
This backup and the cards can be used to restore the security world on a new RFS or HSM if the HSM and/or the RFS are damaged.
This section explains how to restore security world RFS and HSM using the backup.
Recover an RFS
-
To configure a new RFS, apply following steps:
-
On the RFS:
-
Install the Security World Software.
The following is an example of a shell script to automate the installation if the Security World Software payload (for example, folder “linux/libc6_11”) is copied into the <NSHIELD_DISTRIB> folder defined in the script.
Copy#!/bin/sh
NSHIELD_DISTRIB=/WORK/nShieldConnect
NFAST_HOME=/opt/nfast
# Create nfast and ncsnmpd system users
useradd -r -m -d $NFAST_HOME -s /bin/bash -c "nFast" nfast
useradd -r -m -d $NFAST_HOME -s /bin/bash -c "nFast" ncsnmpd
# untar distribution
cd /
find $NSHIELD_DISTRIB -name '*.tar' -exec /bin/tar xf '{}' \;
# install
$NFAST_HOME/sbin/install || {
echo "fail to install nShield Connect Security World Software"
}
chown -R nfast:nfast $NFAST_HOME -
Add a firewall rule to open 9004 inbound TCP port.
-
Switch to the nfast user account.
Copysu - nfast -
Check that the HSM is operational using the following command (output of the command should show “mode operational” for the “Server” section):
Copy./enquiry -
Retrieve the ESN and keyhash of the HSM using the following command:
Copyanonkneti <HSM-IP> -
Create the RFS directory structure using the following command:
Copyrfs-setup --force <HSM-IP> <HSM-ESN> <HSM-KNETI-hash>CopyFor example:
$> rfs-setup --force 10.16.96.149 FFDF-E4F6-9787 b4cdac0cb25c2326c3de1886b8fb205d119529f0
Adding read-only remote_file_system entries
Ensuring the directory /opt/nfast/kmdata/local exists
Adding new writable remote_file_system entries
Ensuring the directory /opt/nfast/kmdata/hsm-FFDF-E4F6-9787 exists
Ensuring the directory /opt/nfast/femcerts exists
Ensuring the directory /opt/nfast/kmdata/hsm-FFDF-E4F6-9787/features exists
Ensuring the directory /opt/nfast/kmdata/hsm-FFDF-E4F6-9787/config exists
Ensuring the directory /opt/nfast/log/hsm-FFDF-E4F6-9787 exists
Saving the new config file and configuring the hardserver
Done
-
-
On the HSM:
-
Configure the HSM to use the RFS by entering the IP address of the RFS machine and leaving the port number as the default (9004) (HSM menu 1-1-3).
-
-
-
Restore the content of the /opt/nfast/kmdata/local folder from the security world backup.
-
To finalize the RFS configuration, as the nfast user account, use the following commands to:
-
Reconfigure the RFS on the appliances.
Recover an HSM
On the HSM:
-
Configure the Ethernet interface (IP address/netmask of the HSM) and leave the link speed set to auto/1Gb (HSM menu 1-1-1-1).
-
Set the default gateway (HSM menu 1-1-1-3).
-
“Ping” or “Trace route” the RFS and the ActivID Appliance(s) (menu 1-1-1-6 or 1-1-1-7).
-
Configure the HSM to use the RFS by entering the IP address of the RFS machine and leaving the port number as the default (9004) (HSM menu 1-1-3).
-
(Optional) Allow HSM configuration files on the RFS to be modified and then loaded to the module by turning on the auto push (HSM menu 1-1-6-2).
-
Configure the HSM log file storage and append the option to allow storing the log files on the RFS and HSM (HSM menu 1-1-7).
-
Set the time and date as UTC (HSM menu 1-1-8).
-
Add the RFS and the ActivID Appliance(s) as HSM clients by entering the remote client IP address and setting the client permission to unprivileged (HSM menu 1-1-4-1).
-
Load the Security world (HSM menu 3.2.2).
The security world will be loaded from the RFS /opt/nfast/kmdata/local folder.
You will be asked for the security world administrator cards.
Note: When loading the security world, you will need the old HSM operator card that was created in Create the Operator Card Sets.You can recover the operator card using the administrator card as described in the technical documentation provided with your HSM.
On the ActivID Appliance:
-
Reconfigure the RFS on the appliances.
-
Restart the ActivID applications.
Remove an Unreachable HSM
If an HSM becomes unreachable (cannot be recovered), then you can remove it from the ActivID Appliance configuration.
-
Log on to the ActivID Console and, under System in the left menu, select Cryptography.
-
Under External HSM, click Clean.
-
Click OK to confirm the removal.
Connectivity Error Messages
-
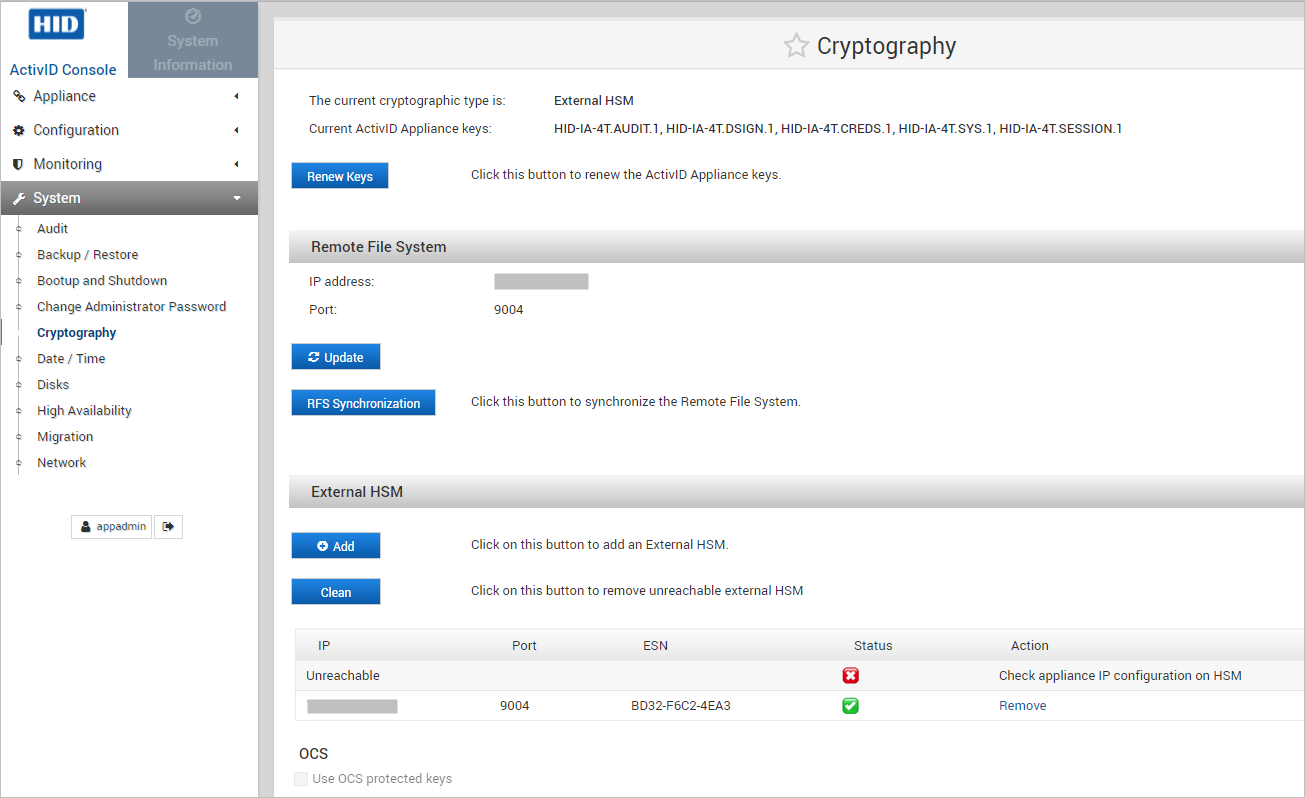
In the ActivID Console Cryptography page, if an HSM module is not available (module is disconnected from the network or powered down):

-
In the ActivID Console Cryptography page, if the ActivID Appliance IP is not enabled on the external HSM (that is, not configured as an allowed IP address), the HSM is unreachable:
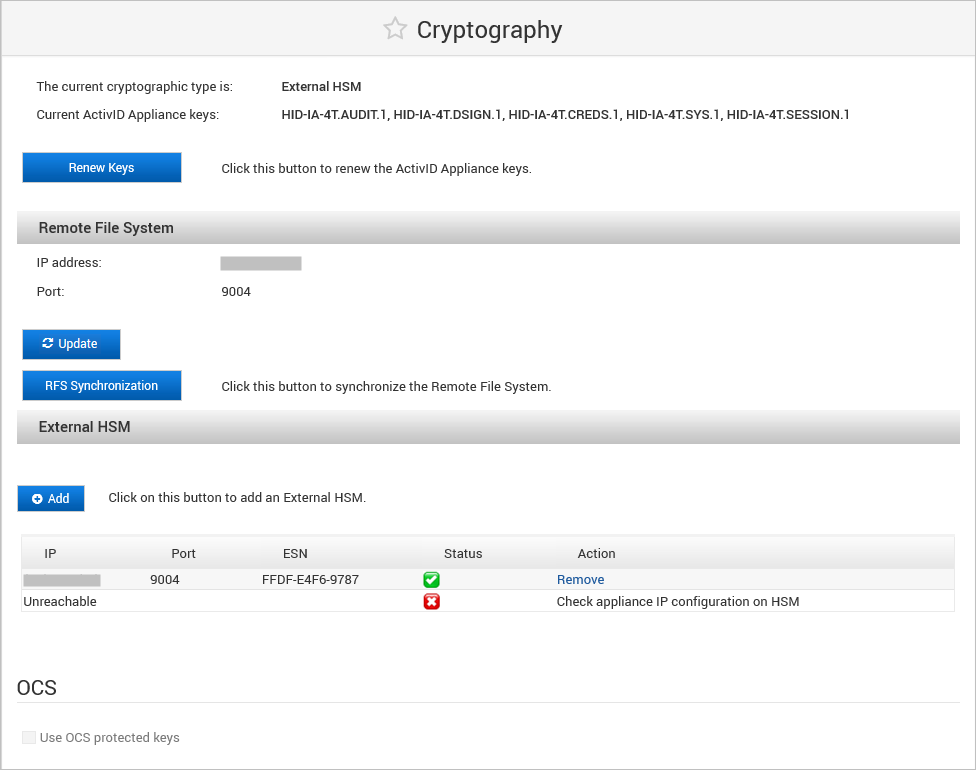
-
Make sure your ActivID Appliance IP address is correctly configured on the HSM before adding it as an HSM module.
-
If the module is ‘unreachable’, update the configuration on HSM and refresh the Cryptography page.


