Task 4: Configuring HSM to Work with a Client System
Connecting with the client is done using Ethernet (port 1 or 2) and depends upon the port to which you connected with the HSM (in the following example, port 1 is used). Configure HSM to work with a client system by completing the following steps:
-
Using buttons A and B and the Rotating Switch on the nCipher front panel menu (see the Figure in Task 2: Configuring the HSM Ethernet Port), complete the following tasks:
-
Press Button B to select System
-
Press Button B to select System Configuration
-
Scroll down using the Rotating Switch and press Button B to select Client Configuration
-
Press Button B to select New Client
-
-
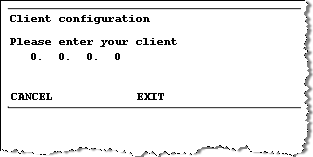
Enter the IP address for the client using the dotted decimal notation format.
-
Press Button B to display Client permissions.

-
Using the Rotating Switch, select privileged on any port for the client.
-
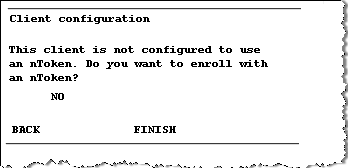
Press Button B to display the following message.
-
Using the Rotating Switch, select NO to indicate that you do not want to enroll using the nToken.
Selecting this option means that the client is enrolled without nToken authentication.
-
When Finish is displayed, press Button B to end this operation.
-
Repeat this series of steps for each client that is involved.


