Configuring PCIe HSMs
This section provides details on how to configure Thales PCIe HSMs for use with ActivID CMS. For the PCIe HSMs (Thales SafeNet PCIe HSM / Thales TCT Luna PCI-E for Government HSM), you must use the SafeNet lunacm utility to configure the HSM. ActivID KMS is next used to load keys in the HSM.
PCIe HSM Product Versions
Refer to the ActivID CMS System Environment for the list of supported Thales (formerly Gemalto) SafeNet PCIe and Thales TCT (formerly SafeNet AT) Luna PCI-E for Government HSMs.
Setting Up an HSM
Before you attempt to use the HSM with ActivID KMS, the HSM must first be initialized with the Thales / Thales TCT software (lunacm.exe).
-
Go to the location of lunacm.exe file in the LunaPCI directory.
The Thales SafeNet PCIe / Thales TCT Luna PCI-E directory is created during the installation of the Thales / Thales TCT software (by default, the directory location is C:\Program Files\SafeNet\LunaClient).
-
Launch lunacm.

Initializing an HSM
HSM initialization consists of assigning a label and a new password for the Security Officer (SO). In the following example, the default value is retained for the password (in an actual deployment, the new SO value would be different).
ActivID KMS is supposed to change the SO PIN each time the principal HSM The first or main HSM. If you require multiple HSMs with the same master keys, use HSM manufacturer tools to duplicate the keys in the other HSM. is set up. In practice, this operation can fail if the initial SO PIN is not set to default. For initialization of the HSM using ActivID KMS, the SO PIN must remain unchanged from the factory settings.
See Using the HSM 'factoryreset' Command for details on how to reset the HSM to factory settings using the SafeNet hsm factoryreset command.
If needed, you can always change the SO PIN and assign an HSM label using the SafeNet lunacm command. A similar operation can be performed from ActivID KMS (where you change the SO password once ActivID KMS has initialized the PCI-E HSM).
To initialize the HSM, complete the following task:
-
At the lunacm:> command prompt, enter the following commands:
Copyhsm init -label “new label” –domain “new domain” -password “new password”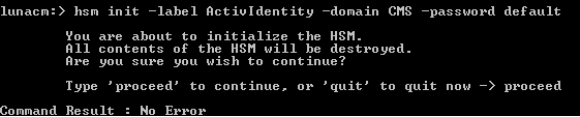
-
The -domain parameter is optional during an initialization request. The password must be sufficiently strong that it meets or complies with the FIPS Federal Information Processing Standard 140 policies. The HSM rejects any passwords if the HSM does not meet the FIPS 140 policies.
-
The partition password (known as Operator PIN in ActivID KMS) can be modified in ActivID KMS (however, the SO password cannot be modified in ActivID KMS).
Creating a Partition
The HSM must be configured with at least one partition to operate. There is no default partition created in a brand new HSM (the default partition must be created by the SO).
To create a partition, complete the following steps:
-
Log in as the SO using the hsm login command using the default password.

The password for the SO must match the password that was selected during the initialization of the HSM. The system allows only three attempts to present the successful SO PIN.
If you exceed the number of login attempts, the HSM is zeroized (meaning that the keys are destroyed). Once done, these keys can no longer be used. If this occurs, the HSM must be re-initialized.
-
Create the HSM partition using the partition create command (in the following example, the partition name is partition_AI).

-
Each partition is assigned with specific policies (as shown on the subsequent pages). It is not required that you change any of the default policies to create an HSM partition. Once the partition is created, your HSM is ready to use with both the ActivID KMS and ActivID CMS products.
Copy the cryptoki.dll file into your KMS directory (the same directory from which the ackms.exe is run). The cryptoki.dll file resides in the directory in which you installed the Thales / Thales TCT software. During the ActivID CMS installation procedure, you have to go to this .dll file when requested by ActivID CMS.
-
After initialization has completed, you can exit or close the lunacm utility by entering the following command at the lunacm:> command prompt:
Copyexit
Once done, the HSM is ready for use in ActivID KMS first and next in ActivID CMS.


