Advanced Configuration
These sections describe how to perform advanced ActivID CMS configurations.
To set the timeout value for the Operator Portal, perform the following:
-
Log on to the Operator Portal, and set the Operator Portal timeout in the Session timeouts section.
-
Restart the CMS Server.
The default timeout value is 30 minutes. This number specifies how long an operator connection remains valid. The timeout elapses if there is no activity from the operator console server for the specified number of minutes. When the time-out is reached, the following message appears when the operator tries to access the ActivID CMS server:
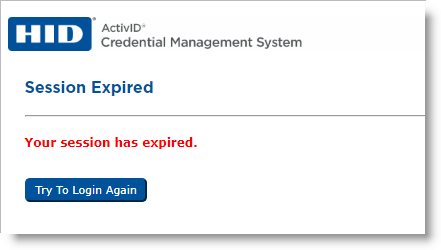
When the session is expired, the operator can click the Try to Login Again button to log on again.
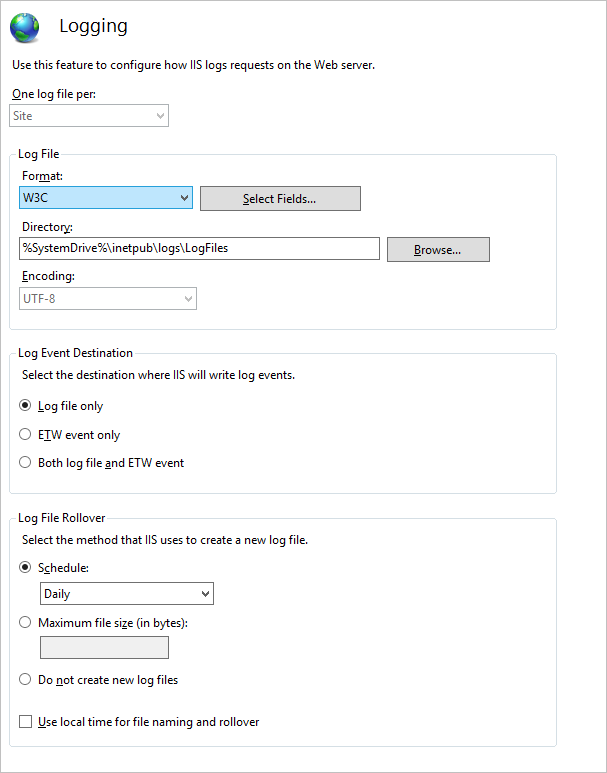
You can configure the Web log file properties in the Microsoft Internet Information Services (IIS) Manager. The IIS log files record information about server operations and status.
Procedure on Windows Server
-
On the Windows Start menu, point to Programs > Administrative Tools, and then click Internet Information Services (IIS) Manager.
-
In the IIS Manager console, expand Internet Information Services, expand the Sites node, and click the CMS Web Site.

-
In the CMS Web Site Home pane, double-click Logging.
-
Next to the Directory field, click Browse to change the log file directory.
-
In the Actions pane, click Apply, and restart the IIS Web Server.
ActivID CMS is installed and configured to start in attended or unattended startup mode.
IIS and CMS servers are stopped.
For information about the difference between the two startup modes, see Attended Startup Mode vs. Unattended Startup Mode.
When you change the ActivID CMS startup mode from attended to unattended, we strongly recommend you obfuscate the Security Key Password, Database Owner Passwords, and the HSM PIN for the ActivID CMS system components. (Obfuscating the passwords replaces the passwords stored in clear text files with an encrypted version of the passwords.)
-
Using a text editor, edit the securedata.properties file in the %PROGRAMDATA%\HID Global\Credential Management System\Local Files\services\repositories directory.
-
Comment the following line, if it exists, by adding a hashtag "#" at the beginning of the line as shown below:
Copy# SecureData.mode = securesite -
Make sure that the following lines are present in the file:
CopySecureData.mode = insecure
SecureData.SecurityPwd.insecureValue = <value> -
If you are deploying ActivID CMS with an HSM, uncomment the following line by removing the hashtag "#":
CopySecureData.HSMPin.insecureValue = <value> -
If you are using an Oracle or SQL Server configured in SQL Server authentication mode, remove the hashtag "#" at the beginning of this line:
CopySecureData.DatabasesPwd.insecureValue = <value> -
Restart the IIS and CMS Server services.
-
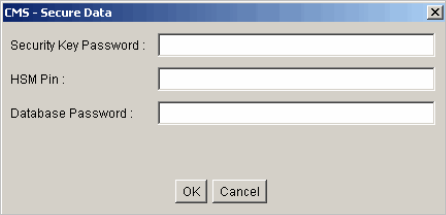
On the Windows Start menu, point to Programs > HID Global > Credential Management System, and then click Password Obfuscation.
The CMS - Secure Data dialog field appears:
-
Enter the appropriate passwords, and then click OK.
-
Open the securedata.properties file and check that the passwords you entered have been obfuscated.
For example:
Before password obfuscation, the following line appears as:
CopySecureData.DatabasesPwd.insecureValue = hidglobalAfter password obfuscation, the following line appears as:
CopySecureData.DatabasesPwd.value = 214245292631403e56Rules:
If
Copy*.insecureValue = valueis found, it is replaced by:
Copy*.value = obfuscated value-or-
If
Copy*.value = obfuscatedValueis found, it is replaced by:
Copy*.value = newObfuscatedValueFor example:
HSM PIN
Before obfuscation
SecureData.HSMPin.insecureValue = value
After obfuscation
SecureData.HSMPin.value = 711302746564
Database Password
Before obfuscation
SecureData.DatabasesPwd.insecureValue = value
After obfuscation
SecureData.DatabasesPwd.value = 214245292631403e56
Security Key Password
Before obfuscation
SecureData.SecurityPwd.insecureValue = value
After obfuscation
SecureData.DatabasesPwd.value = 214245292631403e56
-
To remove the password obfuscation:
-
Make sure that the IIS and CMS servers are stopped.
-
Using a text editor, edit the securedata.properties file in the %PROGRAMDATA%\HID Global\Credential Management System\Local Files\services\repositories directory.
-
Edit as follows:
HSM PIN
Remove
SecureData.HSMPin.value = 711302746564
Add
SecureData.HSMPin.insecureValue = <value>*
Database Password
Remove
SecureData.DatabasesPwd.value = 214245292631403e56
Add
SecureData.DatabasesPwd.insecureValue =<value>*
Security Key Password
Remove
SecureData.SecurityPwd.value = 214245292631403e56
Add
SecureData.SecurityPwd.insecureValue =<value>*
* <value> should be replaced by the real value of the HSM PIN/Database password/Security Key password.
-
-
Using a text editor, edit the securedata.properties file in the %PROGRAMDATA%\HID Global\Credential Management System\Local Files\services\repositories directory.
-
Comment the following line, if it exists, by adding a hashtag "#" at the beginning of the line as shown below:
Copy# SecureData.mode = insecure -
Make sure that the following line is present in the securedata.properties file:
CopySecureData.mode = securesite
When you start ActivID CMS for the first time, it creates a set of log files. These log files contain events about the activity of the system. They are used to help with troubleshooting in case of system problems.
After ActivID CMS is up and running, check the log files to make sure that the system is working properly. You should also check the log files from the Web server.
The logs of the ActivID CMS servers are in cms_install_dir\logs where cms_install_dir is the directory into which ActivID CMS is installed. (By default, C:\Program Files\HID Global\Credential Management System.).
The logs of the Web server are located in the cms_install_dir\wildfly\standalone\log directory.
ActivID CMS logging is controlled by a configuration file named logback.xml. You can find this file in the %PROGRAMDATA%\HID Global\Credential Management System\Local Files.
You do not need to restart the system in order for ActivID CMS to take changes into account. ActivID CMS automatically reloads the logging configuration every 60 seconds.
By default, ActivID CMS only logs error messages. If you encounter problems with ActivID CMS, you can change the logging mode to DEBUG. This configures ActivID CMS to provide additional details about the activity of the system. By doing so, the next time a problem occurs, you have more information available to help you resolve the problem.
To change to DEBUG mode:
-
Open the logback.xml file with a text editor, and replace all instances of ERROR with DEBUG.
-
Save your changes.
By default, ActivID CMS rotates each log file as soon as it reaches 10 MB, and keeps 20 old “slices” of each log file. Each old slice is renamed with a number.
If you need to change this policy—for example, if you think it is too much—you can change the parameters in the logback.xml file.
To do this:
-
Open the logback.xml file with a text editor, and replace the following values:
-
<maxIndex>20</maxIndex>
Replace 20 by the number of slices you want to keep.
Note: There is one maxIndex value per log file; be sure to change all the relevant ones.
-
<MaxFileSize>10MB</MaxFileSize>
Replace 10MB by the size you think is appropriate for each slice.
Note: There is one MaxFileSize value per log file; be sure to change all the relevant ones.
-
-
Save your changes.
When a Help Desk operator posts an unlock request for a device, the request is valid for a limited period of time (the default is 10 minutes). After the time expires, the request cannot be executed, and the Help Desk operator must post another request. To change the default value, you must edit the request_validity.properties file.
-
Shut down the ActivID CMS servers using the Web server console.
-
Locate the request_validity.properties file in %PROGRAMDATA%\HID Global\Credential Management System\Shared Files\services\repositories.
-
Open the request_validity.properties file with your text editor, and change the value for unlock.
This value represents the number of seconds for which an unlock request is valid.
-
Save your changes and restart the ActivID CMS servers.
If you want to use the MS SQL Server with a different port than the default, make the following changes on the server running ActivID CMS.
-
On the Windows Start menu, point to Programs, and then click Microsoft SQL Server Configuration Manager.

-
Click SQL Native Client 11.0 Configuration, and then click Client Protocols.
Note: Select 32-bit or 64-bit as per your configuration.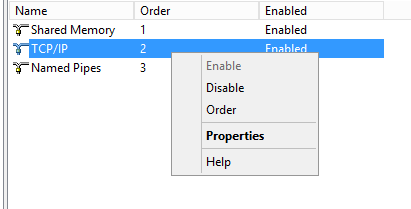
-
Right-click TCP/IP and then click Order.
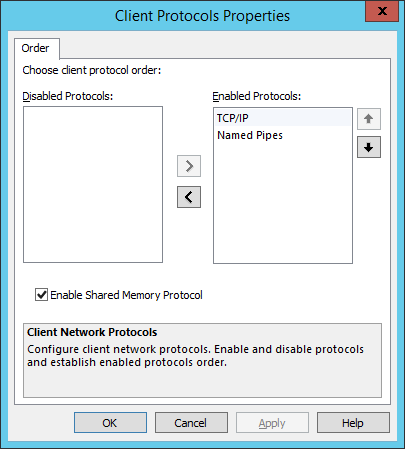
-
In the Client Protocols Properties, select TCP/IP, then click the up arrow to move it to the top position.
-
Click OK.
-
Right-click TCP/IP, and then Properties. The TCP/IP Properties dialog box appears:
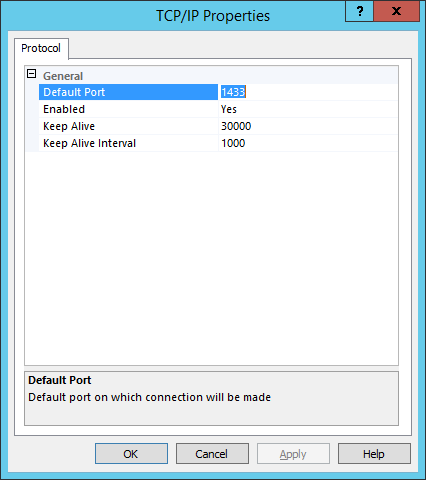
-
In the Default Port field, enter the port information, and then click OK.
-
Restart the IIS Web server.
Obtain the root CA certificate and export it to a Base64 encoded file.
Obtain the client certificate from the issuing CA - export the certificate and private key into a PKCS#12 (.pfx) file. Make sure that the full certificate chain is exported to the .pfx file.
A user entry in the directory exists for a user who has been issued the above certificate and private key.
This user entry can be found through the Operator Portal when searching the directory.
-
Make sure the Root CA is trusted by the ActivID CMS server.
-
Import the certificate into the Trusted Root Certificate Authorities container in the machine certificate store.
-
Obtain the certificate subject, exactly as it is on the certificate.
-
You may need to go to the CA to view the issued certificate in order to get this information.
-
Connect to the Operator Portal. ActivID CMS displays the exact certificate subject string for the operator subject.
-
-
Log on to ActivID CMS using the original ActivID CMS installer-generated client certificates.
-
Enroll the directory user entry as an operator with the appropriate role. Supply the certificate subject obtained in step 3. (The entry must be exactly the same as the subject in the certificate, including white-space and case.)
-
Import the client .pfx file into the local certificate store on your machine (that is, the machine that you use to access the Operator Portal).
You can use the Security Key Password Change menu item to change the "Security Key" password, which protects several secrets in the database (passwords, PIV Personal Identity Verification (technical standard of "HSPD-12") metadata, operators, etc.).
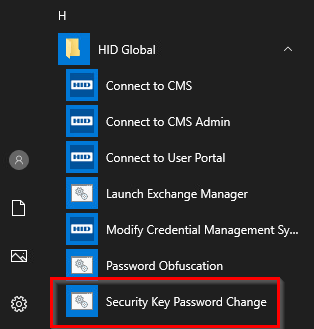
-
You must stop ActivID CMS before you select the Security Key Password Change menu item; otherwise, the program will not operate.
-
If you are using peers, all the peers must be stopped.
-
If required, enter the "CMS Server" user password and click OK:
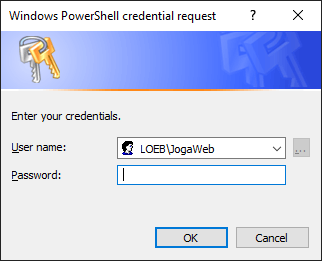 Note: On older operating systems, it may be necessary to start the program manually using the "Run as a different user" Windows feature.
 -
Enter the Current security key password and the Database password:
 Note: You can click on the eye icon to the right of the field to display the password (as shown below). Only the password currently being entered can be displayed.
- Click Connect. The program then checks that:
ActivID CMS is stopped;
It can connect to the database using the Database password provided;
It can access the Security Key using the Current security key password provided.
If the checks fail, the program displays one of the following error messages:


If you receive an error message, click Back and try again.
- If the checks are successful, enter and confirm a new Security Key password:
 Note: For security reasons, you must enter the new password twice. The Apply button is only available when both entries match (as shown below).
- Click Apply. The following confirmation dialog appears:
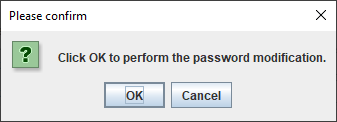
- Click OK. The program changes the Security Key password in the database:

- If ActivID CMS is set to "unattended mode", the program will require Administrator privileges to change the securedata.properties file.
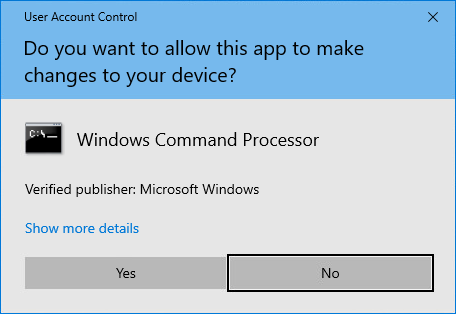
- Click Yes. When the change is done, the program displays a success message:

-
Click Exit.
-
Start ActivID CMS and perform a Connectivity Check (for more information, see Checking Connectivity).
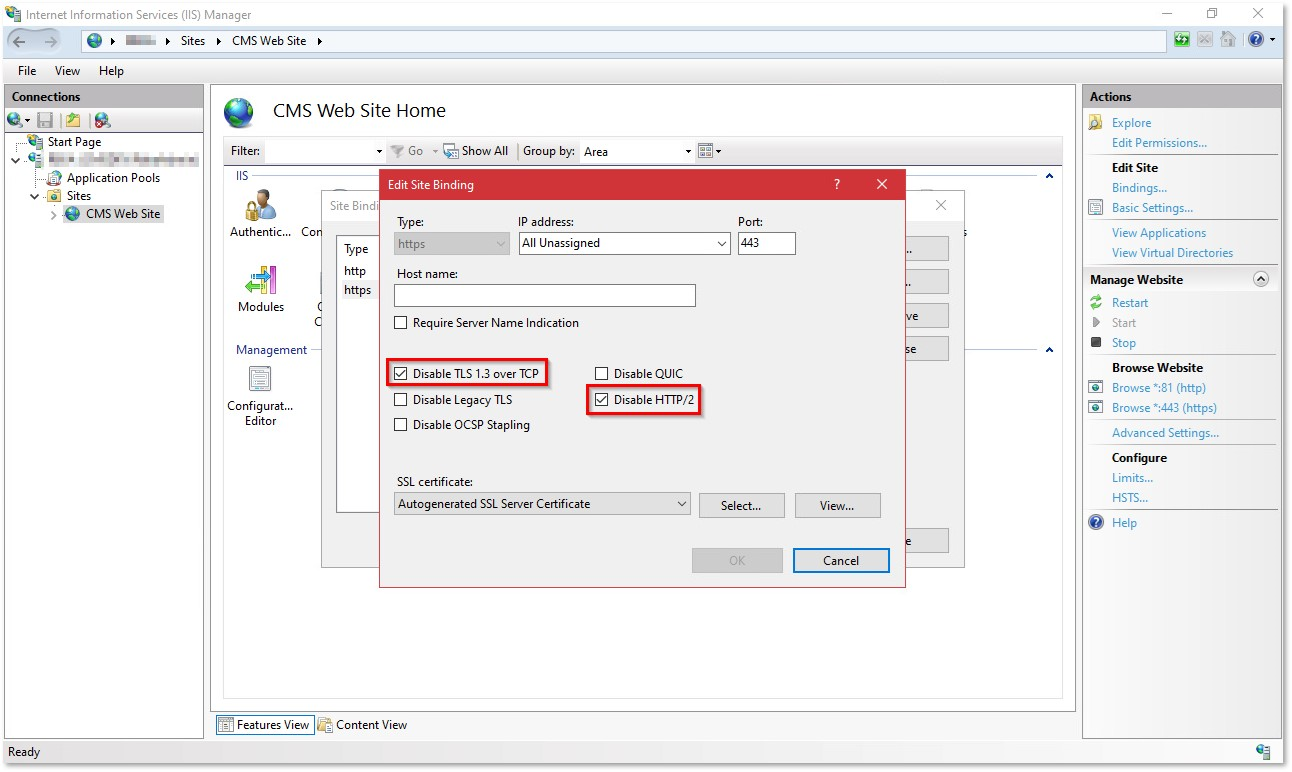
ActivID CMS does not support TLS 1.3 nor HTTP/2. If you are installing ActivID CMS on Windows Server 2022, be sure to disable TLS 1.3 and HTTP/2 on the CMS Web Site https binding as shown here:
