Updates to Initial Configuration
For updates to initial configuration, follow the below steps:
-
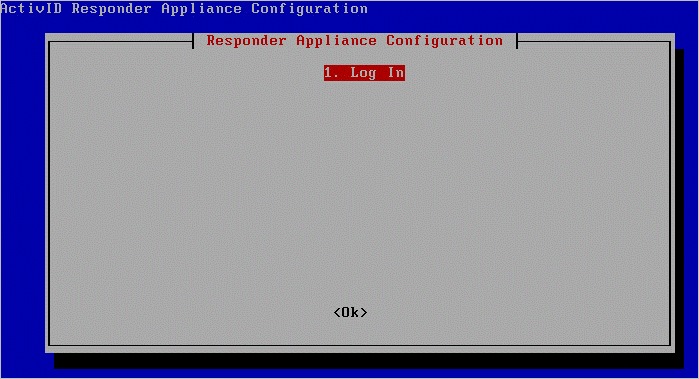
Access the system console. If not visible on the monitor connected to the appliance, use Alt+F1 to access it.
-
Select Ok and press Enter.
-
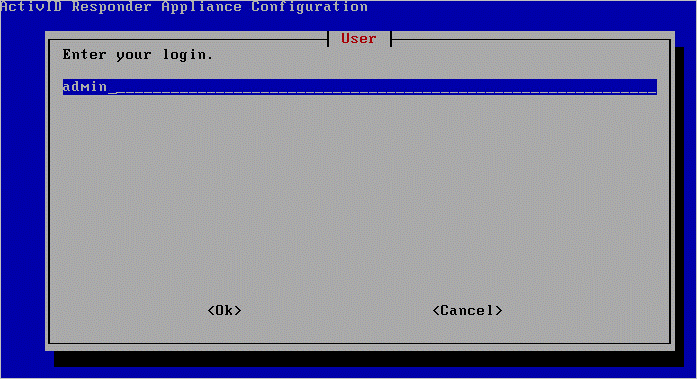
Enter your login name, select Ok and press Enter.
-
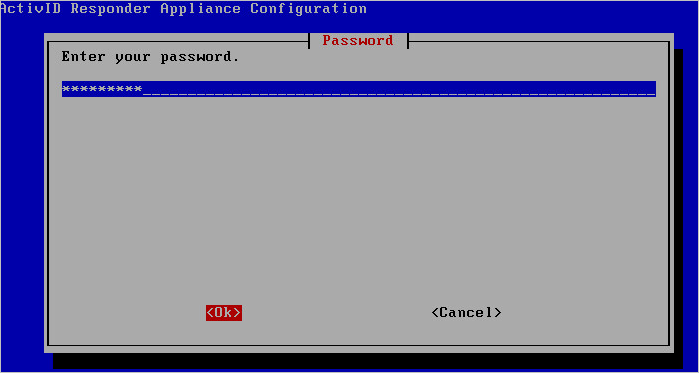
Enter your password, select Ok and press Enter. When you see a successful login message, select Ok and press Enter to view the main menu.
-
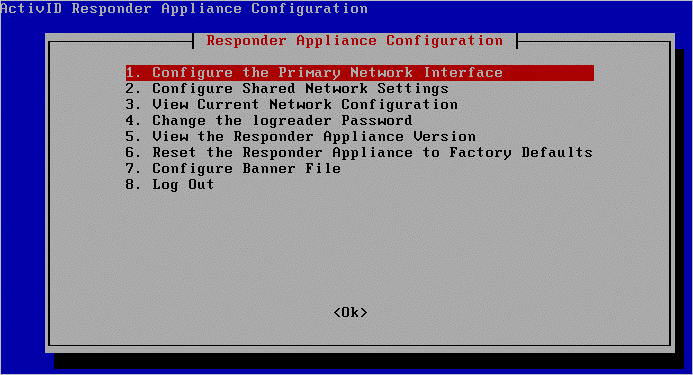
Select an option, select Ok and press Enter.
The following illustrations show the main screens for each of the eight option listed on this page. Follow the prompts to complete each procedure.
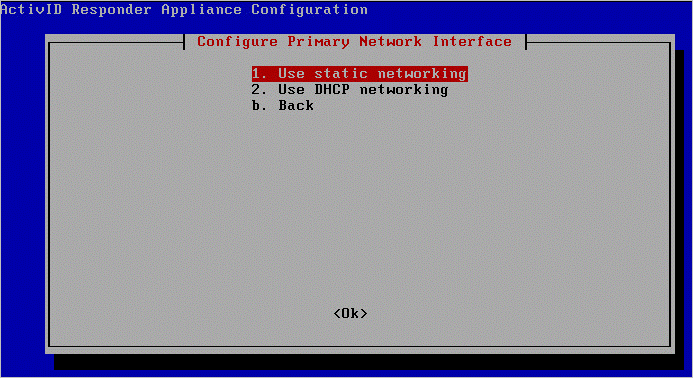
On the Responder Appliance Configuration screen select 1. Configure the Primary Network Interface, select Ok and press Enter.
-
For static networking, you will configure a static IP address and subnet mask and be asked to confirm your settings.
-
For DHCP networking, you will be prompted to restart to have changes take effect. If you are in a remote session you will be disconnected and will be asked to confirm networking restart. After the restart, you will see a success message with the IP address displayed.
When you have completed either static or DHCP networking configuration, select the option Back to return to the main menu.
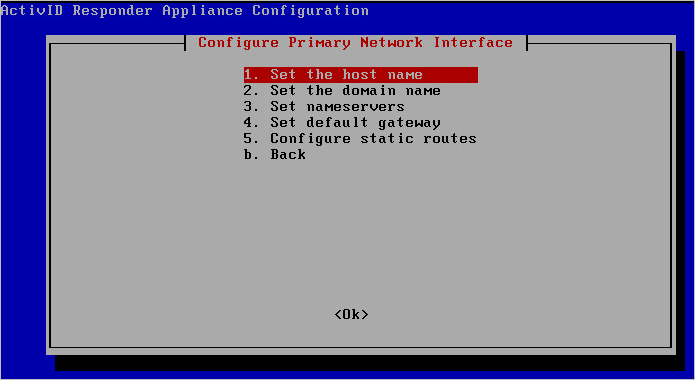
On the Responder Appliance Configuration screen select option 2. Configure Shared Network Settings, select Ok and press Enter.
-
For each option listed, you will enter the requested information and then confirm by selecting Ok and pressing Enter.
-
When you select option 5. Configure static routes, you will be directed to a sub-menu, as illustrated next.

From this sub-menu you can add a new static route or delete an existing one. Follow the prompts for each option.
When prompted by a success message, select Ok and press Enter.
When you have completed either static or DHCP networking configuration, select the option Back to return to the main menu.
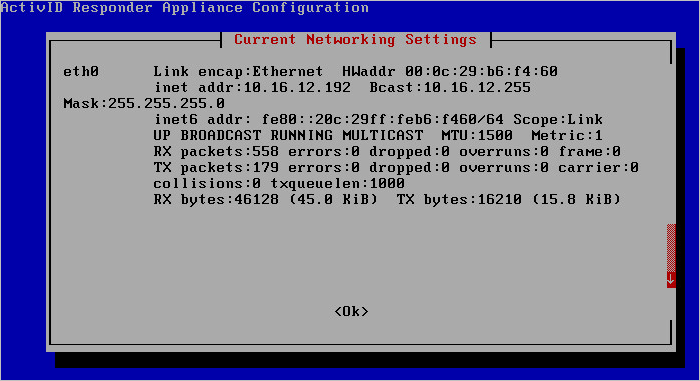
On the Responder Appliance Configuration screen select 3. View Current Network Configuration, select Ok and press Enter. Current networking settings are displayed. Select Ok and press Enter to exit the screen and return to the main Responder Appliance Configuration menu.
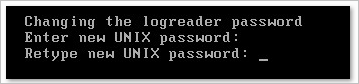
On the Responder Appliance Configuration screen select 4. Change the logreader Password, select Ok and press Enter. Type and confirm a new password and press Enter. You will see a success message.
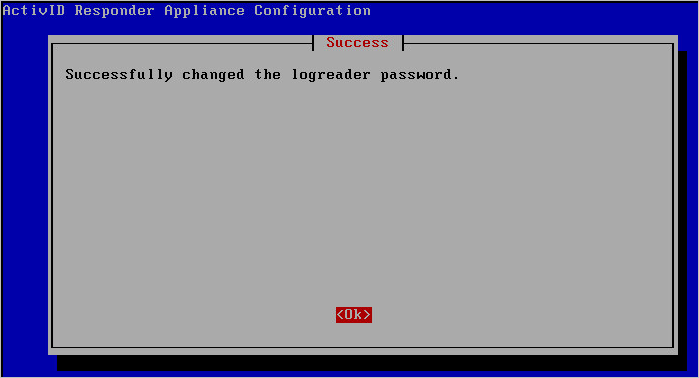
When you have completed the password change, select the option Back to return to the main menu.
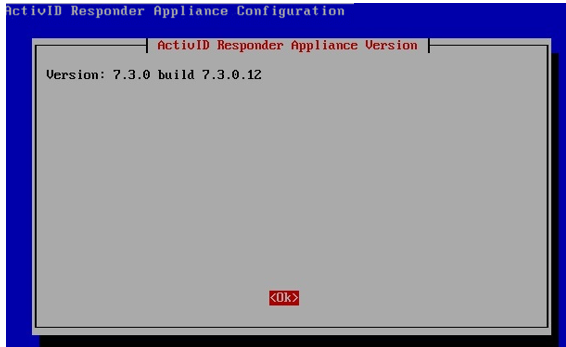
On the Responder Appliance Configuration screen select 5. View the Responder Appliance Version, select Ok and press Enter. The appliance version is displayed. (You will see the actual build number instead of ${abv.bn}.) You can locate the build number in the release notes. Select Ok and press Enter to exit the screen and return to the main Responder Appliance Configuration menu.
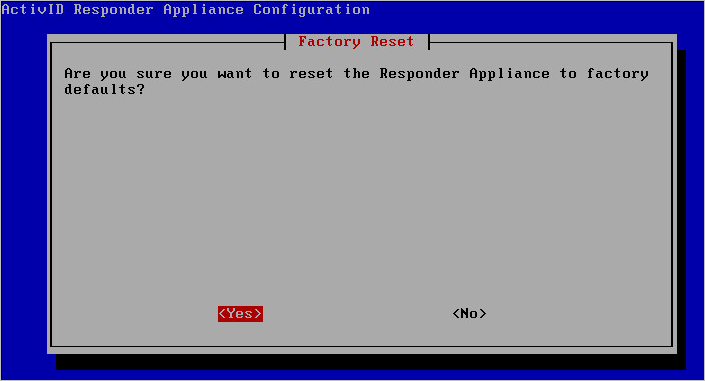
On the Responder Appliance Configuration screen select 6. Reset Appliance to Factory Defaults, select Yes and press Enter.
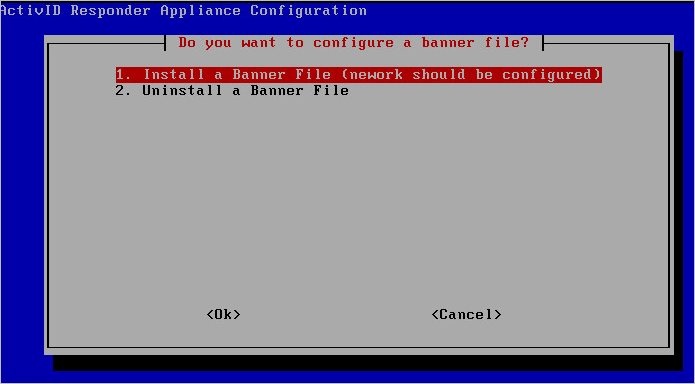
On the Responder Appliance Configuration screen select 7. Configure Banner File, select Ok and press Enter. A sub-menu is displayed. You can install a new banner file or uninstall an existing one. Select an option, select Ok and press Enter. Follow the prompts for your choice.

On the Responder Appliance Configuration main menu, select 8. Log Out, select Ok and press Enter.


