Managing the HID RADIUS Authentication Agent
The HID RADIUS Authentication Agent enables OTP (including SMS OTP), static password authentication (including LDAP) and push-based authentication with the HID Approve™ mobile application over the Remote Authentication Dial-In User Service (RADIUS) protocol. This allows integrations using RADIUS protocol, such as VPN agents.
The HID RADIUS Authentication Agent receives a RADIUS authentication request and translates it into an authentication call to the HID Authentication Service public API.
The HID RADIUS Authentication Agent communicates with the HID Authentication Service using the OpenID and SCIM APIs.
The communication between the HID RADIUS Authentication Agent and the HID Authentication Service is secured using SSL.
Install the HID RADIUS Authentication Agent
To use the HID RADIUS Authentication Agent, it must be installed on your local machine.
The agent supports the following server editions:
- Microsoft® Windows® Server 2016
- Microsoft Windows Server 2019
- Microsoft Windows 10 (32 and 64-bit)
Onboard a tenant in the HID Authentication Service and create users and authenticators (password, OTP, push, etc..). For further information, see Managing Users Groups and Roles and Enabling User Authentication.
Make sure port 1812 is configured in the inbound rules on the Microsoft Windows server where the HID RADIUS Authentication Agent is installed.
-
Download the HID RADIUS Authentication Agent setup file from the HID Global Customer Portal.
-
Run the .exe as an administrator, and click Next in the Welcome screen.
-
Accept the License Agreement terms and click Next.
-
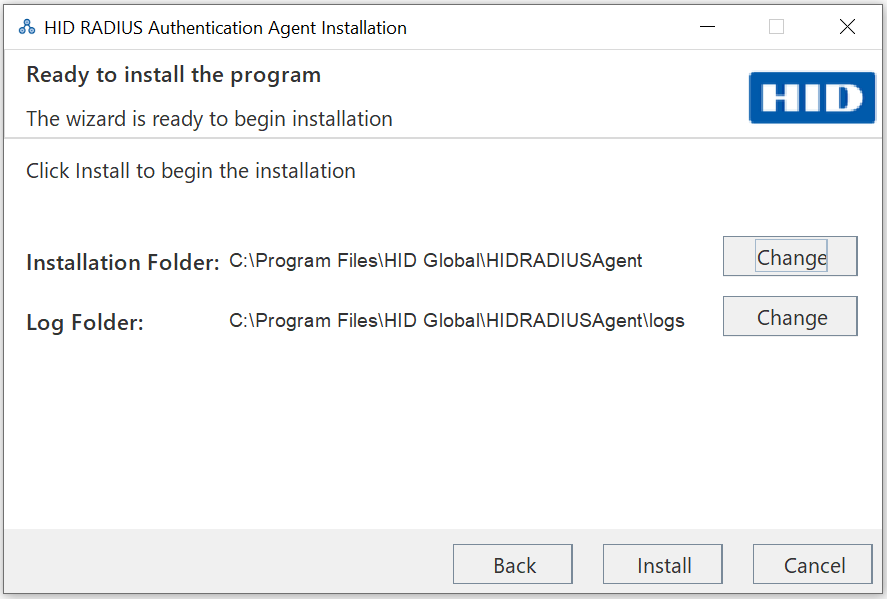
If necessary, change the Installation Folder and Log Folder and then click Install.
-
Click Finish to complete the installation.
The HID RADIUS Authentication Agent is now available in the system tray:

Configure the HID RADIUS Authentication Agent
The agent's settings are organized into the following sections:
-
In the System Tray, right-click on the HID RADIUS Authentication Agent and select Settings.
-
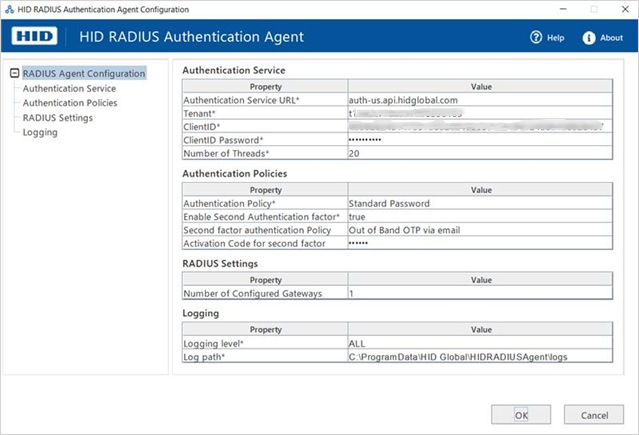
In the Authentication Service section, define the settings for your HID Authentication Service system:
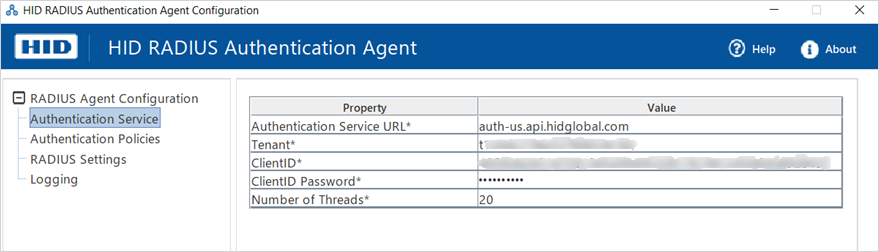
Property Description Authentication Service URL
Enter the URL of the HID Authentication Service platform for which authentication is requested.
For example, auth-us.api.hidglobal.com
Tenant
Enter your tenant identifier.
A tenant is uniquely identified by an alpha numeric value with the prefix t, and is automatically generated by the HID Authentication Service when onboarding an organization.
For example, t134fg778a367208536160
ClientID
Enter your identifier of the OIDC Client ID as defined in the HID Authentication Service.
A ClientID is a unique user in your tenant, specially configured (with a group, a role and a set of registration data) to be authorized through OpenID.
For example, 70832624314759130520949533907619412406458927584
ClientID Password
Enter the OIDC Client ID password.
Number of Threads
Enter the number of threads supported for RADIUS authentication requests.
-
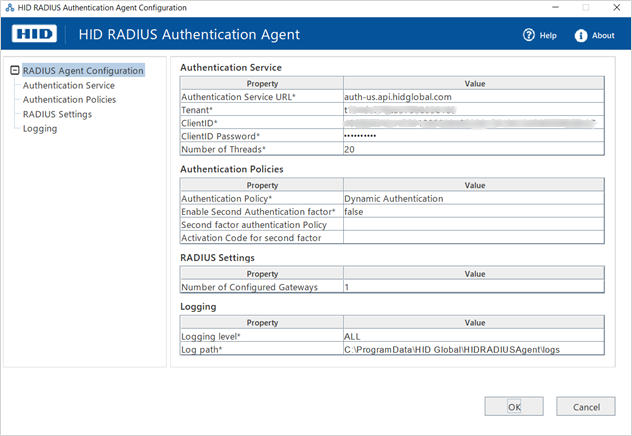
In the Authentication Policies section, define the first and second level authentication policies
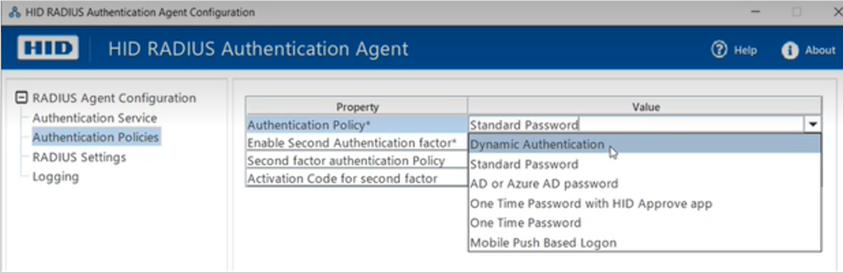
Property Description Authentication Policy
Select the required first factor authentication policy from the drop-down list or enter the name of a own custom authentication policy.
An authentication policy defines the authentication factors (MFA) settings, such as password lengths or constraints, One-Time Password synchronization protocols, and push notification signature details.
There are two types of policies:
-
For static authentication, select a specific authentication policy:
-
Standard Password
-
AD or Azure AD Password
-
One Time Password with HID Approve app
-
One Time Password
-
Mobile Push Based Logon
-
-
To allow authentication with any of the polices, select Dynamic Authentication
For example, select Standard Password for static password authentication.
Enable Second Authentication factor
Select True if you want to enable the second factor authentication, or else select False.
Second factor authentication Policy
Select the required second factor authentication policy from the drop-down list or enter the name of a own custom authentication policy.
Second factor authentication is a security system that requires two separate, distinct forms of identification in order to access a protected resource. The first factor could be a password and the second factor commonly includes a text with a code sent to your smartphone, or biometrics using your fingerprint, face, or retina.
For example, select Out of Band OTP via SMS for the delivery of an OTP via SMS to the user's mobile device.
Activation code for second factor
If the second factor authentication policy is AT_OOBEML or AT_OOBSMS, enter the Activation Code.
This code is sent to the HID Authentication Service API to trigger the delivery of the OTP via SMS or email.
Note:For list of authentication policies, see Authentication Policies in the HID Authentication Service
To create your own policies and configure them to fit your needs, see Custom Authentication Policies.
-
-
In the RADIUS Settings section, add or edit multiple gateways for the RADIUS clients:
The Number of Configured Gateways is indicted in the agent's configuration interface.
-
Select the RADIUS Settings node to access the gateway configuration tool.
-
Either click Add to define a new gateway or select an existing one to edit it.
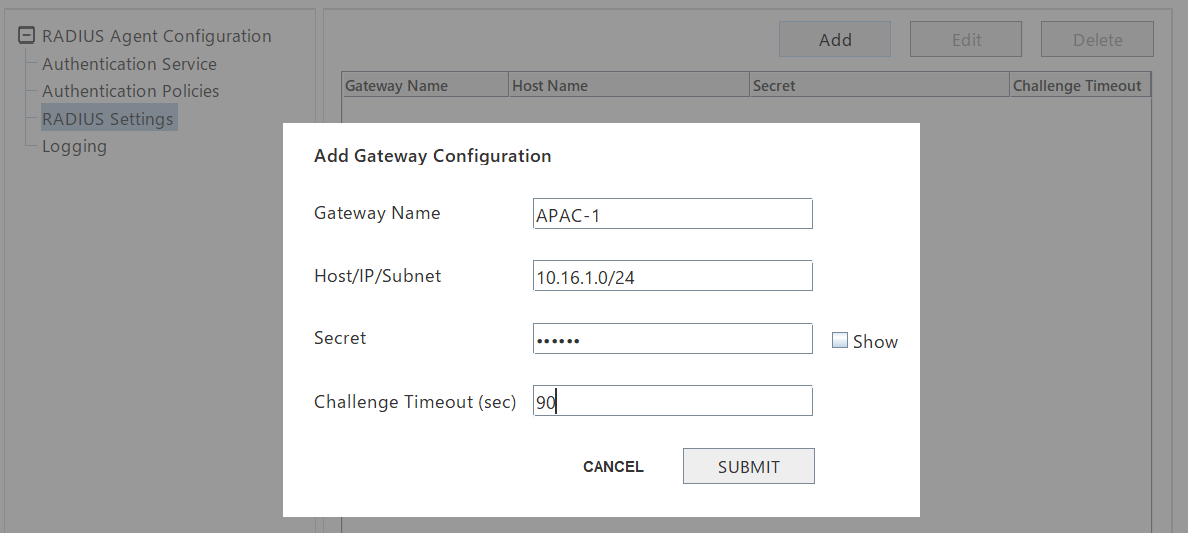
Property Description Gateway Name
Enter an identifiable name for the gateway
Host/IP/Subnet
Enter the RADIUS client's hostname or IP address (v4 or v6)
This can either be a single entry or a range of hostnames/addresses
Secret
Enter your RADIUS shared secret
Challenge Timeout
Enter the duration for the session timeout in seconds
The default value is 0 (that is, a timeout is not applied)
It is recommended setting a timeout between 30 and 180 seconds
There are no constraints (minimum or maximum duration)
Click SUBMIT to apply your changes.
Note: Authentication requests will be sent through a PAP, CHAP or MS-CHAPv2 channel: Password Authentication Protocol (PAP)
PAP is a two-way handshake authentication mechanism used by the Point to Point Protocol (PPP) to validate users based on their password.
As the credentials are sent to the to the server as plain unencrypted text, it is vulnerable to data interception by packet sniffer attacks.
Challenge-Handshake Authentication Protocol (CHAP)CHAP is a three-way handshake authentication mechanism providing password authentication when the initial link is established.
The credentials are encrypted using a hash with a shared secret key known by both the client and server.
CHAP is more secure than PAP as neither the password nor secret is sent over the link.
Microsoft Challenge-Handshake Authentication Protocol version 2 (MS-CHAPv2)MS-CHAPv2 is similar to CHAP but provides greater security due to its mutual authentication process.
It also allows clients to change their account password if the RADIUS server detects that it has expired.
All the authentication policies are supported through PAP channel.
The AD/Azure AD password (AT_LDAP) and Mobile Push Based Logon authentication policies are not supported through CHAP and MS-CHAPv2 channel.
For dynamic authentication (CHAP, MS-CHAPv2), due to limitations in these protocols, AD/Azure AD password (AT_LDAP) and Mobile Push Based Logon authentication are not supported.
-
-
In the Logging section, define your logging requirements:
Property Description Logging Level
Select the type/severity of the logging level from the drop-down list
The available levels are:
-
OFF
-
FATAL
-
ERROR
-
WARN
-
INFO
-
DEBUG
-
TRACE
-
ALL
It is recommended setting the level to ERROR for regular operations in a production environment
Log Path
Set the folder path where the logs should be stored
By default, this is C:\ProgramData\HID Global\HIDRADIUSAgent\logs
-
-
Click OK.
-
In the System Tray, right-click on the HID RADIUS Authentication Agent and select Start.
HID RADIUS Send After Support
A Send After profile defines a set of attribute values to be returned in the response for a successful authentication request.
The Send After attribute/value pairs can be sent back to the service provider. For example, to provide additional information about the user and the last successful authentication, the following information can be sent:
-
User_Full_Name = John Doe
-
Last_Successful_Access = 01/01/2023
-
Send After attributes are supported for PAP channel.
-
Send After attributes are not supported for Mobile Push Based Logon authentication.
To configure Send After profiles on your tenant, contact HID Global Technical Support.
The following table lists the Send After dictionary attributes supported for RADIUS authentication.
| Send After Attribute | Type |
|---|---|
| User-Name | string |
| User-Password | octets |
| CHAP-Password | octets |
| NAS-IP-Address | ipaddr |
| NAS-Port | integer |
| Service-Type | integer |
| Framed-Protocol | integer |
| Framed-IP-Address | ipaddr |
| Framed-IP-Netmask | ipaddr |
| Framed-Routing | integer |
| Filter-Id | string |
| Framed-MTU | integer |
| Framed-Compression | integer |
| Login-IP-Host | ipaddr |
| Login-Service | integer |
| Login-TCP-Port | integer |
| Reply-Message | string |
| Callback-Number | string |
| Callback-Id | string |
| Framed-Route | string |
| Framed-IPX-Network | ipaddr |
| State | octets |
| Class | string |
| Vendor-Specific | octets |
| Session-Timeout | integer |
| Idle-Timeout | integer |
| Termination-Action | integer |
| Called-Station-Id | string |
| Calling-Station-Id | string |
| NAS-Identifier | string |
| Proxy-State | octets |
| Login-LAT-Service | string |
| Login-LAT-Node | string |
| Login-LAT-Group | octets |
| Framed-AppleTalk-Link | integer |
| Framed-AppleTalk-Network | integer |
| Framed-AppleTalk-Zone | string |
| Acct-Status-Type | integer |
| Acct-Delay-Time | integer |
| Acct-Input-Octets | integer |
| Acct-Output-Octets | integer |
| Acct-Session-Id | string |
| Acct-Authentic | integer |
| Acct-Session-Time | integer |
| Acct-Input-Packets | integer |
| Acct-Output-Packets | integer |
| Acct-Terminate-Cause | integer |
| Acct-Multi-Session-Id | string |
| Acct-Link-Count | integer |
| Acct-Input-Gigawords | integer |
| Acct-Output-Gigawords | integer |
| Event-Timestamp | date |
| CHAP-Challenge | octets |
| NAS-Port-Type | integer |
| Port-Limit | integer |
| Login-LAT-Port | integer |
| Acct-Tunnel-Connection | string |
| ARAP-Password | string |
| ARAP-Features | string |
| ARAP-Zone-Access | integer |
| ARAP-Security | integer |
| ARAP-Security-Data | string |
| Password-Retry | integer |
| Prompt | integer |
| Connect-Info | string |
| Configuration-Token | string |
| EAP-Message | octets |
| Message-Authenticator | octets |
| ARAP-Challenge-Response | string |
| Acct-Interim-Interval | integer |
| NAS-Port-Id | string |
| Framed-Pool | string |
| NAS-IPv6-Address | ipv6addr |
| Framed-Interface-Id | octets |
| Framed-IPv6-Prefix | ipv6prefix |
| Login-IPv6-Host | octets |
| Framed-IPv6-Route | string |
| Framed-IPv6-Pool | string |
| Error-Cause | integer |
| Delegated-IPv6-Prefix | ipv6prefix |
| Framed-IPv6-Address | ipv6addr |
| DNS-Server-IPv6-Address | ipv6addr |
| Route-IPv6-Information | octets |
| Delegated-IPv6-Prefix-Pool | string |
| Stateful-IPv6-Address-Pool | string |
| Digest-Response | string |
| Digest-Attributes | octets |
Configure VPN or Client Tools
The configuration required for VPN/client tool integration with the HID RADIUS Authentication Agent varies according to the VPN software you are deploying.
As a guideline, the following parameters are required:
-
RADIUS Server: - enter the IP of the server
-
RADIUS Port - enter the 1812 as the port
-
RADIUS Secret Key - enter the shared secret configured in the agent's settings
-
User Name - enter a username for the configured tenant
-
Password - enter the tenant user's password
-
Request Type - enter Authentication Request as the type


