Identification List
By default, all domain users are granted Kiosk access. However, DigitalPersona AD provides the capability to restrict identification to a specific list of users with permissions for the computer where the identification request originates.
To restrict identification:
-
Enable the Restrict identification to a specific list of users GPO setting.
-
Remove the default domain-level permission that includes all domain users in the identification list.
-
Assign Allow or Deny permissions to the OU or computers.
Also, since the Kiosk rights have to be read from the DigitalPersona AD Server to see whether or not there is a restriction, if the Kiosk is unable to reach an DigitalPersona AD Server, all users are assumed to be “restricted” and will be rejected, except for those users who have previously logged onto the Kiosk and are therefore cached on the client.
Example: Restricting Kiosk Identification
The following procedure assumes that a kiosk has already been created and that required Shared Account information has been entered. See Kiosk Shared Account Settings.
-
In the AD Users and Computers console menu, check the View menu to make sure that Advanced Features is enabled.
-
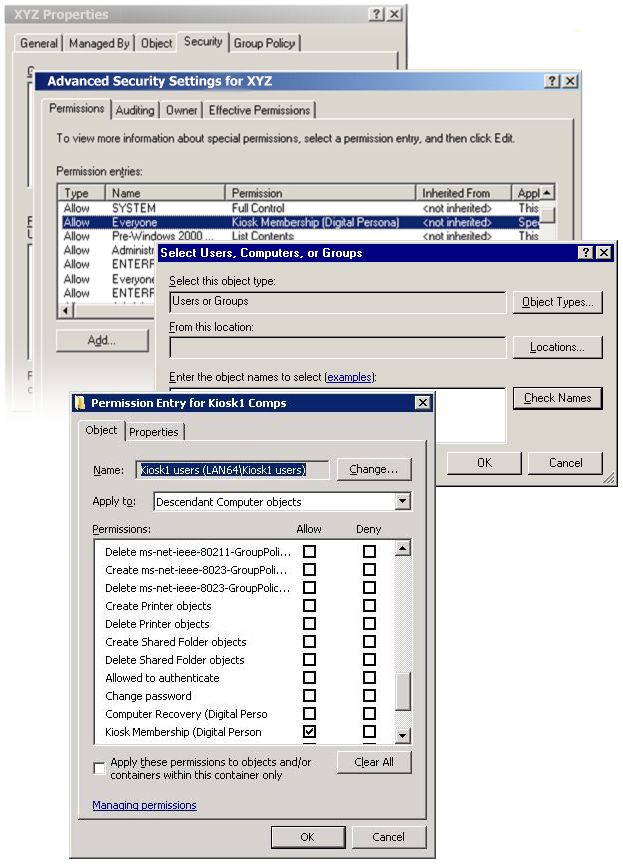
Remove the default domain-level Kiosk Membership permission that allows everyone in the domain to be identified through the built-in ID Server.
-
Right-click on the domain and select Properties.
-
On the Security tab, click Advanced.
-
In the Advanced Security Settings dialog, in the list of permissions, locate the permission Allow\Everyone\Kiosk Membership (DigitalPersona), and click Remove to delete it.
-
-
Locate (or create) and select the OU or container object for which you want to configure the membership.
-
Ensure that all Kiosk computers that you want to use this identification list for are shown within the container.
Add Kiosk computers as necessary.
-
If you are not using a previously defined user group for the identification list, create a new user group object and add the desired users to the group.

-
Right-click on the Kiosk container and select Properties. On the Security tab, click the Advanced button.
-
Set Allow or Deny permissions as desired.
-
In the Advanced Security Settings dialog, click Add to display the Permission Entry dialog.
-
Click the Select a principal link to display the Select Users, Computers or Groups dialog.
Then enter the name of the group (or specific user) that you want to define permissions for and click OK.
-
Choose the permission type (Allow or Deny) from the Type drop-down menu.
-
In the Applies To drop-down list, select Descendant Computer objects.
-
Select Kiosk Membership (DigitalPersona) and then click OK.
In most cases, it is preferable to manage permissions at the group level rather than on a user-by-user level.


