Installation and Setup Customization
ActivClient can be installed locally on individual machines or deployed remotely across multiple users or computers, streamlining the process and helping reduce the total cost of ownership.
In addition, the ActivClient setup can be extensively customized to meet your organization's specific requirements.
Installation Prerequisites
Before installing ActivClient, ensure your system meets the following minimum requirements:
The system must meet the minimum requirements:
-
One of the supported
 Operating Systems
 -
Up to 210 MB (ActivClient x64 with all features installed) of free disk space
For full details, see System Requirements and Operating Systems.
ActivClient is signed by an IdenTrust code-signing certificate which may not be pre-installed on all Windows workstations. If your environment automatically receives the latest root certificates from Microsoft (most common scenario), the IdenTrust code-signing certificate is likely already trusted.
-
To verify trust:
Open the Certificate Store and confirm the presence of IdenTrust Commercial Root CA 1 under Trusted Root Certification Authorities. Ensure it includes the “code signing” property.
-
Automatic download:
If the workstation has internet access, the IdenTrust root certificate will be downloaded automatically, and the trust will be verified.
-
Manual installation:
If the workstation has no internet connection or if ActivClient is deployed via push mechanism, the administrator must manually install the IdenTrust root certificate on the workstation prior to installing ActivClient.
-
You can download the latest root certificates from Microsoft here.
-
If Microsoft no longer provides updates (e.g., for unsupported Windows versions), you can retrieve the root certificates directly from IdenTrust.
The ActivClient installer (MSI package) must be accessible from a local drive.
Alternatively, installation from a network location can be enabled by marking the location as a source of installation media in Active Directory.
Installation requires administrator privileges on the workstation.
ActivClient Components
The ActivClient setup consists of several components that you can enable or disable for installation, depending on the scope of your deployment.
-
By default, i.e., when you choose the Typical setup type, the components marked with
 in the "Typical Installation" column of the table below will be installed.
 -
You can also decide to customize the installation by selecting which components (and sub-components) to install or not install.
The following table provides complete details of the available ActivClient components:

* Used in msiexec command line arguments.
-
OTP configuration is available through the ActivClient Console component for tokens that support OTP.
-
If the ActivClient Minidriver is installed, its code-signing certificate is automatically added to the Trusted Publishers store on the workstation.
Installation Wizard
You can install ActivClient interactively through a graphical user interface (GUI).
To install ActivClient with the Installation Wizard:
-
Locate the ActivClient MSI installer in the ActivClient product folder of the distribution package and double-click it.
Alternatively, you can
run the MSI installer from the command line or PowerShell. -
On the Welcome page of the ActivClient Installation Wizard, click Next.
-
Accept the license agreement and click Next.
-
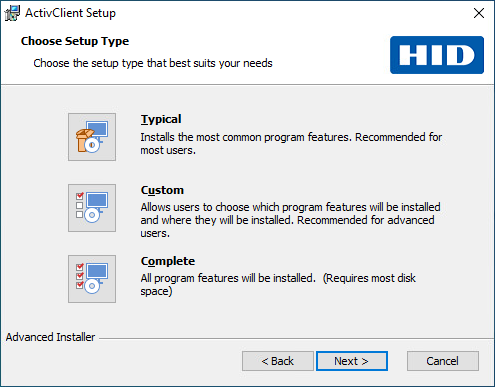
In the Choose Setup Type dialog:
-
Leave the setup type as Typical (default setting) and click Next for a typical installation.
-
Select Custom and click Next
to choose manually which features you wish to install. -
Select Complete for installing all available program features.
-
-
Click Install.
-
The Setup Progress page is displayed. The progress might take several minutes.
-
If the required Visual C++ Redistributable packages are not already installed, the ActivClient installer will prompt for User Account Control (UAC) and install them automatically.
-
Once the setup is complete, click Finish.
Post-Installation Steps
-
Restart Workstation:
It is recommended to restart your workstation after successful installation of ActivClient to make sure all the services are active.
-
Smart Card Readers:
-
The security device reader that you use requires a reader driver. This driver might be present in your Microsoft Windows system, or you might need to install it. Contact your reader vendor for information.
-
If you use an HID Global OMNIKEY® reader, and if the reader is not recognized automatically, or if the driver is not installed by Microsoft Windows Update, the drivers are available for download from HID Global’s website.
-
Modifying an Existing Installation
After installing ActivClient, you can modify the ActivClient installation by adding or removing components.
-
Run the ActivClient MSI installer from the ActivClient product folder of the distribution package.
Alternatively, go to the program or app management feature on your system, select ActivClient from the list and click Change.
-
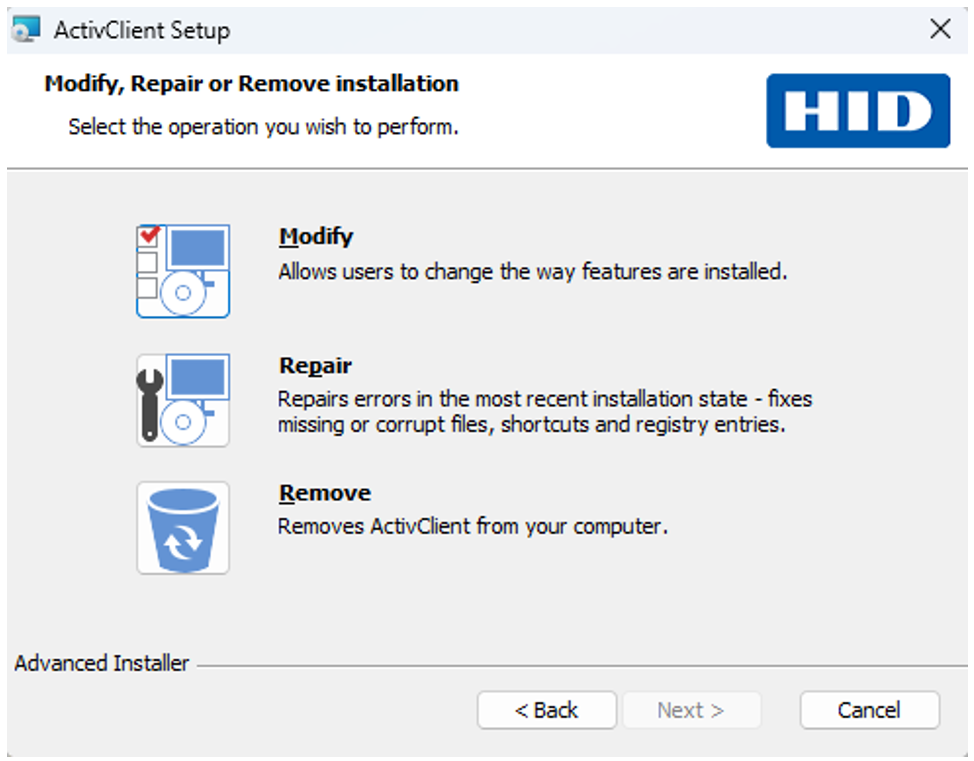
In the Program Maintenance window, select the Modify icon.
-
Select the ActivClient components you want to install from the list using the appropriate option from the right-click menu:
-
To add (install) a component, click the
 icon for the component and then click the appropriate installation option in the displayed list.
 -
To remove a component, click the
 icon for the component and then click in the displayed list.
-
-
Click Next to proceed. The Ready to Install the Program page is displayed.
-
Click Install.
-
When the InstallShield Wizard Completed page is displayed, click Finish.
-
To benefit from all ActivClient services immediately, it is recommended to restart your workstation after the installation is completed.
Command Line or PowerShell
Installing ActivClient via the command line or PowerShell enables automation of the installation process and provides more extensive customization options than the interactive Installation Wizard.
- <path> refers to the path to the folder containing the ActivClient setup MSI file.
<ActivClient_setup> refers to the ActivClient setup MSI file name.
<FeatureName> refers to the name of the respective ActivClient feature to include in or exclude from the setup. For a list of features and their names, see ActivClient Components.
Quotation marks in the commands are required if the path or file name contains spaces. They are optional otherwise but recommended for consistency.
Installing the Default ActivClient Setup
To install ActivClient using the Microsoft Installer (MSI) with the default configuration, run the following command:
msiexec.exe /i "<path>\<ActivClient_setup>"This performs the same default installation as when double-clicking the setup file and selecting the Typical option in the Installation Wizard.
Excluding Features During Installation
To exclude one or several features from the setup program, use the following command:
msiexec /i "<path>\<ActivClient_setup>" AddLocal=ALL Remove=<FeatureName1>,<FeatureName2>For a list of features and their names, see ActivClient Components.
Forcing Features During Installation
To force installation of one or several features from the setup program, use the following command:
msiexec.exe /i "<path>\<ActivClient_setup>" AddLocal=<FeatureName1>,<FeatureName2>When installing ActivClient with this command, you need to list all the features that you want to install.
For a list of features and their names, see ActivClient Components.
Removing Features From Existing Installation
To remove one or several features from an existing installation, use the following command:
msiexec /i "<path>\<ActivClient_setup>" Remove=<FeatureName1>,<FeatureName2>For a list of features and their names, see ActivClient Components.
Adding Features to Existing Installation
When modifying an existing installation, you can use AddLocal to add only the features that you want to install.
To add one or several features to an existing installation, use the following command:
msiexec.exe /i "<path>\<ActivClient_setup>" AddLocal=<FeatureName1>,<FeatureName2>For a list of features and their names, see ActivClient Components.
Customizing the Setup Restart Behavior
In some cases, the ActivClient installer may require a system restart at the end of the installation process. To control this behavior, use the REBOOT property.
| REBOOT value | Description |
|---|---|
| Force | Forces a restart unless an error occurs. |
| ForceAlways | Always forces a restart, regardless of errors. |
| Suppress |
Suppresses automatic restart, but prompts the user when ForceReboot is triggered. In a blind setup, the system restarts automatically. |
| ReallySuppress |
Suppresses all restart actions and prompts, including those triggered by ForceReboot. |
Running a Blind Setup (Silent Installation)
To run the setup without any user interface (blind setup), use:
msiexec.exe /i "<path>\<ActivClient_setup>" /qCustomizing the User Interface Level
You can customize the user interface level using additional /q options (see the Windows Installer documentation):
| Parameter | Description |
|---|---|
|
/quiet, /q , /qn |
No UI. |
|
/qb |
Basic UI. Use /qb! to hide the Wizard Cancel button. |
|
/qr |
Reduced UI with no modal dialog box displayed at the end of the installation. |
|
/qf |
Full UI and any authored FatalError, UserExit, or Exit modal dialog boxes at the end. |
|
/qn+ |
No UI except for a modal dialog box displayed at the end. |
|
/qb+ |
Basic UI with a modal dialog box displayed at the end. The modal box is not displayed if the user cancels the installation. Use /qb+! or /qb!+ to hide the Cancel button. |
|
/qb- |
Basic UI with no modal dialog boxes. Use /qb-! or /qb!- to hide the Cancel button. |