Setting Up Agents
-
Log into the HIS Configuration Manager portal using the provided credentials. Please note that the user is required to change the password upon the initial login.
-
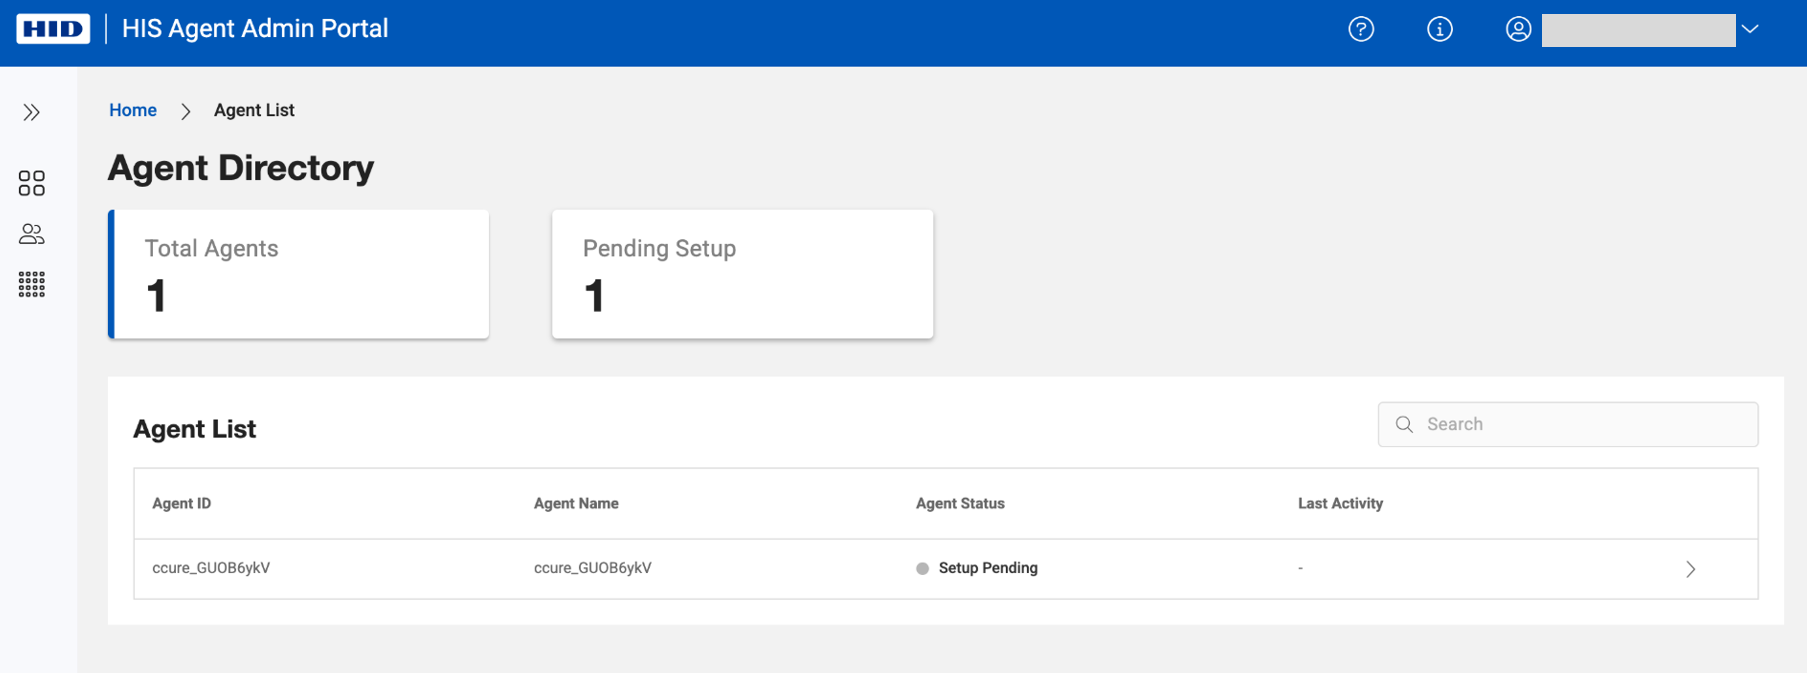
Home page shows the list of subscribed agent. Agents that are not yet configured are shown with status - 'Setup Pending'. Please select an agent to proceed.
-
Perform following steps in the “Setup Configuration” page:
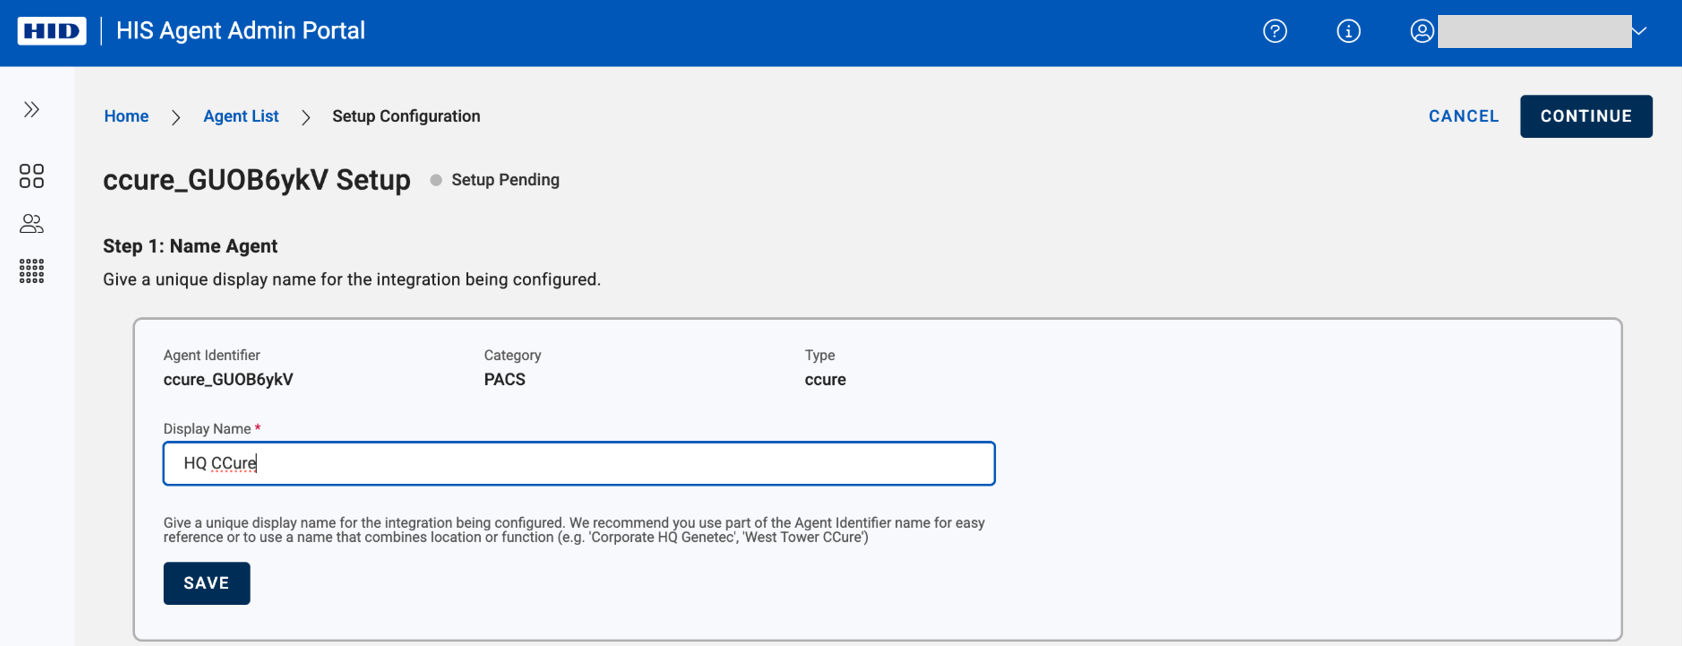
Step 1: Name your Agent
Begin by assigning a unique name to your agent. The name could reflects the location or function of the agent or anything that helps you remember this later.
E.g. Corporate HQ Genetec or West Tower Ccure.
Click on SAVE before proceeding to step 2.
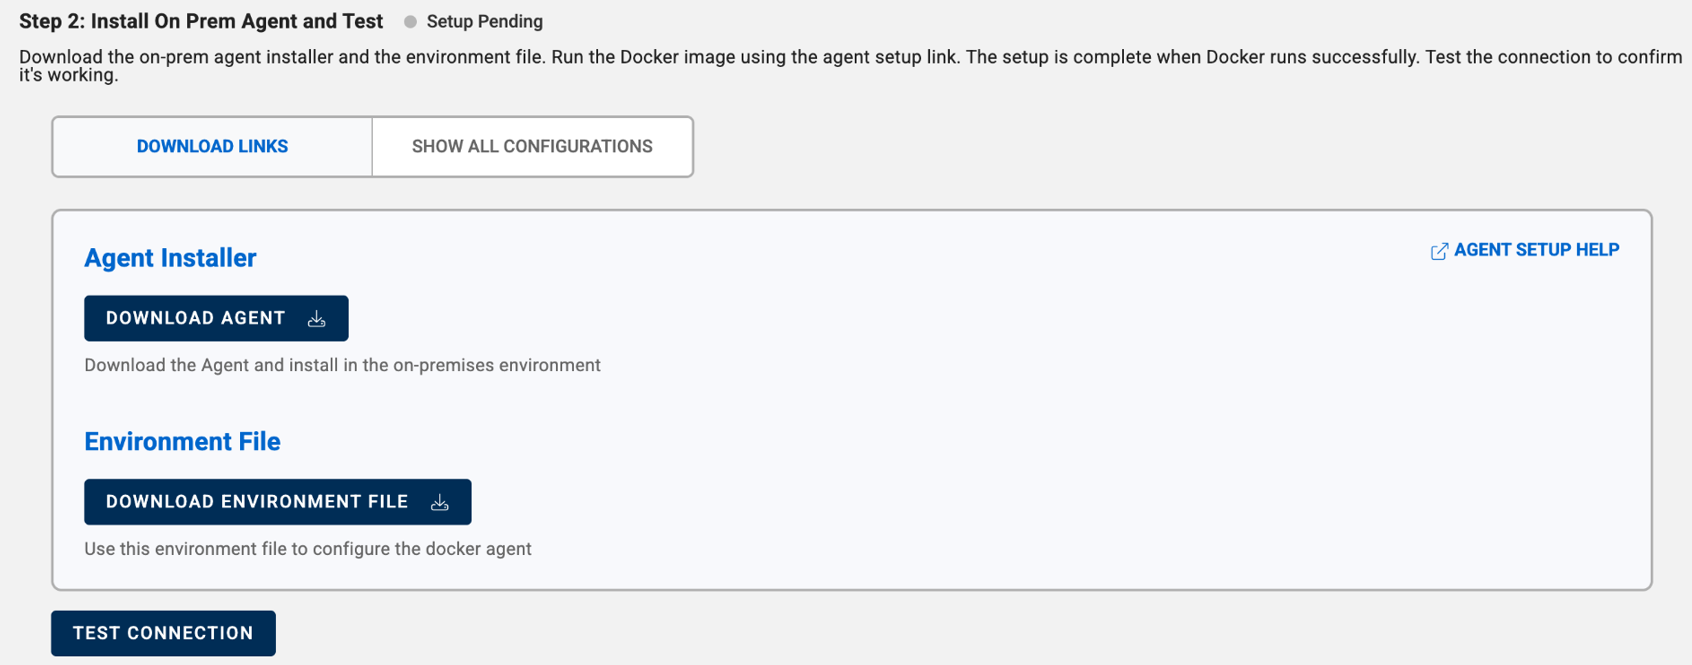
Step 2: Install On-Prem Agent
-
Download the agent using provided link
-
Access the agent setup help using provided link. Our hosted agent setup help has detailed steps to configure the agent in docker using the environment file (see next step)
-
Download the environment file and configure agent specific parameters by following the agent setup help.
-
Refer to agent specific help pages to check for
-
Agent pre-requisites
-
PACS setup steps
-
Agent configuration
-
-
Here are some examples of agents specific help pages -
-
Run the docker image and confirm it is running by following the instruction covered in respective agent setup help pages.
-
Once docker image is successfully running, test the connection using 'TEST CONNECTION' button. If agent is able to communicate with HIS platform, this will show a success message. If not, refer back to the help pages and check all the configurations.
A successful test would result in 'Connected’ status for the agent and would mean that on-premises agent is able to connect with HIS platform and is now ready to be configured further as needed.
Step 3: Configure the Integrated Application
-
Connect the integrated client application to HIS by copying the following information from Authentication Details and HID Integration Service Details sections:
-
Auth URL
-
API Technical Account Client ID
-
API Technical Account Client Secret (Please click the “Generate” icon to create the code.)
-
Agent Endpoint URL
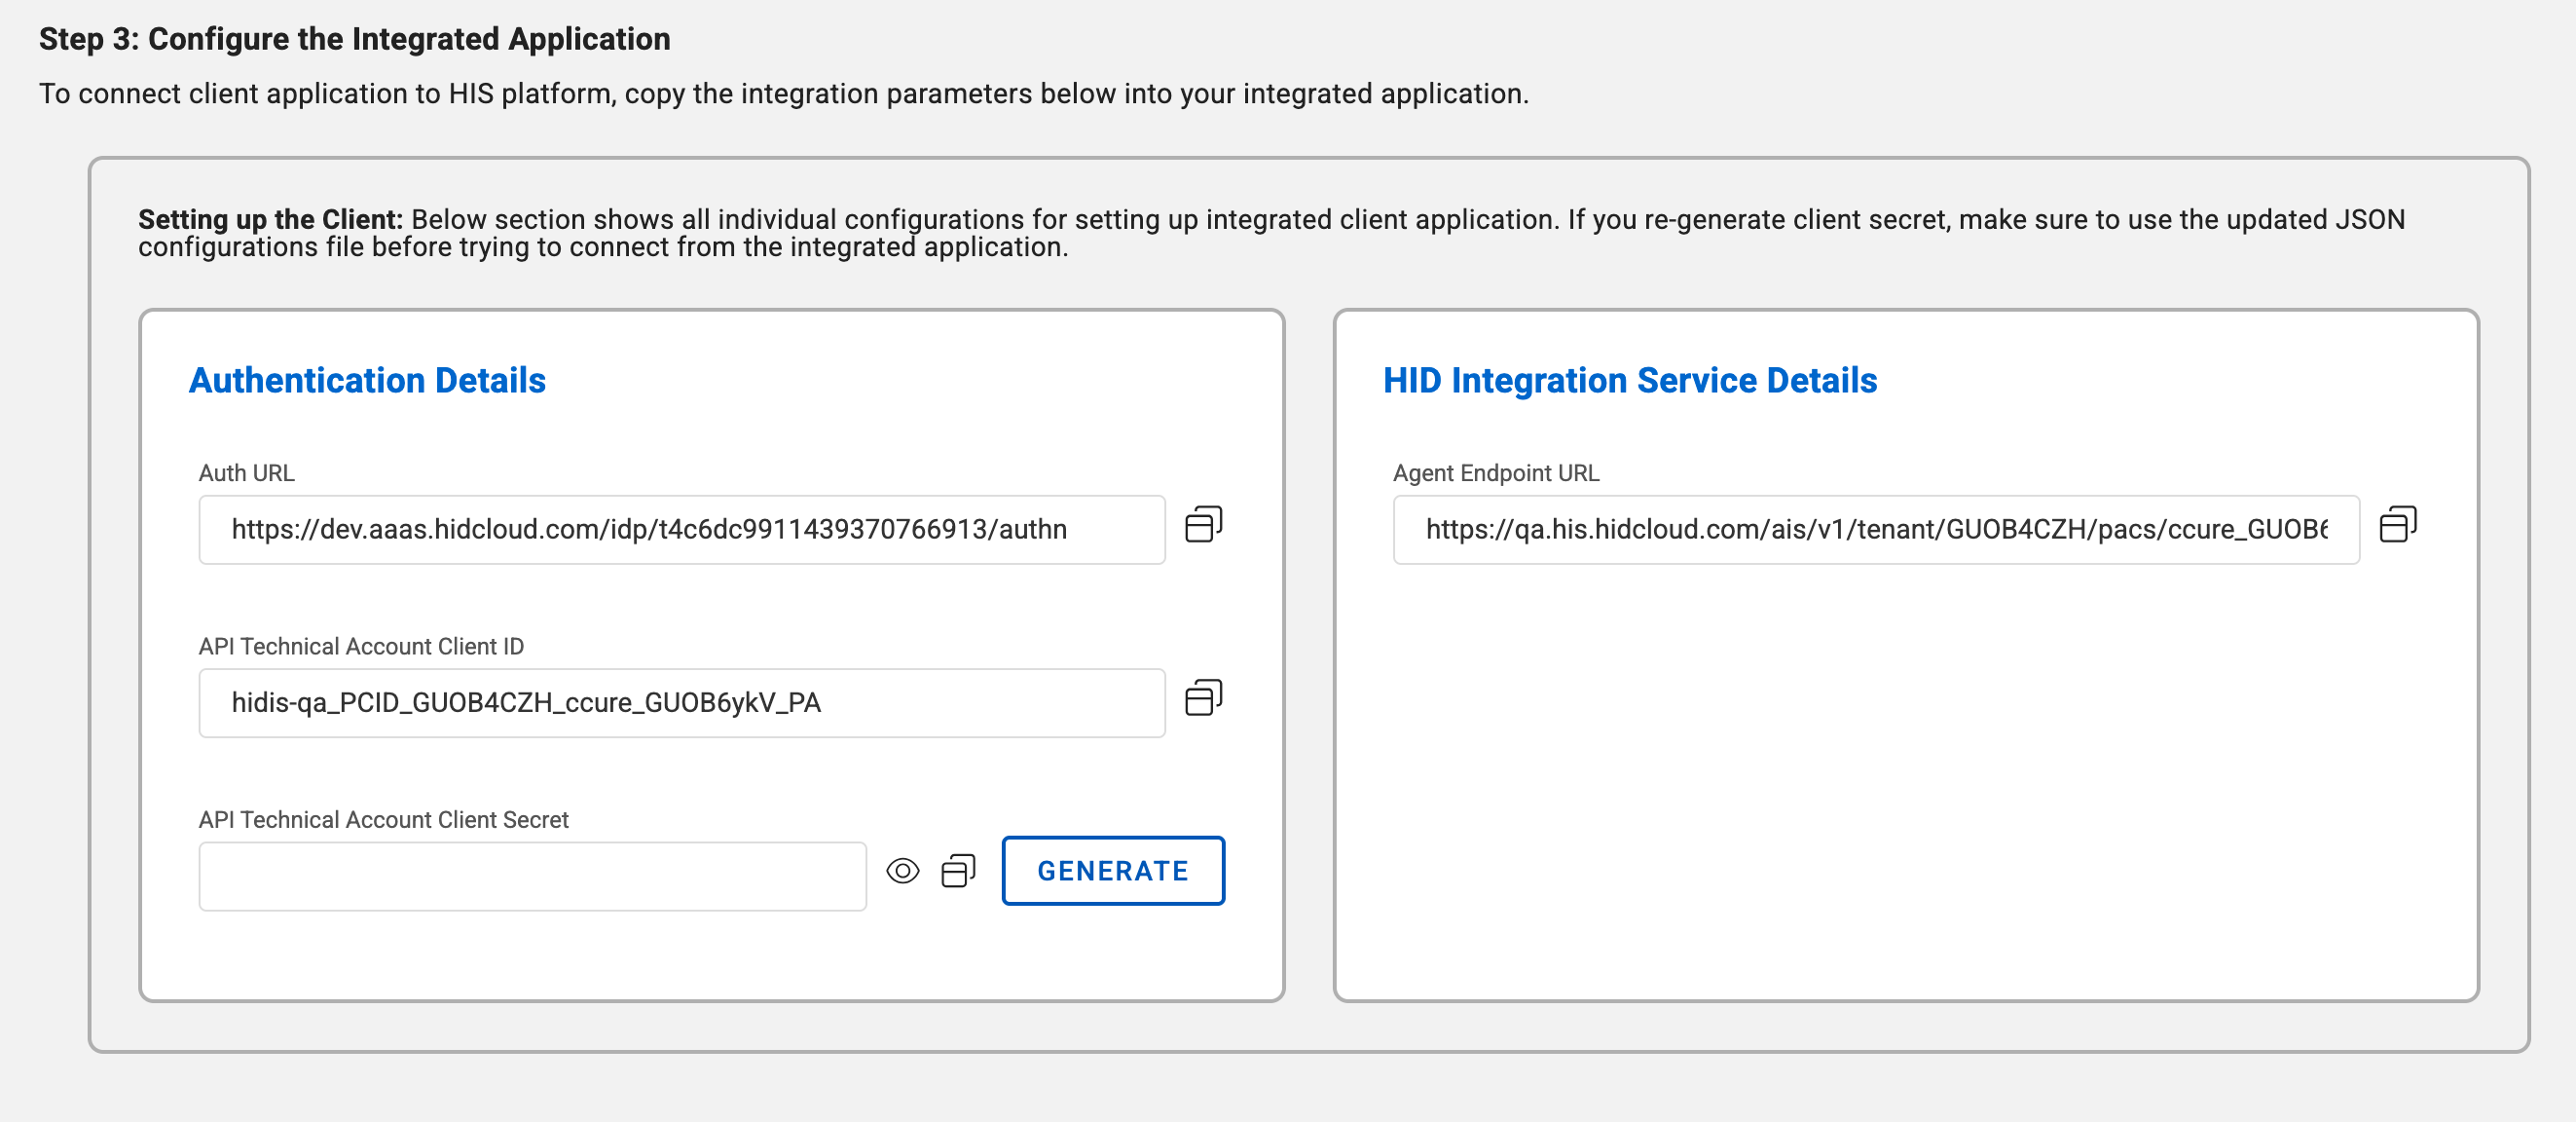 Note: Once client secret is generated, it will be displayed only during the current session. Make sure to copy it and use it in your integrated application before navigating away from the page—otherwise, you’ll need to generate a new one.Important: Generating a new secret will replace the existing one. As a result, any current connection using the previous secret will stop functioning. As per security best practices, it is advisable to periodically regenerate secret and update the clients.
-
-
Use the information in the integrated client application. SAVE the information and test the connection to HIS platform.
Note: The steps outlined may differ depending on the specific client application. Please consult the HIS integration guide provided by the application developer for detailed instructions.If the integrated client application is able to communicate with the HIS platform, move on to the next step else, make sure URLs, client ID and client secret are copied and used properly in the integrated application to make connection. Also, make sure client application has access to internet for this step.
Step 4: Save the Agent
Once connected, select ‘Continue’ at the top right of the page. This saves the agent details. Move onto field mappings step if needed.

Next step - Manage Field Mappings


