Additional Fields for Identities
This section describes how to create additional fields for Identities (employees).
-
Admin users can add up to 20 text fields (including dropdown and text fields) and 5 date fields.
-
The field name length is restricted to a maximum of 500 characters.
-
Fields created for Identities can be used for external system integration (both inbound and outbound).
Add Additional Fields
-
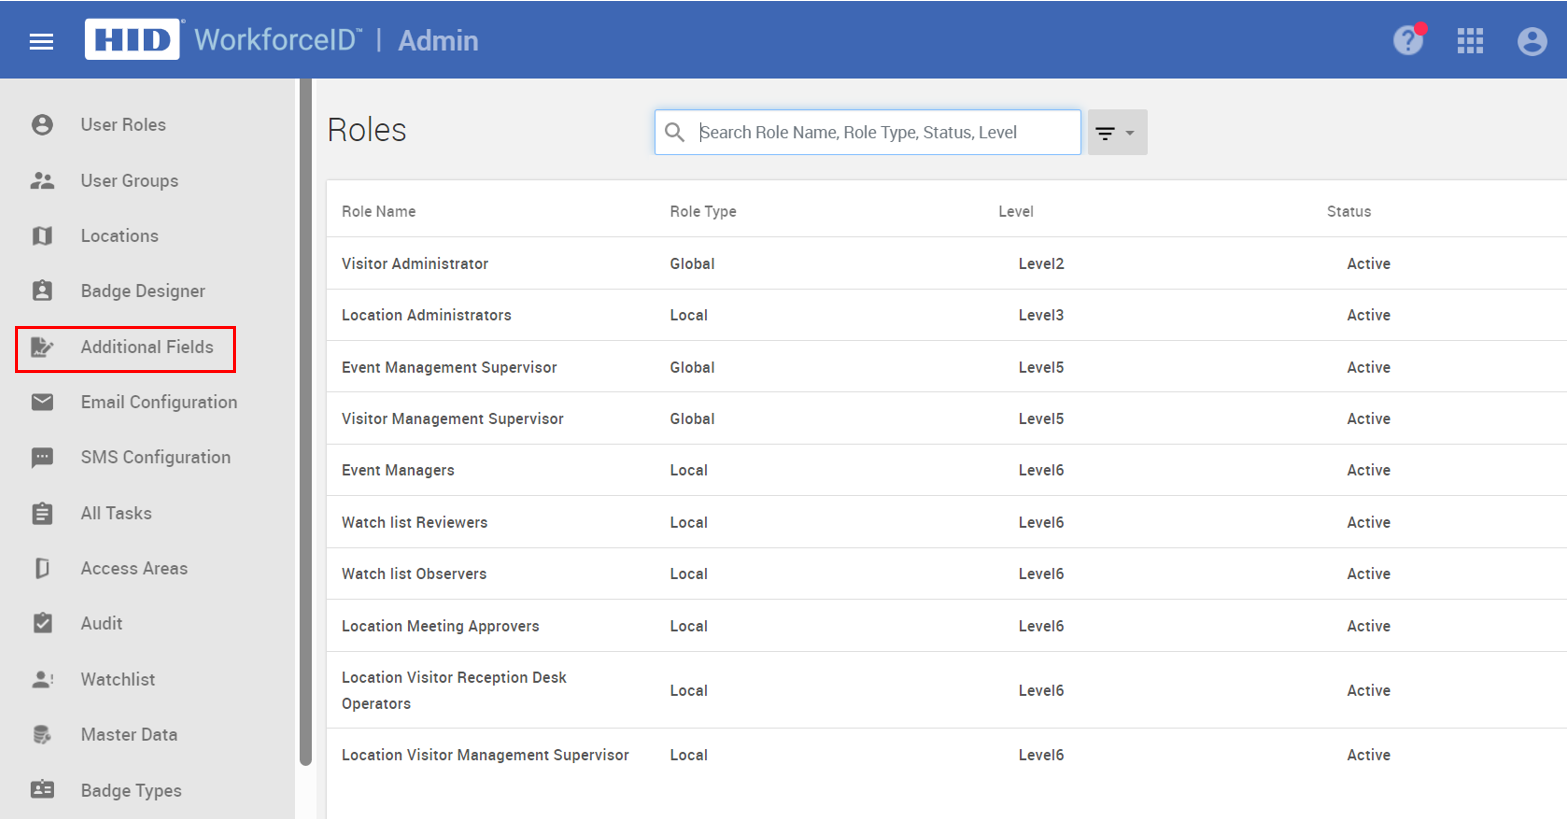
Select the Admin application from the App Launcher and click on the Additional Fields tab.
-
Adding a New Field
-
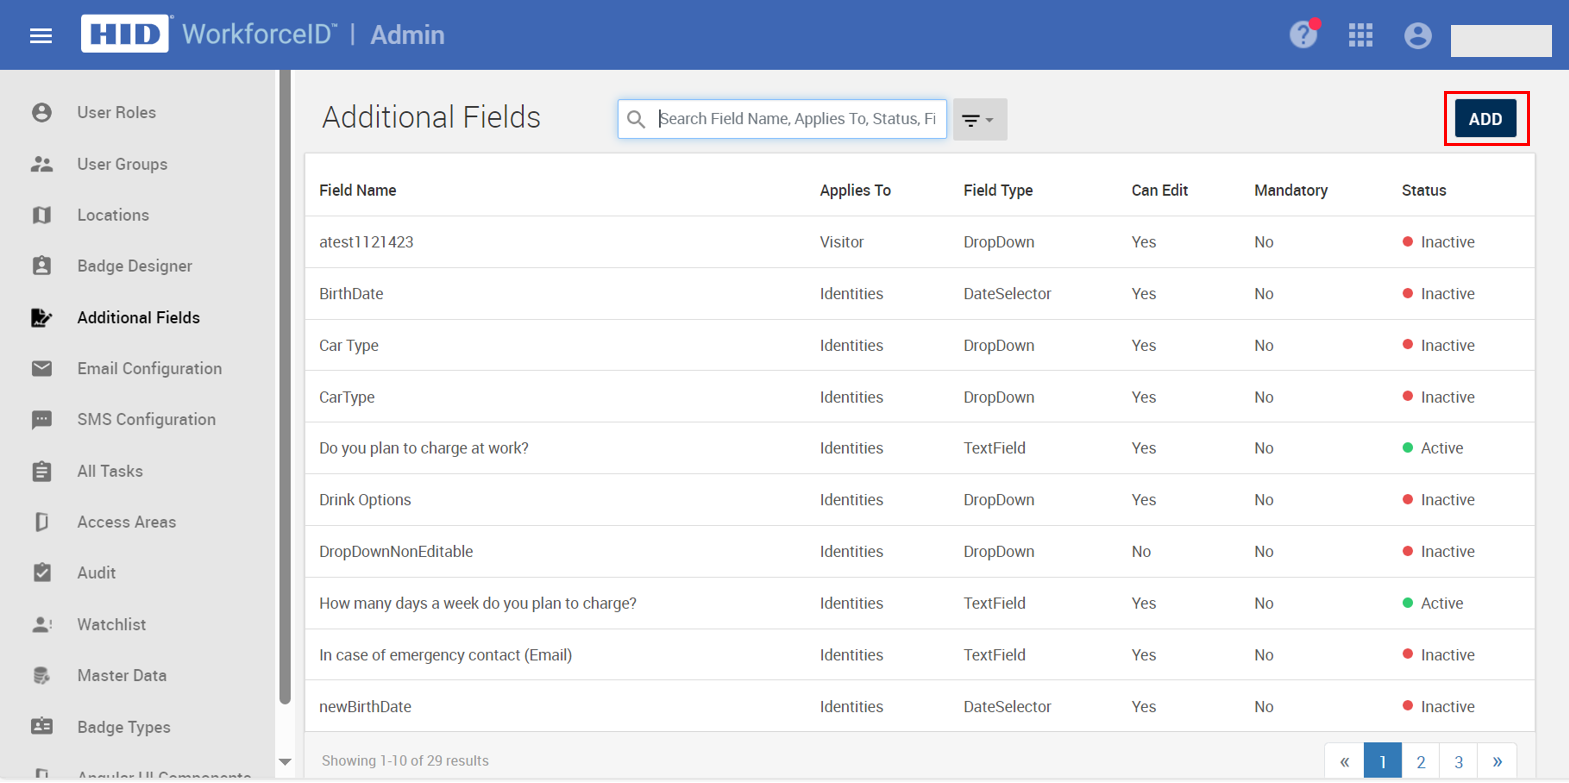
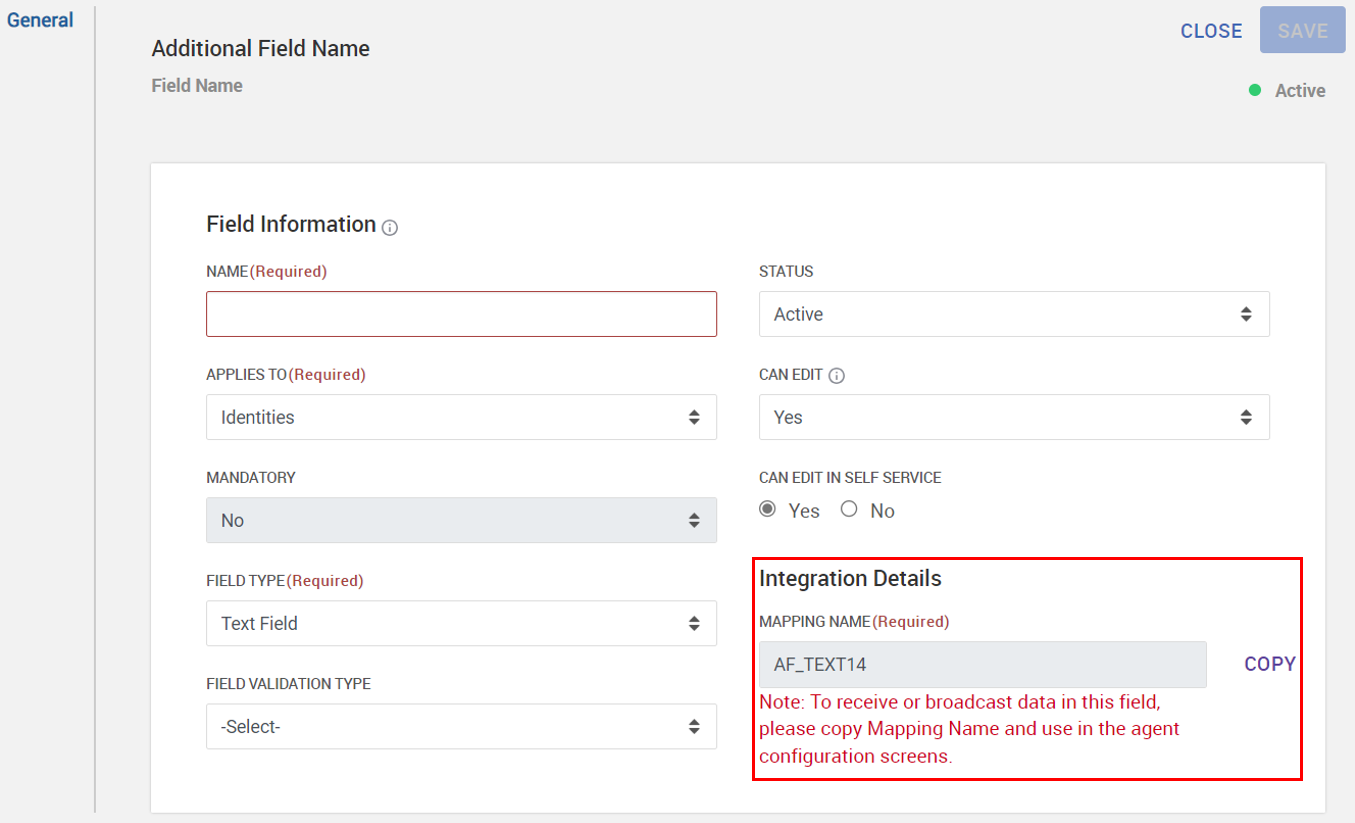
Click the ADD button to open the page for creating new additional fields.
-
Enter a name for the new field (maximum character limit: 500).
-
The Applies To field lets you choose the object for which this field applies. Select Identities.
-
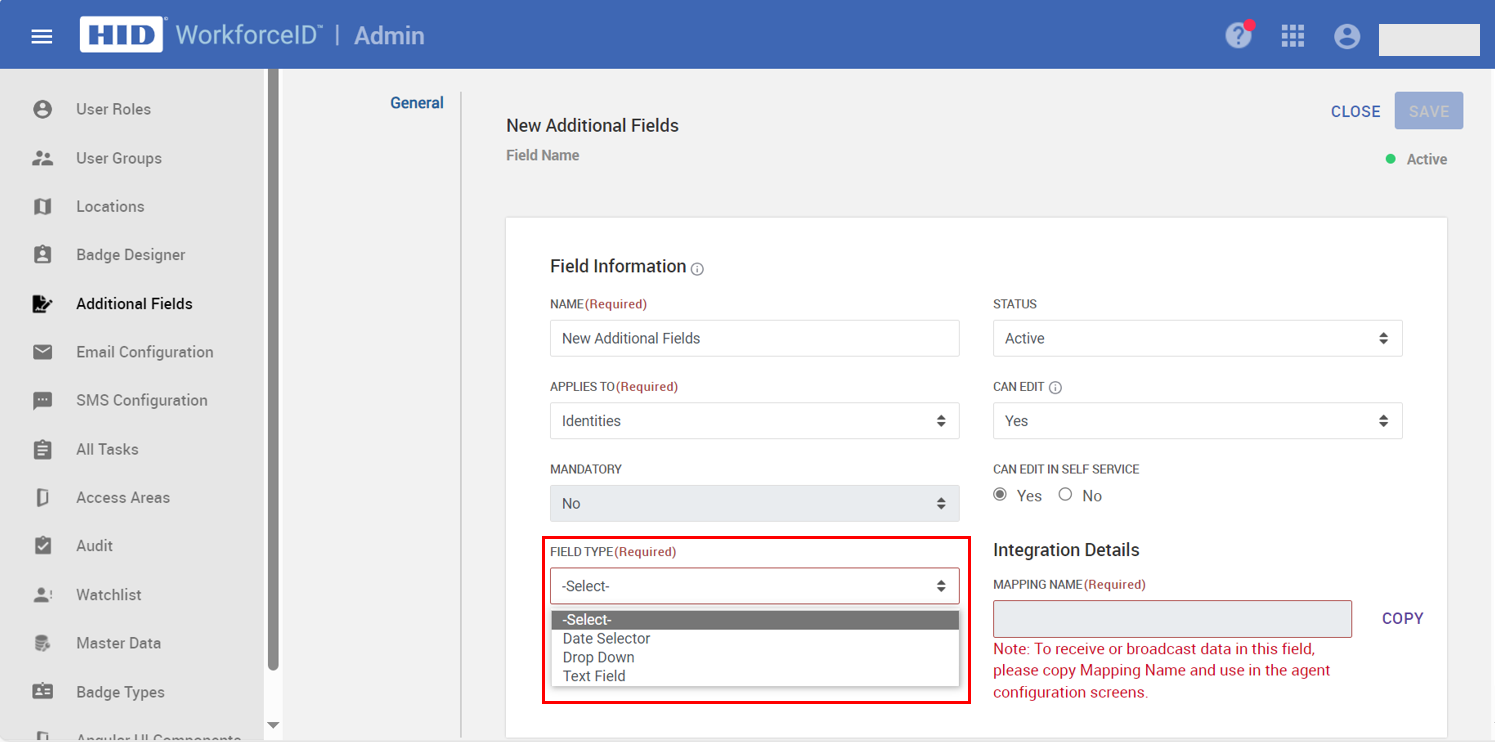
Select the Field Type from the dropdown menu. Choose from Date Selector, Drop Down, or Text Field.
-
Date Selector: No further action is needed. A date type field will be created.
-
Drop Down: You will need to provide a list of dropdown options separated by semicolons (;).
-
Text Field: Select a field validation type to add validation to the text field. Leaving this blank creates a text field with no validation.
-
-
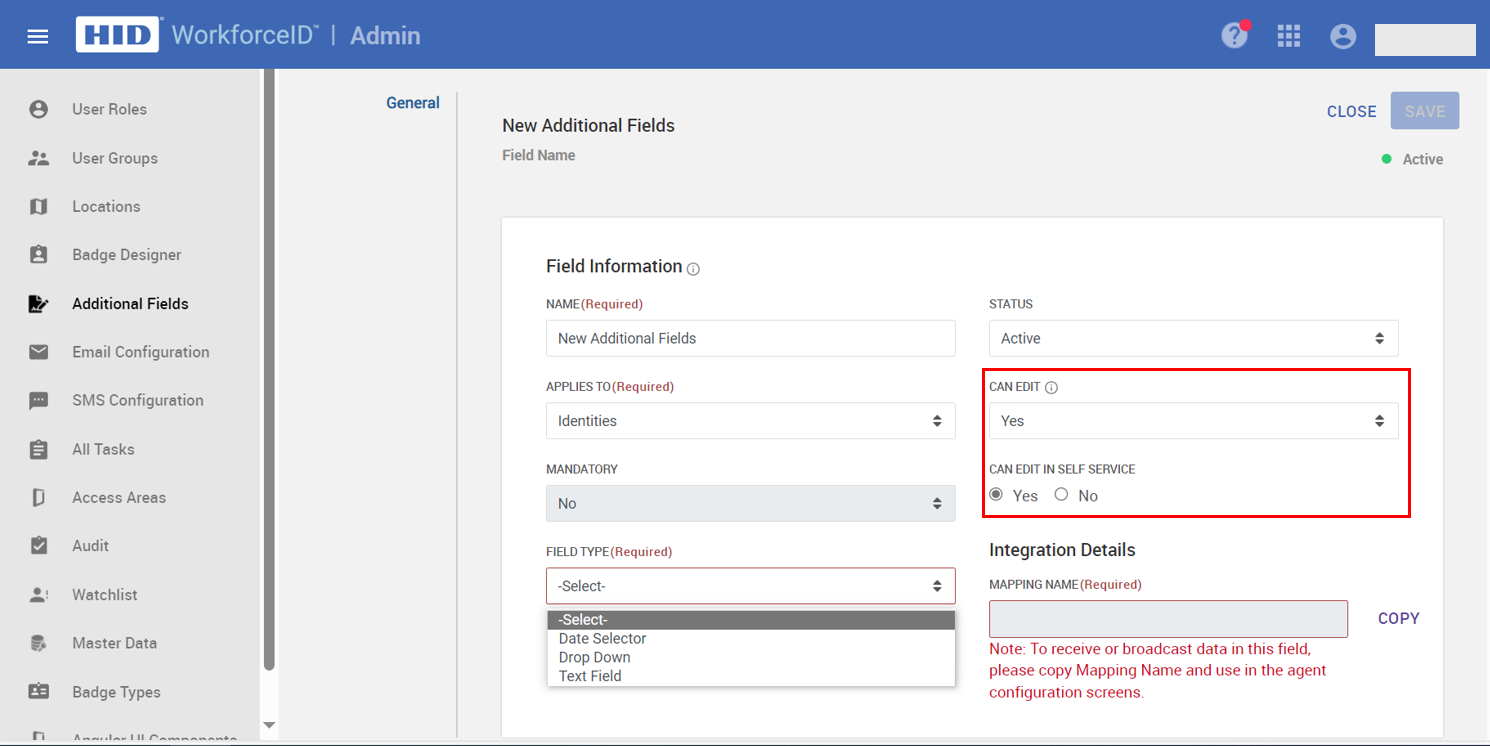
Select whether users can edit the field.
-
If CAN EDIT is set to No, the field is read-only and can only be filled by system data.
-
If CAN EDIT is set to Yes, users can edit the field.
-
To allow editing on the self-service My Profile page, select Yes for CAN EDIT IN SELF SERVICE.
-
To prevent editing on the self-service My Profile page, select No for CAN EDIT IN SELF SERVICE.
-
-
-
-
The Integration Details section allows you to map additional fields to external systems for data exchange.
-
Copy the field name you want to map using the COPY button.
-
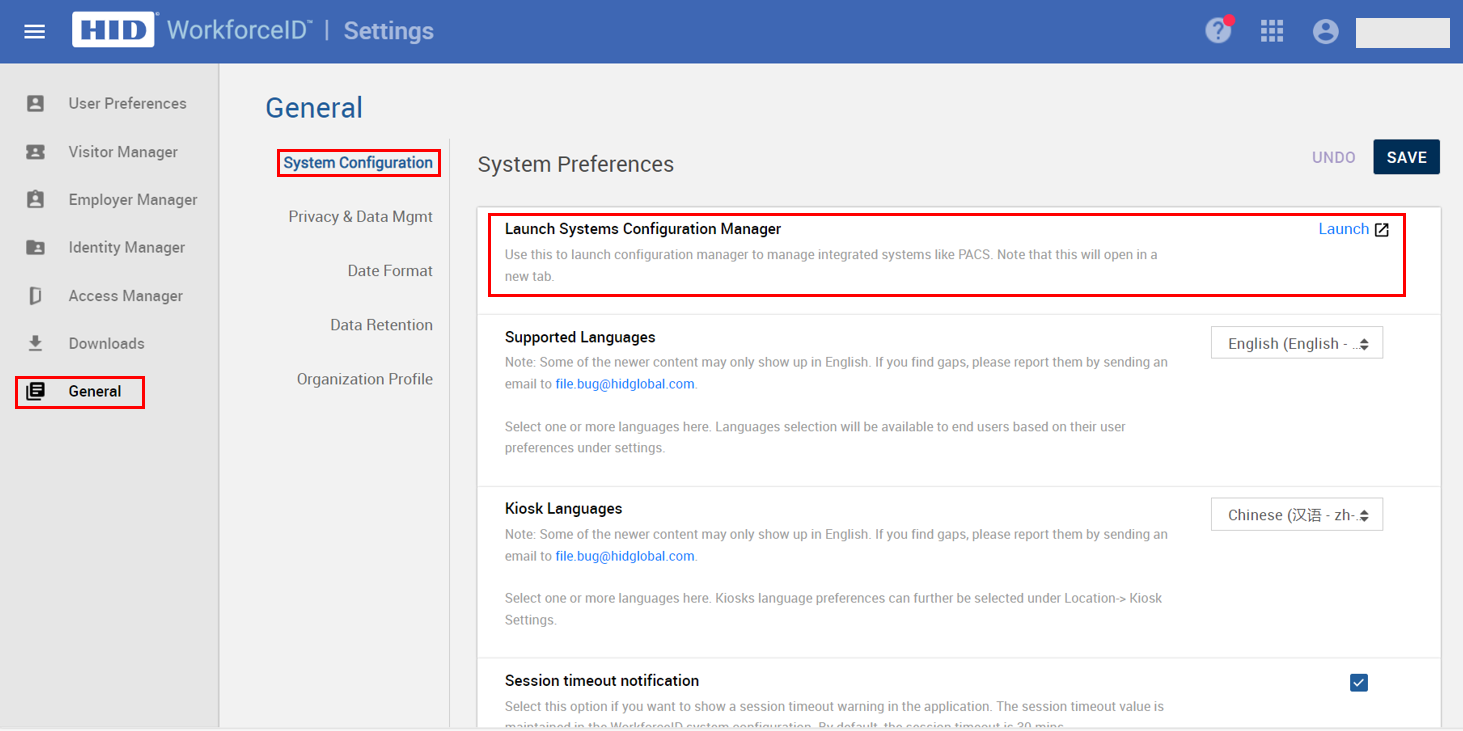
Use the Visitor Manager System Configuration Manager tool to add the mapping to the external system. You can launch this tool by navigating to Settings > General > System Configuration.
-
Select the integration system from the list. Navigate to Data Object and then expand the Person (ObjectID - 10000)*.
-
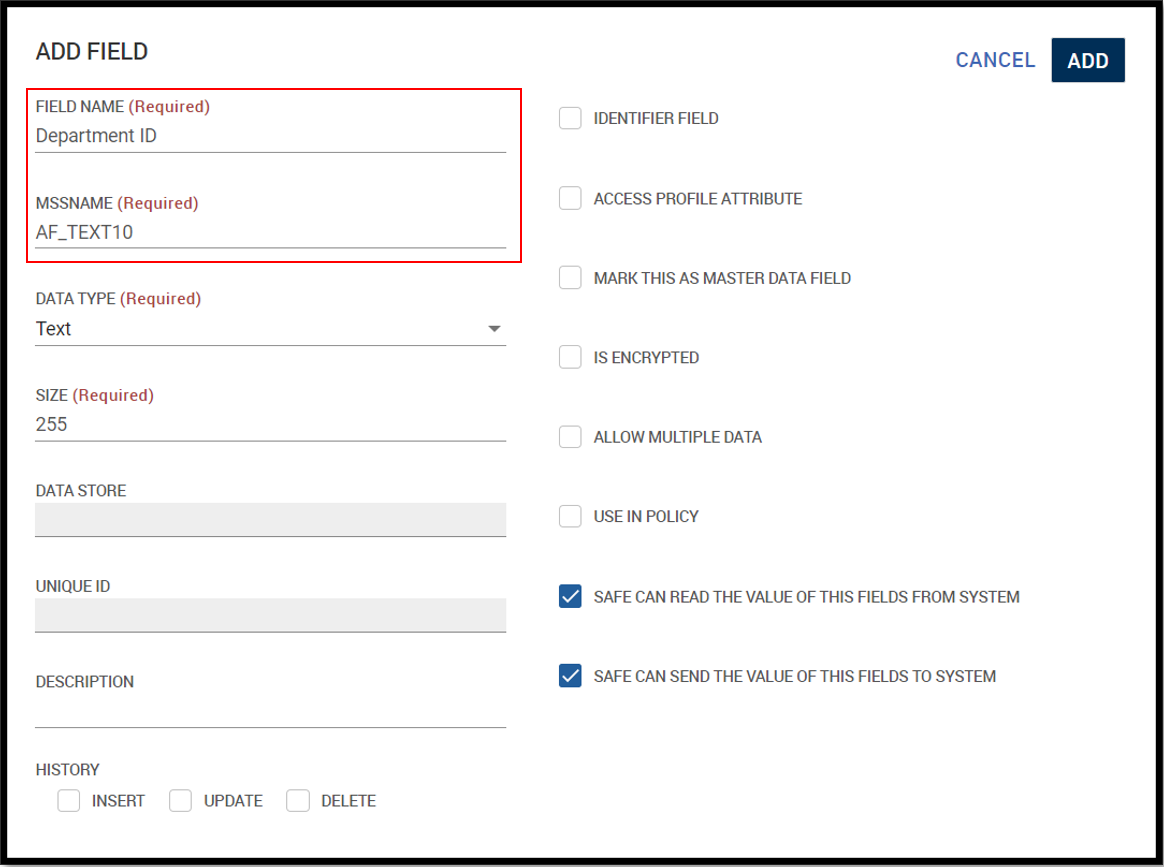
Click the Add Field button and enter the following details:
-
Enter the field name used by the external system.
-
Paste the copied field name from step 3.a.
-
Fill the other required fields and then click the ADD button.
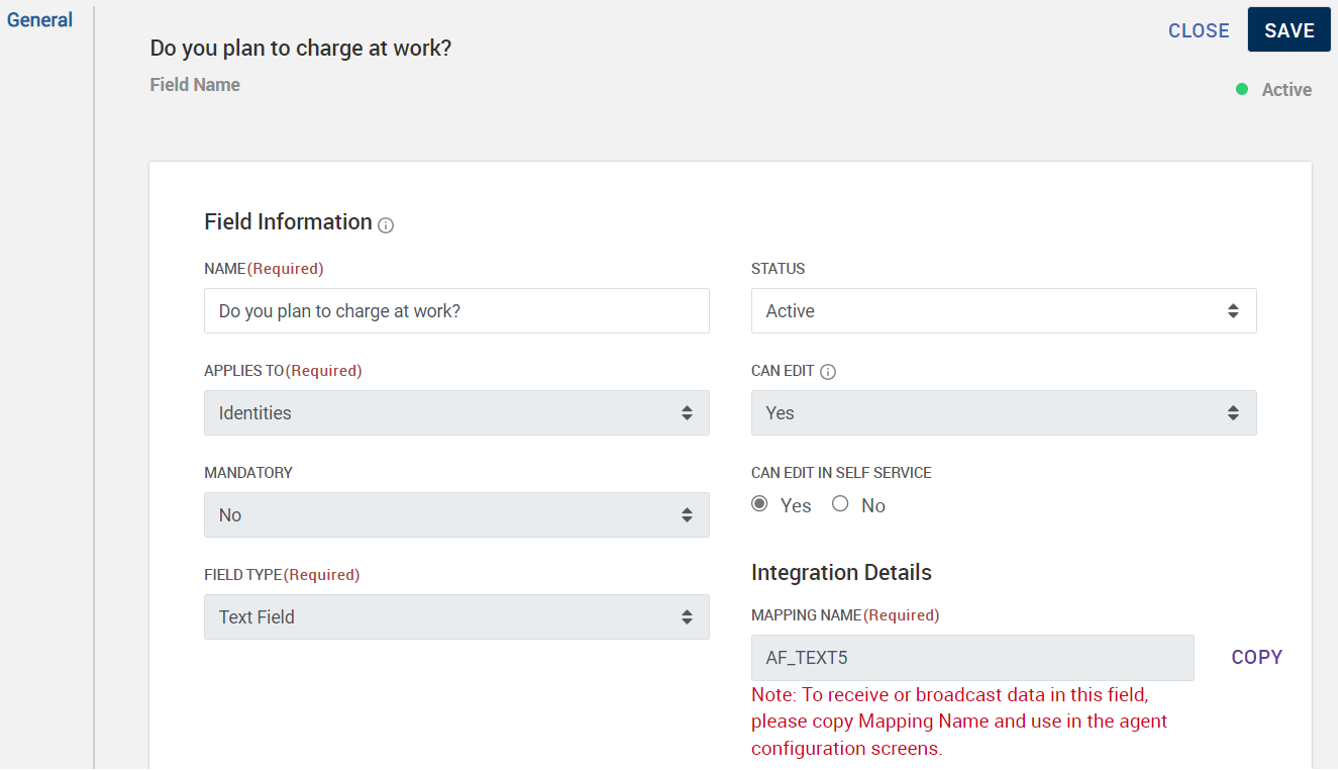
By following these steps, data entered into the additional field will be broadcasted to the external system. You can then view the mapped field details in the incoming or outgoing audit logs.
-
-
Click SAVE.
Note:Once a new additional field is saved, it becomes read-only. Existing data entered by identities before the field was locked will be preserved.
Related Topics:
