Report List
HID Visitor Manager provides various reports out-of-the-box. In addition, you can also add new reports, modify existing reports as well as broadcast and export reports. See below for more details.
Create a new Report
Users can create a new report on top of existing views
-
Open the report.
-
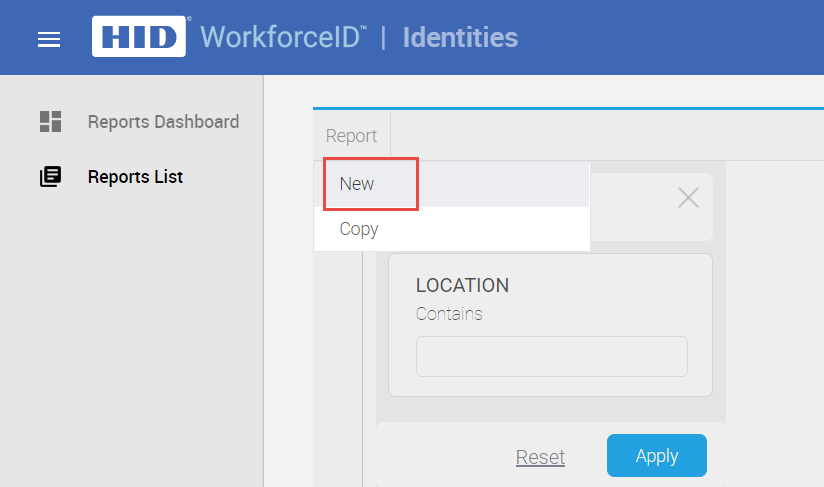
Click on the Report link in the main navigation bar and click NEW to create a report.
-
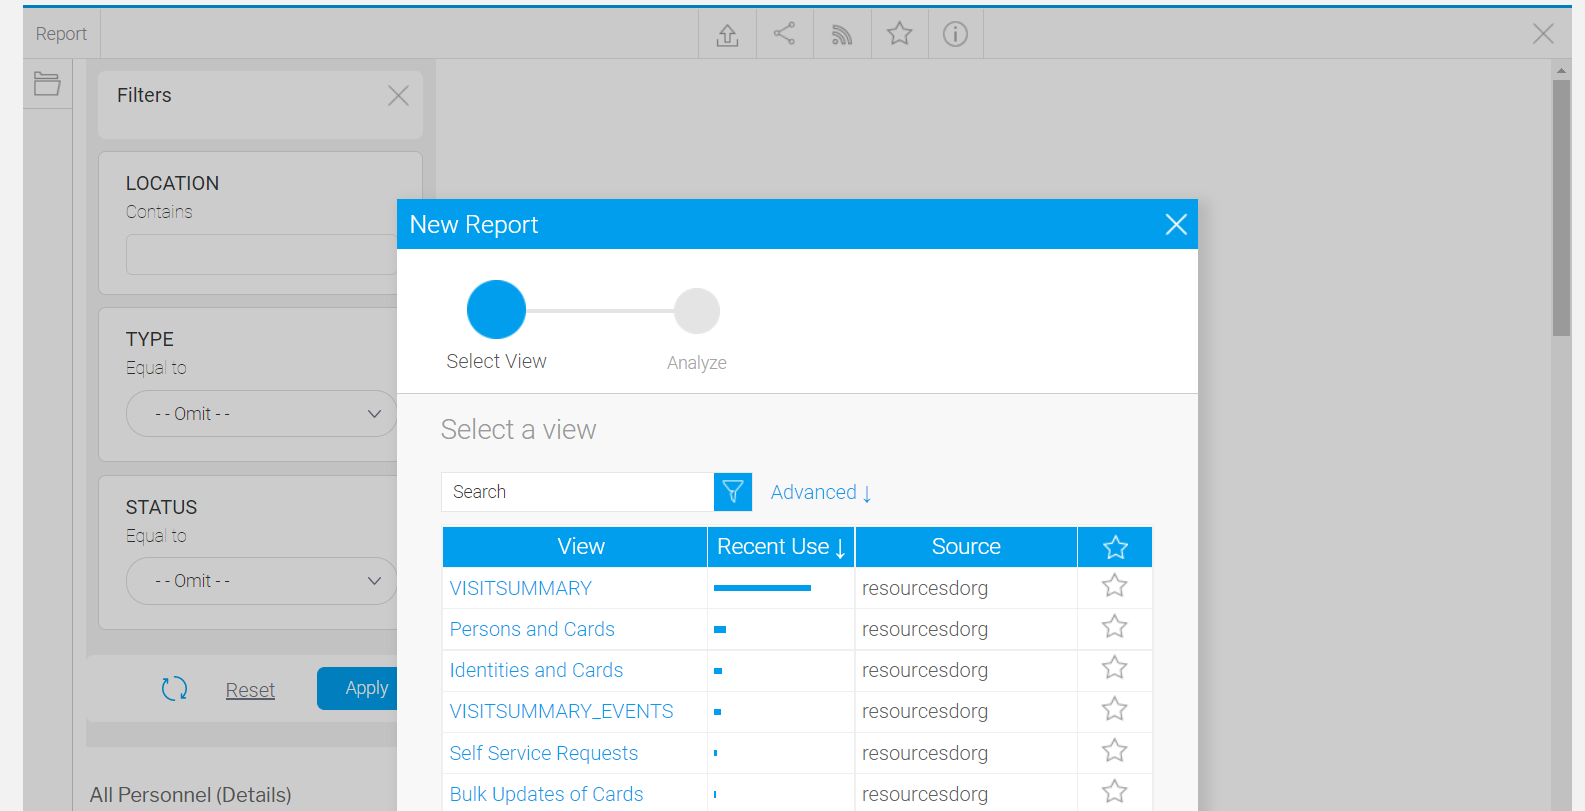
Search and select View to be able to choose the fields to include in your report.
-
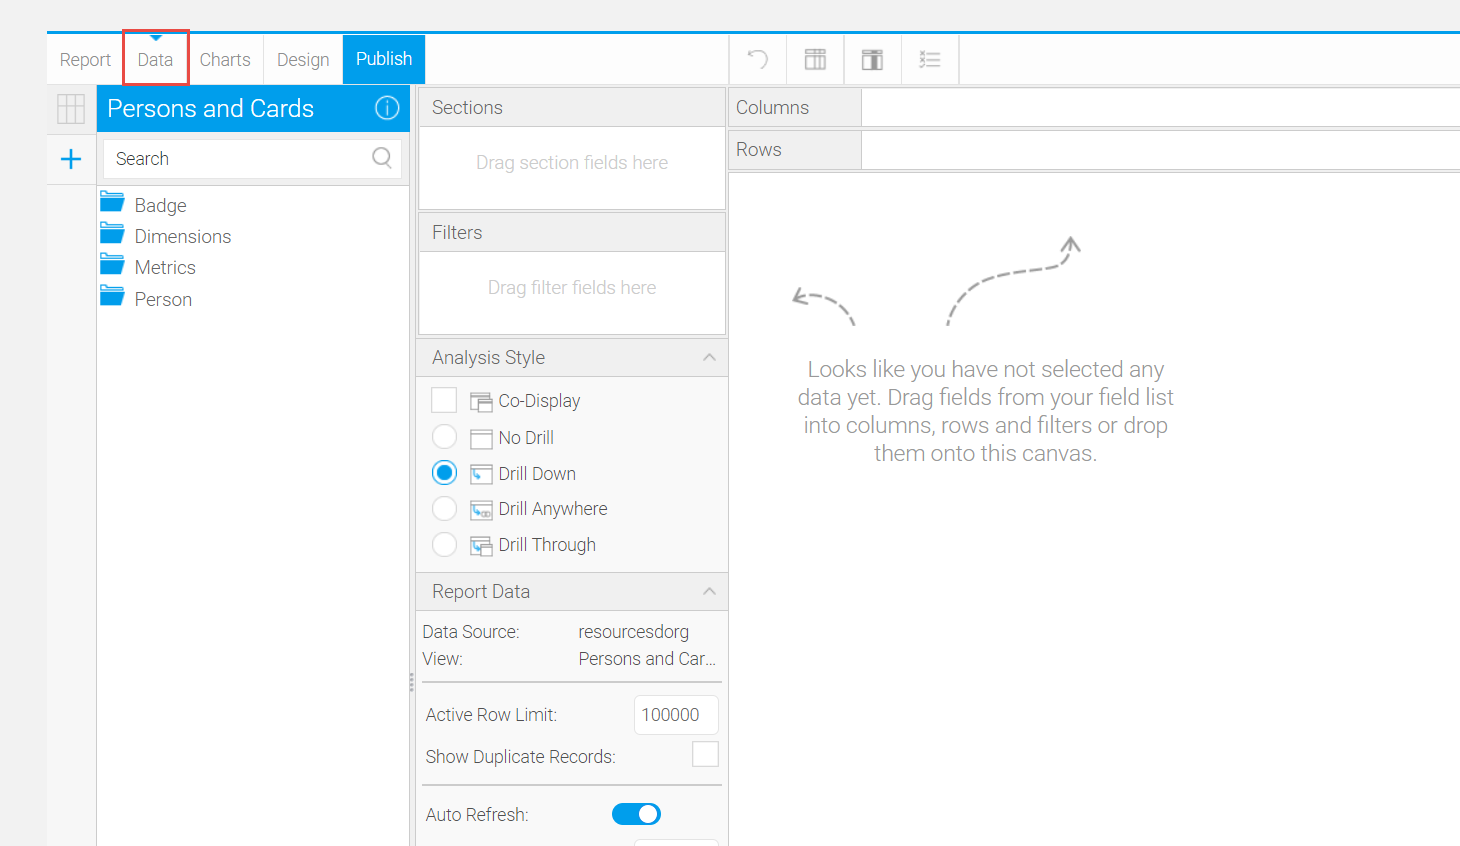
You will get transferred to the Data step of the builder. From here, you will be able to define the fields to be used in your report, format them, define any filters and sections as well as select other advanced options for your report
-
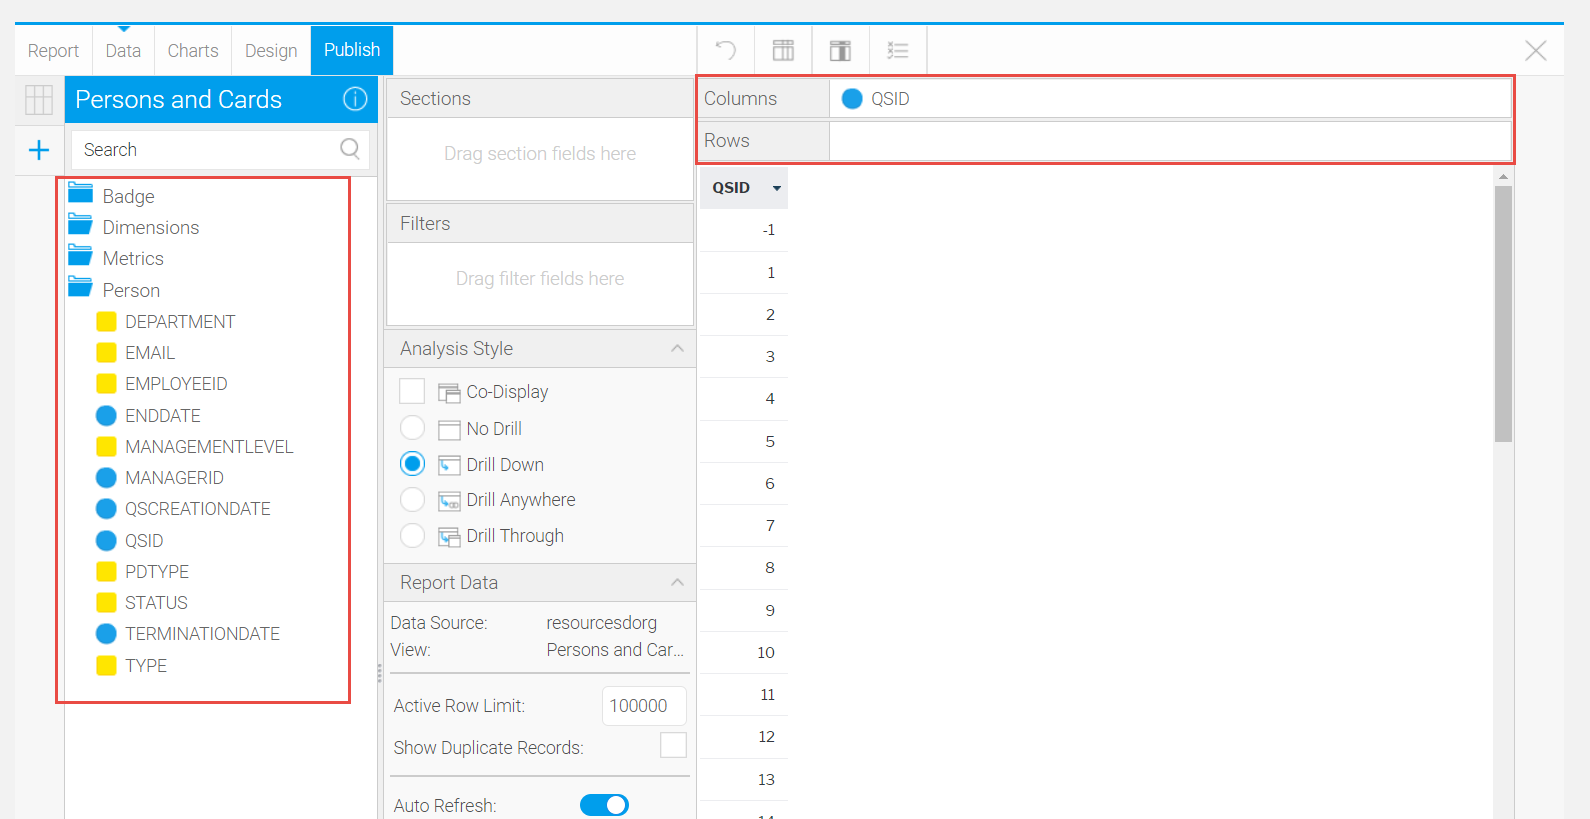
On the left, you will see a list of folders, expand the folder in order to access fields and drag and drop the field into the preview area or drag it directly into the Column or Rows list, if preferred.
-
After adding all the required fields, the user can create a chart builder by clicking on the Charts link in the main navigation bar.
-
The Charts page allows you to build visualizations based on the table created in the Data step.
-
-
Click on the Report link in the main navigation bar and select the Save option.
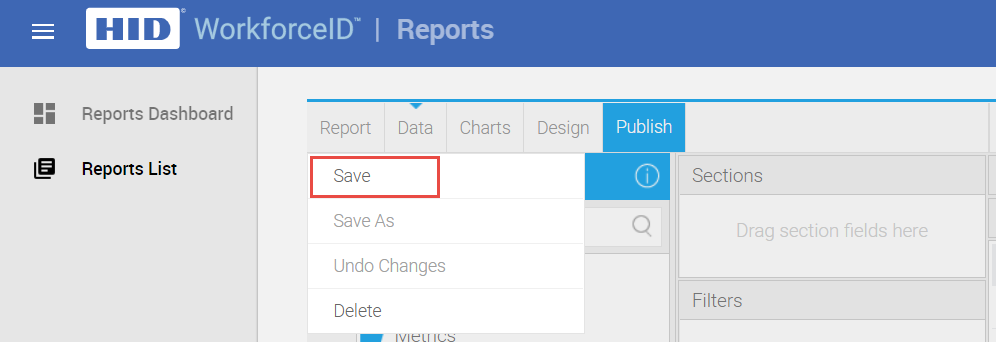
-
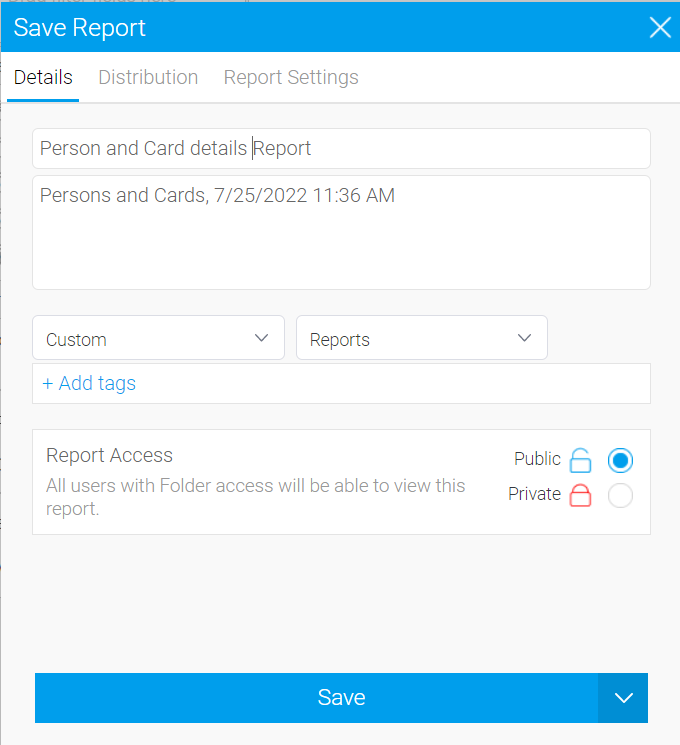
Add Name and Description for the report, then provide Category and Sub Category options for storage.
-
Click on the Activate button to save your report and activate it for consumer use.
Customize existing Report
Users can clone a report, add columns and/or change filters to customize it. All custom reports are available in the Custom folder.
-
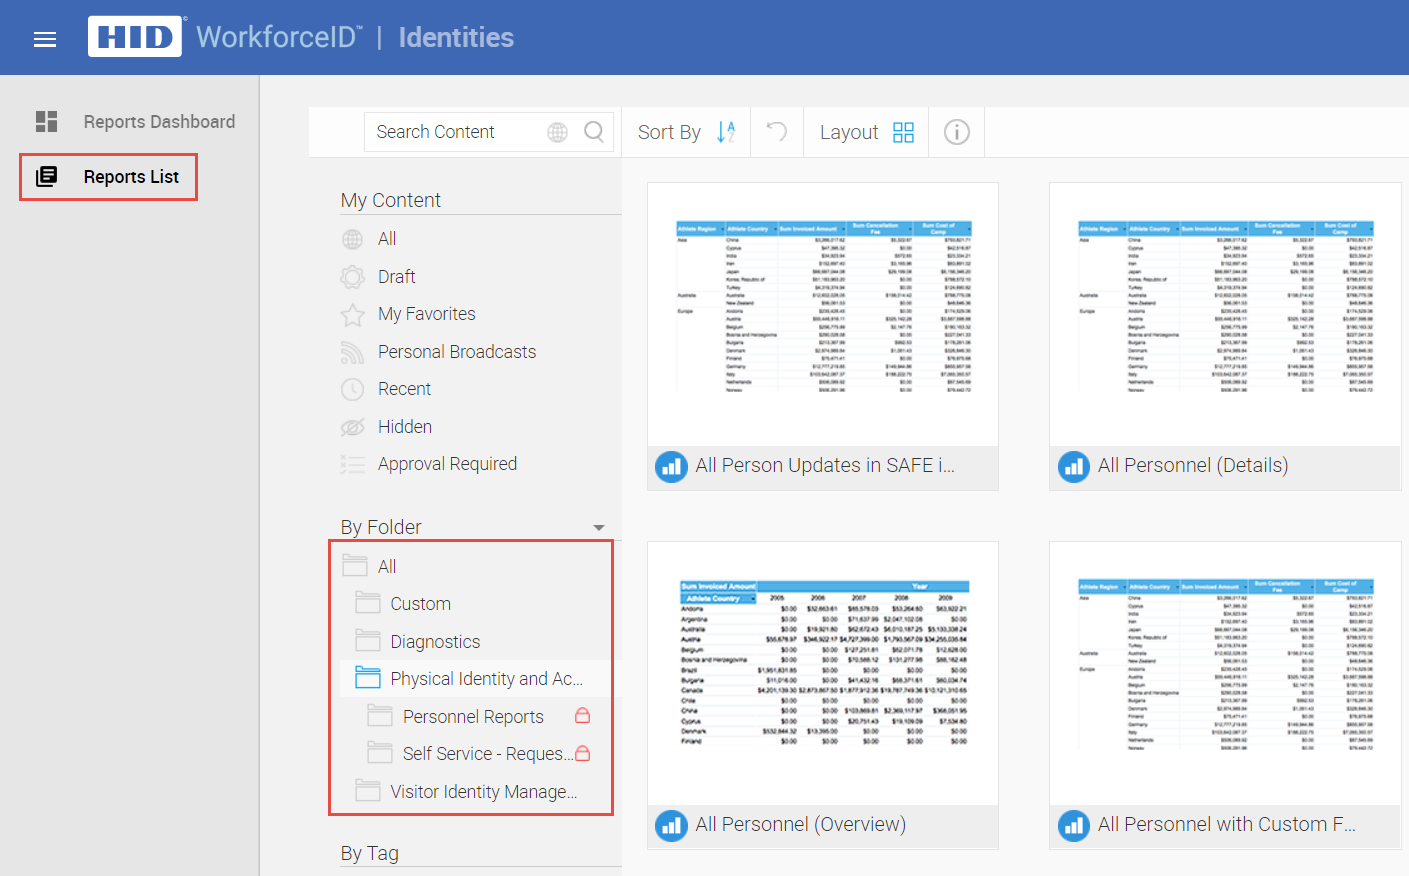
Navigate to Report app > Report list tab.
-
Enter the report name in the Search box or navigate each folder to search for the report.
-
Open the report.
-
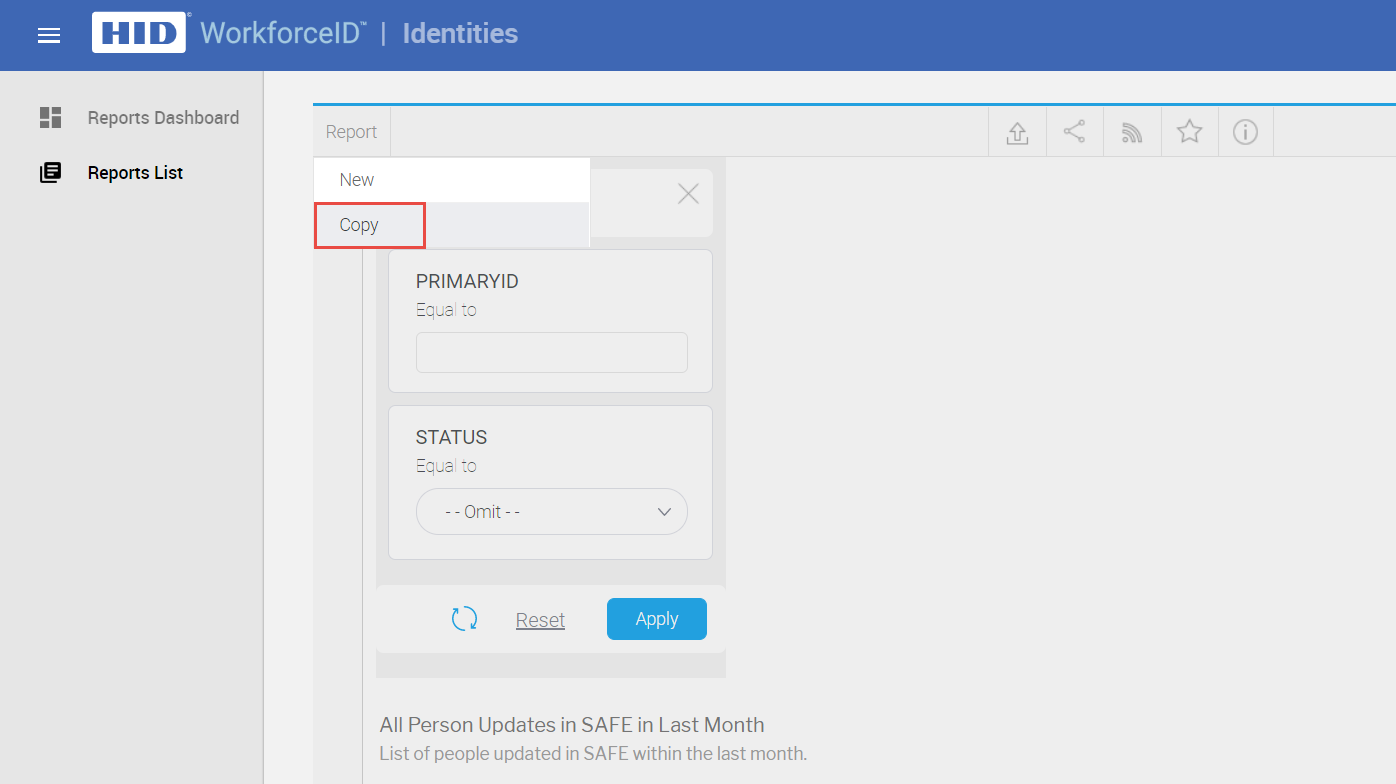
Click Report > Copy as shown below.
-
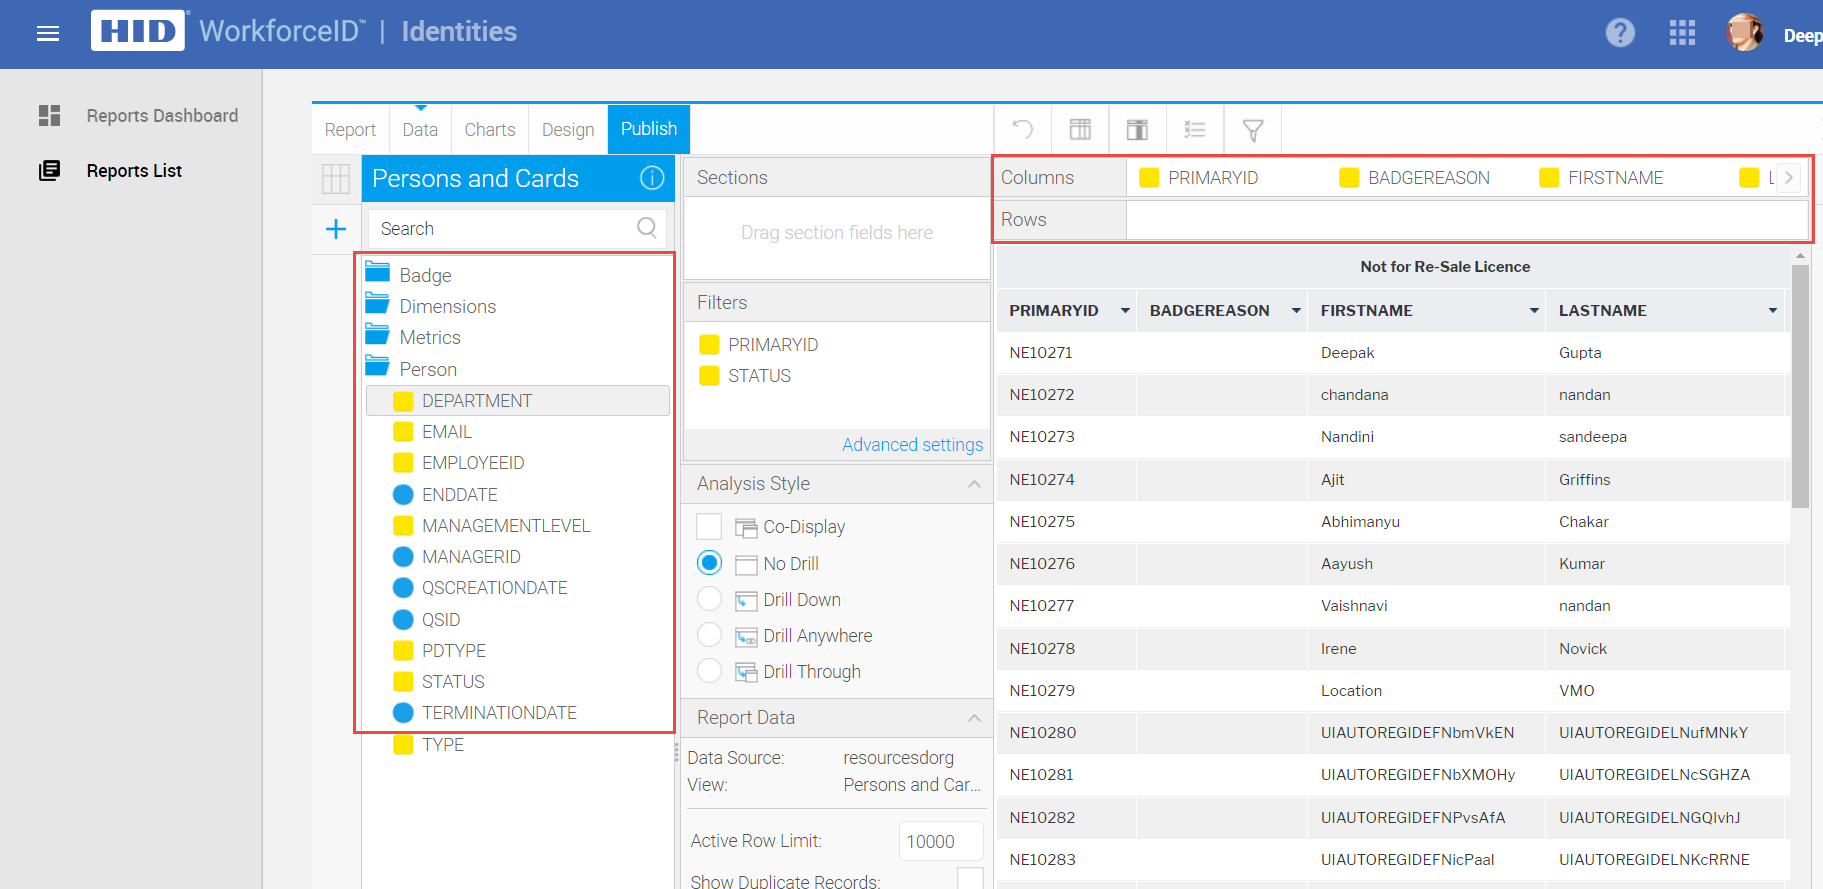
This will open up the Report Data page. From this page, you will be able to add/remove report fields as required.
-
Drag and drop the report fields from the folder to the columns panel and vice-versa as shown in the image below.
-
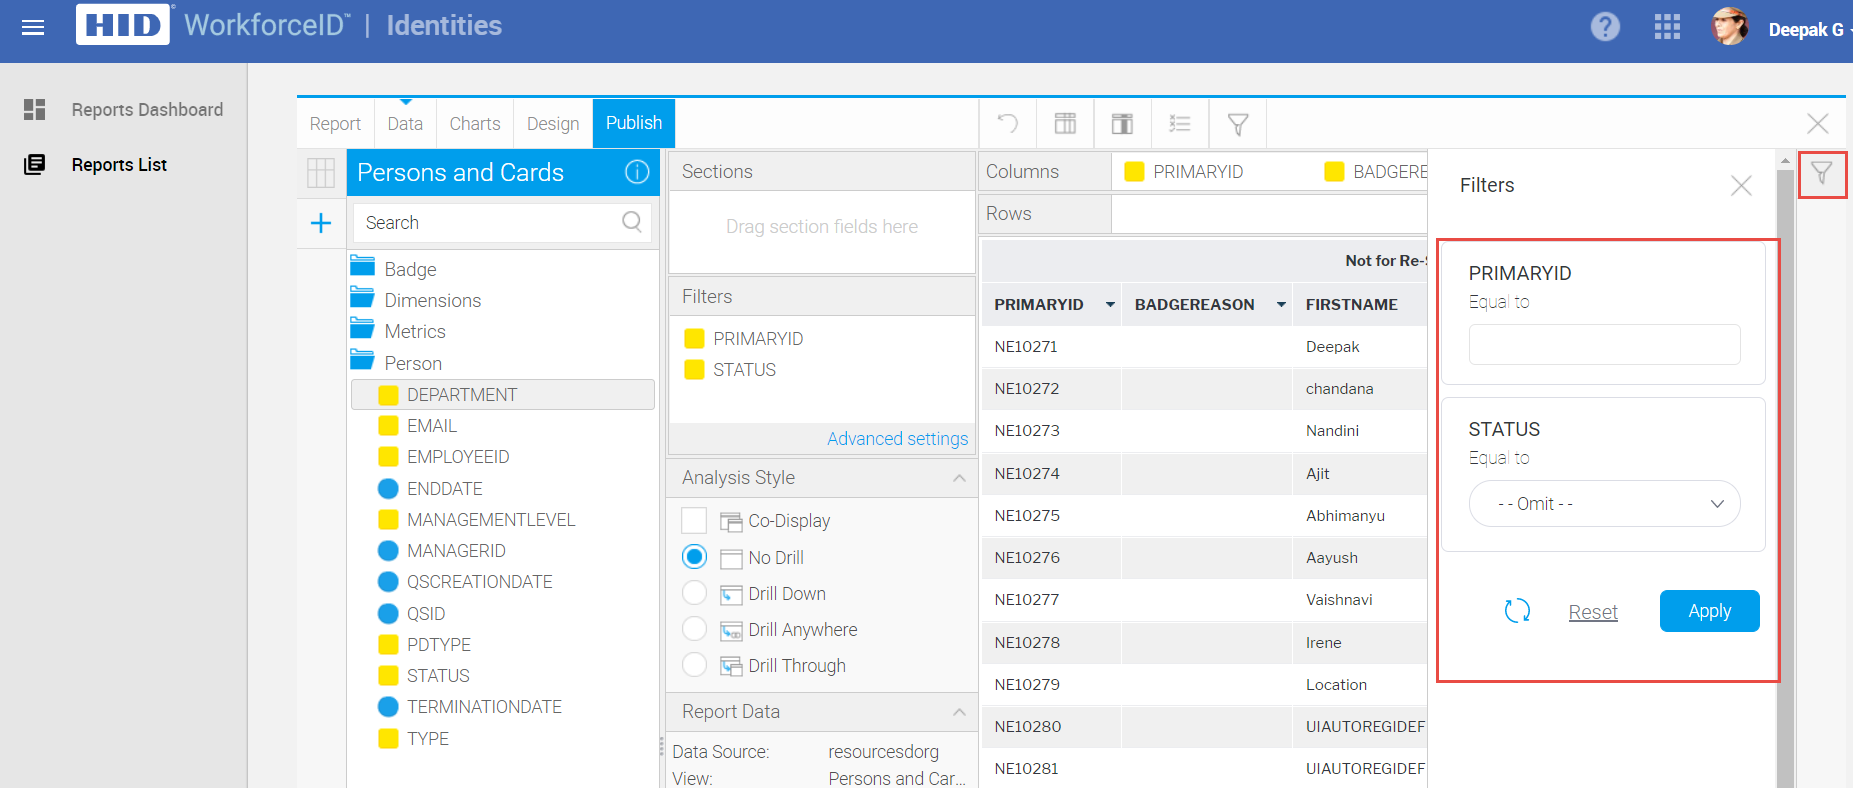
After editing the report, click on the Filter icon at the top of the left corner.
-
Select the appropriate filter and click Apply to preview the report.
-
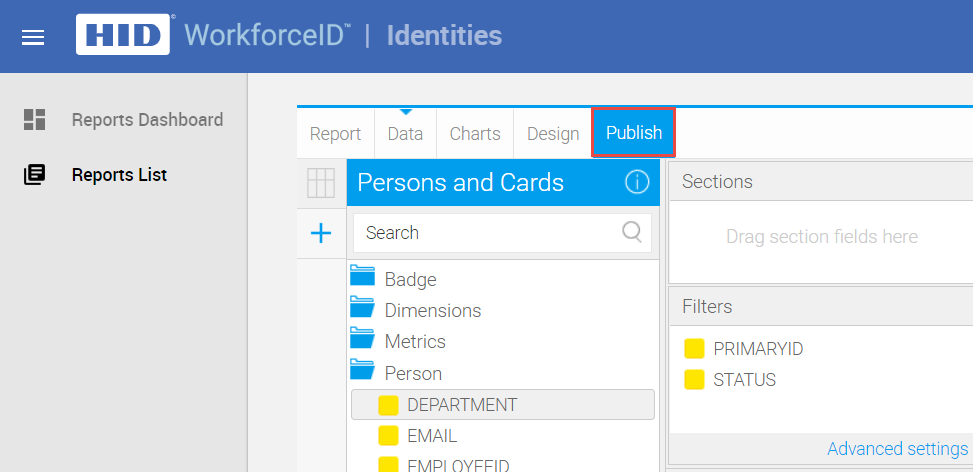
Click Publish after completing the edit.
-
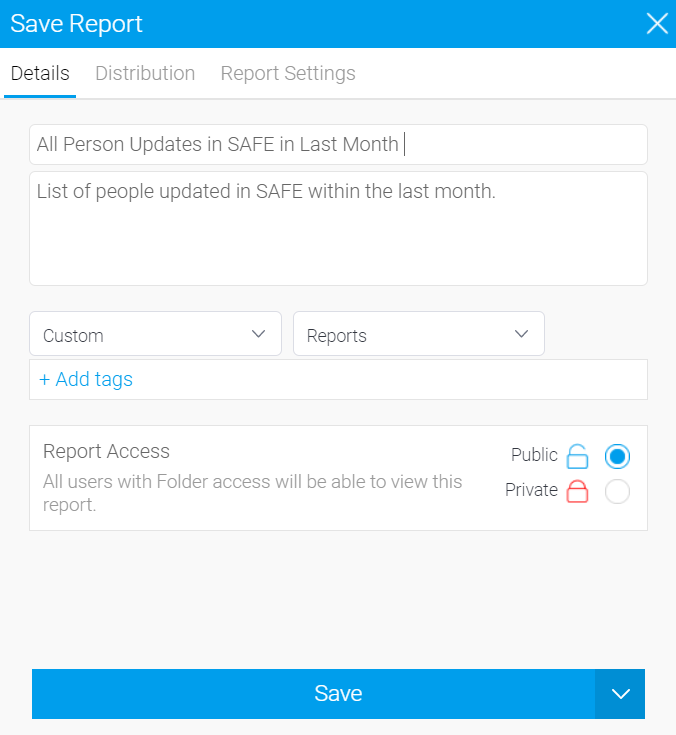
Change the report name as required and click Save.
-
All custom reports are available in the Custom folder.
Add Reports to Favorite
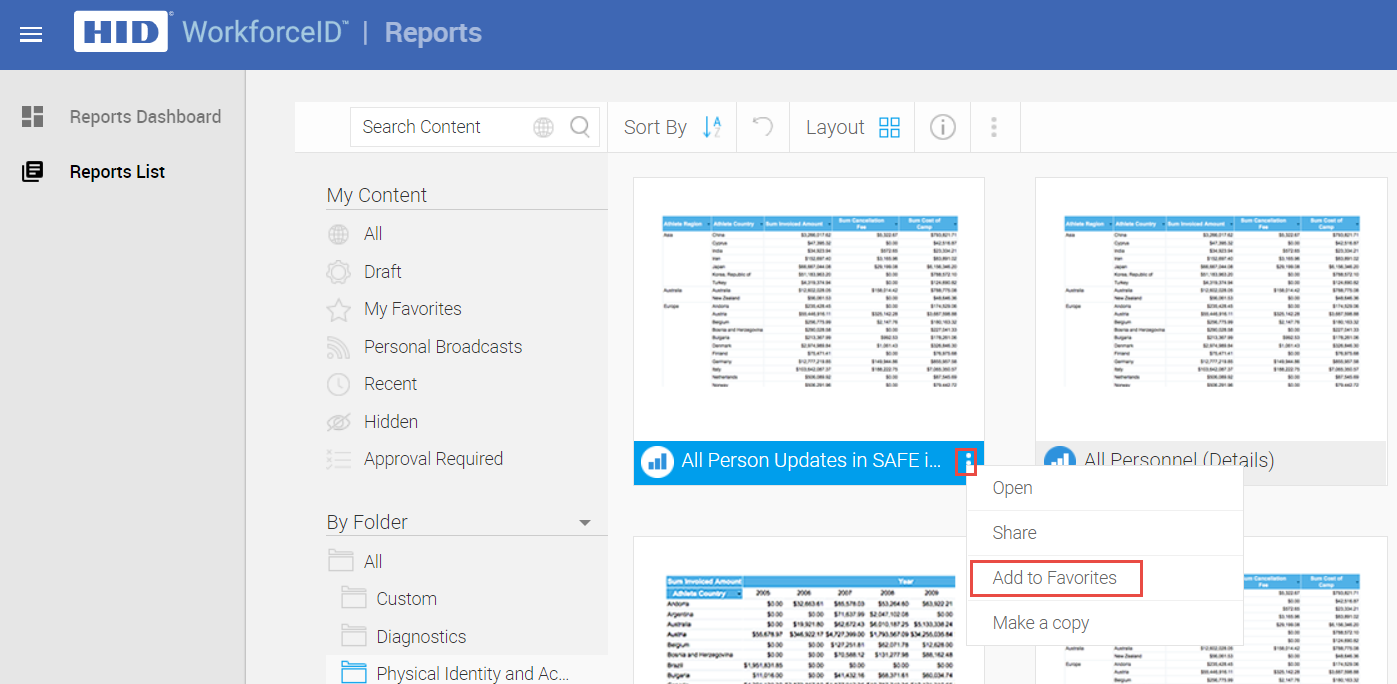
Users have the option to add reports to Favorites for a quick and easy access to those reports when needed.
-
Search and select the report that you want to add to Favorites.
-
Click on the three dots icon and click Add to Favorites.
Related Topics:


