ActivClient Agent
The ActivClient Agent starts automatically with the system and monitors security device activity, including reader connections, token insertion, usage, and removal.
It also provides quick access to the following features:
-
ActivClient Console (by double-clicking the ActivClient Agent icon)
-
ActivClient online documentation
-
Start/stop logging
-
Log folder
-
Clear Cache functionality
-
Forget PINs functionality
-
ActivClient Diagnostics
Accessing the ActivClient Agent
To access the ActivClient Agent, right-click the ActivClient Agent icon in the notification area.
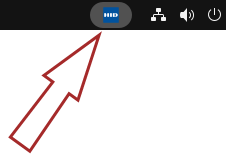
The icon changes based on the security device activity:

|
Recognized token connected |

|
Token connected but not recognized |
ActivClient Agent Functionalities
To access the available commands, right-click the ActivClient Agent icon in the notification area:
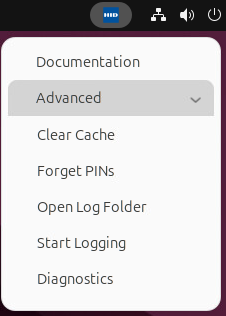
| Command | Description |
|---|---|
|
Documentation |
Opens the ActivClient documentation link in the default web browser. |
|
Advanced |
Expands to show advanced functions (listed below):
|
|
Clear Cache (Advanced) |
Clears all caches for all connected tokens. Note:
This is different from the Clear Cache option in the ActivClient Console, which clears the caches for the selected token only.
|
|
Forget PINs (Advanced) |
Clears the cached PIN information for all connected tokens. |
|
Open Log Folder (Advanced) |
Opens the folder containing ActivClient logs. |
|
Start Logging/Stop Logging (Advanced) |
Enables or disables logging for troubleshooting purposes. |
|
Diagnostics (Advanced) |
Runs a diagnostic check of ActivClient and opens the resulting log file. |
Card or Key Auto-Update
ActivClient includes the Card Auto-Update feature that can automatically update smart card and key content for security devices managed by HID Credential Management System (CMS).
If an update is available for your smart card or key, ActivClient Agent displays a notification:
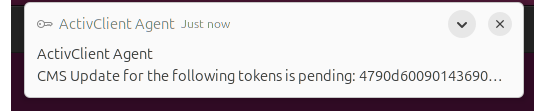
You can either postpone the update by dismissing the notification (ActivClient Agent will prompt you again after some time or the next time the token is inserted) or accept the update immediately.
To complete the update:
-
Click the ActivClient Agent notification.
-
Authenticate to the HID CMS Self-Service Portal The CMS Self-Service Portal is a component of HID CMS that allows end users to access the self-service CMS functions. opened by ActivClient in your default browser and follow the on-screen instructions to update your token.
-
When the update is complete, the Self-Service Portal prompts you to remove and then reinsert the token to apply the updated content.
Do not use the card or key for other operations (such as email signature). Any such requests will be automatically blocked until the update is complete.
Do not lock the screen or log off until the process is complete.
Do not remove the device until the process is complete.