Creating the VM using Microsoft Azure
This section describes how to create the virtual ActivID Appliance using Microsoft Azure.
The ActivID-Appliance_8.0.0.492.iso media is available
The Microsoft virtualization software requirements are:
Hyper-V v10.0.x on either Microsoft Windows 10 Enterprise, Windows Server 2012 or Windows Server 2016.
Hyper-V host Windows version 9.0
Configure a Virtual Switch
If you do not have an existing external virtual switch for the virtual machine network adapter, you must create one as follows:
-
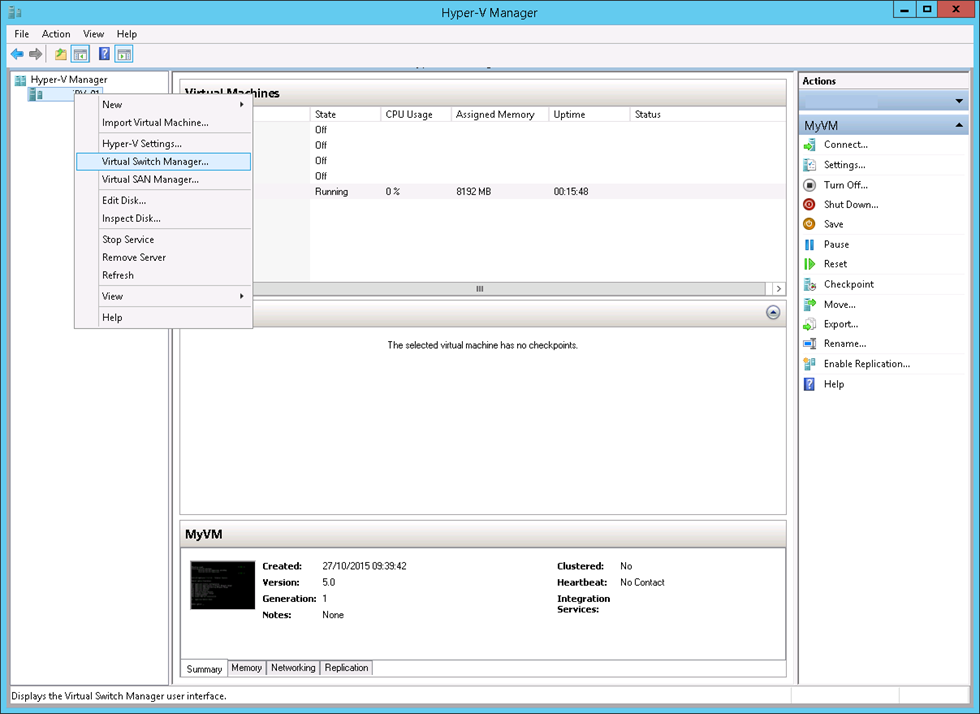
Open the Hyper-V Manager.
-
In the left panel, right-click on your server and select Virtual Switch Manager.
-
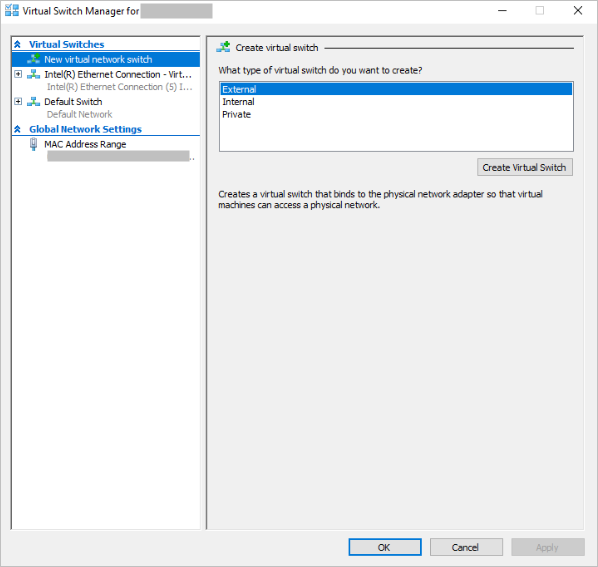
In the left panel, select New virtual network switch and then, in the right panel, select External as the type and click Create Virtual Switch.
Note: In a test environment, it is recommended that you use an internal network.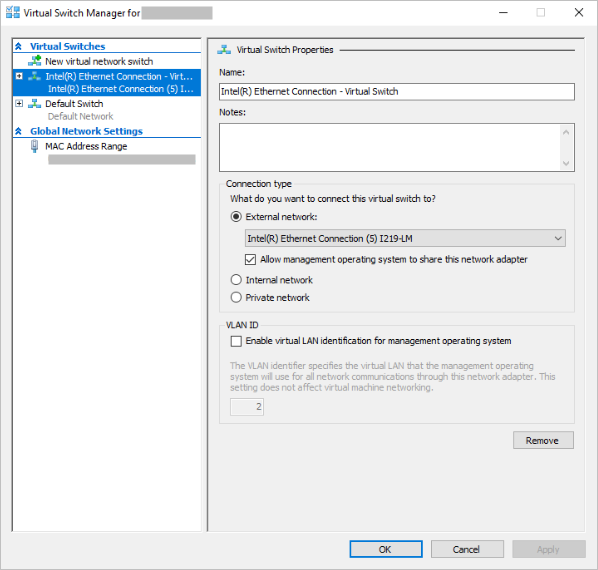
-
In the switch properties, make sure External network is selected as the Connection type and that it is attached to the correct network card, and then click OK.
Create the Virtual Appliance
-
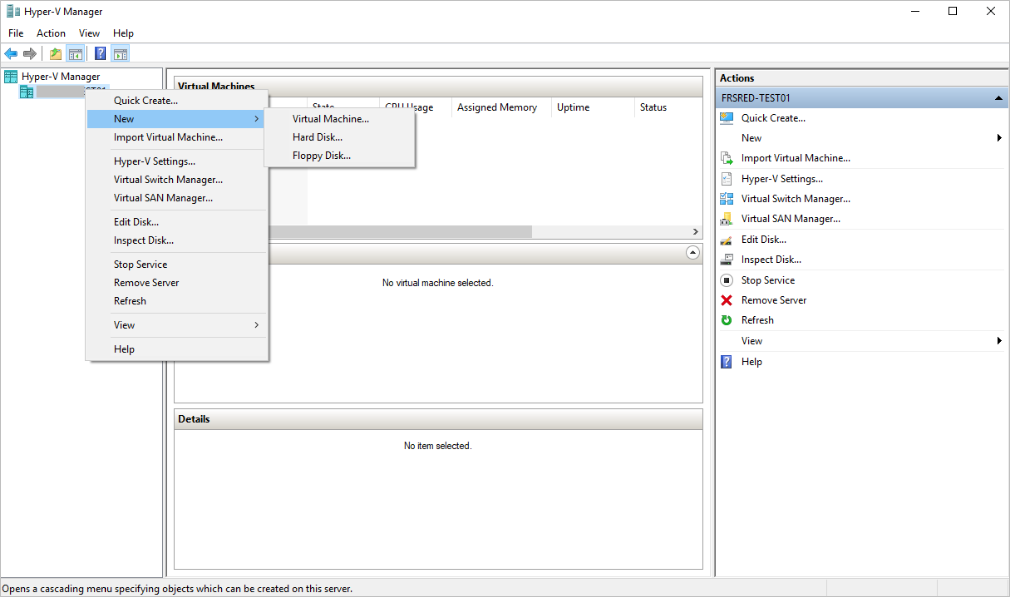
Open the Hyper-V Manager.
-
In the left panel, right-click on the server and select New, and then Virtual Machine....
-
In the wizard welcome page, click Next.
-
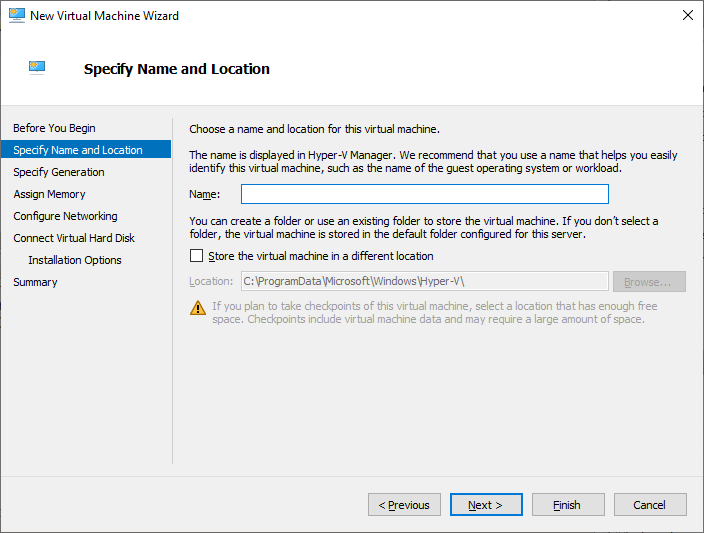
Enter a Name for your virtual machine and click Next.
-
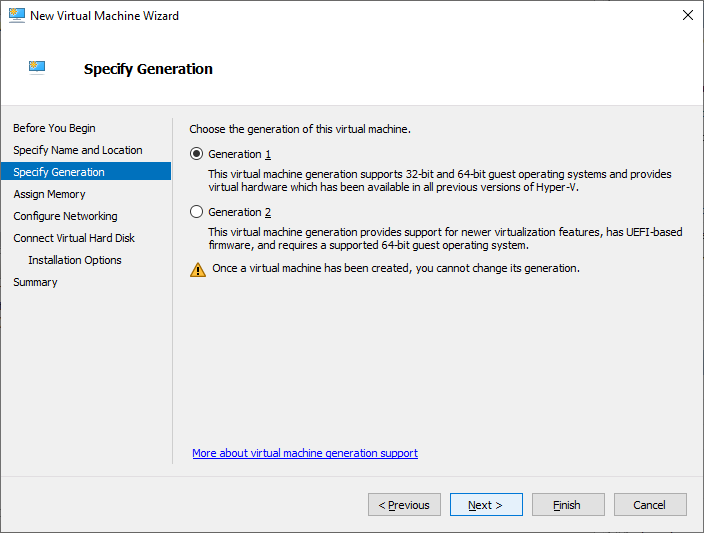
In the Specify Generation page, select Generation 1 and click Next.
Note: A Generation 1 virtual machine includes IDE controllers as well as SCSI controllers. The SCSI drives are not bootable because the virtual SCSI controller cannot be loaded before the OS kernel.It also includes the Legacy Network Adapter which is the only network adapter that can be used as a boot device.
The emulated hardware's firmware is a BIOS in which you can set the order of boot devices.
-
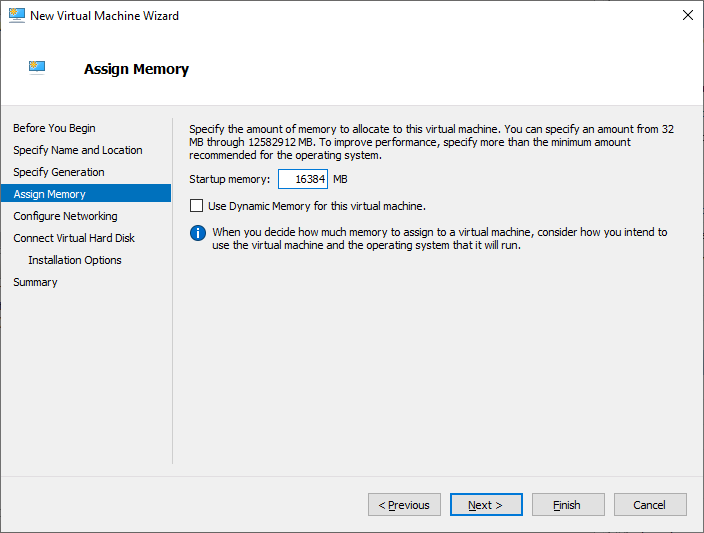
In the Assign Memory page, enter 16384 (MB) as the memory required by the virtual appliance.
-
Clear the Use Dynamic Memory for… option and click Next.
-
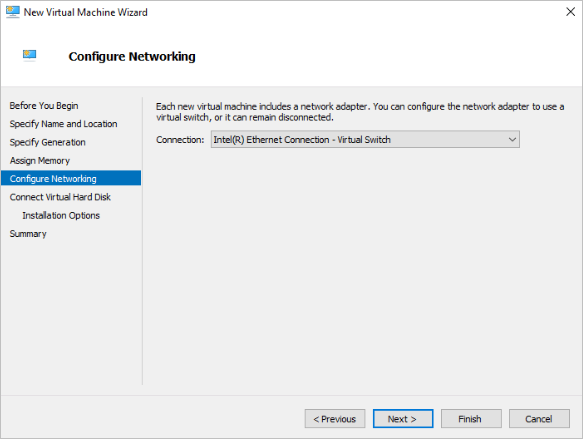
In the Configure Network page, from the drop-down list, select the virtual switch you created in the previous section and click Next.
-
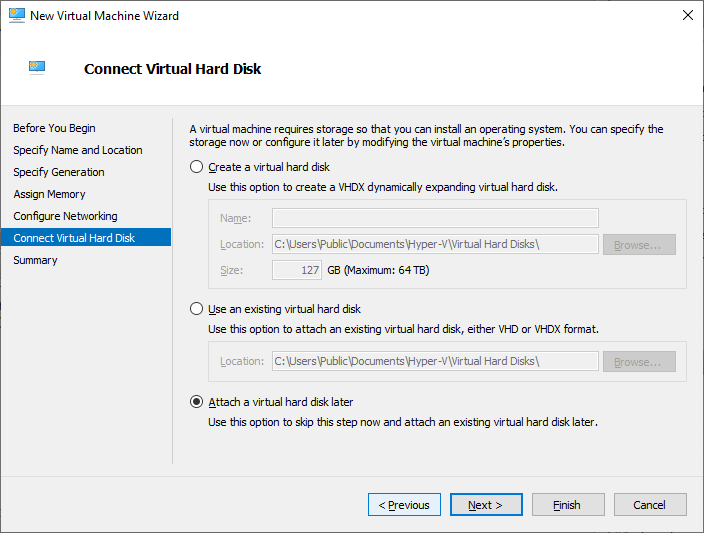
In the Connect Virtual Hard Disk page, select Attach a virtual disk later and click Next.
-
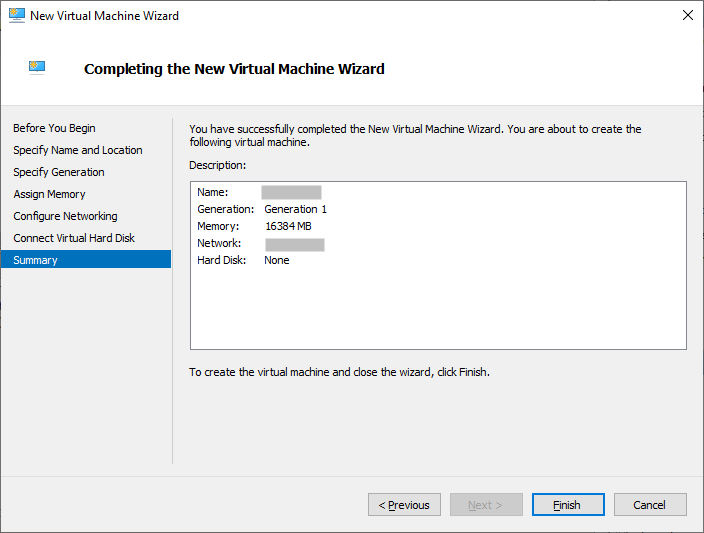
Verify that the Summary is correct and click Finish.
Configuring the Virtual Appliance
To configure the virtual machine for ActivID Appliance, you need to:
-
-
BIOS
-
CPU
-
Hard drives
-
-
Install the ActivID Appliance on the virtual machine
Configure the VM Settings
-
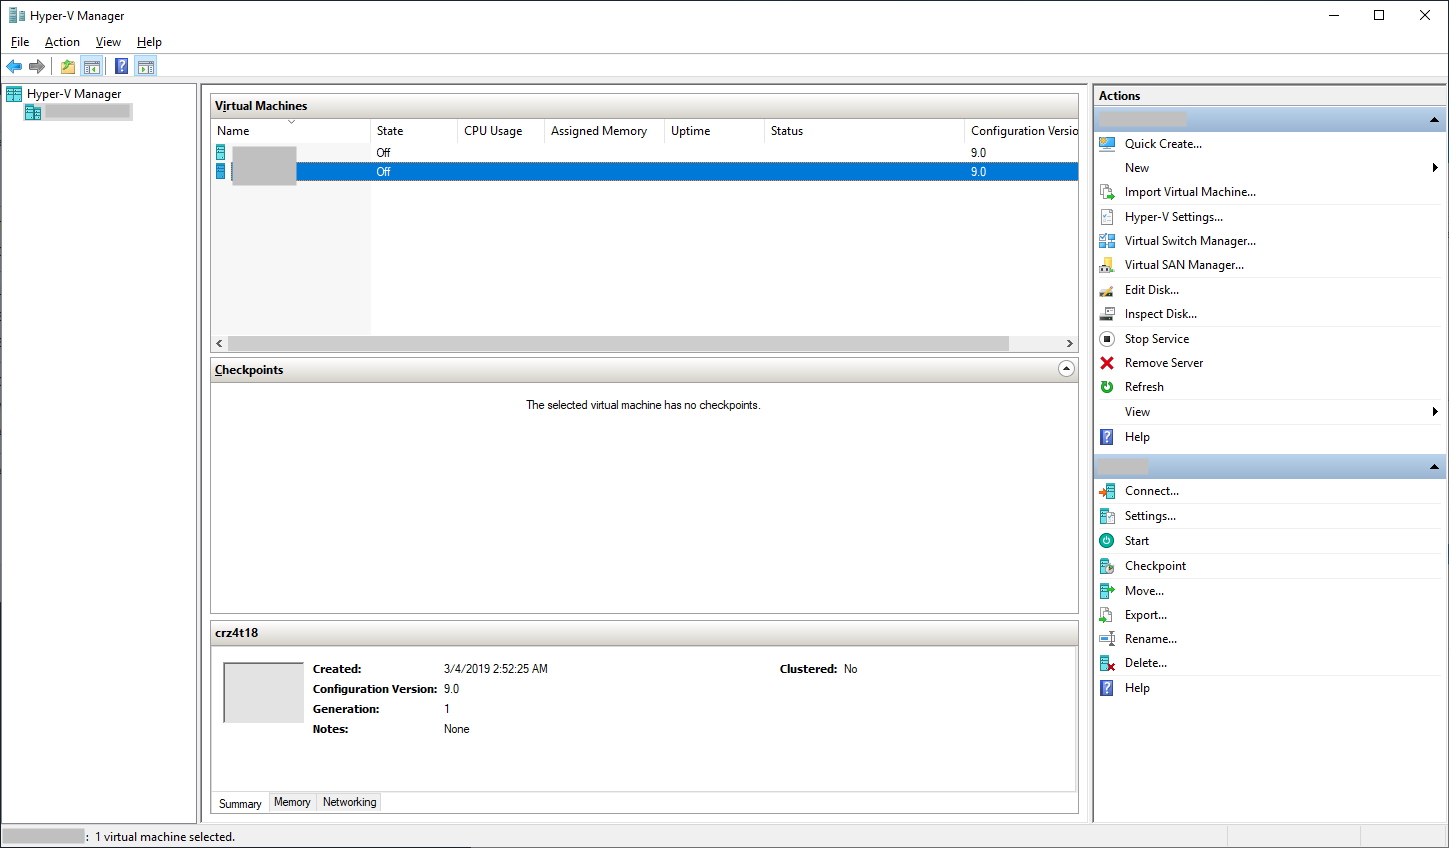
Open the Hyper-V Manager.
-
In the list of Virtual Machines, right-click on your machine and select Settings.
-
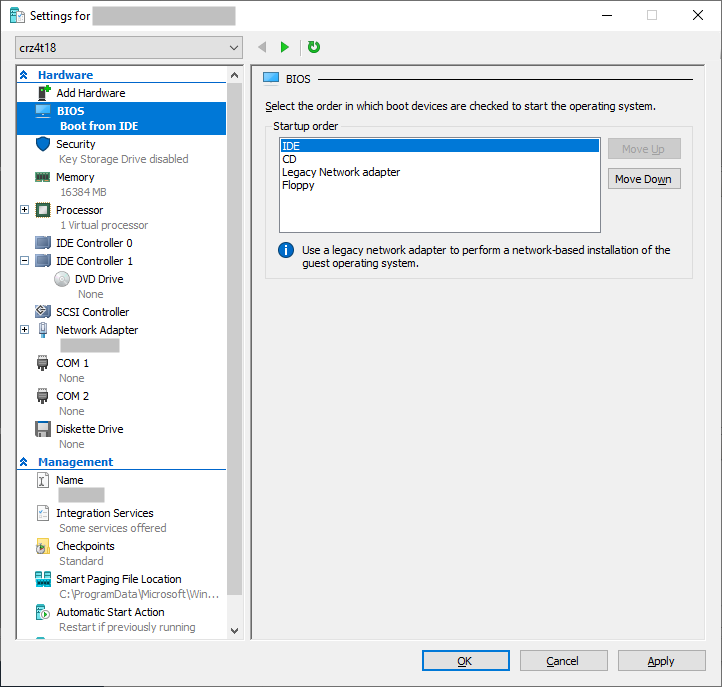
In the left panel, select BIOS and set the boot order by moving IDE to the first position, and then CD to the second.
In this configuration:
-
At the first boot, the CD will be loaded because the IDE disks are empty
-
After installation, the machine will boot on the correct IDE disk
-
-
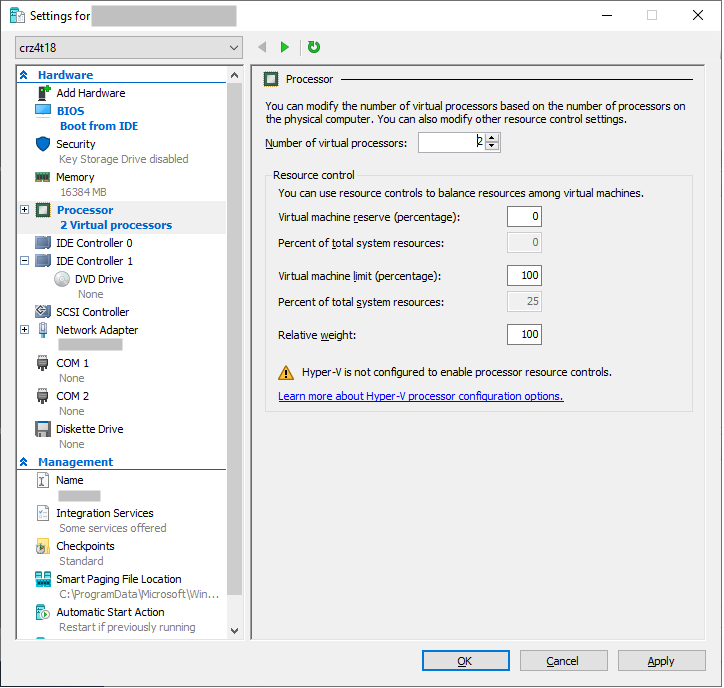
In the left panel, select Processor and set the Number of virtual processors to 2.
-
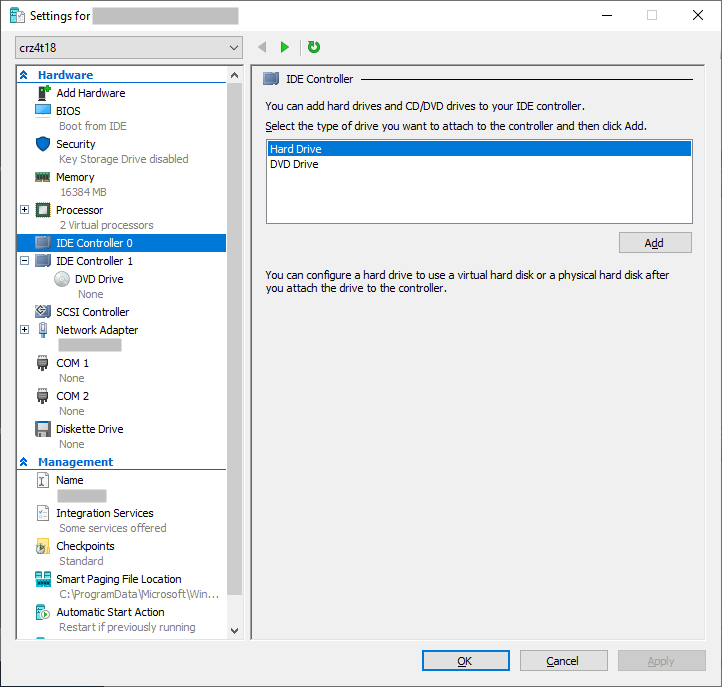
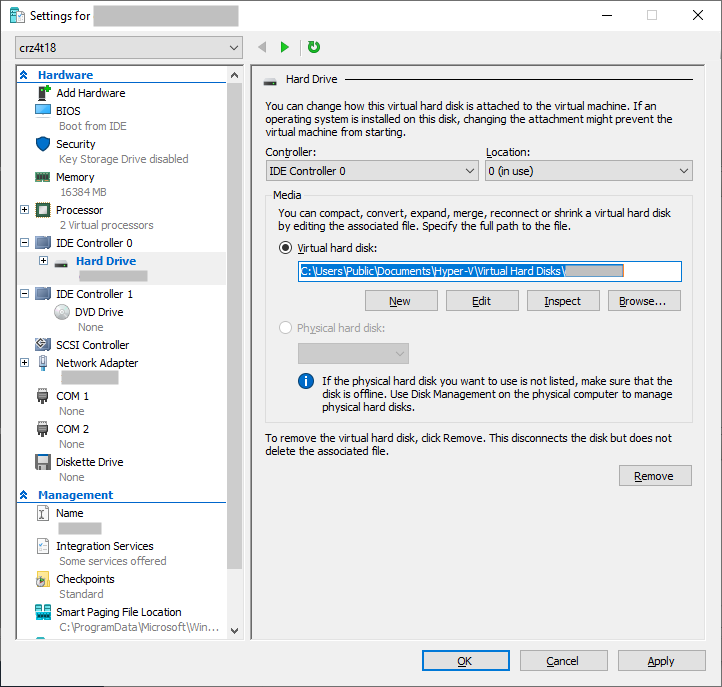
In the left panel, select IDE Controller 0 and then Hard Drive as the type of drive, and click Add.
Your new hard drive should be allocated to IDE Controller 0, with Location 0 (as illustrated above).
-
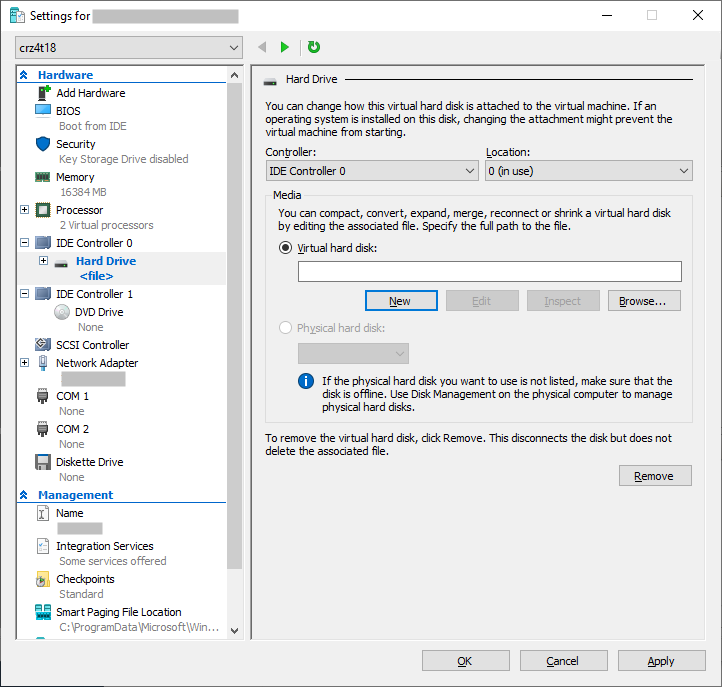
Click New to create a new disk and, in the wizard, click Next.
-
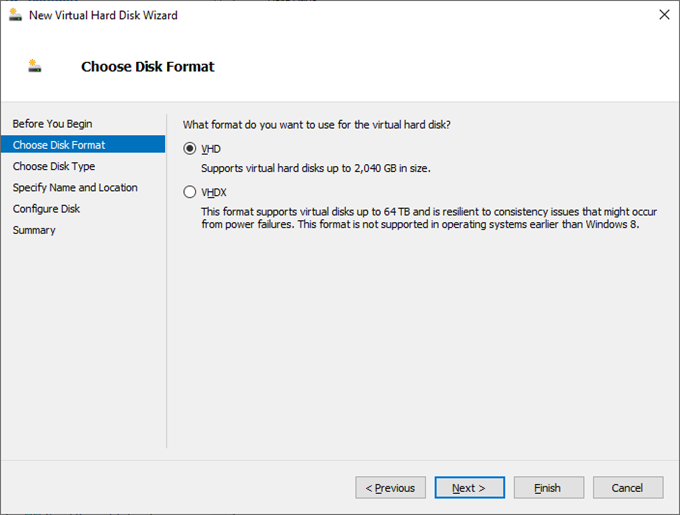
Select VHD as the disk format and click Next.
-
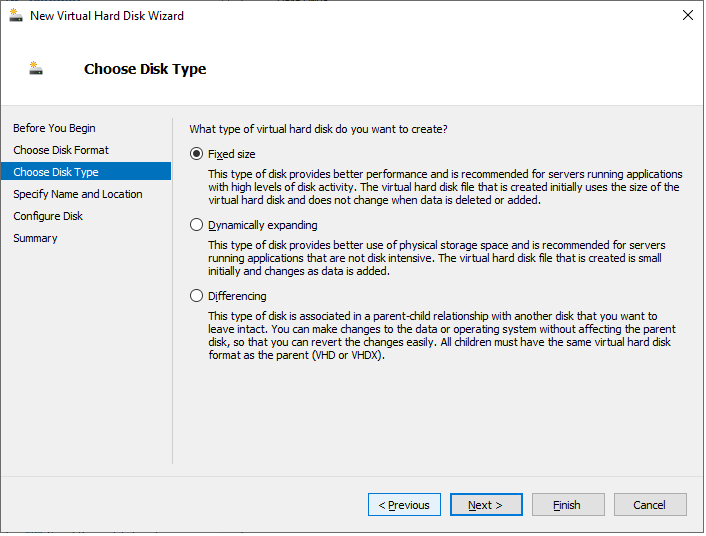
Select Fixed size as the virtual disk type and click Next.
-
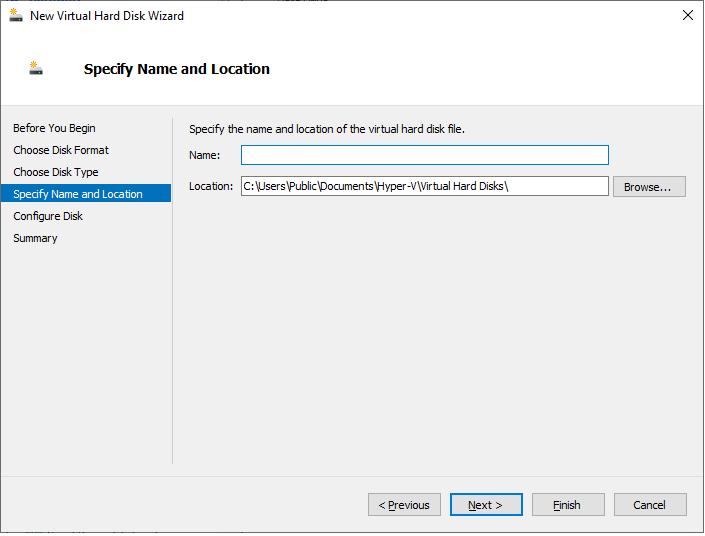
Enter a Name for the disk and select a Location, and then click Next.
-
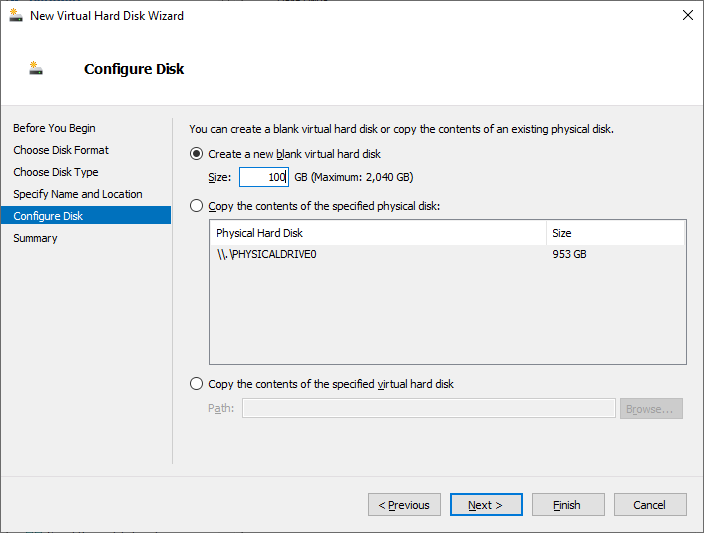
Select to Create a new blank virtual hard disk and set the disk size to 100 (GB), and complete the wizard instructions.
-
Select IDE Controller 0 again and repeat steps 5 and onwards to add a second hard drive in the IDE Controller 0 (allocated to Location 1).
Important: Before proceeding, make sure that you have created two drives.IDE Controller 0 should have two hard drives, where the second hard drive is allocated to Location 1.
-
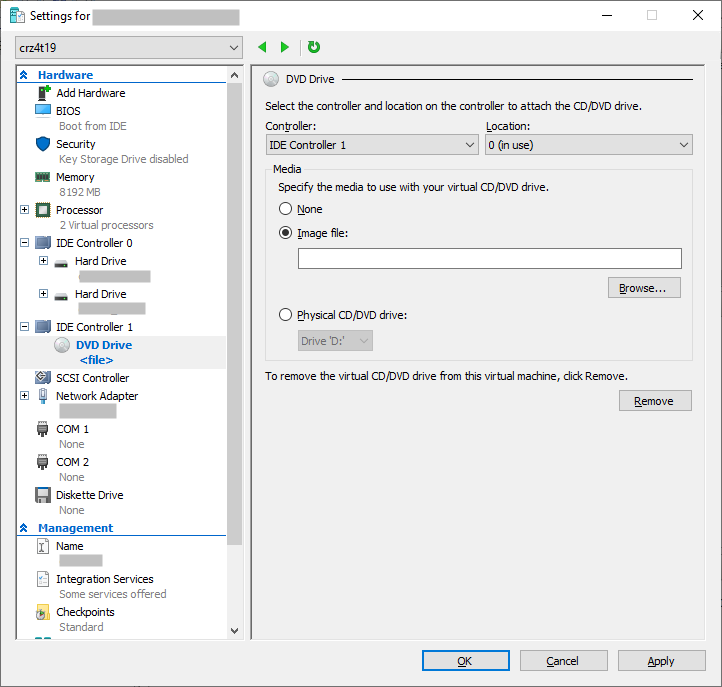
In the left panel, select IDE Controller 1 and then DVD Drive as the disk type.
-
Under Media, select Image file and then browse to the ActivID-Appliance_8.0.0.492.iso.
-
Click Apply and then OK to save your configuration.
An initial automatic checkpoint is created for this VM (Initial).
Install the ActivID Appliance
-
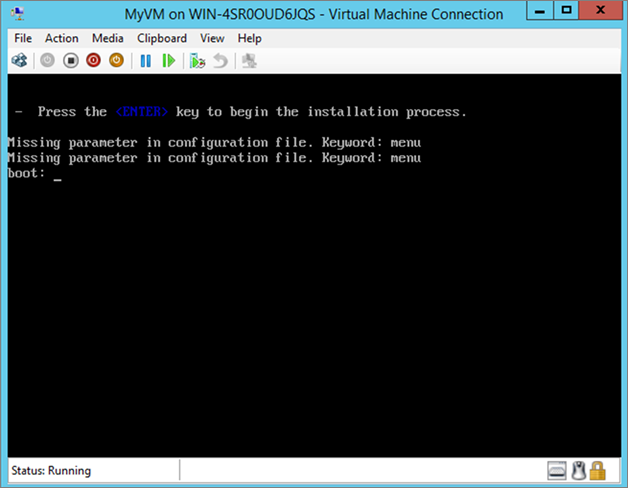
In the Hyper-V Manager, start the virtual machine.
-
Press ENTER.
-
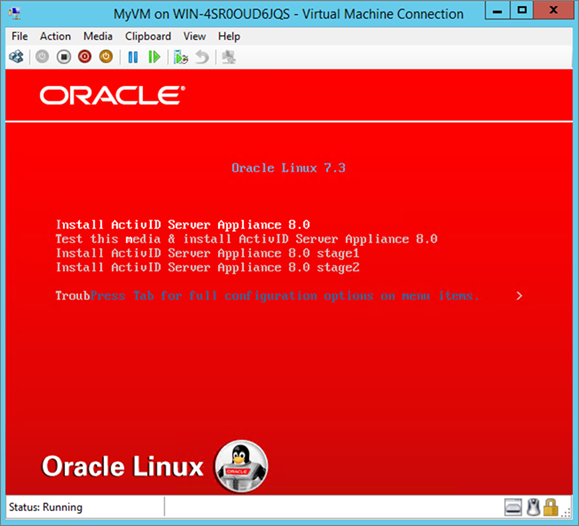
Select Install ActivID Server Appliance 8.0 (the first option) to launch the installation.
During the installation process, the virtual machine restarts once.
When the installation is finished, the virtual machine shuts down.
-
Create a new checkpoint (for example, First install).
Configure the Virtual Appliance for Azure Migration
-
Log on to the virtual appliance using the appadmin account and then switch to root.
-
Get the Microsoft Azure Linux Guest Agent from GitHub:
Copywget https://github.com/Azure/WALinuxAgent/archive/v2.2.35.zip
-
Unzip the distribution in the current repository:
Copyunzip v2.2.35.zip
-
Go to the distribution folder:
Copycd WALinuxAgent-2.2.35
-
Get the specific distribution script file:
Copywget https://bootstrap.pypa.io/get-pip.py
-
Run the python script to get the python packages (pip, setuptools and wheel):
Copypython get-pip.py
-
Execute the following command to check that the network is turned on:
Copy/sbin/chkconfig network on
-
Edit the /etc/default/grub file and modify the
GRUB_CMDLINE_LINUXparameter as follows to add additional kernel parameters for Azure:rootdelay=300 console=ttyS0 earlyprintk=ttyS0 net.ifnames=0
-
Remove the "rhgb" and "quiet" parameters from the
GRUB_CMDLINE_LINUXparameter.
-
Run the following command to regenerate the grub configuration:
Copysudo grub2-mkconfig -o /boot/grub2/grub.cfg
-
Modify /etc/ssh/sshd_config to update the ClientAliveInterval setting:
ClientAliveInterval 180
-
Install the WAAgent:
Copycd WALinuxAgent-2.2.35
sudo python setup.py install
-
Check the version of the installed agent:
Copywaagent –versionIt should return:
CopyWALinuxAgent-2.2.35.1 running on oracle 7.3
Python: 2.7.5
Goal state agent: 2.2.35.1
-
Check agent’s configuration and turn on the service:
Copy/sbin/chkconfig waagent on
-
Update the agent’s settings in /etc/waagent.conf:
Provisioning.DeleteRootPassword=n
ResourceDisk.Format=y
ResourceDisk.Filesystem=ext4
ResourceDisk.MountPoint=/mnt/resource
ResourceDisk.EnableSwap=y
ResourceDisk.SwapSizeMB=8192
-
Execute the following command to prepare the export:
Copysudo waagent -force -deprovisionThis command:
-
Stops the waagent service
-
Deletes all SSH host key pairs
-
Deletes cached DHCP leases
-
Disables the root password
-
Deletes the /etc/resolv.conf file
-
Sets the primary network interface to eth0
-
-
Execute the following command:
Copyexport HISTSIZE=0
-
Exit and shutdown the virtual machine, and create the final checkpoint (for example, Ready to export).
Create the Azure Migration VHD Files
For each virtual disk you created, you should have a main VHD file (corresponding to the disk) and .avhd files corresponding to the checkpoints.
For example:
-
Disk1.vhd – the main VHD file
-
Disk1_<Initial>.avhd – checkpoint 1
-
Disk1_<First install>.avhd – checkpoint 2
-
Disk1_<Ready to export>.avhd – checkpoint 3
-
Copy the .avhd files to a dedicated temporary repository.
-
Change the file extension of checkpoint 3 (Ready to export) from .avhd file to .vhd.
-
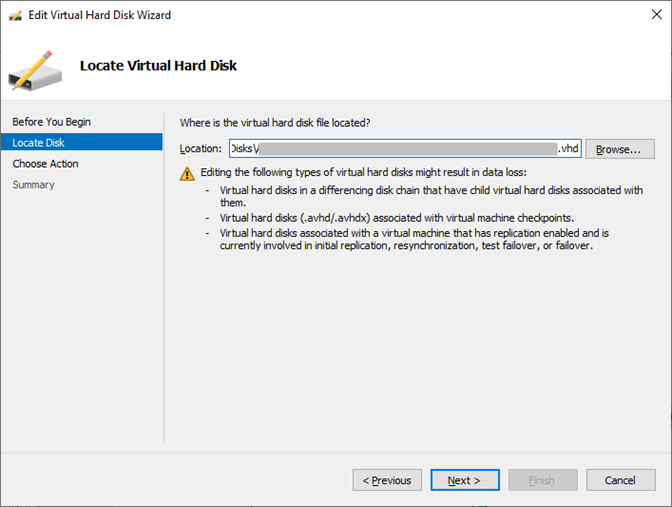
In the Hyper-V Manager, select Action and then Edit Disk, and click Next to start the wizard.
-
Select the checkpoint 3 file for which you just modified the extension and click Next.
-
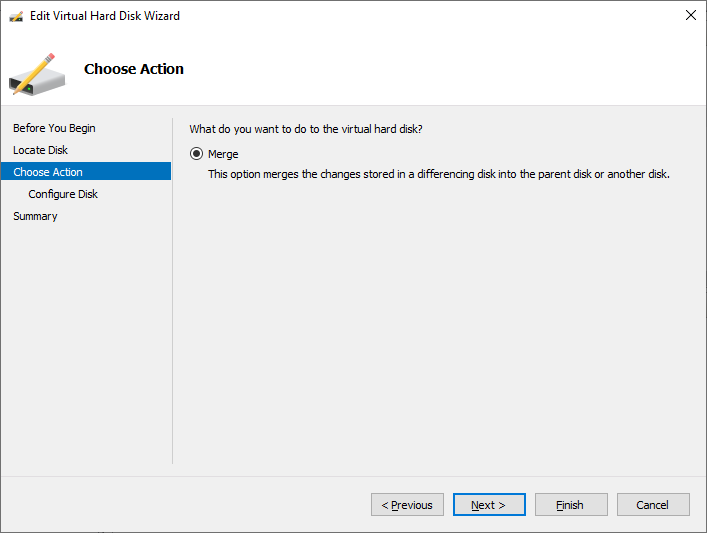
Select Merge and click Next.
-
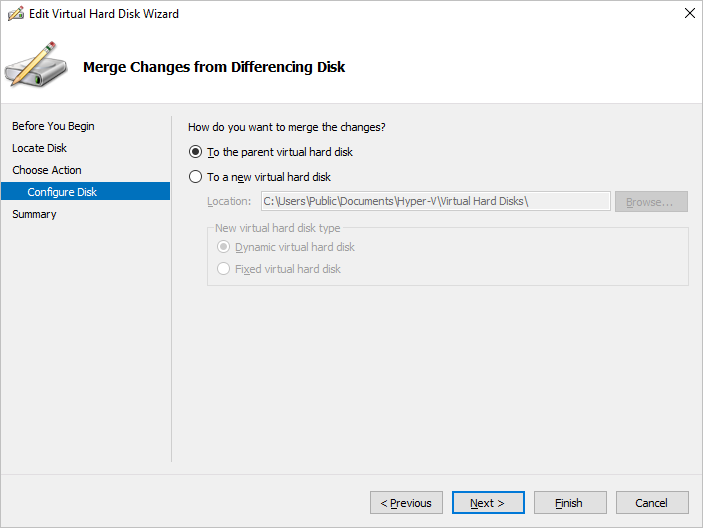
Keep the To the parent virtual hard disk merging option and click Next.
-
In the summary, make sure the selected Parent is checkpoint 2 (First install).
-
Click Finish to complete the merge.
Note: The checkpoint 3 file is deleted after the merge.
-
Change the file extension of checkpoint 2 (First install) from .avhd file to .vhd.
-
Repeat the above steps to merge checkpoint 2 (First install) with checkpoint 1 (Initial).
-
Change the file extension of checkpoint 1 (Initial) from .avhd file to .vhd.
-
Repeat the above steps to merge checkpoint 1 (Initial) with the main VHD file.
-
Repeat the merge steps for the second virtual disk.
When completed, you should have two main VHD disks:
-
Disk1.vhd
-
Disk2.vhd
Convert the VHD Files for Azure Migration
To make sure that the format is compatible for import to Azure, convert the main VHD disk file to the .vhd format:
-
In the Hyper-V Manager, select Action and then Edit Disk, and click Next to start the wizard.
-
Select the main VHD disk file and click Next.
-
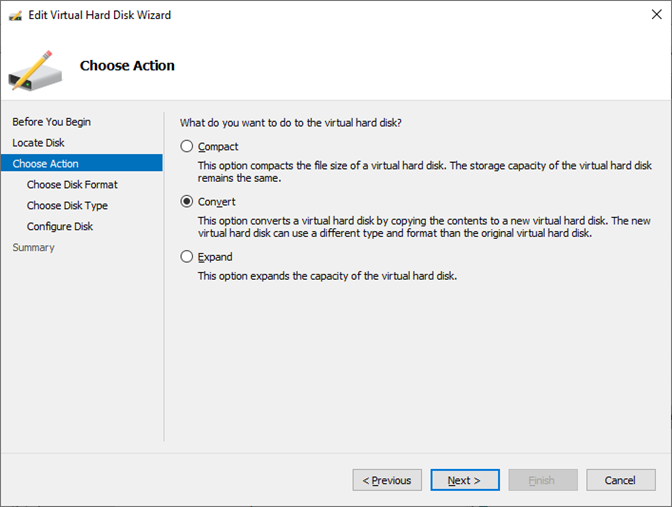
Select Convert and click Next.

-
Keep the VHD formatting option and click Next.
-
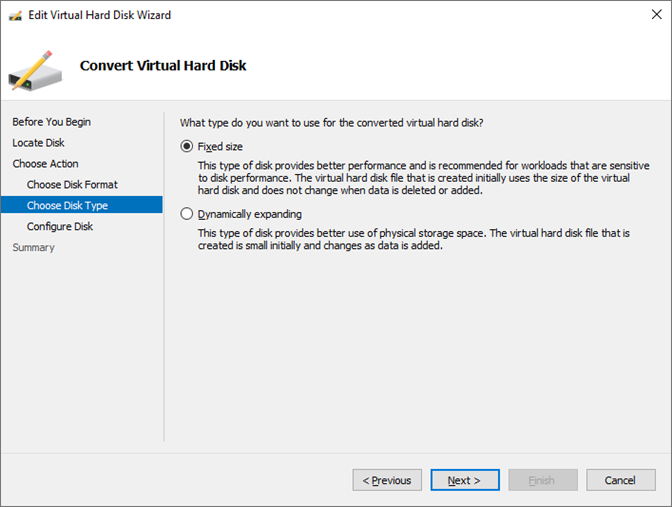
Keep the Fixed size option and click Next.
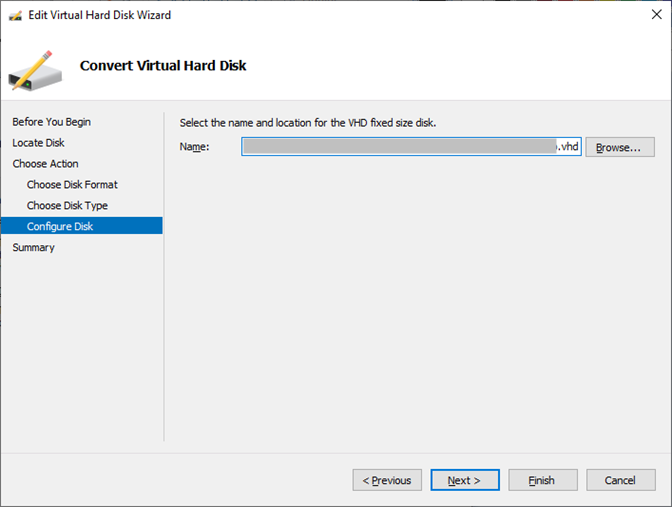
-
Enter the name and location for the output file that will be used to import the virtual machine into Azure and click Next.
-
Click Finish to complete the formatting.
-
Repeat the conversion steps for the second virtual disk.
Import the Virtual Disk Files into Azure
You can import the virtual disk files using the Microsoft Azure Storage Explorer as described in https://azure.microsoft.com/fr-fr/features/storage-explorer/.
Import the VHD disk files into the Storage Account of your Resource Group.
For further instructions, go to:
https://docs.microsoft.com/fr-fr/azure/storage/common/storage-account-overview
https://docs.microsoft.com/fr-fr/azure/azure-resource-manager/resource-group-overview
Create a Managed Disk in Azure
You already have an Azure account with the required rights to create an image and publish a new virtual machine.
You have uploaded the VHD disk files and they are ready to be used.
-
Connect to the Microsoft Azure portal, select your Resource group and click Add.
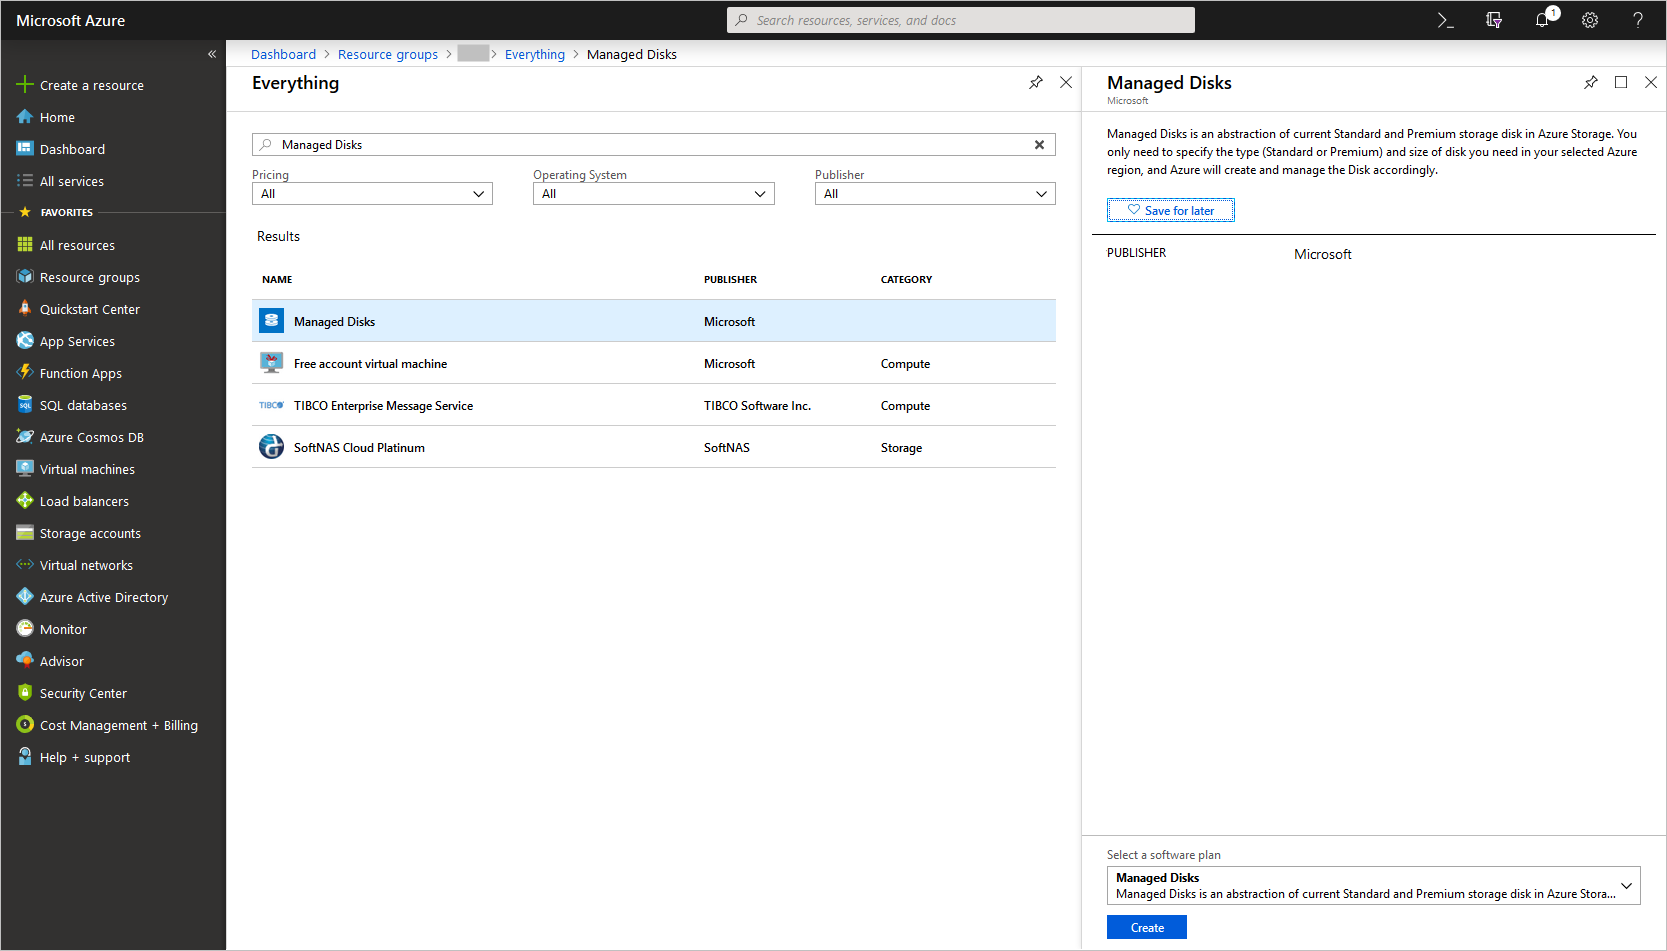
-
Search for Managed Disks and then click Create.
-
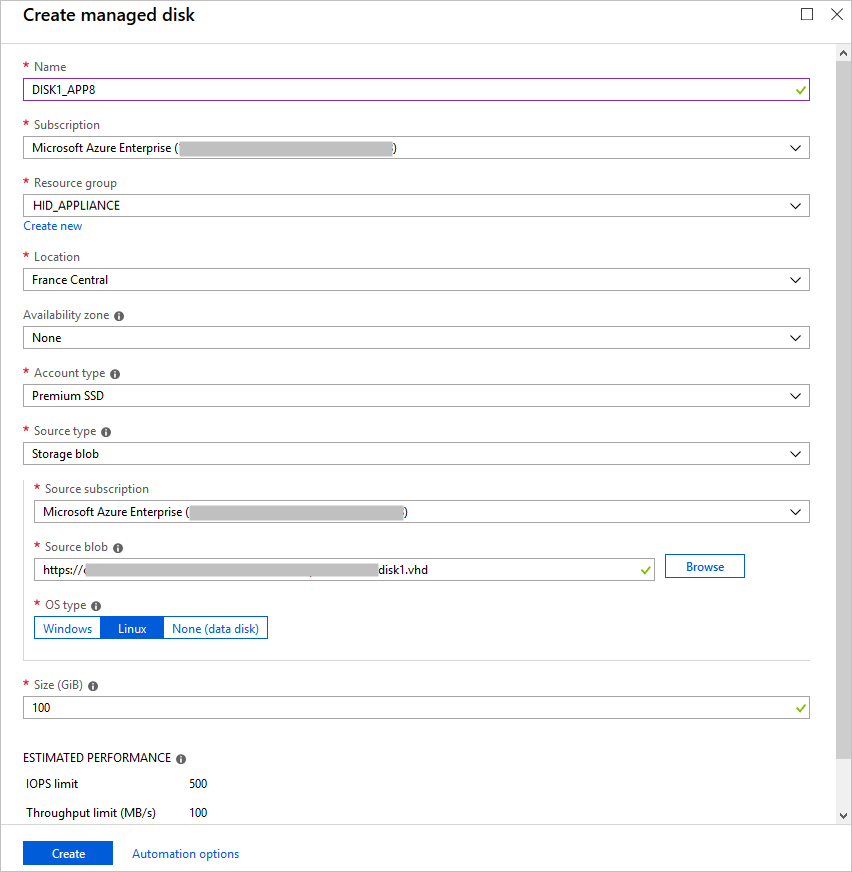
Enter a name for the disk and select the Resource group.
-
Select Storage blob as the Source type and browse to your first VHD file (in this example, Disk1.vhd).
-
Select Linux as the OS type, enter 100 GB for the disk Size and click Create.
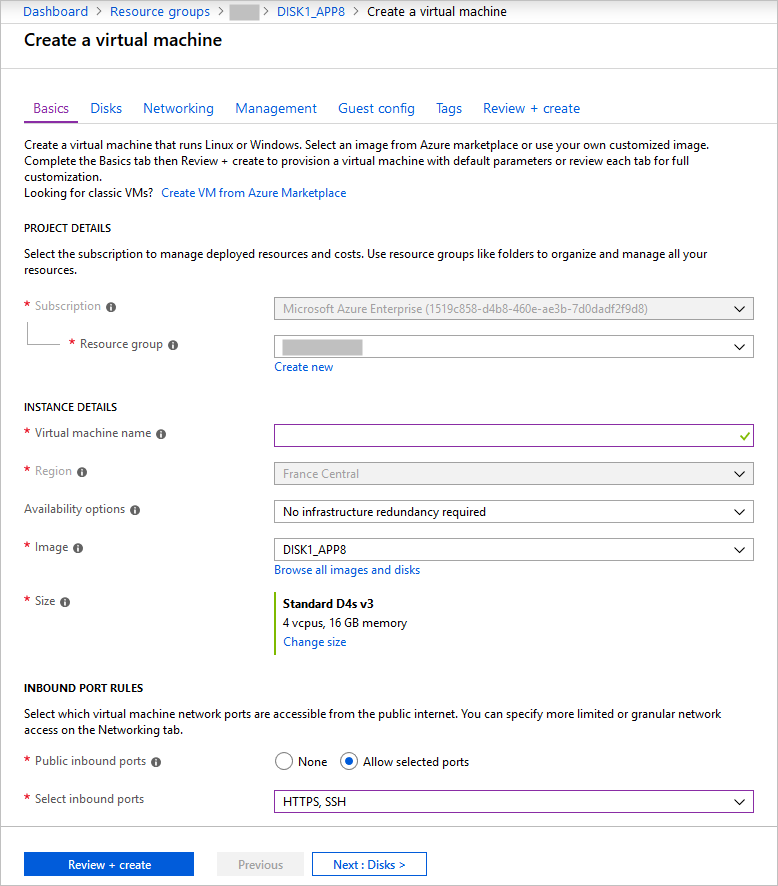
Create a New Virtual Machine in Azure
-
In the Microsoft Azure portal, refresh your resources and select the managed disk you just created.
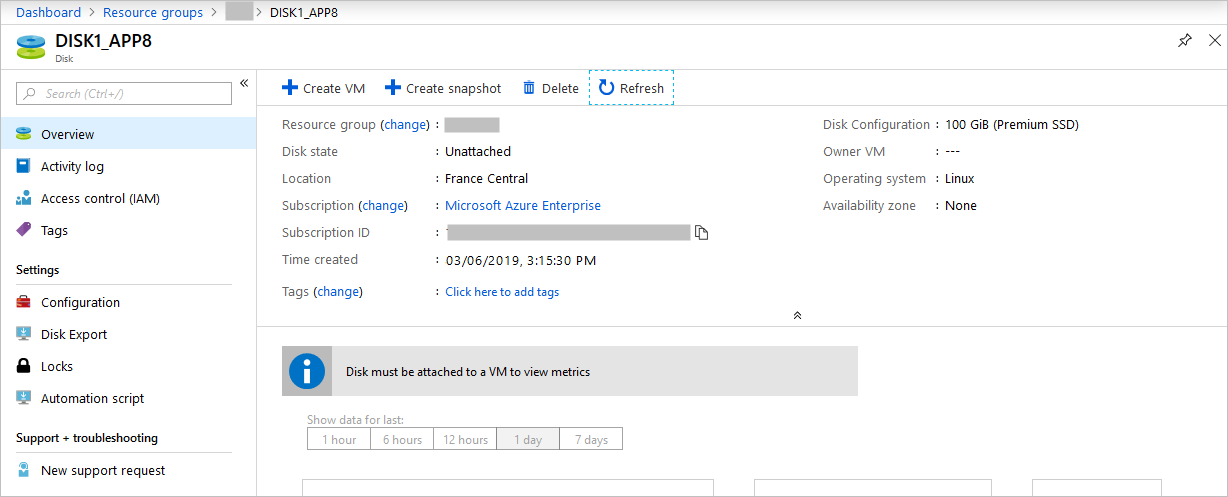
-
Click Create VM.
-
Select the Resource group and enter a name for the virtual machine.
-
Make sure the correct disk is selected in the Image field.
-
Select a Size for your virtual machine. It is recommended that you use the Standard D4s v3 type.
-
Select Allow selected ports and select HTTPS, SSH as the inbound ports and click Next : Disks.
-
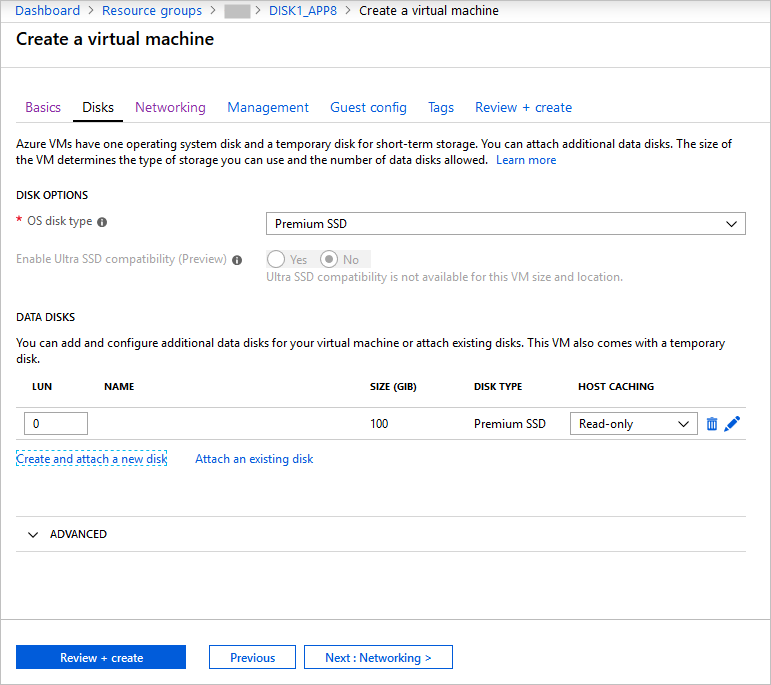
Under Data Disks, select Create and attach a new disk.

-
Enter a Name for the new disk and select Storage blob as the Source type.
-
For the Storage blob, browse to the second VHD that you imported (in this example, Disk2.vhd), and then click OK.

-
For Host Caching option for the new disk, select Read/write and then click Next : Networking.
-
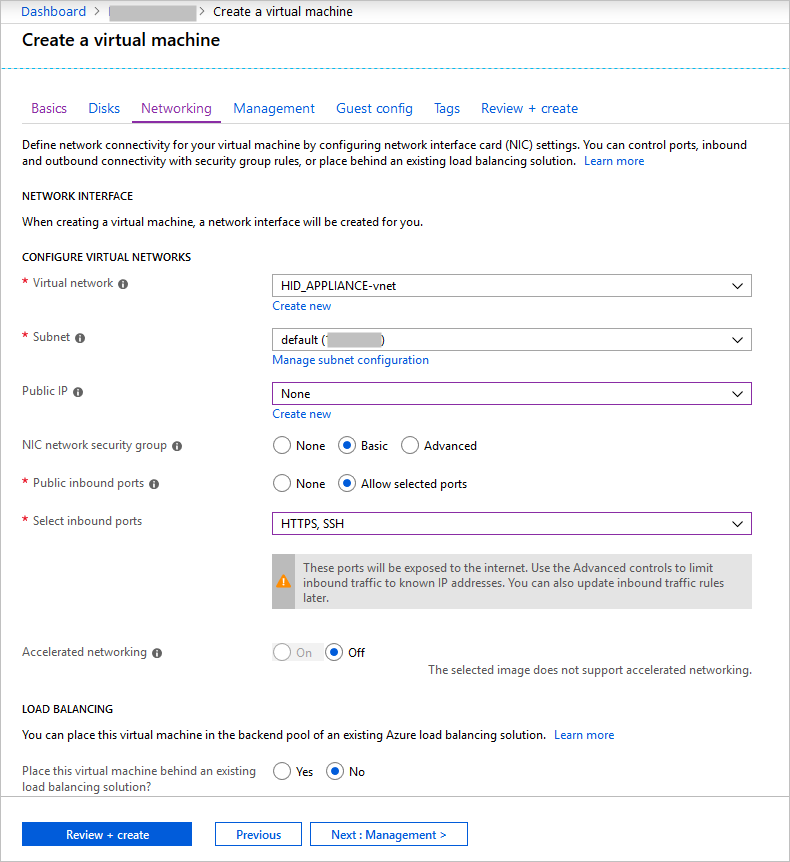
In the Networking tab, select HTTPS, SSH as an inbound ports, keep the default values for the other settings and click Next.
-
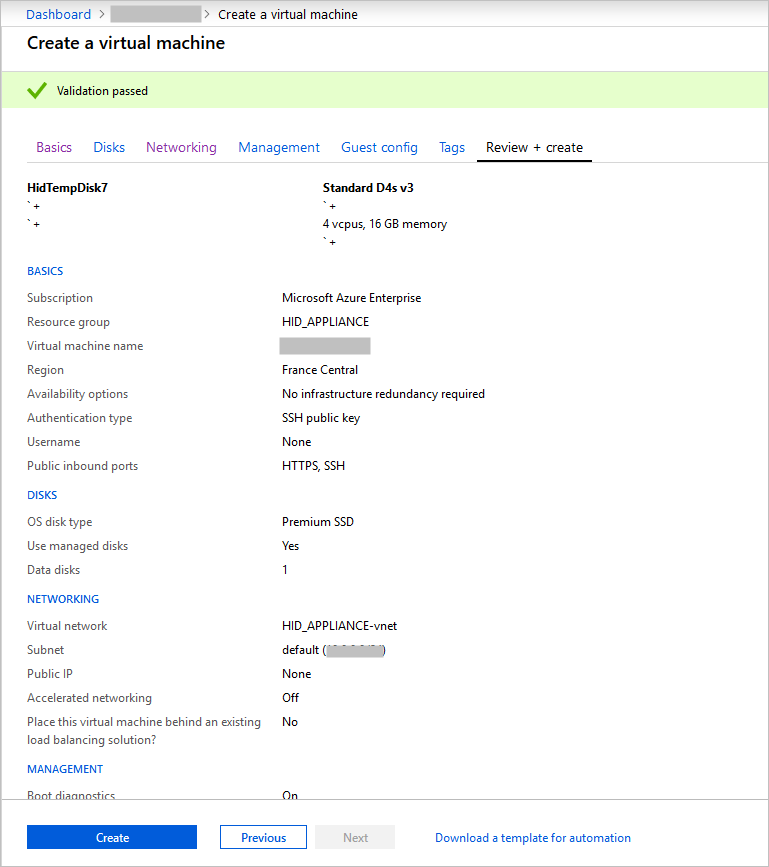
Proceed to the Review and create tab, keeping the default values in the Management, Guest config and Tags tabs.
-
Review the settings and click Create to create the virtual machine.
Configure the Azure VM Network Settings
-
In the Microsoft Azure portal, refresh your resources and select the virtual machine.
-
Select the Serial console.

-
Connect to the ActivID UNIX Terminal Console using the appadmin account.
-
Run the configure_network.sh script to update the virtual machine network configuration to the Azure network.
Your VM is now ready for initialization (see Initializing the ActivID Appliance).


