Initializing the ActivID Appliance
Once the appliance network is configured via the ActivID UNIX Terminal, you can log on to the ActivID Console to initialize the appliance (set the installation type, add security domains, etc.).
Access the ActivID Console
-
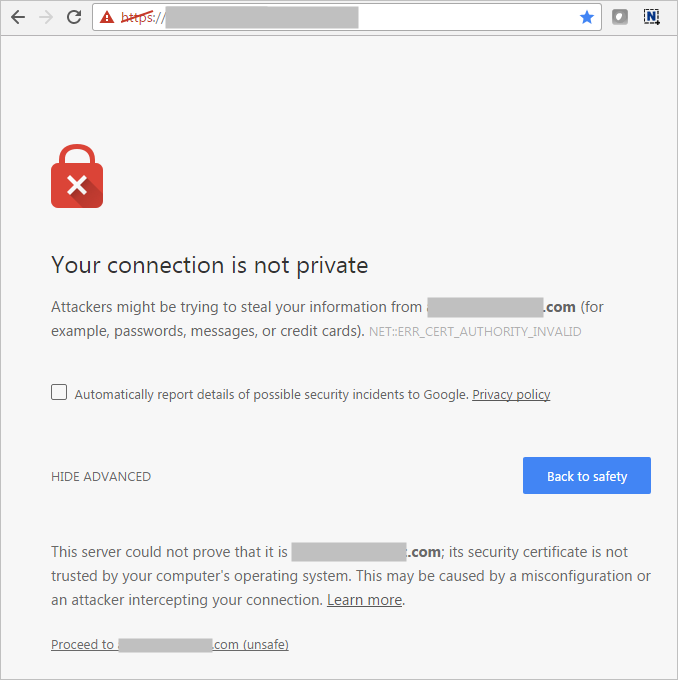
From any browser, access the ActivID Console using the following URL:
https://<appliance-hostname>:1005
The first time you access the ActivID Console, you are prompted to trust the connection to the site.
-
Click Proceed to <appliance site>.
-
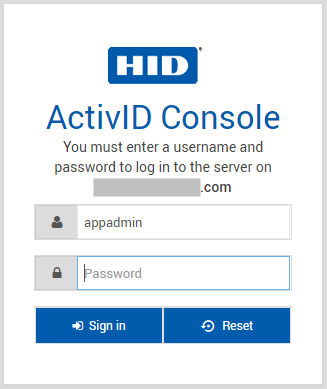
Enter the credentials for the Appliance Administrator account (appadmin and the password you set during the initial configuration using the UNIX terminal).
Installing the ActivID Appliance 8.6
If you are installing ActivID Appliance 8.6 on a virtual machine, make sure that at least 16 GB RAM is allocated to the VM
The update packages specified in the following sections are available for upload.
They can be obtained from HID Global Technical Support or on the ActivID Appliance Service Pack delivery disks, in the ActivID-Service-Pack folder
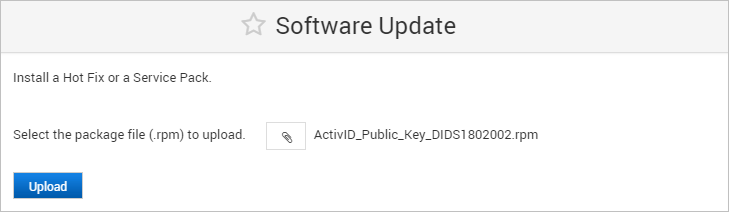
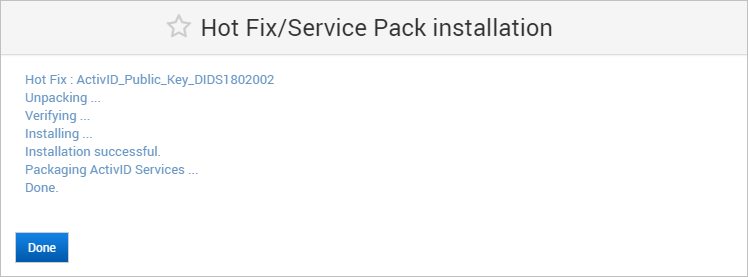
Install the ActivID Public Key
-
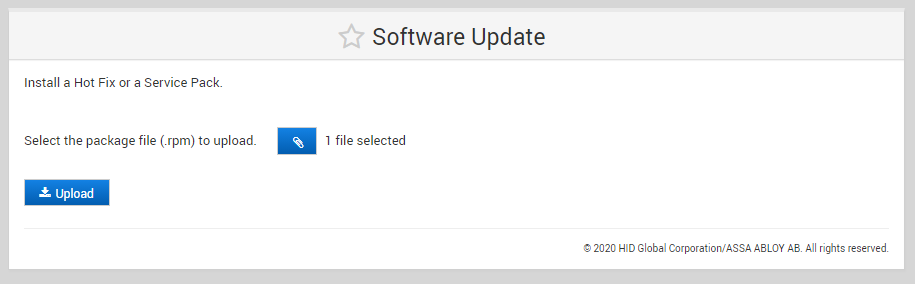
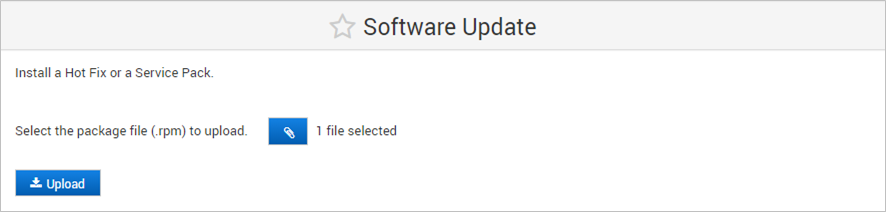
Under Appliance in the left-side menu, select Software Update.
-
Select the ActivID_Public_Key_DIDS1802002.rpm update package and click Upload.
Note: This package is available from HID Global Technical Support.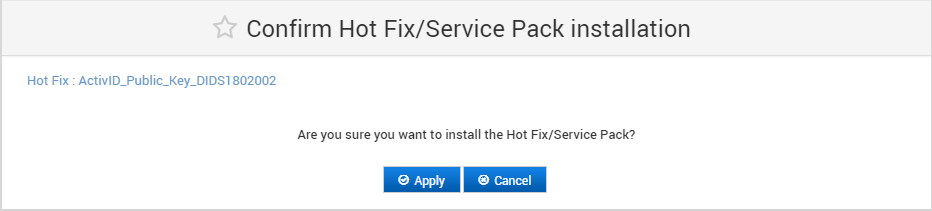
-
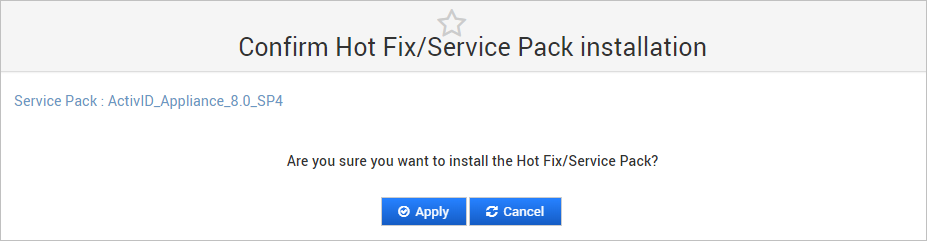
Click Apply.
-
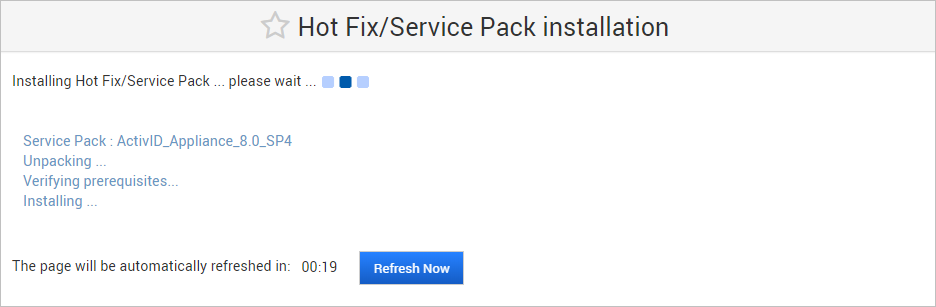
When the update is complete, click Done.
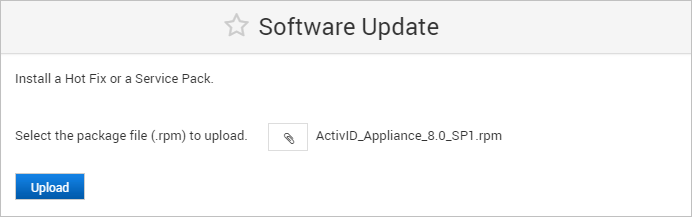
Install the ActivID Appliance 8.0.1 (8.0 SP1)
-
Under Appliance in the left-side menu, select Software Update.
-
Select the ActivID Appliance 8.0.1 (8.0 SP1) (ActivID_Appliance_8.0_SP1.rpm) update package and click Upload.
-
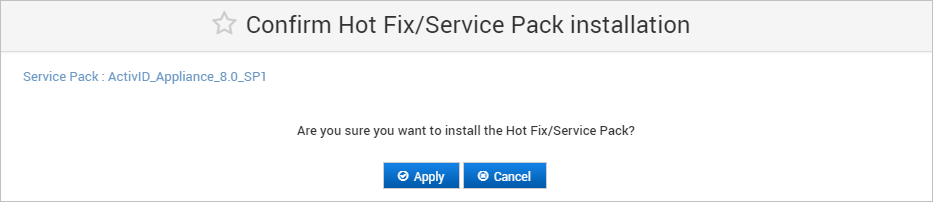
Click Apply.

-
When the update is complete, click Done.
-
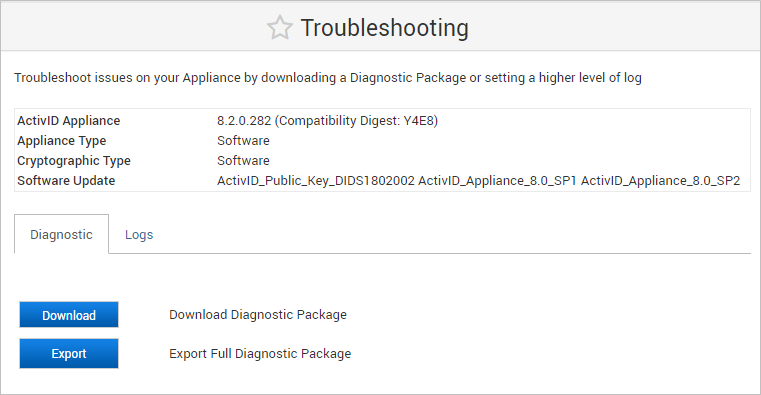
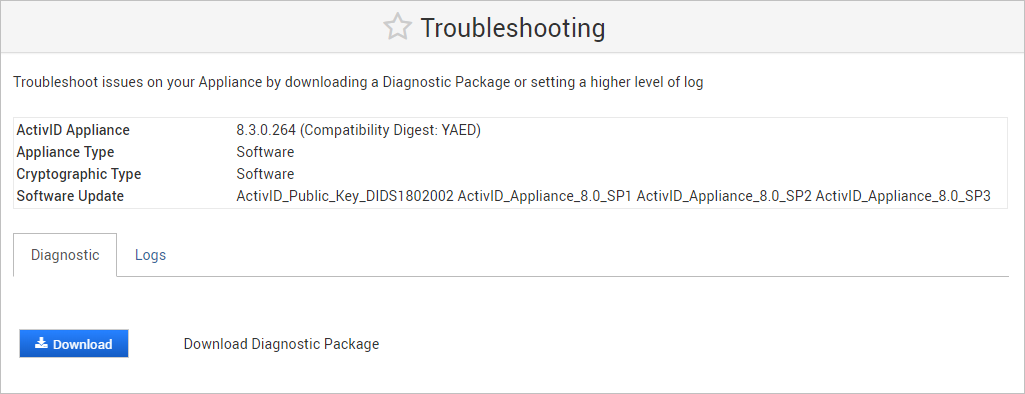
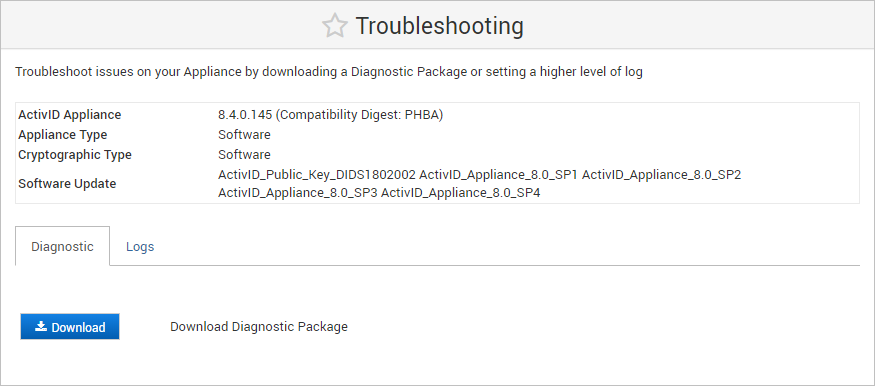
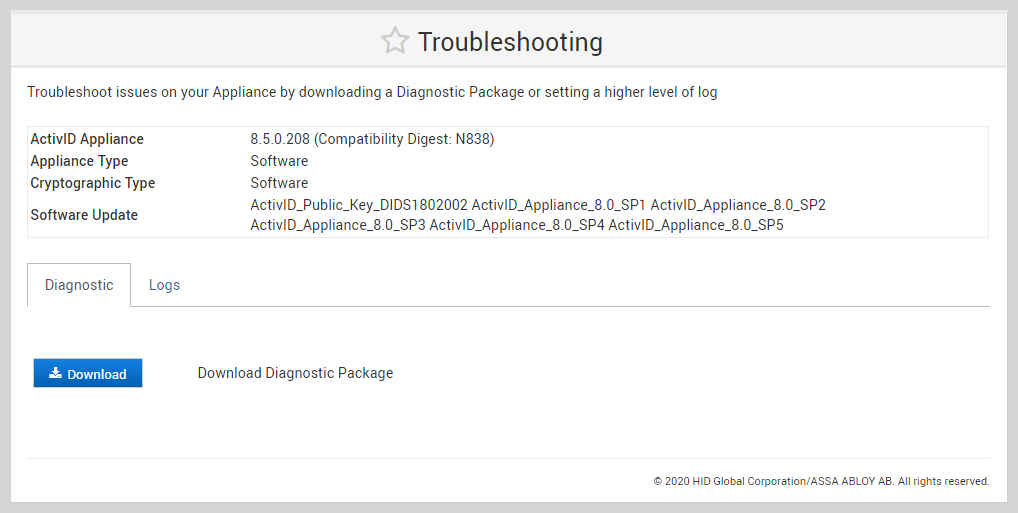
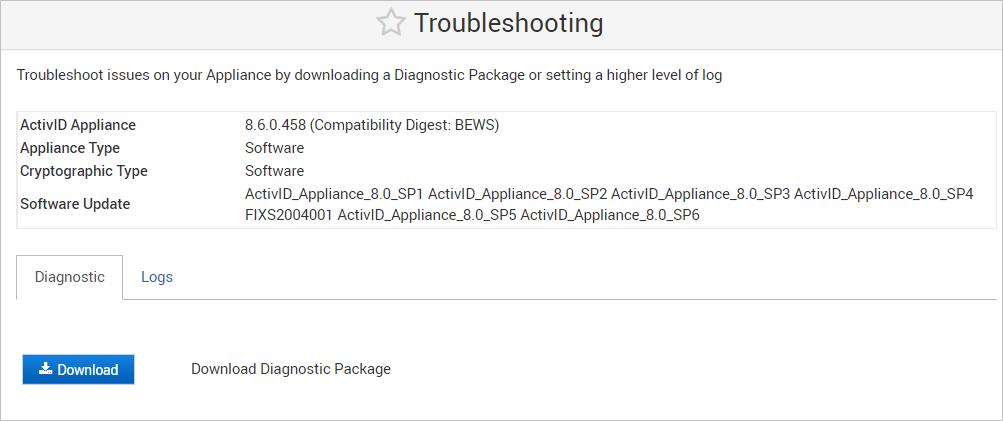
Verify that the product version has been updated by selecting the Applications page (under Configuration in the left menu) at least once after the update. This action refreshes the version.
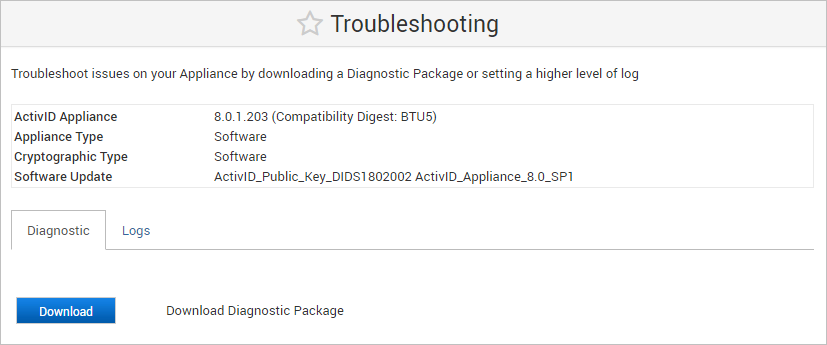
The appliance version can be viewed in the Troubleshooting page.
-
Reboot the appliance.
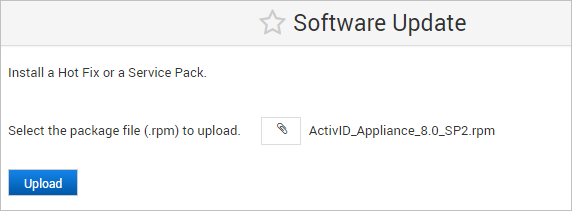
Install the ActivID Appliance 8.2 (8.0 SP2)
-
Under Appliance in the left-side menu, select Software Update.
-
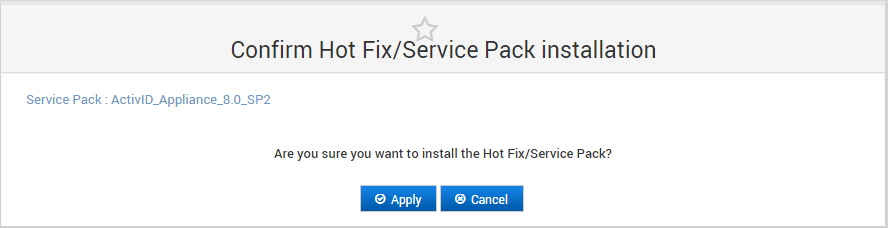
Select the ActivID Appliance 8.2 (8.0 SP2) (ActivID_Appliance_8.0_SP2.rpm) update package and click Upload.
-
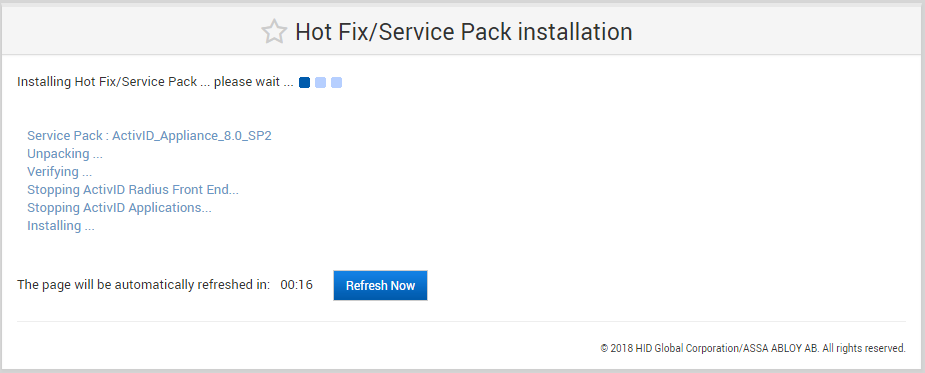
Click Apply.
-
When the update is complete, click Done.
-
Verify that the product version has been updated by selecting the Applications page (under Configuration in the left menu) at least once after the update. This action refreshes the version.
The appliance version can be viewed in the Troubleshooting page.
-
Reboot the appliance.
Install the ActivID Appliance 8.3 (8.0 SP3)
-
Under Appliance in the left-side menu, select Software Update.

-
Select the ActivID Appliance 8.3 (8.0 SP3) (ActivID_Appliance_8.0_SP3.rpm) update package and click Upload.
-
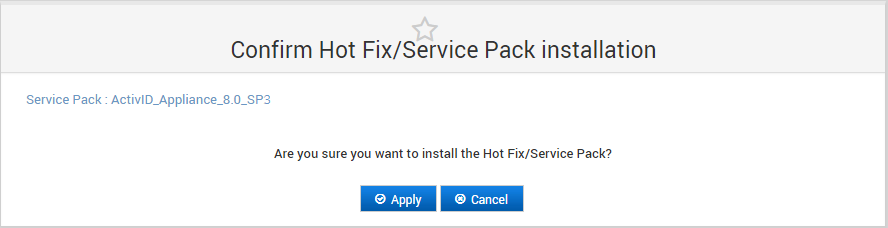
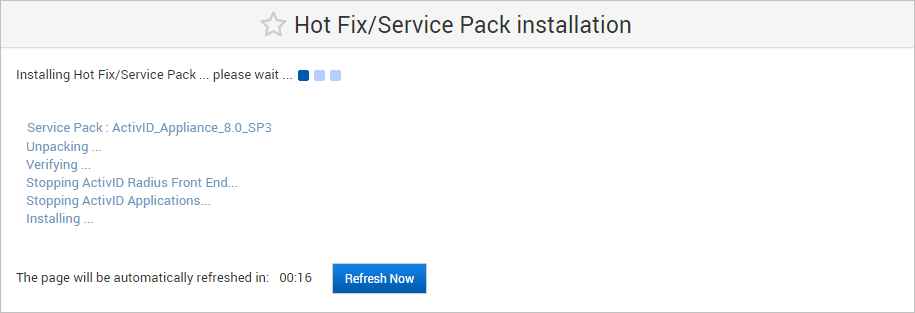
Click Apply.
-
When the update is complete, click Done.
-
Verify that the product version has been updated by selecting the Applications page (under Configuration in the left menu) at least once after the update. This action refreshes the version.
The appliance version can be viewed in the Troubleshooting page.
-
Reboot the appliance.
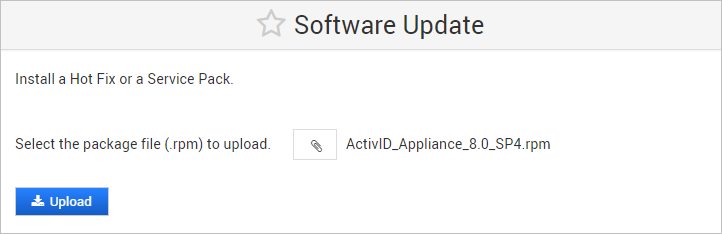
Install the ActivID Appliance 8.4 (8.0 SP4)
-
Under Appliance in the left-side menu, select Software Update.
-
Select the ActivID Appliance 8.4 (8.0 SP4) (ActivID_Appliance_8.0_SP4.rpm) update package and click Upload.
-
Click Apply.
-
When the update is complete, click Done.
-
Verify that the product version has been updated by selecting the Applications page (under Configuration in the left menu) at least once after the update. This action refreshes the version.
The appliance version can be viewed in the Troubleshooting page.
-
Reboot the appliance.
Install the ActivID Appliance 8.5 (8.0 SP5)
-
Under Appliance in the left-side menu, select Software Update.
-
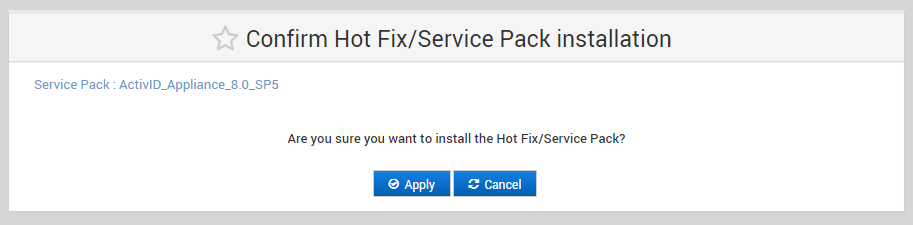
Select the ActivID Appliance 8.5 (8.0 SP5) (ActivID_Appliance_8.0_SP5.rpm) update package and click Upload.
-
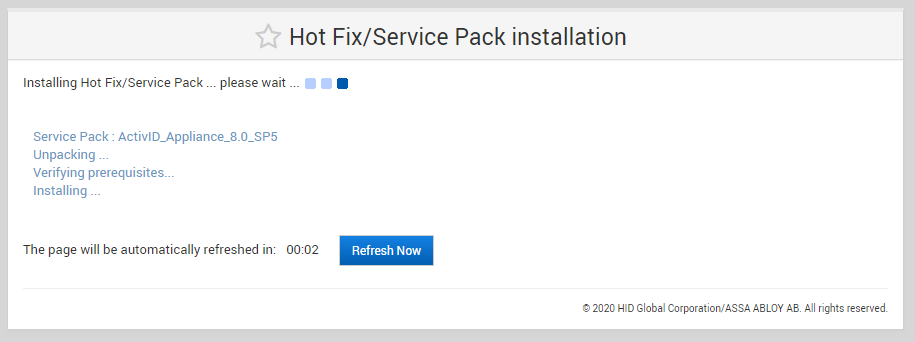
Click Apply.
-
When the update is complete, click Done.
-
Verify that the product version has been updated by selecting the Applications page (under Configuration in the left menu) at least once after the update. This action refreshes the version.
The appliance version can be viewed in the Troubleshooting page.
-
Reboot the appliance.
Install the ActivID Appliance 8.6 (8.0 SP6)
-
Under Appliance in the left-side menu, select Software Update.
-
Select the the ActivID Appliance 8.6 (8.0 SP6) (ActivID_Appliance_8.0_SP6.rpm) update package and click Upload.
-
Click Apply.
-
When the update is complete, click Done.
-
Verify that the product version has been updated by selecting the Applications page (under Configuration in the left menu) at least once after the update. This action refreshes the version.
The appliance version can be viewed in the Troubleshooting page.
-
Reboot the appliance.
Initialize the ActivID Appliance
-
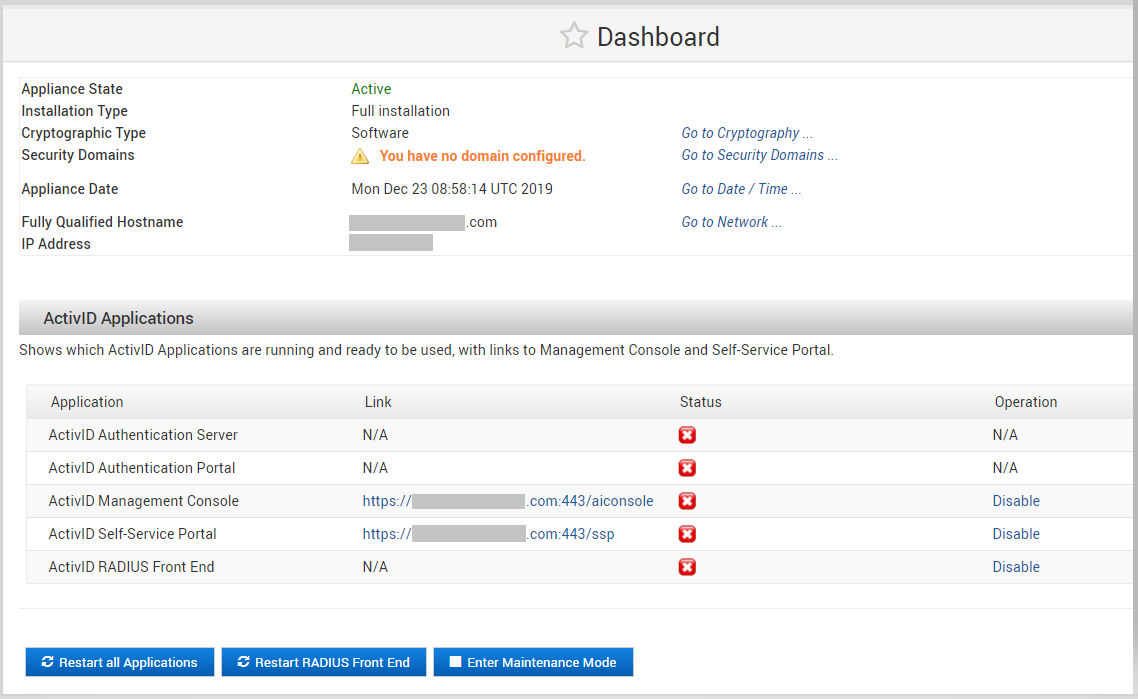
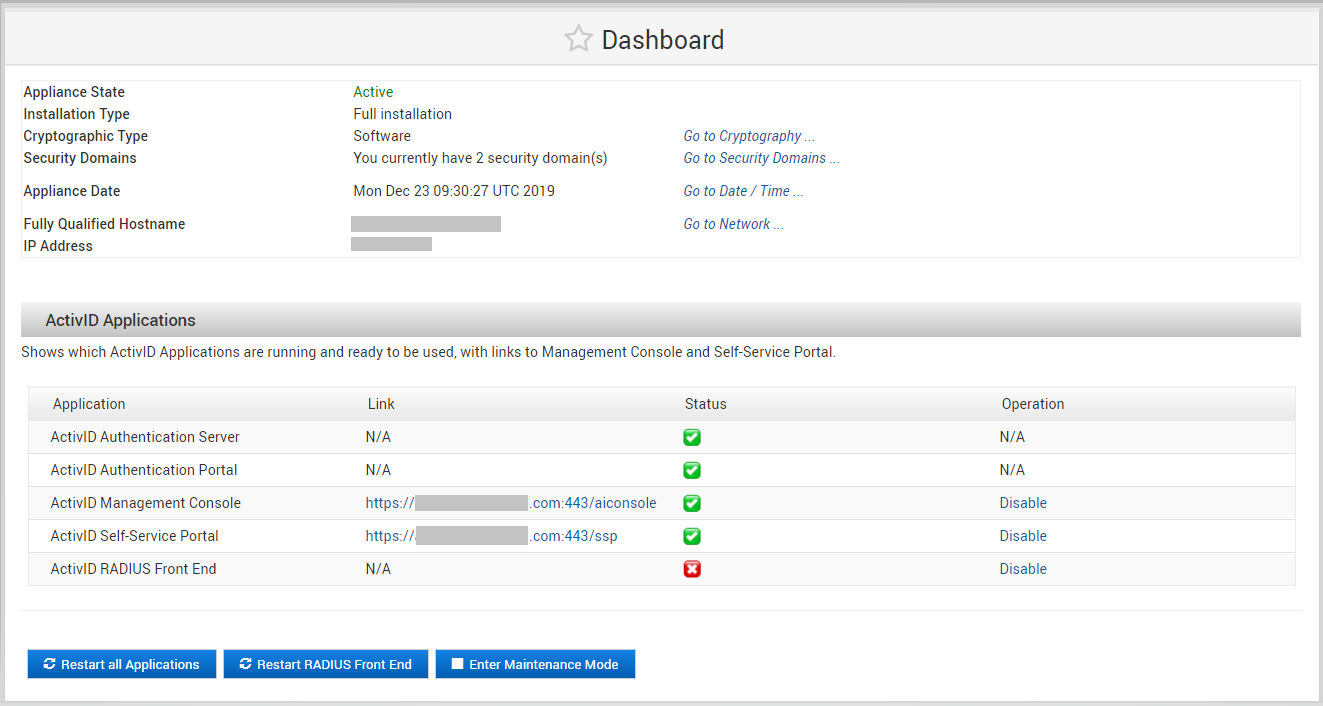
Under Appliance in the left menu, select Dashboard.
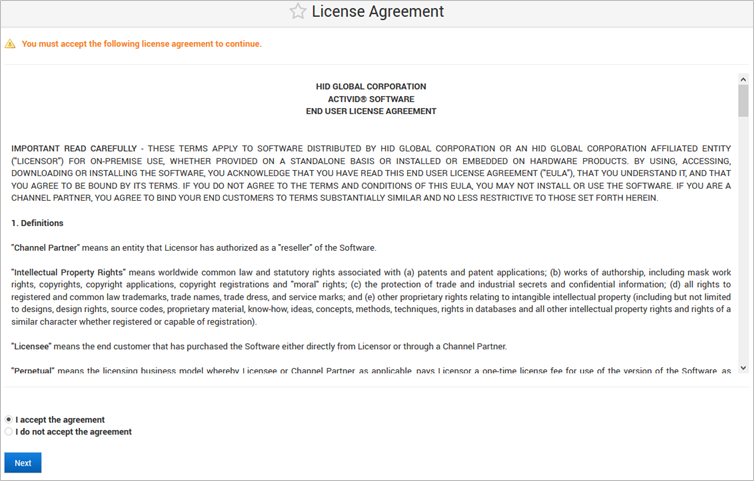
The ActivID Appliance License Agreement is displayed.
-
Select I accept the agreement and click Next.
The appliance dashboard screen is displayed.
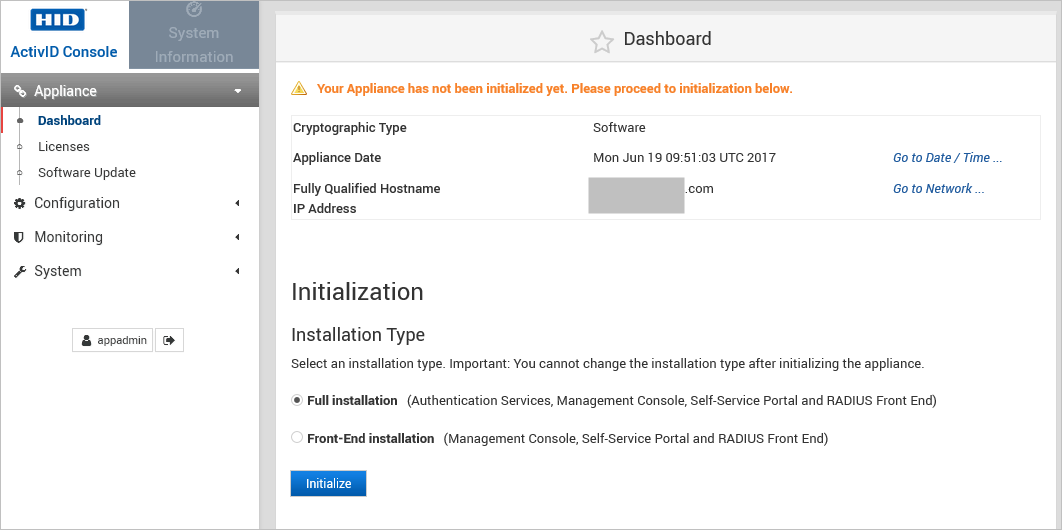
You are then prompted to select the Installation Type.
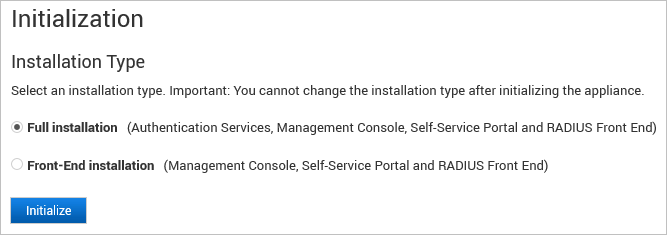
-
Select Full installation to install all the ActivID applications.
The deployment of the Authentication Services and the database are enforced.
To install only the ActivID Front Ends (ActivID Management Console, Self-Service Portal and RADIUS Front End), select Front-End installation and follow the instructions in Installing the Front-End Applications.
Important: After successfully setting the appliance installation type (Full or Front End), you cannot change it unless you reset the appliance to the factory settings (for hardware versions) or revert to the Initial backup (for virtual machines).
-
Click Initialize.
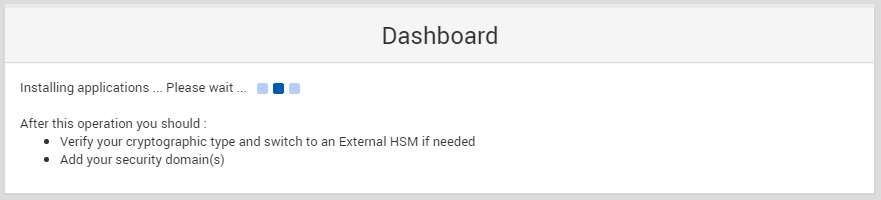
The initialization process might take several minutes.
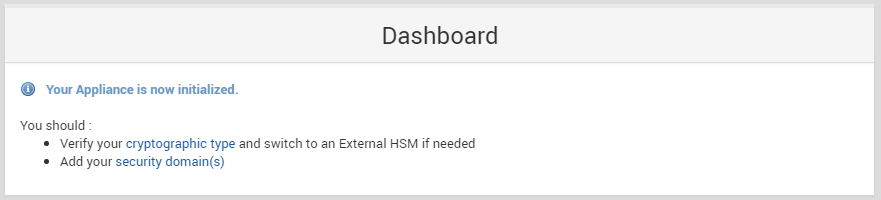
To finalize the initialization of the appliance, you must now create your security domains.
Alternatively, you can click Dashboard in the menu on the left to view the status of the appliance.
Back Up the Initialized State (Virtual Appliance Only)
For virtual ActivID Appliances only, before you start using the appliance, it is recommended that you generate the appliance Site ID and then back up the virtual appliance (that is, create a snapshot/checkpoint) in its initialized state.
This initialized state will be used as a reference in case you need revert to a clean installation (in this state you will be able to install the latest hot fixes, perform reconfiguration and restore your latest backup).
-
Log on to the ActivID Console, under Appliance in the left-side menu, select Licenses.
This generates the Site ID.
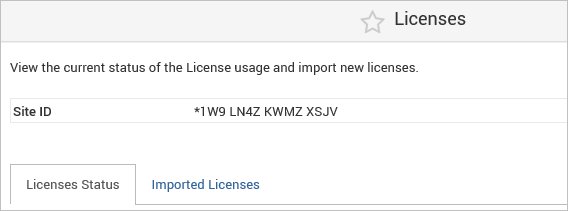
The Site ID can be used to register licenses at any time, and the registered licenses will work if you need to revert to this backup to reset the appliance.
For further information, see Managing the Licenses.
-
Make a note of the displayed Site ID and then log off from the ActivID Console.
-
Shut down the appliance from the ActivID UNIX Terminal.
-
Back up this virtual appliance state (that is, create a snapshot/checkpoint) in case you need to reset the appliance in the future.
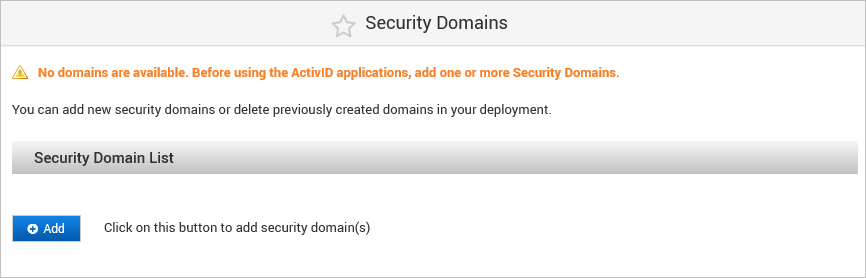
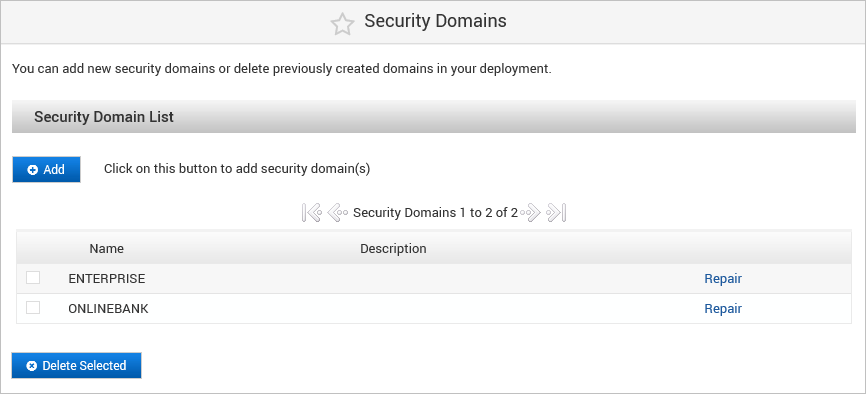
Create the Security Domains
When you create a new security domain, it adds a new set of data to your deployment.
This data is specific to your domain and is defined by the dataset you chose when creating the domain (for example, the default users and permissions included in the dataset).
-
Under Configuration in the left menu, select Security Domains (or click Go to Security Domains in the Dashboard).
-
To add a security domain, click Add.
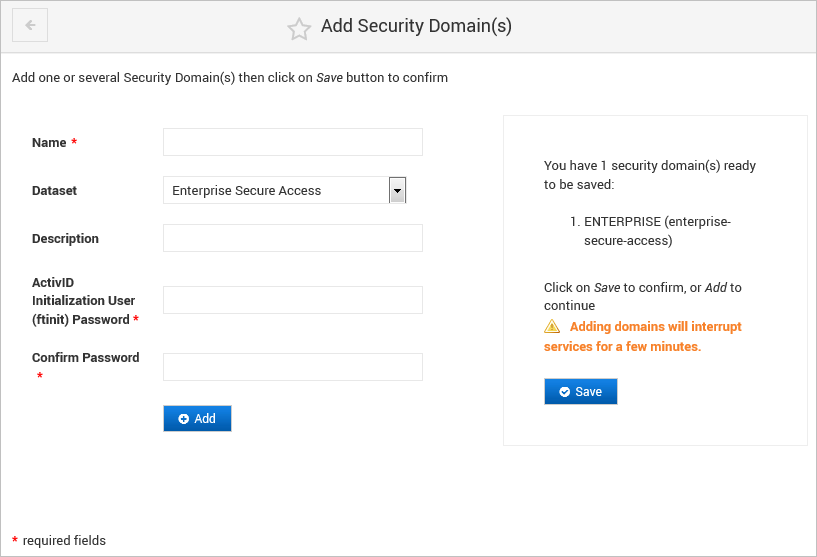
Important: Adding a domain causes an interruption of service and the process might take several minutes.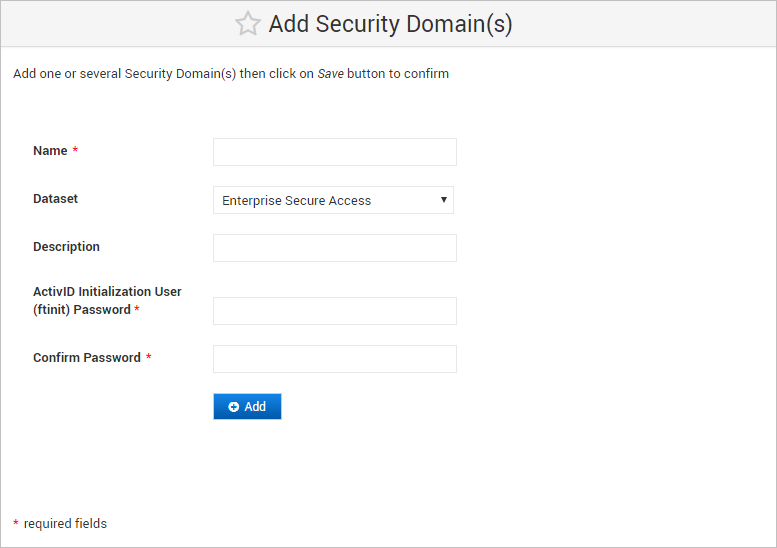
-
Enter the Domain Name, select the Dataset from the drop-down list and, optionally, enter a Description.
Important: To add a new security domain, you must observe the following rules when creating the domain name:Must contain alphanumeric characters
Must not contain any of these characters !#%&()+"'<>?*-_
Must not start with a numeric character
Must be at maximum 20 characters
Must not be a variation of an existing security domain name using a different case for one or more characters (for example, do not use Onlinebank when ONLINEBANK already exists)
Oracle reserved keywords are not allowed (that is “SELECT”, “ONLINE”, etc.)
-
Enter and confirm the password for the ActivID Initialization User (ftinit).
Important: This user is the pre-defined administrator account for the security domain. Make sure you keep a record of the password.The password must:
-
Contain at least one alphabetic and one numeric character
-
Contain at least 3 different characters
-
Be a maximum of 20 characters
-
Be a minimum of 10 characters
-
Be different from any previous password
-
Not contain blacklisted or user-related words
-
Not be a sequence of letters or numbers
-
Not be password01
-
-
Then click Add.
-
Repeat the previous step to create additional domains.
You can create up to 10 domains at the same time.
-
Then click Save.
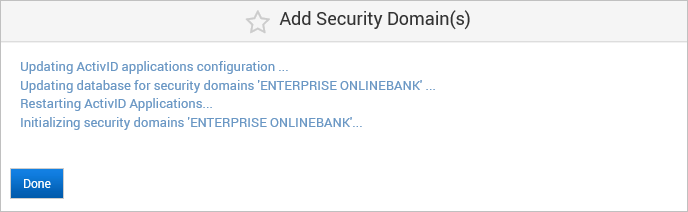
The configuration process might take several minutes.
-
Click Done when the creation process is complete.
-
Under Appliance in the left menu, select Dashboard and then review the appliance status.
Configure an External HSM (Optional)
If you want to integrate a network Entrust® nShield® Connect HSM (all versions) as an external HSM with the ActivID Appliance, you can now install and configure the HSM.
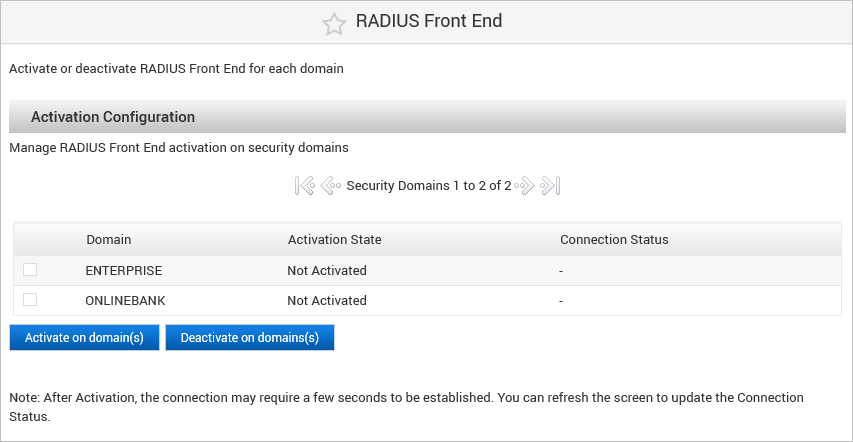
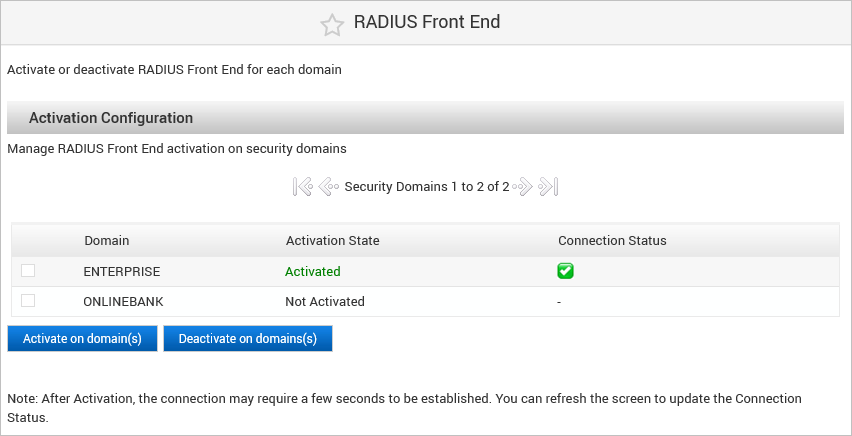
Enable Security Domains for RADIUS Front End (Optional)
This section explains how to activate the ActivID RADIUS Front End on all or a subset of the security domains.
-
Under Configuration in the left menu, select RADIUS Front End.
-
Select the checkbox(es) of the domain(s) that you want to activate for RADIUS Front End.
-
Click Activate on domain(s).
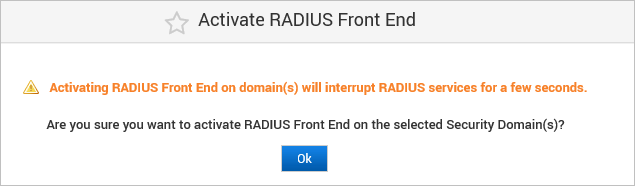
-
Click Ok.
The Activation Status is updated to ‘Activated’ and a green check mark is displayed under Connection Status when the connection is established.
-
Under Configuration in the left menu, click Applications.
-
Click Restart RADIUS Front End to restart the RADIUS service to update the RADIUS configuration.
Post-Installation Steps
Once you have completed the ActivID Appliance installation and setup, you can configure the initial elements of the authentication system.
- Log on to the ActivID Management Console using one of the pre-defined operator accounts (for example, ftadmin).
- Configure the ActivID Appliance environment such as:
- Organize your user population by user type or administration group.
- Create the ActivID Management Console operators and define the access control rules by assigning roles and permissions.
- Import devices so they can be assigned to your users.
- Register authentication methods for your users.
It is strongly recommended that you access the ActivID Management Console immediately after installation in order to change the default password.
See also:


