Import OATH PSKC Devices and Cards
You can import OATH PSKC devices and cards
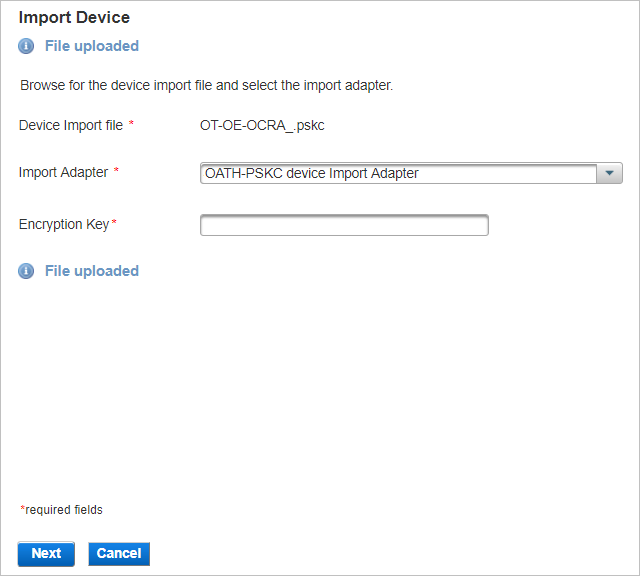
Certain parts of a .pskc file relate to the secret information in the token and are stored encrypted. You must enter the encryption key to read such encrypted sections.
Import PSKC Devices
-
Log on to the ActivID Management Console as a Device Manager.
-
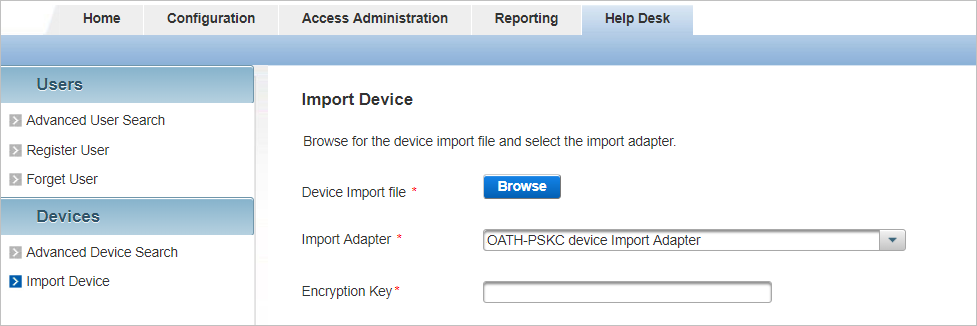
Select the Help Desk tab and, under Devices, select Import Device.
-
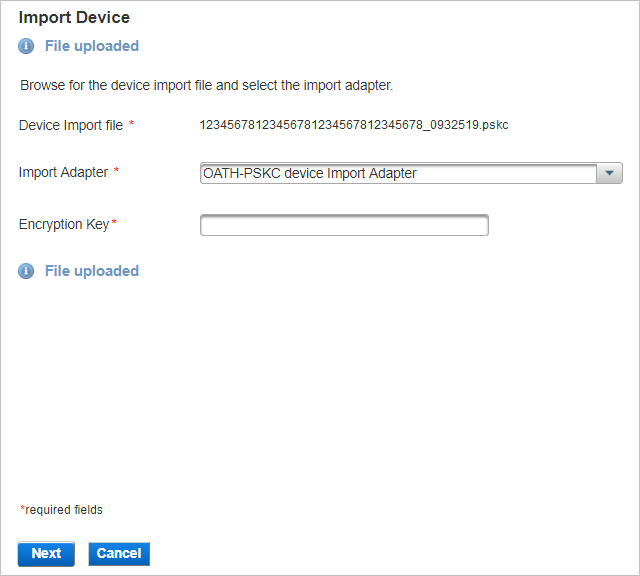
Click Browse to select the .pskc file to be imported.
-
If not automatically selected, from the Import Adapter drop-down list, select OATH-PSKC device Import Adapter.
-
Enter the Encryption Key for the import file and click Next.
-
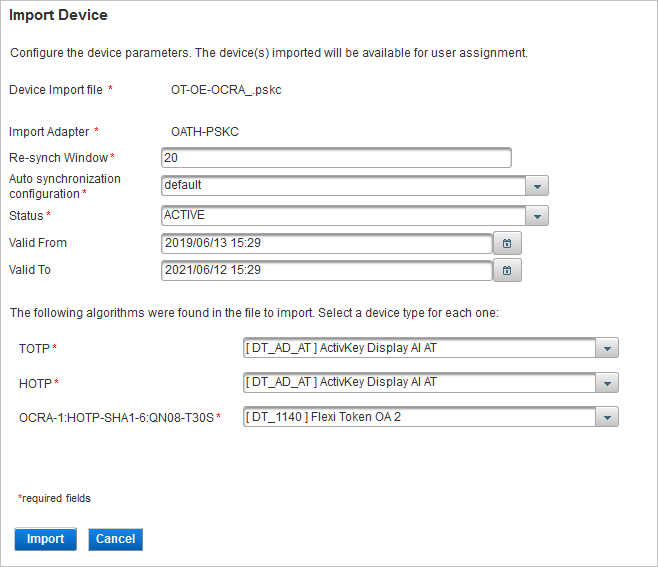
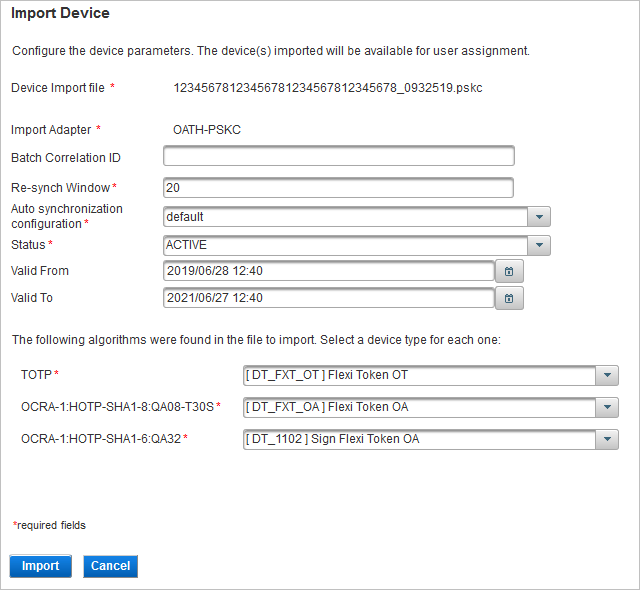
Define the Re-synch Window and the Auto synchronization configuration.
- For OATH event-based algorithms (HOTP):
- Since the Re-synch window is 20, the event tolerance window is equal to 20, and the authentication will succeed for any OTP used within the event tolerance window.
- If the first OTP to authenticate is the 1st OTP generated by the device, then the authentication should succeed.
- If the next OTP to authenticate is any OTP between the 2nd to the 21st OTP from the device, then the authentication should succeed.
- If the next OTP to authenticate is the 22nd OTP from the device, then the authentication should fail.
- For OATH time-based algorithms (TOTP):
- Since the Re-synch window is 20, the time tolerance window is equal to + or - 20 time steps, and the authentication will succeed for any OTP used within the time tolerance window.
- The time step is usually equal to 30 seconds, so this gives a time tolerance of + or - 10 minutes.
- For event-based OATH devices, since the Re-synch window is 20, the event tolerance window is equal to 20, and the authentication should succeed for any OTP used within the event tolerance window.
- For time-based OATH devices, the number of time steps to check is increased so that a time window of + or - 3600 seconds (+/- 120 time steps) is used until the first successful authentication. Then the time window is set back to its default value of 20 time steps (that is, + or - 10 minutes).
For further information about device synchronization and window size, see Synchronizing OTP Devices.
There are three possible scenarios:
As the value of Auto Synchronization configuration is “Increased Sync window at first use”, the event tolerance window is extended to 30 OTPs if the given OTP is not available in the initial event tolerance window. The event tolerance window will be extended for only the first successful OTP verification. Once an OTP has been successfully verified, the window goes back to its initial value of 20.
The behavior is the same as that for scenario 2 except that this is applied for all the authentications, not only the first one.
-
From the Status drop-down list, select either Active or Pending.
-
If required, enter the Valid From, and Valid To dates.
-
For each algorithm detected in the import file, select the corresponding Device Type.
- TOTP – [DT_PSD2_OT] PSD2 OATH OT device
- OCRA-1:HOTP-SHA1-6:QA06 – [DT_PSD2_CR] PSD2 OATH OA Challenge Response device
- OCRA-1:HOTP-SHA1-6:QA32-T30S – [DT_PSD2_SG] PSD2 OATH OA Signing device
If you select Pending, an operator can change the status to Active in the device's Details page when required.
The start date and end date are validated during authentication. These values then are applied to all devices loaded as part of this import. If in doubt, leave these fields empty.
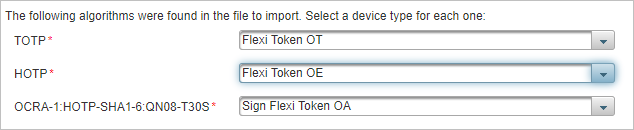
For example, when importing devices for PSD2 compliance, map the algorithms found in the PSKC file as follows:
The drop-down lists only contain the device types compatible with the detected algorithms. ActivID Appliance does not read the file to automatically determine the device type.
If a compatible device type is not found for one of the algorithms, the file cannot be imported.
-
Click Import.
-
To view import results, select the Reporting tab, and then check the audit reports.
Import PSKC EMV Cards
-
Log on to the ActivID Management Console as a Device Manager.
-
Select the Help Desk tab and, under Devices, select Import Device.
-
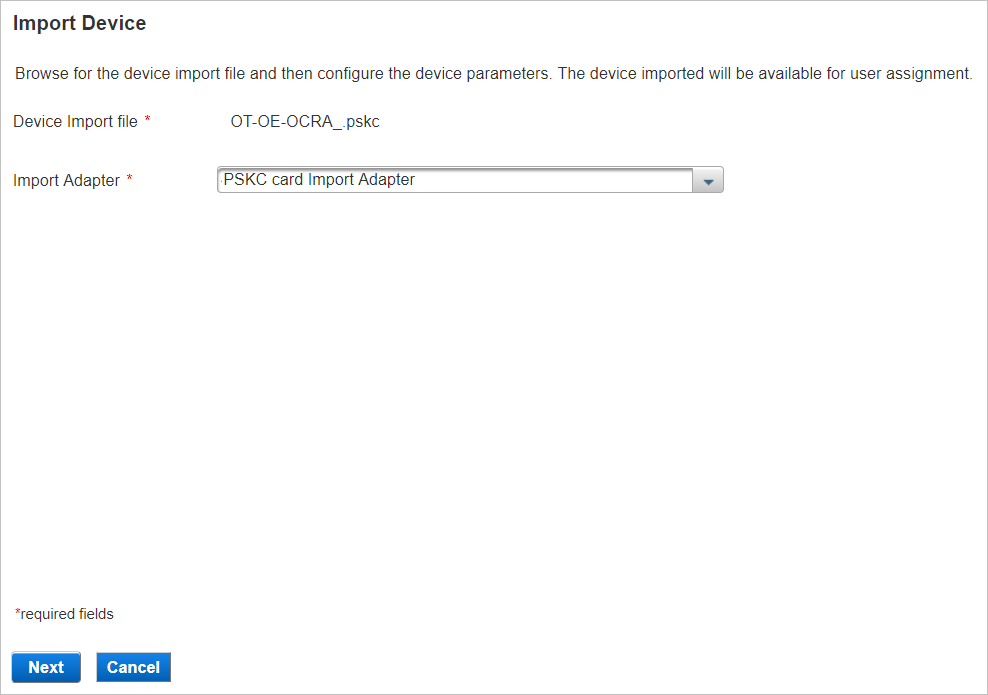
Click Browse to select the .pskc file to be imported.
-
From the Import Adapter drop-down list, select PSKC card Import Adapter and click Next.
-
Select the Device Type contained within the file.
-
From the Status drop-down list, select either Active or Pending.
-
Click Import.
-
To view import results, select the Reporting tab, and then check the audit reports.
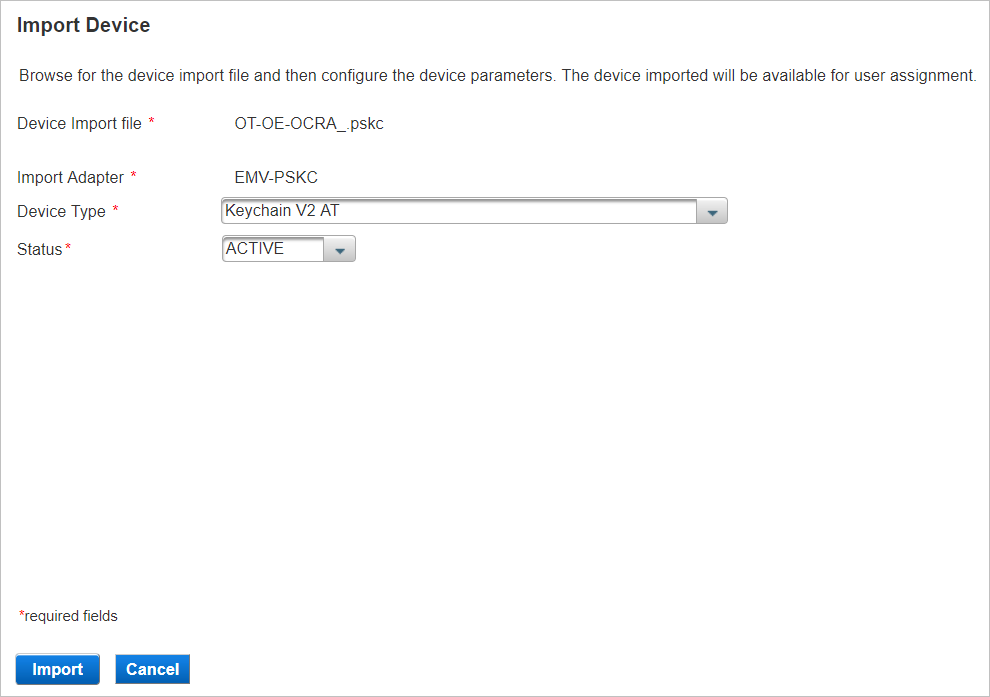
If you select Pending, an operator can change the status to Active in the device's Details page when required.
Import a PSKC File as a Batch
You can import multiple PSKC devices using large .PSKC files with file size greater than 1.5 MB.
The devices from the .PSKC file are imported in a "batch" operation, which runs as a background process.
- If the device import operation fails (that is, some devices might be missing, and/or you have received a monitoring message indicating a failure), then you can import the PSKC file again.
- If you try to import several large PSKC files in a short time frame, the batch jobs will be executed sequentially. The second import starts only when the first import has completed.
- If the import of a particular device fails, then the import of the other devices of the PSKC still proceeds. The import does not stop until all the devices have been processed.
-
Log on to the ActivID Management Console as a Device Manager.
-
Select the Help Desk tab and, under Devices, select Import Device.
-
Click Browse to select the large .PSKC file to be imported.
-
If not automatically selected, from the Import Adapter drop-down list, select OATH-PSKC device Import Adapter.
-
Enter the Encryption Key for the import file and click Next.
-
Optionally, enter a Batch Correlation ID to identify your device import batch or leave it empty.
The ID must consist of between 5 and 32 alphanumeric characters.
If you leave it empty, a Batch Correlation ID is set automatically.
-
Define the Re-synch Window and the Auto synchronization configuration.
For further information about device synchronization and window size, see Synchronizing OTP Devices.
There are three possible scenarios:
 Scenario 1: The Re-synch window is 20 (that is, + or - 20 time steps or events depending on the algorithm) and Auto Synchronization configuration is Default.
- For OATH event-based algorithms (HOTP):
- Since the Re-synch window is 20, the event tolerance window is equal to 20, and the authentication will succeed for any OTP used within the event tolerance window.
- If the first OTP to authenticate is the 1st OTP generated by the device, then the authentication should succeed.
- If the next OTP to authenticate is any OTP between the 2nd to the 21st OTP from the device, then the authentication should succeed.
- If the next OTP to authenticate is the 22nd OTP from the device, then the authentication should fail.
- For OATH time-based algorithms (TOTP):
- Since the Re-synch window is 20, the time tolerance window is equal to + or - 20 time steps, and the authentication will succeed for any OTP used within the time tolerance window.
- The time step is usually equal to 30 seconds, so this gives a time tolerance of + or - 10 minutes.
Scenario 2: The Re-synch window is 20 and Auto Synchronization configuration is Increased Sync window at first use
- For event-based OATH devices, since the Re-synch window is 20, the event tolerance window is equal to 20, and the authentication should succeed for any OTP used within the event tolerance window.
- For time-based OATH devices, the number of time steps to check is increased so that a time window of + or - 3600 seconds (+/- 120 time steps) is used until the first successful authentication. Then the time window is set back to its default value of 20 time steps (that is, + or - 10 minutes).
As the value of Auto Synchronization configuration is “Increased Sync window at first use”, the event tolerance window is extended to 30 OTPs if the given OTP is not available in the initial event tolerance window. The event tolerance window will be extended for only the first successful OTP verification. Once an OTP has been successfully verified, the window goes back to its initial value of 20.
Scenario 3: The Re-synch window is 20 and Auto Synchronization configuration is Increased Sync window
The behavior is the same as that for scenario 2 except that this is applied for all the authentications, not only the first one.
- For OATH event-based algorithms (HOTP):
-
From the Status drop-down list, select either Active or Pending.
If you select Pending, an operator can change the status to Active in the device's Details page when required.
-
If required, enter the Valid From and Valid To dates.
The start date and end date are validated during authentication. These values then are applied to all devices loaded as part of this import. If in doubt, leave these fields empty.
-
For each algorithm detected in the import file, select the corresponding Device Type.
For example, when importing devices for PSD2 compliance, map the algorithms found in the PSKC file as follows:
- TOTP – [DT_PSD2_OT] PSD2 OATH OT device
- OCRA-1:HOTP-SHA1-6:QA06 – [DT_PSD2_CR] PSD2 OATH OA Challenge Response device
- OCRA-1:HOTP-SHA1-6:QA32-T30S – [DT_PSD2_SG] PSD2 OATH OA Signing device
Note:The drop-down lists only contain the device types compatible with the detected algorithms. ActivID Appliance does not read the file to automatically determine the device type.
If a compatible device type is not found for one of the algorithms, the file cannot be imported.
-
Click Import.
A success message appears showing the Batch Correlation ID for your device import request. The import procedure starts at this point, and devices will be imported as a background task.
-
To import more devices, click Back.
-
To monitor the progress of the import, you can check the traps received by your client though SNMP monitoring.
-
To verify that the import has completed successfully, check the presence of the successful completion message in the traps received by your client though SNMP monitoring.
-
If import has not been completed successfully, or has been interrupted, you can repeat the operation to have the devices missing from the initial attempt imported.


