Migrate to ActivID Appliance 8.7
Install ActivID Appliance 8.7
Install and initialize ActivID Appliance 8.7 as described in Setting Up the ActivID Appliance.
During the installation process, you must:
-
Initialize the appliance using the Full installation type (Front-End installations are not supported by the migration process)
-
Make sure no security domains are defined (those exported from ActivID Appliance 8.6 will be used)
-
Configure the connection to the SFTP site where the ActivID Appliance 8.6 migration package is stored
Import the Migration Package
You can import an ActivID Appliance 8.6 migration package on an ActivID Appliance 8.7 using the dedicated Migration screen.
You have generated the ActivID Appliance 8.6 migration package and it is available on the SFTP site configured when installing ActivID Appliance 8.7
Migration packages from versions other than 8.6 are not supported.
It is recommended that you allocate 15 licenses per domain (for example, if your deployment contains four domains, at least 60 licenses should be available).
-
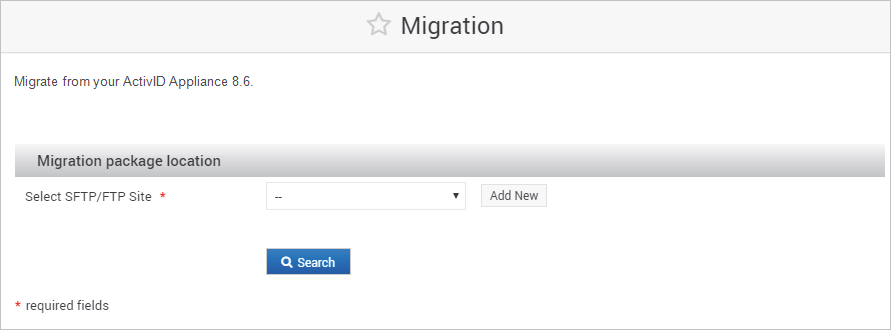
From the ActivID Console, under System, select Migration.
 Note: This screen is only available after the appliance is initialized and before any domains are added.
 -
Select the SFTP/FTP site where the migration package is stored from the drop-down list and click Search.
If necessary, click Add New and configure the connection to the SFTP site.
-
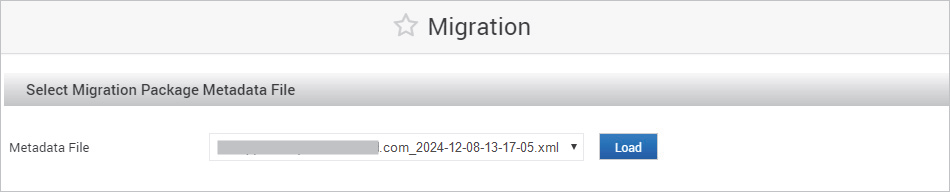
From the drop-down list of results, select the metadata .xml file corresponding to the ActivID Appliance 8.6 migration package and click Load.
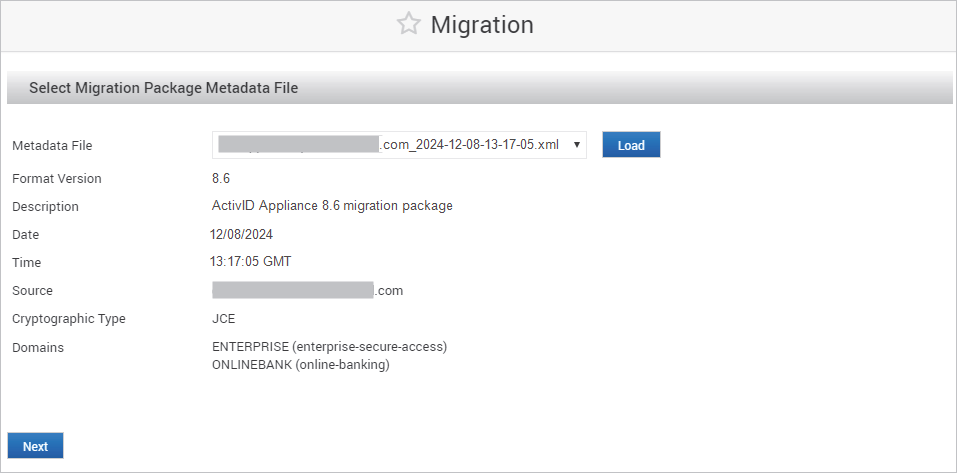
The metadata is displayed.
-
Verify that the migration package is correct.
The appliance checks if the older appliance and the new one have the same cryptographic type (HSM_NSC500 or JCE).
If the cryptographic type does not match, an error is displayed.
-
Click Next.
-
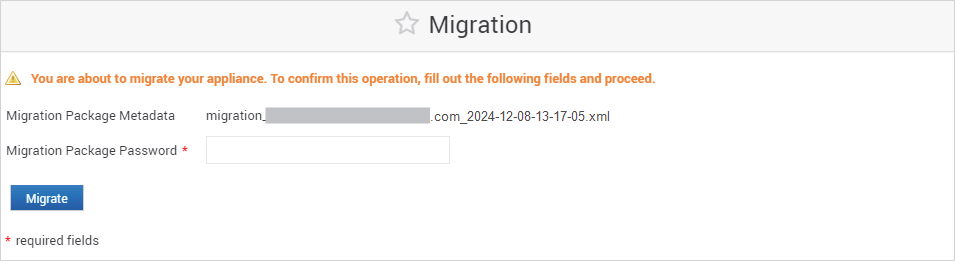
Enter the Migration Package Password defined when the package was generated.
-
Click Migrate.
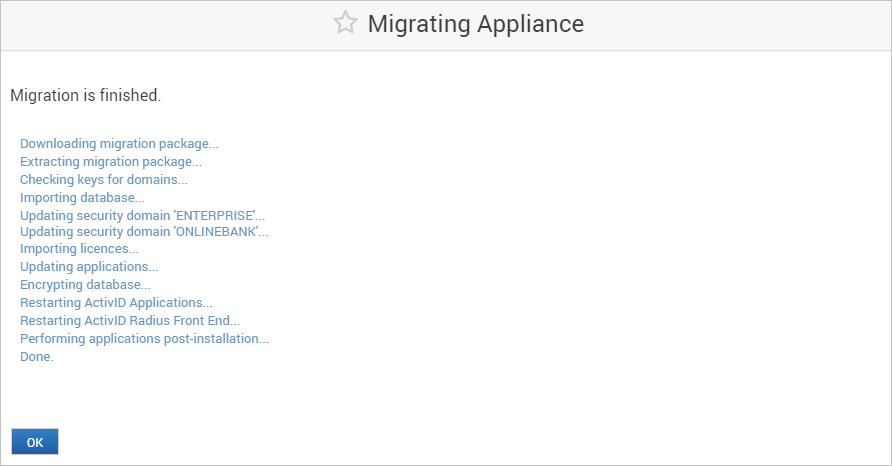
The migration package is then downloaded and imported on the appliance.
-
Review the migration summary, noting any errors or conflicts (highlighted in orange) that need to be resolved and then click OK.
Next step:


