Configure the ActivID Identity Provider
This section describes how to configure the ActivID Identity Provider (IdP).
Configure the ActivID IdP for Signed Authentication Requests
By default, the IdP will request signed Authentication Requests. You can disable this option if necessary.
-
Log on to the ActivID Management Console as an administrator.
-
Select the Configuration tab.
-
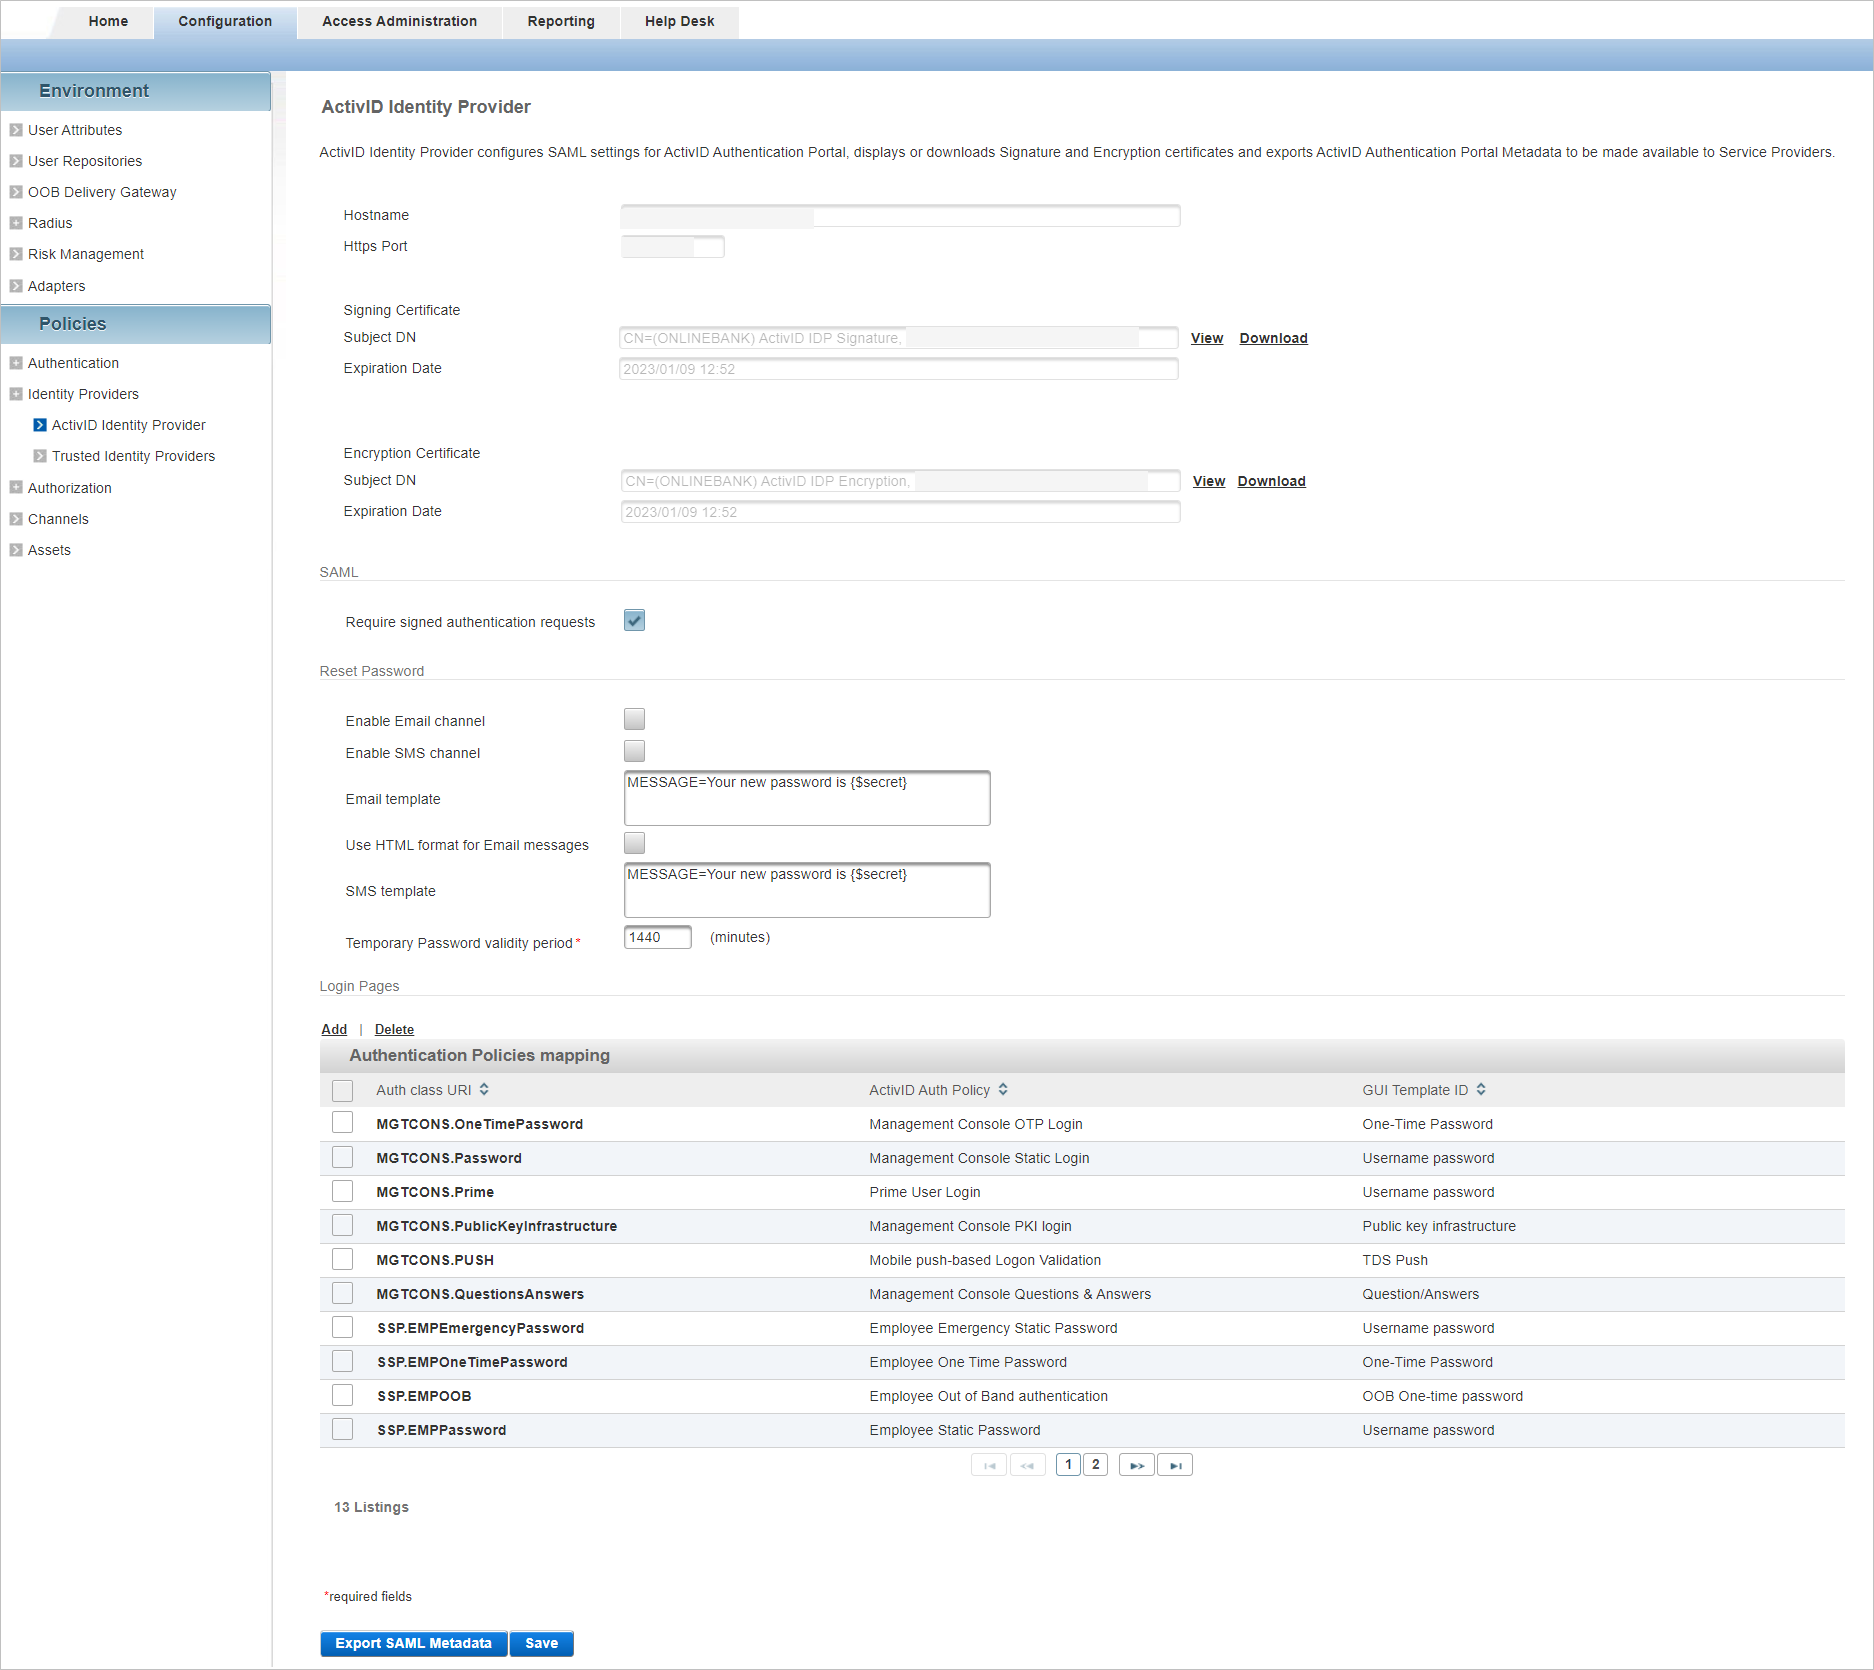
Under Identity Providers, select ActivID Identity Provider.
-
Select the Require signed authentication requests option and click Save.
Configure the Reset Password Option
You can configure the ActivID Authentication Portal to provide a Reset Password option for end users, eliminating the need for users to contact their help desk if they forget their password.
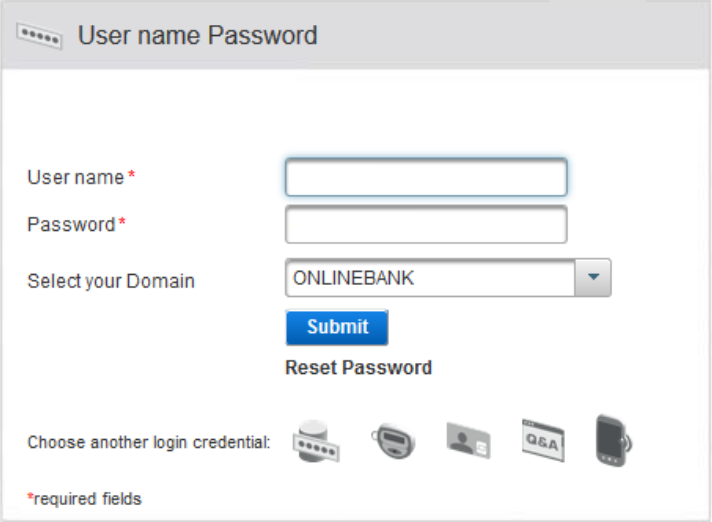
When the user clicks the reset link on the login page, they can choose to receive a temporary password via SMS or email. You can enable one or both channels.
The user then authenticates with the temporary password and is re-directed to the change password workflow in order to set a new password (the original authenticator is set expired to force the password change).
-
The authenticator validity period is updated according to the authentication policy.
-
The consecutive failed or successful authentication counters are reset.
However, the user’s authenticator will become blocked if they reach the maximum number of incorrect ‘change password’ attempts.
To manually unblock the authenticator in the ActivID Management Console, you can reset a valid "End" date in the authenticator's validity period tab, and then change the password or reset the counters on behalf of the user.
The ActivID Authentication Portal GUI template must match at least one Username/Password authentication policy.
The Out of Band (OOB) gateways are configured for the email and/or SMS services for the delivery of the temporary passwords, and are assigned to the required authentication policies and channels.
The end user email addresses and/or mobile phone numbers are configured in their user profiles.
For further information, Configure OOB Delivery Gateways.
- You can customize the design of reset password wizard by editing the ActivID Authentication Portal branding files.
For further information about the end-user experience, refer to the ActivID Self-Service Portal User Guide available in the ActivID Customer Portal.
For example, you can customize the link label by editing the ai.samlidp.forgotpwd property in the AuthenticationPortal/default/ap/ac-4tress-portal_en.properties file.
For further information, see Customize the ActivID AS Design.
-
Log on to the ActivID Management Console as an administrator for the domain.
-
Select the Configuration tab.

-
Under Identity Providers, select ActivID Identity Provider.
-
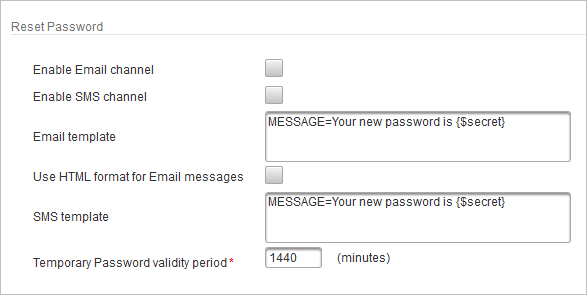
Go to the Reset Password section.
-
Select the channel(s) via which the temporary password should be sent to the end user – Email and/or SMS.
-
If necessary, edit the default message in the Email template that will be sent with the temporary password.
For additional guidelines, see About the Content of the Message Templates.
-
Select the Use HTML format for email messages if you want to send formatted messages instead of plain text.
-
If necessary, edit the default message in the SMS template that will be sent with the temporary password.
For additional guidelines, see About the Content of the Message Templates.
-
If necessary, define the Temporary Password validity period (in minutes).
-
Click Save.
-
To configure the Reset Password option for other domains, repeat the above steps for each domain.
You can select one or both.
It is recommended that you do not enable this setting if users are using email clients that block HTML content.
By default, this is set to 1440 minutes.
If the end user has not authenticated with the temporary password within this period, they must restart the Reset Password workflow to request a new one.
Message templates are a set of properties allowing to define messages in multiple languages.
Template properties:
- MESSAGE[_<locale>] - if the locale is not specified, the default is used (that is, en_US)
- SUBJECT[_<locale>] - optionally for email messages, you can include an email subject and define the locale
If it is not specified in the template, the email delivery gateway subject will be used.
The MESSAGE and SUBJECT properties can both be parametrized with variables that will be resolved when sending the message.
Template variables must use the {$variable[, type, style]} format and can be:
- Predefined variables:
- secret - the secret code to send
- usercode - the username
- temp_pwd_validity_period - the reset password temporary pass code validity period in miliseconds
- temp_pwd_expiry_date - the reset password temporary pass code expiry date
- now - the current date
- User attributes
- Authentication request parameters
For further information about the supported types and styles, go to https://docs.oracle.com/javase/8/docs/api/java/text/MessageFormat.html and https://docs.oracle.com/javase/8/docs/api/java/text/SimpleDateFormat.html
Guidelines:
- There is no limitation on the length of the message in ActivID AS.
However, modern networks limit a single SMS message to 160 characters.
-
Special characters are supported.
However, ActivID AS applies GSM encoding for SMS messages (by default, GSM-7) which might result in limitations depending on the encoding system.
-
The date style is extended to optionally specify a timezone (default time zone is GMT).
For example, {$now, date, dd/M/yyyy hh:mm:ss [Europe/Paris]}
-
The duration style can be used to format a duration expressed in milliseconds (ms) where the y/M/d/H/m/s/S element format corresponds to years/months/days/hours/minutes/seconds/milliseconds.
For example, with a validity_period of 139801000 ms:
MESSAGE=Your temporary password is only valid for {$validity_period, duration , m 'Minutes' }.
Displayed message – Your temporary password is only valid for 2330 minutes.
MESSAGE=Your temporary password is only valid for {$validity_period, duration , d 'Days' H 'Hours' m 'Minutes' s 'Seconds'}.
Displayed message – Your temporary password is only valid for 1 Days 14 Hours 50 Minutes 1 Seconds.
-
Single quotes should be escaped using a single quote.
For example, It can't be changed must be replaced by It can''t be changed.
-
Curly brackets should be enclosed with single quotes.
For example, { or } should be escaped must be replaced by '{' or '}' should be escaped.
-
To add a new line, use \r\n. Do not use carriage returns as the message validation will fail.
Example of an email template - text/plain:
MESSAGE=Hello,\r\nYou requested a password reset for ActivID AS. Your temporary password is {$secret}. Your temporary password is only valid for {$temp_pwd_validity_period, duration , d 'Days' H 'Hours' m 'Minutes'}.\r\nPlease enter the temporary password at the reset screen, to set your permanent password.\r\nIf you did not request a password reset, please ignore this email.\r\n\r\nThank you.\r\n\r\nSystem Administration\r\nHID Global\r\n\r\nPlease do not reply to this message.\r\n©{$now, date, yyyy} HID Global Corporation/ASSA ABLOY AB
SUBJECT=ActivID AS – Password Reset
Example of an email template - text/plain in French (fr):
MESSAGE_fr=Bonjour,\r\nVous avez demandé à changer le mot de passe de votre compte ActivID AS. Votre mot de passe temporaire est {$secret}. Ce mot de passe expirera le {$temp_pwd_validity_period, duration , m 'Minutes'}.\r\nEntrez ce mot de passe temporaire pour pouvoir changer de mot de passe.\r\nSi vous n'’avez pas demandé à changer votre mot de passe, ignorez ce message.r\n\r\nMerci.\r\n\r\nAdministration Système\r\nHID Global\r\n\r\nMerci de ne pas répondre à ce message.\r\n©{$now, date, yyyy} HID Global Corporation/ASSA ABLOY AB
SUBJECT_fr=ActivID AS – Changement de mot de passe
Example of an email template - text/HTML:
MESSAGE=Hello,<br>You requested a password reset for the ActivID AS. Your temporary password is <b>{$secret}</b>. Your temporary password is only valid for {$temp_pwd_validity_period, duration , d 'Days' H 'Hours' m 'Minutes'}.<br>Please enter the temporary password at the reset screen, to set your permanent password.<br>If you did not request a password reset, please ignore this email.<br><br>Thank you.<br><br>System Administration<br>HID Global<br><br>Please do not reply to this message.<br>©{$now, date, yyyy} HID Global Corporation/ASSA ABLOY AB
SUBJECT=ActivID AS – Password Reset
Hide the List of Domains
This section explains how to configure the ActivID Authentication Portal so that the list of domains in your deployment is not visible to users in the login page. This configuration will also prevent users from changing the domain name during authentication.
Specify the Domain in the URI
The ActivID portals (Authentication Portal, Management Console and Self-Service Portal) accept a domain name as a parameter in the authentication request.
To pass a domain name as parameter, the URI must contain the domain as follows:
https://<YourActivIDASServer>/aiconsole?domain=sha256(<DOMAINNAME>)
For example, for the ONLINEBANK domain:
https://activididas.com/aiconsole?domain=d6ff9b39dbd361944f415668251e28eec3f9286c47754d66d71bf603277a6ff6
When a user accesses the portal logon page with the domain already present as a parameter in the ActivID Authentication Portal’s SingleSignOnService URL:
-
When ActivID AS is configured with optional domain parameter:
- If the request originates from the ActivID Management Console, the IdP preselects the domain specified in the request in the list of available domains.
- If the request originates from any other referrer, the domain in the parameter is automatically selected. The list of domains is not displayed, and users simply enter their credentials to authenticate.
-
When ActivID AS is configured with required domain parameter, the IdP never displays the list of available domains. Users simply enter their credentials to authenticate.
For further details, see Enforce the Domain Requirement in the Authentication Request.
Enforce the Domain Requirement in the Authentication Request
You configure the Authentication Portal to make the domain name as either optional or required in the authentication request.
-
If you set the domain name as optional and it is missing from the authentication request, the list of domains is displayed to the user.
-
If you set the domain name as required and it is missing from the authentication request, an error page is displayed to the user.
To configure the ActivID Authentication Portal to make the domain name as either optional or required:
-
Open the samlidp.properties file in the <ActivID_AS>/applications/resources/ap/ directory for editing.
- To configure the domain name as optional in the authentication request, set the
DomainRequiredproperty to false (this is the default value). - To configure the domain name as required in the authentication request, set the
DomainRequiredproperty to true.
- To configure the domain name as optional in the authentication request, set the
-
Save and close the file.
-
Restart the server.
Export the ActivID SAML IdP Metadata
To configure the ActivID IdP as an IdP for a SAML SP, you must provide the metadata information to the SP.
The IdP metadata is based on the following data:
- IdP hostname
- IdP port number
- Security Domain – the Security Domain name is part of the URIs defined in the metadata.
- Flag indicating if the IdP accepts only signed requests – this is an optional attribute that indicates a requirement for the <samlp:AuthnRequest> messages received by this IdP to be signed. If omitted, the value is assumed to be false.
- Alias of the IdP certificates (signing & encryption) stored in the ActivID AS keystore.
- Log on to the ActivID Management Console as an administrator.
-
Select the Configuration tab.
-
Under the Identity Providers menu, select ActivID Identity Provider.
-
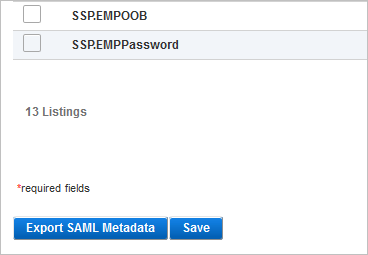
Under the Authentication Policies mapping list, click Export SAML Metadata.
-
Save the ACTIVID_IDP_METADATA.xml file to a location of your choice.
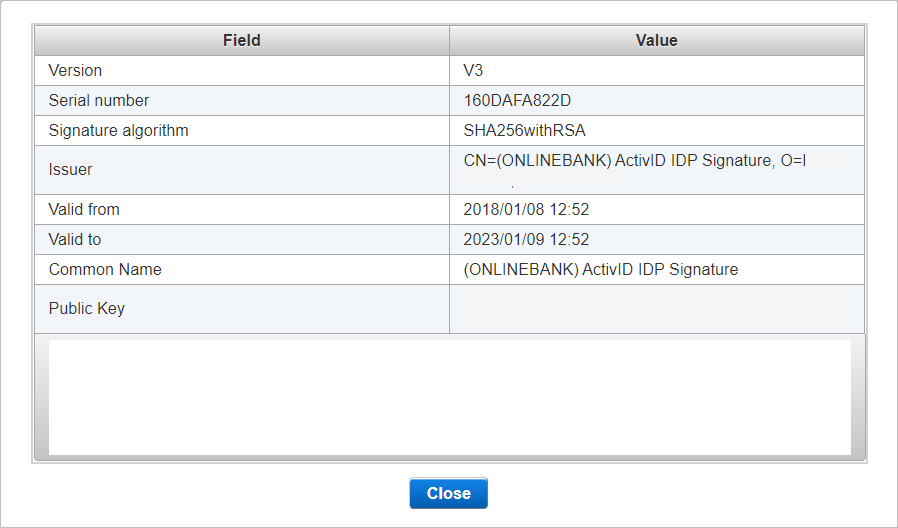
View or Download the ActivID IdP Certificates
-
Log on to the ActivID Management Console as an administrator for the domain.
-
Select the Configuration tab.
Details of the ActivID IdP Signing Certificate and Encryption Certificate are displayed above the configuration options.
- Click View for the required certificate.
- Click Download for the required certificate to download the certificate (.cer).
Update the ActivID IdP Certificates
There is one SAML IdP signing certificate and one SAML IdP encryption certificate per security domain.
These certificates are stored in the ActivID Authentication server software keystore (<ACTIVID_HOME>/ActivID_AS/config/ActivID.keystore) under the idp_cert_signature_<domain> and idp_cert_ encryption_<domain> aliases.
Renew SAML IdP (Authentication Portal) Keys and Certificates
-
As ftadmin, run the following command:
Copy<ACTIVID_HOME>/ActivID_AS/bin/configureIDPData.sh -c createkeyscerts -d <domain name> -v <validity period (years)> -
When prompted, enter the keystore password.
-
Replicate the keystore changes to all the ActivID AS servers in your deployment.
-
Restart the server.
-
Export the IdP metadata and reconfigure the service providers.
Replace the Certificates with CA Signed Certificates
For the the idp_cert_signature_<domain> and idp_cert_ encryption_<domain> keystore entry aliases, as ftadmin, use the following commands:
-
To load the environmental variable:
Copy. <ACTIVID_HOME>/ActivID_AS/bin/envdef
-
To generate the Certificate Signing Request:
Copykeytool –keystore <the keystore> –certreq –alias <alias> –keyalg rsa
–file client.csr -storetype JCEKS
-
To send the CSR to your Certificate Authority and then import CA certificate into the ActivID AS keystore:
Copykeytool -import -keystore <the keystore> -file ca-certificate.pem
-alias theCARoot -storetype JCEKS
-
To import the signed certificate in the keystore:
Copykeytool –import –keystore <the keystore> –file <CA signed IDP certificate> –alias <alias> -storetype JCEKS
-
Replicate the keystore changes to all the ActivID AS servers in your deployment.
-
Restart the server.
-
Export the IdP metadata and reconfigure the service providers.


