Synchronize an OTP Device
You can synchronize a device from either the Device Details page, or from the user’s Wallet tab.
-
Click Synchronize.

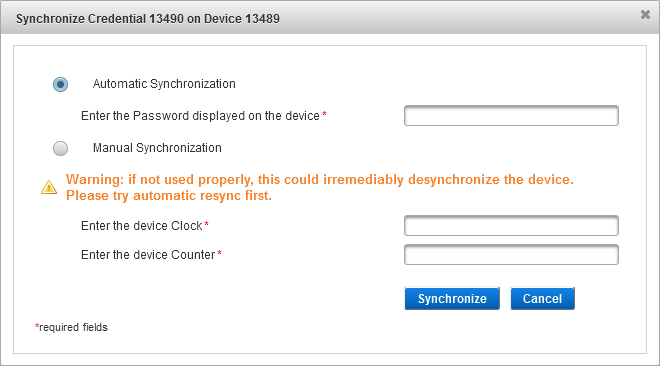
Automatic Synchronization
Submit the one-time password as displayed on the device to ActivID AS.
ActivID AS tests the internal system clock values or counter values, or both, for that individual device against the one-time password received from the device. The range is determined by the parameter values in "Counter Range" and "Time Offset" defined for this device type.
- For time-based OTPs, the automatic synchronization will compute the time offset, either positive or negative, between the device and the server clocks.
- For counter-based OTPs, the automatic synchronization function only advances the event counter. It will not try event counter values that are lower than the value stored on the host system.
Select Automatic Synchronization.
- Generate an OTP with the user's device and enter it in the Enter the Password displayed on the device field.
Manual Synchronization
The prompts and corresponding boxes displayed in the Manual Synchronization section depend upon the device type to which the device is linked. For example, if the device type supports re-synchronization by entry of the clock value, but not the device counter value, only the Enter the device Clock prompt is displayed.
Select Manual Synchronization.
- Enter the Clock and/or Counter values displayed on the user’s device.
The counter and clock offsets stored for this device are updated. The View Device page is displayed, with a success message.
Note: Manual synchronization might complete successfully without proving conclusively that the device is generating a one-time password (OTP) that can be verified successfully by the host system. It simply updates the event counter and clock offsets on the host system.
- Click Synchronize.
After a successful synchronization, you should test the device in order to validate that it is working correctly.


