Managing Devices
This section provides details on how to manage devices using the ActivID CMS User Portal:
Use this scenario if you have a functional device and you want to perform one of the following tasks.
-
Change the device PIN,
-
Change the answers to the security questions (this is only applicable if security questions are configured as a possible authentication method by the ActivID CMS administrator), or
-
Execute a device applications update.
-
Insert the device into the reader and connect to the ActivID CMS User Portal. To connect to the ActivID CMS User Portal, follow steps 1 to 3 in Self-Issuing a Device.
-
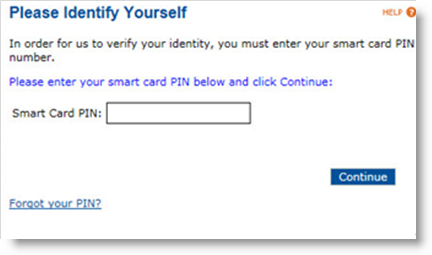
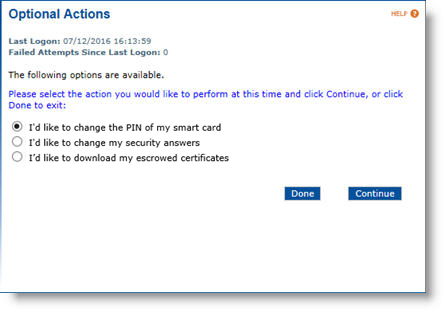
Enter the device PIN, and then click Continue. The system automatically performs any pending updates. When the automatic updates are completed, the Optional Actions page appears. From this page, you can:
-
Change the PIN of the device,
-
Change the security answers, or
-
Download escrowed certificates.
-
-
Select one of the options (change your PIN, change your security answers, or download escrowed certificates), and then click Continue.
-
To change your PIN, enter the current device PIN, and then enter and confirm a new PIN. The new PIN must meet the requirements specified in the PIN policy.
-
To change your security answers, enter new responses to the security question prompts. If you cannot remember these answers, record them, and keep them in a secure location. To log on to the ActivID CMS User Portal without your device, you must know these answers.
-
Click Continue, and then when a confirmation message is displayed, click Done to return to the Optional Actions page.
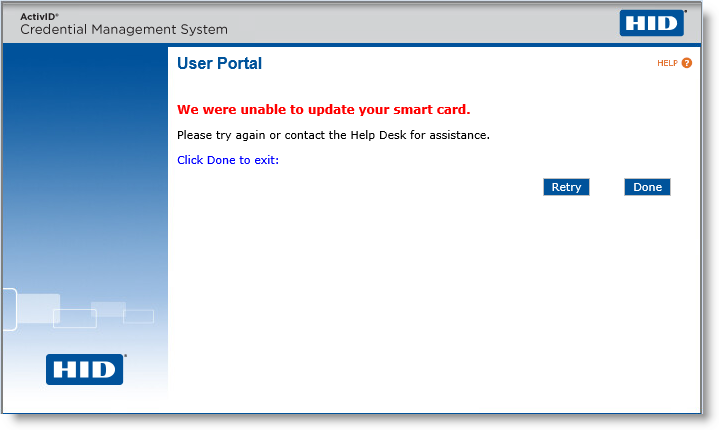
If the update is not successful, a warning is displayed:
-
(Optional) If the update is not successful, you can click Retry to attempt the update again.
Note: In order for the Retry button to be available, the Enable issuance retry for user option must have been enabled using the Operator Portal. -
To download escrowed certificates, see Downloading Escrowed Certificates.
If you have locked your device (for example, you have exceeded the number of incorrect PINs attempts permitted), and you need to unlock it, then follow this scenario.
-
Insert the locked device into the reader and connect to the ActivID CMS User Portal. To connect to the ActivID CMS User Portal, follow steps 1 to 3 in Self-Issuing a Device. Depending on how the ActivID CMS User Portal is configured, you will be prompted to enter one of the following types of authentication:
-
LDAP password,
-
Answers to security questions, or
-
Emergency password (provided by an ActivID CMS Help desk agent). Depending on how the portal has been configured, you might be prompted to contact an ActivID CMS Help desk agent to unlock the device.
-
-
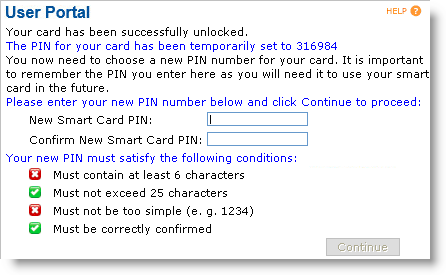
If prompted for your LDAP Lightweight Directory Access Protocol password or answers to security questions, enter the required authentication credentials, and then click Continue. Your device will be unlocked and a confirmation message will be displayed.
-
Enter and confirm a New Smart Card PIN, and then click Continue.
-
Click Done when the confirmation message appears.
Use this scenario if you have forgotten the PIN of your device.
-
Open your Web browser and go to the Web page provided by your ActivID CMS administrator for connecting to the ActivID CMS User Portal.
-
Click Launch User Portal. The Welcome page appears. The first time you connect to the ActivID CMS User Portal from the workstation, a security message might appear before the Welcome page. If this happens, then click Yes to continue.
-
Click Start.
-
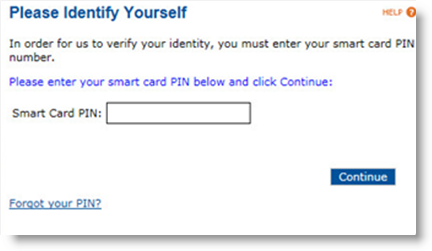
If you forgot the PIN of your device, click the Forgot your PIN? link.
-
Depending on how the ActivID CMS administrator configured the ActivID CMS User Portal, you might be prompted to enter the LDAP password instead of an Initial Password or to provide answers to security questions.
-
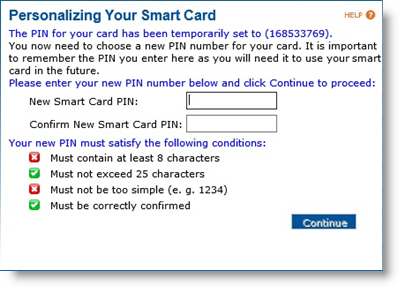
Enter the Initial Password, the LDAP password, or answers to the security questions, and then click Continue. A progress bar is displayed. When the process has been completed, a page similar to the following message appears.
-
Enter and confirm a new PIN for the device, and then click Continue.
-
When a confirmation message appears, click Done.
Use this scenario to declare a device incident (for example, the device is forgotten, lost, stolen, or damaged).
-
To connect to the ActivID CMS User Portal, follow steps 1 and 2 in Self-Issuing a Device. Depending on the ActivID CMS User Portal configuration, you will be prompted to enter one of the following authentication types:
-
LDAP password, or
-
Answers to security questions.
-
-
Click I don’t have my smart card.
-
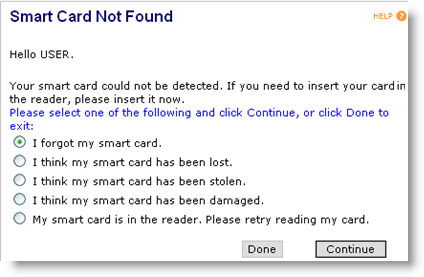
Enter the required authentication credentials, and then click Continue. The Smart Card Not Found page is displayed.
-
If one of the following options applies, then select it:
-
I forgot my smart card.
-
I think my smart card has been lost.
-
I think my smart card has been stolen.
- I think my smart card has been damaged.
The declaration of a device incident automatically creates a temporary or permanent device replacement request. This request must be approved by an ActivID CMS operator before a replacement device can be issued.
-
-
If you have the device, but did not insert it into the card reader, you can do so and retry reading the smart card. Select My smart card is in the reader. When you click Continue, this action cancels the request and starts the normal login process.
-
Click Continue. The Device Incident Reported page is displayed. Click Done.
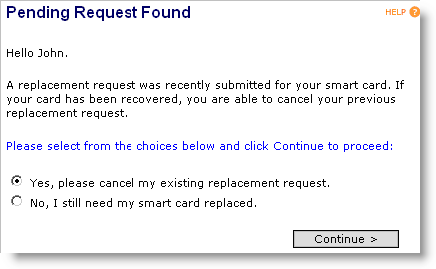
Use this scenario to cancel a device replacement request (for example, you find the device that you had declared lost or stolen). For this scenario, you must be logged onto the ActivID CMS User Portal, and you must have a pending request for a replacement device. After you are authenticated by the ActivID CMS User Portal, the Pending Request Found page is displayed.
-
Select Yes, please cancel my existing replacement request, and then click Continue.
A confirmation message is displayed.
-
Click Done.
Use this scenario if you want to download escrowed keys and certificates in the PFX format. After downloading the keys and certificates, you can send them to your mobile device and import them in the certificate store. This will enable you to use the same keys on your mobile device (without any smart card reader) as you use on your computer with your device.
-
Insert the device into the reader and connect to the User Portal. To connect to the User Portal, follow steps 1 to 3 in Self-Issuing a Device.
-
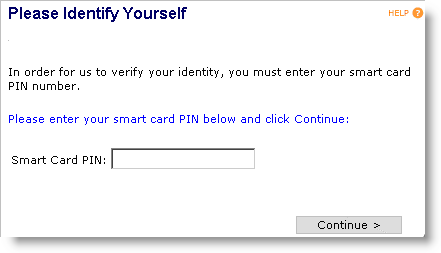
Enter the device PIN, and then click Continue. The system automatically performs any pending updates. When the automatic updates are completed, the Optional Actions page appears.
-
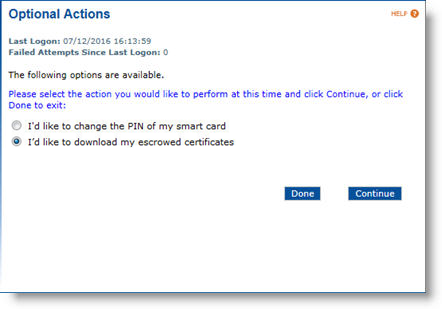
Select I'd like to download my escrowed certificates, and then click Continue. The Download escrowed certificate page displays the list of escrowed certificates that you can download.

-
Click the Download link for each of the escrowed certificate that you want to download. A confirmation page appears.
-
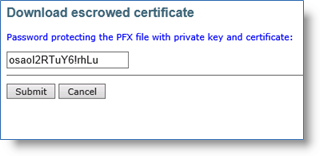
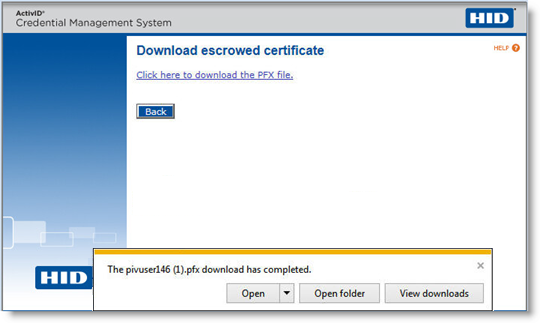
Click Submit. The Download escrowed certificate page displays a link.

-
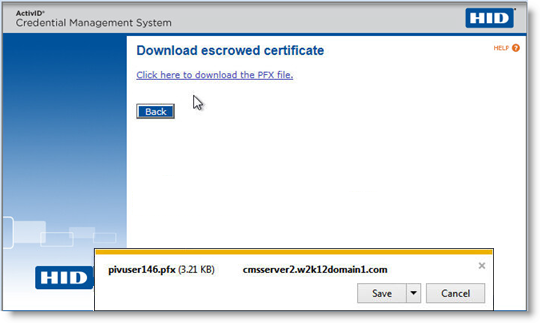
Click the Click here to download the PFX file link.
-
Click Save when the confirmation message appears. The downloaded file contains the escrowed key and certificate.
-
You can now send the key and certificate to the target device when you want to use it. Use the password displayed in step 4 to decrypt it during the import process.
Enrollment of Mobile App Certificates in the User Portal must be enabled using the Operator Portal.
User must have a smart card, smart USB key, or virtual smart card enabling FIPS-196 authentication.
User must have a supported mobile device – This version of ActivID CMS only supports Apple devices running iOS 10 or higher.
Recommended: User should have a QR code app installed on the mobile device. This application must support launching Safari as an external browser. If the browser is embedded in the QR code app, the Apple OTA protocol generates an error.
User must install the root certificates on his or her mobile device and ensure that they are properly trusted.
Make sure that the root certificates installed are enabled in the Certificate Trust Settings of the mobile device.
- If using custom certificates (recommended), root certificates for OTA signing, SCEP, and CMS Server SSL must be provided.
Only one mobile app certificates policy must be assigned to the corresponding user group.
Use this scenario if you have a functional smart card, smart USB key, or virtual smart card and you want to issue credentials (mobile app certificates) for a mobile device.
-
Insert the device into the reader and connect to the ActivID CMS User Portal. To connect to the ActivID CMS User Portal, follow steps 1 to 3 in Self-Issuing a Device.
-
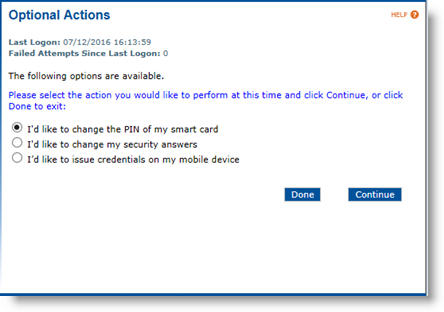
Enter the device PIN, and then click Continue. Upon successful FIPS-196 authentication, the Optional Actions page appears.
-
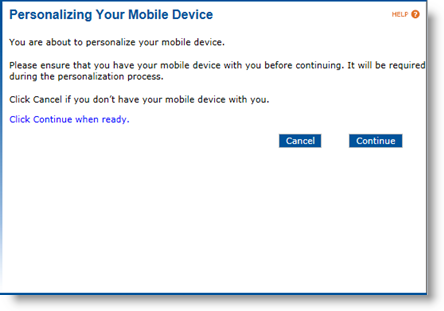
Select I'd like to issue credentials on my mobile device and click Continue. The Personalizing Your Mobile Device page appears:
-
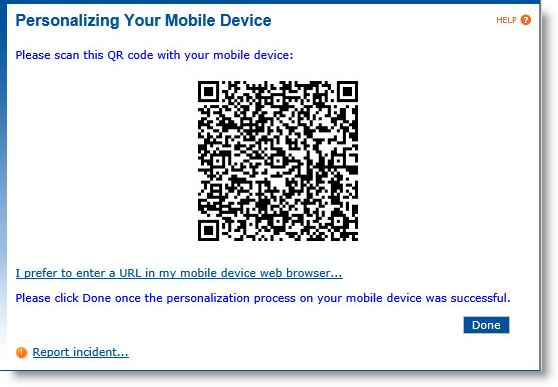
Click Continue. A page appears with a QR code:
-
Scan the QR code with your mobile device. Mobile personalization occurs on the device itself: click on the link displayed and follow the required steps to install the profile (for an illustration, see the Example of Profile installation on iPhone below). Once the process is completed, the mobile device is ready to use.
-
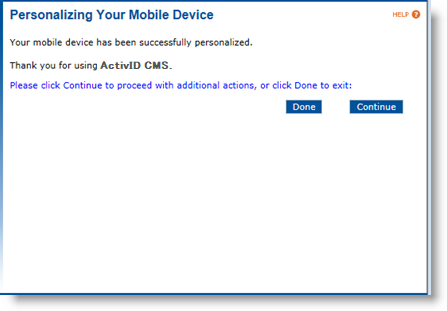
If the personalization process was successful, click Done to return to the Optional Actions page. Otherwise, click Report incident… (see step 1 below).
-
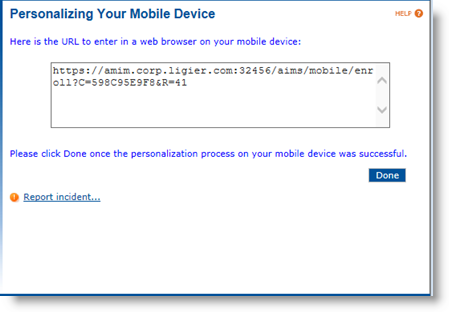
(Optional) Click the I prefer to enter a URL in my mobile device web browser... link. A page appears with a URL in plain text:
-
Enter the URL in a Web browser on the mobile device to run the personalization process. Once the process is completed, the mobile device is ready to use.
-
Click Done to return to the Optional Actions page.
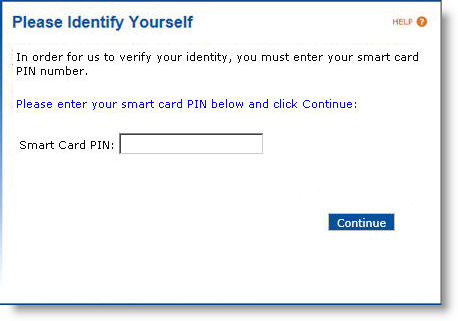
If the personalization process is not completed successfully:
-
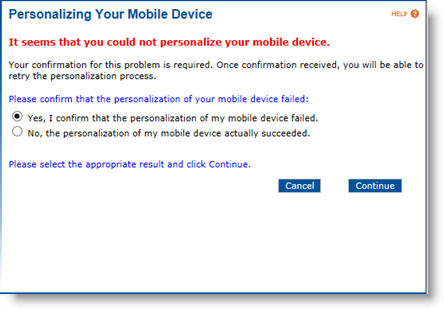
Click the Report incident… link. A confirmation page appears:
-
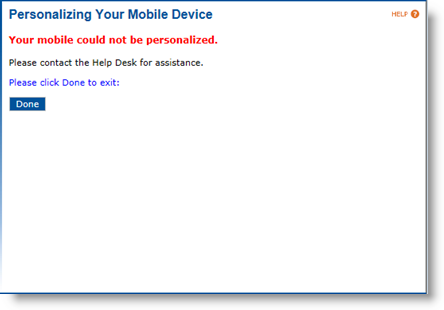
Select Yes, I confirm that the personalization of my mobile device failed and click Continue. The following page appears:
-
(Optional) If applicable, select No, the personalization of my mobile device actually succeeded and click Continue.
-
Click Done to exit the User Portal or Continue to return to the Optional Actions page.
This example shows how to install the credential profile on an iPhone after scanning the QR code (step 5 above).
-
Click on Install (top right) to begin and then on the Install button at the bottom of the screen:
Note: User may need to enter his or her PIN code.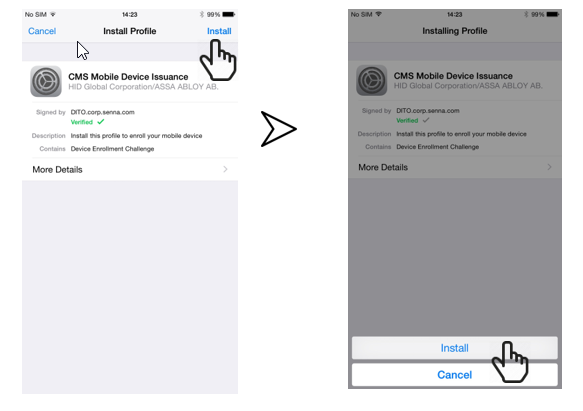
-
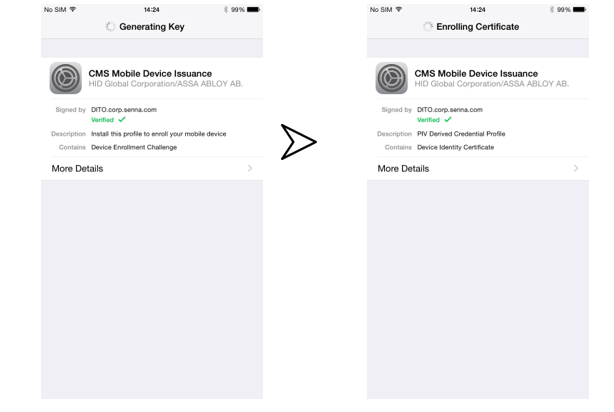
Wait for the installation process to finish:
-
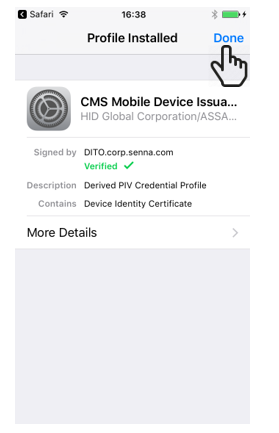
Click Done (top right) once the profile is installed. The mobile device and its credentials (mobile app certificates) are ready to use:
- Enrollment of Mobile App Certificates in the User Portal must be enabled using the Operator Portal.
- User must have a smart card, smart UBS key, or virtual smart card enabling FIPS-196 authentication.
User must have a mobile device issued as described in Issuing Credentials (Mobile App Certificates) on a Mobile Device.
An Applications Update Request must have been performed for the mobile app certificates of this device using the Operator Portal.
Recommended: User should have a QR code app installed on the mobile device. This application must support launching Safari as an external browser. If the browser is embedded in the QR code app, the Apple OTA protocol generates an error.
Use this scenario if you want to update the mobile app certificates of your mobile device.
-
Insert the device into the reader and connect to the ActivID CMS User Portal. To connect to the ActivID CMS User Portal, follow steps 1 to 3 in Self-Issuing a Device.
-
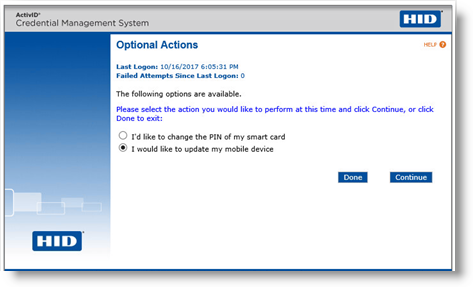
Enter the device PIN, and then click Continue. Upon successful FIPS-196 authentication, the Optional Actions page appears.
-
Select I would like to update my mobile device and click Continue. The Updating Your Mobile Device page appears:
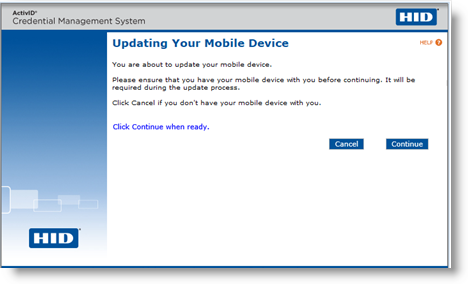 Note: The I would like to update my mobile device option is only available when there is an applications update pending for the mobile app certificates of this device.
 -
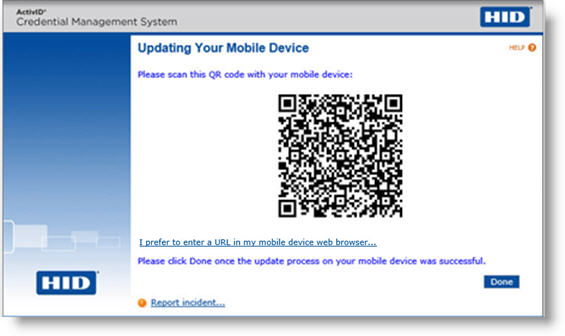
Click Continue. A page appears with a QR code:
-
Scan the QR code with your mobile device. The update process occurs on the device itself: click on the link displayed and follow the required steps to install the update. Once the update process is completed, the mobile device is ready to use.
-
If the update process was successful, click Done to return to the Optional Actions page. Otherwise, click Report incident… (for details, see the steps described for reporting an incident in Issuing Credentials (Mobile App Certificates) on a Mobile Device).
Note: If the update process is not completed, the user cannot use the mobile device and must begin the mobile update process again. On the server side, the mobile device state is set to INVALID-FAILED. -
(Optional) Click the I prefer to enter a URL in my mobile device web browser... link. A page appears with a URL in plain text.
-
Enter the URL in a Web browser on the mobile device to run the update process. Once the process is completed, the mobile device is ready to use.
-
Click Done to return to the Optional Actions page.

ActivID CMS User Portal for Card Auto-Update is a web-based application launched by ActivID ActivClient. This application supports the same environments as the ActivID CMS User Portal, and can also handle multiple cards inserted into multiple card readers.
This feature offers a subset of the ActivID CMS User Portal functionality. It automatically executes pending card update requests (from ActivID CMS) when a user inserts his/her card and logs in. (ActivID ActivClient detects the pending requests.) The auto-update service applies to initial card issuance requests, card re-issuance requests, and card applications updates. ActivID CMS User Portal for Card Auto-Update also enables the unlocking of a card.
You can use the auto-update service to:
-
Enroll a card (and personalize the card with the user information and credentials),
-
Get updates for a card, and
-
Unlock a card (for example, if you exceeded the number of incorrect PINs attempts that caused the card to be locked).
When ActivID ActivClient determines that updates are ready for the card, an automatic alert message that displays this information is triggered.
Click Start to install the updates. The process of automatically updating a card takes between one to five minutes. Make sure that the smart card remains connected until the process has been completed and that network connectivity is maintained.


