Installing the Password Manager Admin Tool
The DigitalPersona Password Manager Admin Tool is an optional component of DigitalPersona Premium that administrators can use to create managed logons for websites, programs and network resources.
The Password Manager Admin Tool enables administrators to provide controlled access to websites, programs and network resources by adding a variety of authentication mechanisms (such as passwords, fingerprints and access cards) to their logon and change password screens.
If you are planning to create managed logons using a web browser supporting extensions, such as Google Chrome, Mozilla Firefox or Microsoft Edge, make sure that the DigitalPersona Password Manager Admin Tool is installed along with your DigitalPersona AD Workstation, and that the Password Manager extension is installed in the browser.
Managed logons created using a Chrome, Firefox, or Edge web browser may not be fully compatible with clients using Internet Explorer. If users need to use Internet Explorer, we recommend creating the managed logons using that browser.
Install the Password Manager Admin Tool
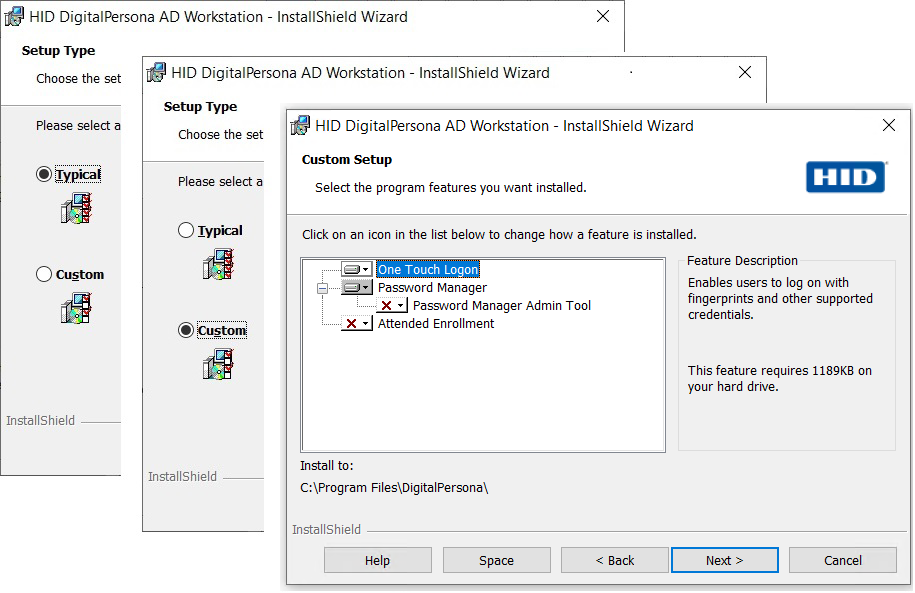
The Password Manager Admin Tool is an optional component that can be installed through the Custom Setup option of the DigitalPersona AD Workstation installation.
-
Locate and launch the setup.exe file for the DigitalPersona AD Workstation.
-
Select Custom Setup.
-
Expand Password Manager to display additional options.
-
Select Password Manager Admin Tool and choose This feature will be installed on local hard drive.
-
Click Next and continue to follow the onscreen instructions.
Once installation is complete, set up the tool by following the instructions in the following sections.
 Create a Shared Network Folder
Managed logons are organized in shared folders created and maintained through the DigitalPersona Password Manager Admin Tool.
Folders are created and managed from the Logons tab in the Password Manager Admin Tool.
The folder should be created on a shared network drive accessible to the DigitalPersona server in order to make the logons available for deployment. However, the folder may be created on a local drive for initial testing and later copied to a shared drive.
Then assign appropriate permissions to the folder’s users.
-
Create a folder on the server/computer where you will store the managed logons.
-
Share the folder that you just created to allow users to access it.
-
Right-click on the folder and click on Properties in the context menu.
-
Click on the Sharing tab.
-
Verify the permissions by clicking on the Permissions button.
Set Up the GPO Policy
The Workstation Administrative Template, DPAltusClient (admx/adm), file must be added to the Active Directory Computer Configuration folder in the Administrative Templates folder of the Group Policy Management Editor. For further details, see Administrative Templates.
-
Open the GPO where the DigitalPersona template was added.
-
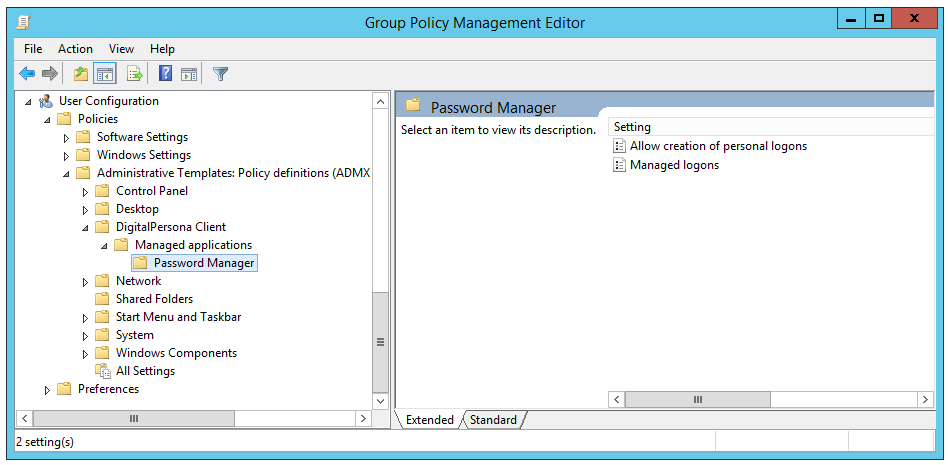
Go to User Configuration\Administrative Templates\DigitalPersona Client\Password Manager.
-
Double-click on Managed logons (in the right pane).
-
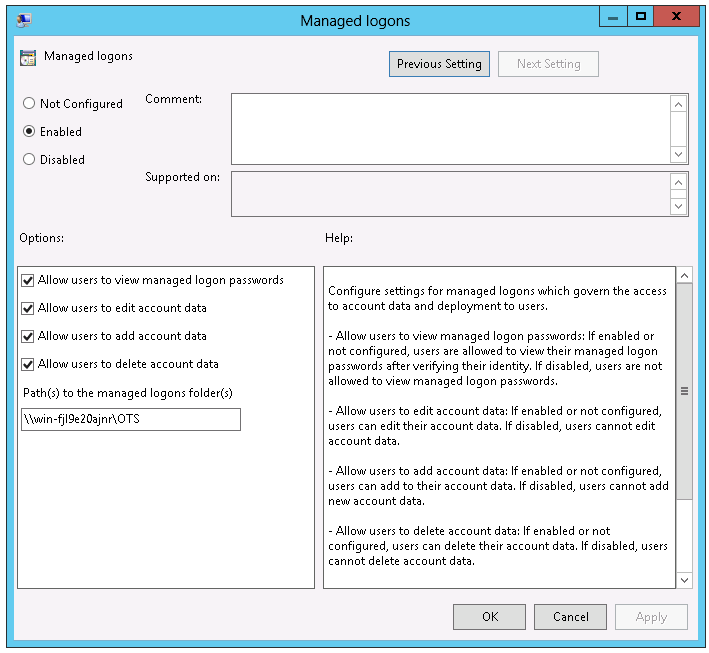
Click on Enabled to enable this policy. The default setting is "Not Configured."
-
Specify the path to the shared folder that you created in the previous section. To specify multiple folders, you can use the pipe ( | ) character.
The new setting will be applied to all DigitalPersona clients during the usual refresh interval or the next time they restart Windows.
See also:


