iOS App and Printer Setup on iPad
Introduction
HID Visitor Manager comes bundled with a visitor kiosk that can be set up on iPad or Surface Pro. This guide covers the installation steps for setting up the visitor kiosk on iPad via the iOS app. Note that the SAFE app is used for both HID Visitor Manager applications and HID SAFE.
Prerequisites
-
iPad Pro 12.9-inch is recommended.
-
HID Visitor Manager Visitor Manager administrator credentials are needed.
-
A printer can optionally be used to check in print badges directly from the iPad.
-
Brother printer should be configured and set up - please use the Brother Printer Setup Guide as your reference or download the User Manual from the Brother website
-
To successfully print badges, SAFE Mobile App and Brother Printers must be connected to the same Wi-Fi network.
-
Download iOS App
-
On your iPad, open the App Store. Search for and download the SAFE Mobile app 5.0+.
-
Open the SAFE Mobile App 5.0+ app, and tap the Cloud Download icon.
-
Once the download and installation of SAFE Mobile App are complete, tap on OPEN.
IOS App Configuration
-
Launch the SAFE Mobile App 5.0+ on your iPad.
-
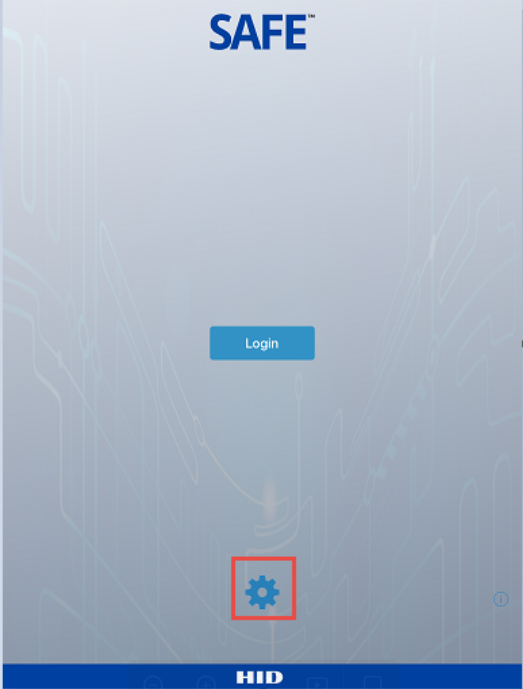
Tap on Settings.
-
The Settings page allows you to configure the HID Visitor Manager Kiosk URL.
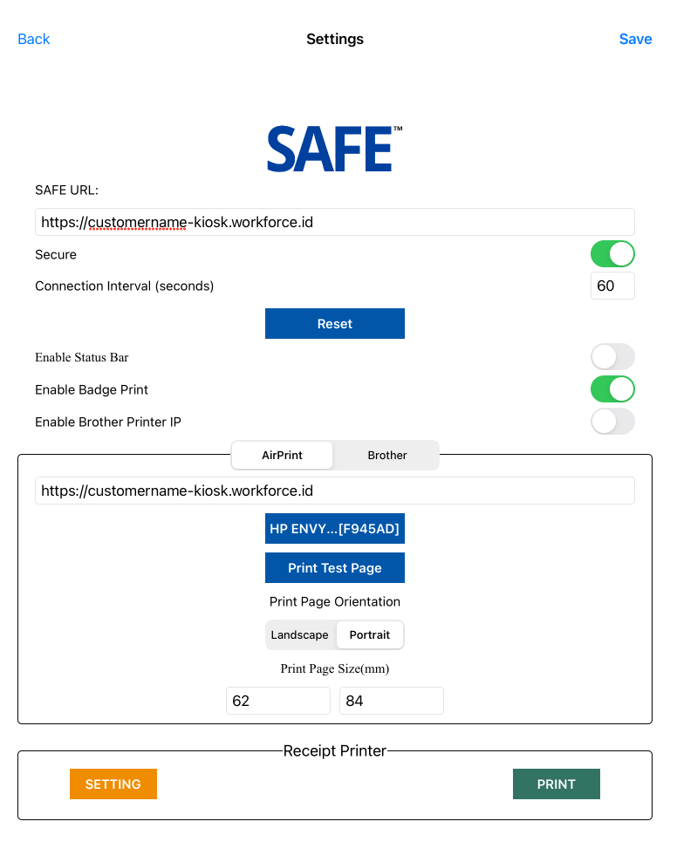
Kiosk URL is generally in this format: http://{{tenantname}}-kiosk.workforce.id.
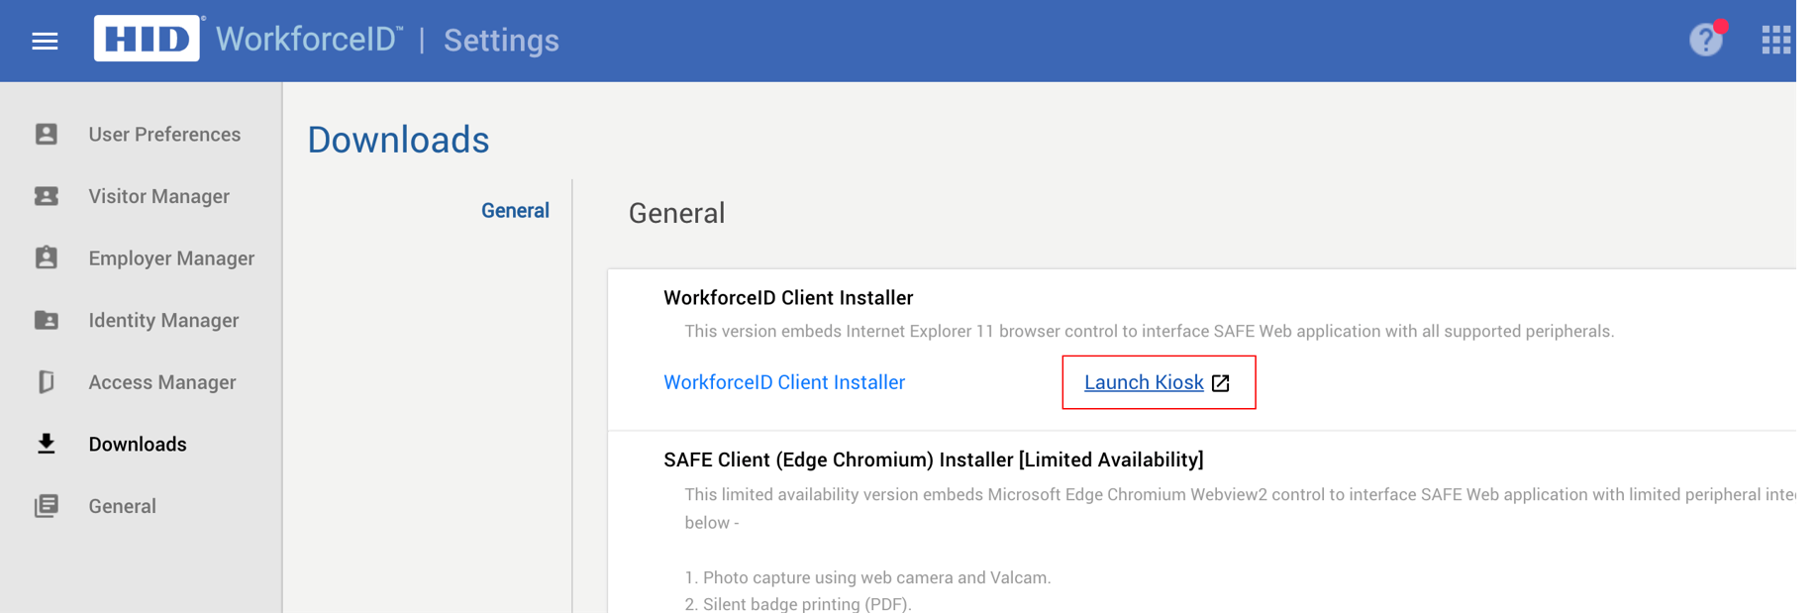
You can find the link to the kiosk by going to Settings > Downloads > General > Launch Kiosk.
Configure iPad camera for photo capture during check-in
-
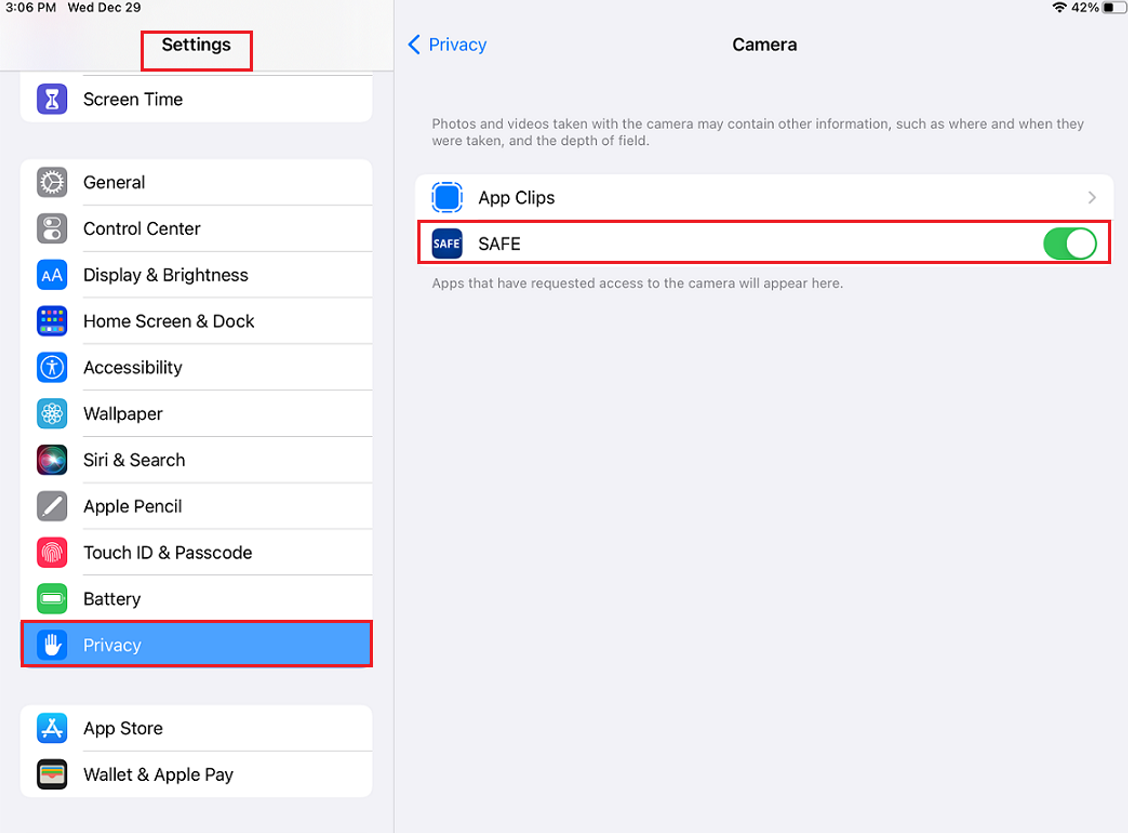
Update the App permission by navigating to iPad Settings > Privacy > Camera > Enabled SAFE App.
-
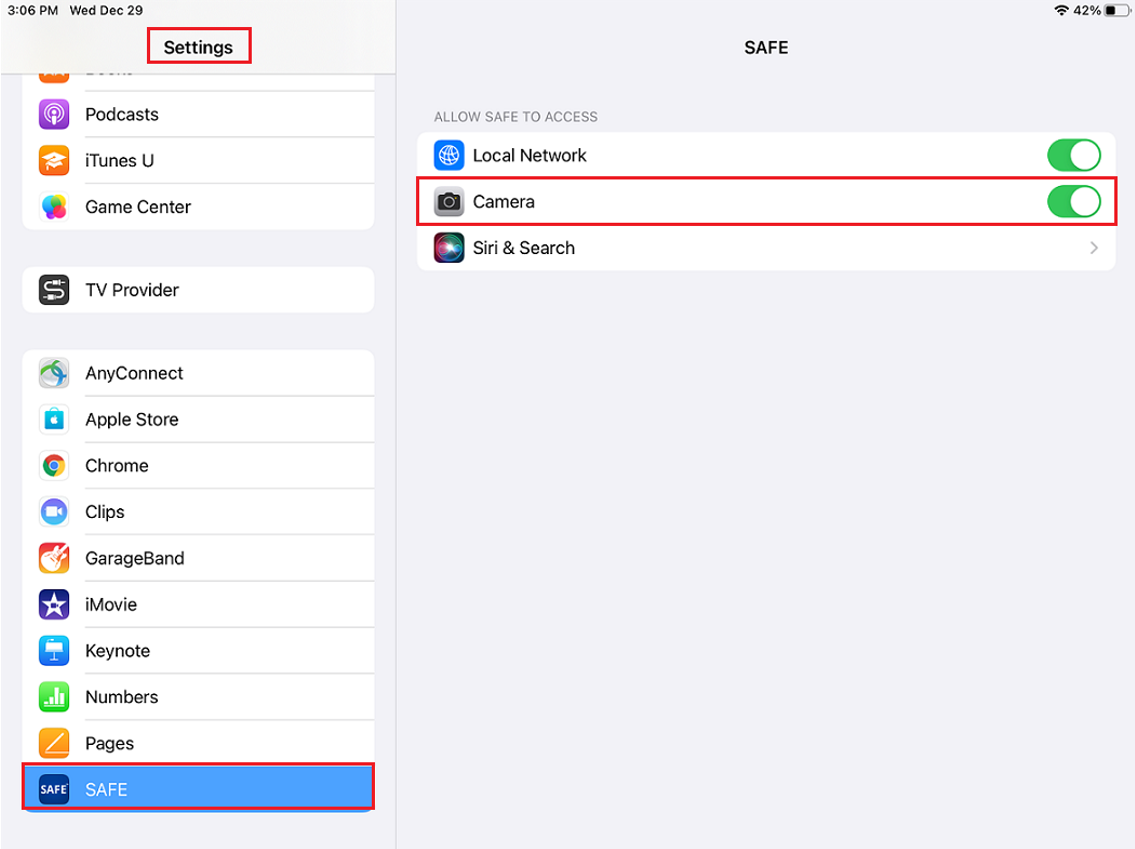
Double-check the settings at iPad Settings > SAFE > Enabled Camera.
-
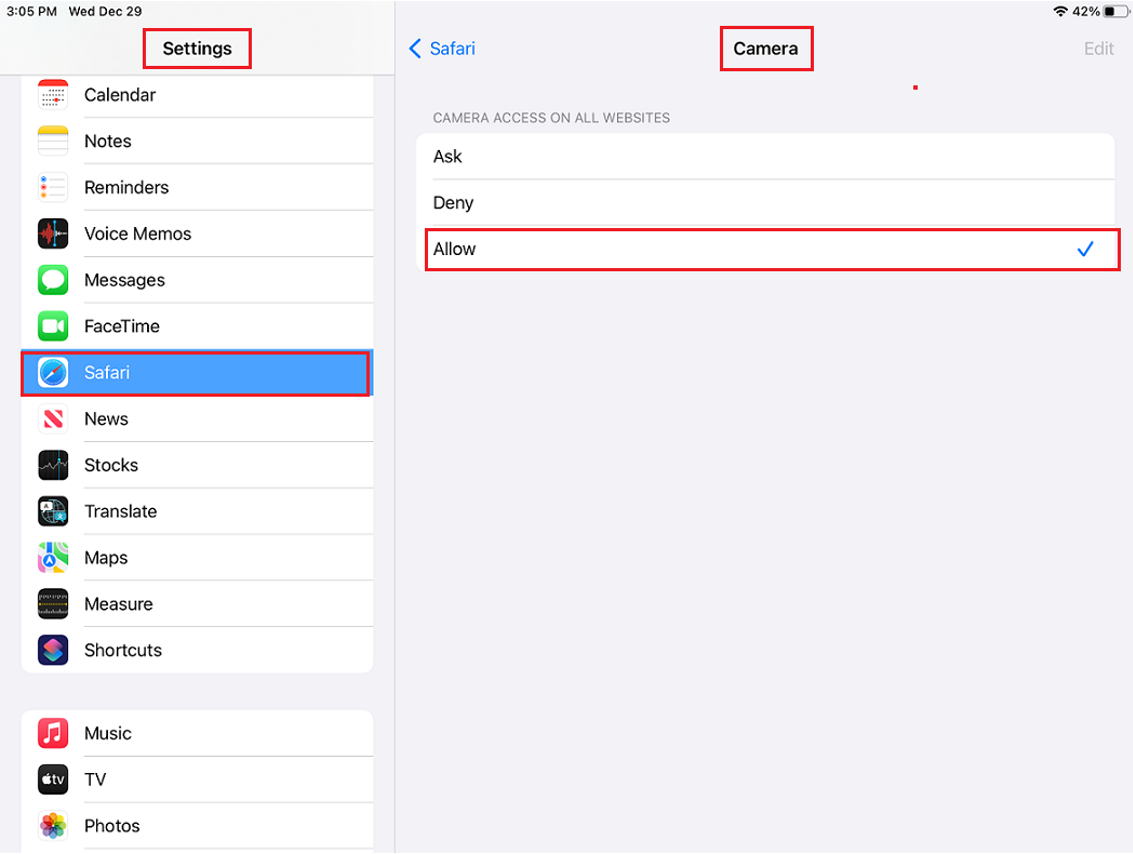
Update the Safari Settings at iPad Settings > Safari > Settings for Websites > Allow the Camera.
-
Once the configuration is done, launch the kiosk on the iPad by tapping the Login button and it will be ready to welcome visitors.
Setting up Printer
You can print badges via Wifi for the selected Brother QL 820NWB label printer. With this options, the badge will print automatically at the time that the visitor completed the check-in via the kiosk.
The below page to configure the Printer based on requirements:
Once the Printing configuration is done, launch the kiosk on the iPad by tapping the Login button and it will be ready to welcome visitors.
APPENDIX
How to Lock SAFE Mobile APP Using Guided Access or SingleApp Mode
Guided Access limits your iOS device to a single app.
How to set up Guided Access
-
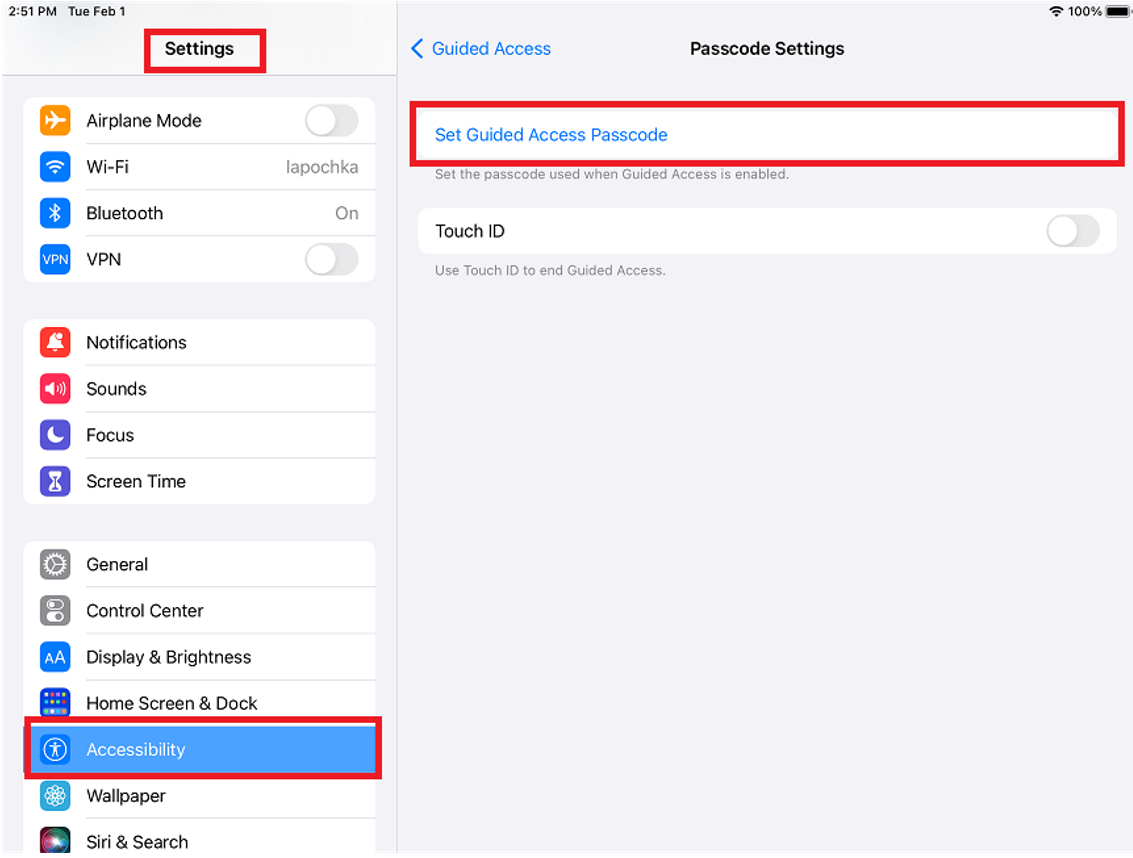
Go to Settings > Accessibility > Guided Access.
-
Turn on Guided Access.
-
Tap Passcode Settings, then tap Set Guided Access Passcode.
-
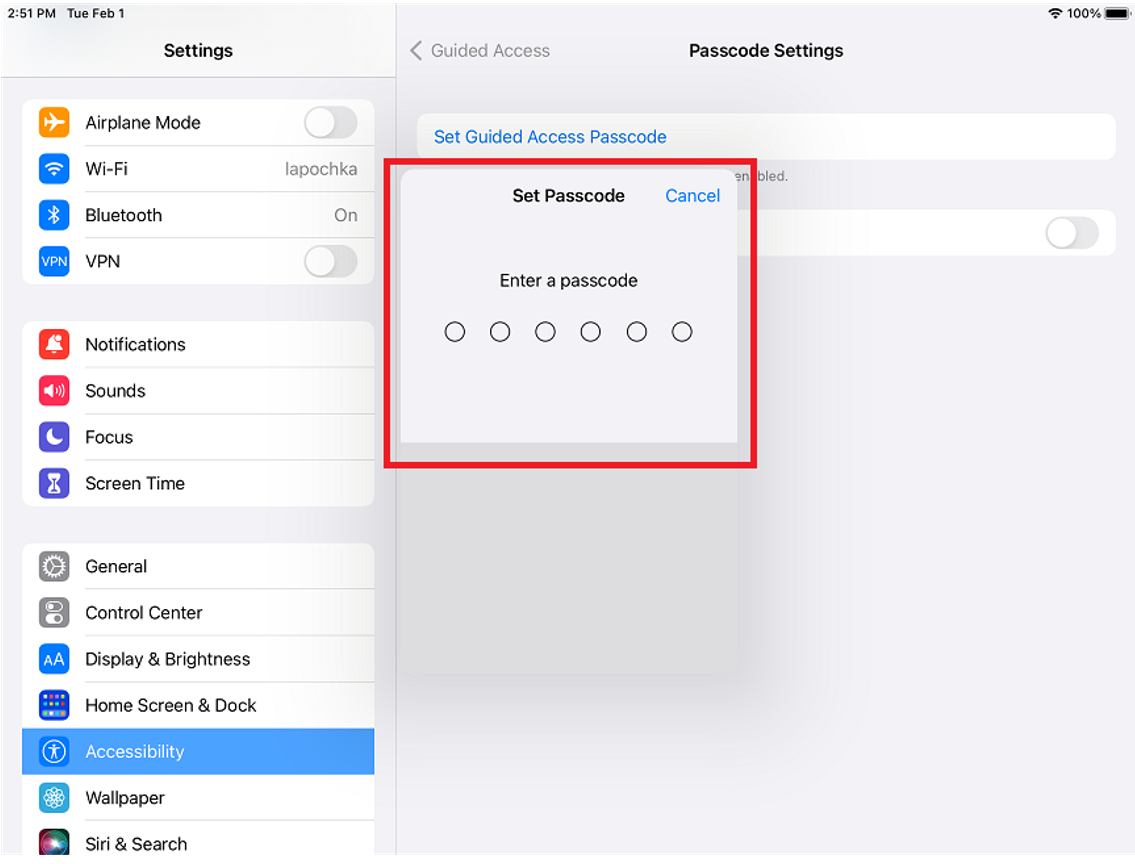
Enter a passcode, then re-enter it. From here, you can also turn on Face ID or Touch ID as a way to end a Guided Access session.
How to start a Guided Access session
Open the app that you want, then triple-click the Home button and Click on Start as seen on top RHS.
How to end a Guided Access session
Triple-click the Home or side button. Enter your Guided Access passcode, then tap End.
App Settings Details
The table below describes all settings of the iOS app.
| Settings | Descriptions |
|---|---|
| Secure | Enabling this setting means that the URL is secure by changing HTTP to HTTPS. |
| Connection Interval (Seconds) | Here you can enter the Connection Interval in seconds. This helps to reconnect when the network connectivity issue (potentially due to a WIFI drop) is resolved and ensures ongoing flow. Whenever there is a network connectivity issue, an alert will be displayed with a reload button. Hence, whenthe reload button is clicked, the app will try to reconnect thus helping to continue with the ongoing flow. |
| Enable Status Bar | Enabling this setting means that the Status Bar is visible and it displays various information, such as WiFi, Battery life and Time, etc. |
Setup Printer for Kiosk
| Settings | Sub-settings | Description |
|---|---|---|
| Enable Badge Print |
Enabling this option allows the user to select printer, print page orientation, and print page size. There are two options to print visitor badges - the user can select either AirPrint or Brother. Note: For AirPrint, ensure that your iPad and the AirPrint-enabled printer are on the same WiFi network. Printing will not work if the iPad and the AirPrint printer are on different networks. After selecting the printing option (via AirPrint or via Brother), enter the below-mentioned configuration. |
|
| Print API Base URL | Enter the URL. (This URL is the same as the HID Visitor Manager Kiosk URL mentioned above) | |
| Select printer | Tap on Select Printer. The printer dialog box appears with the list of printers configured in | |
| Print page Size |
Page size can be customized in this option. Enter the paper size width and enter the paper size height of the badge. |
You might be interested in:


