First Step Authentication
In the authentication first step, choose a required authentication type from the drop-down list and click ADD.
The authentication journey creation with each individual authentication type is mentioned below.
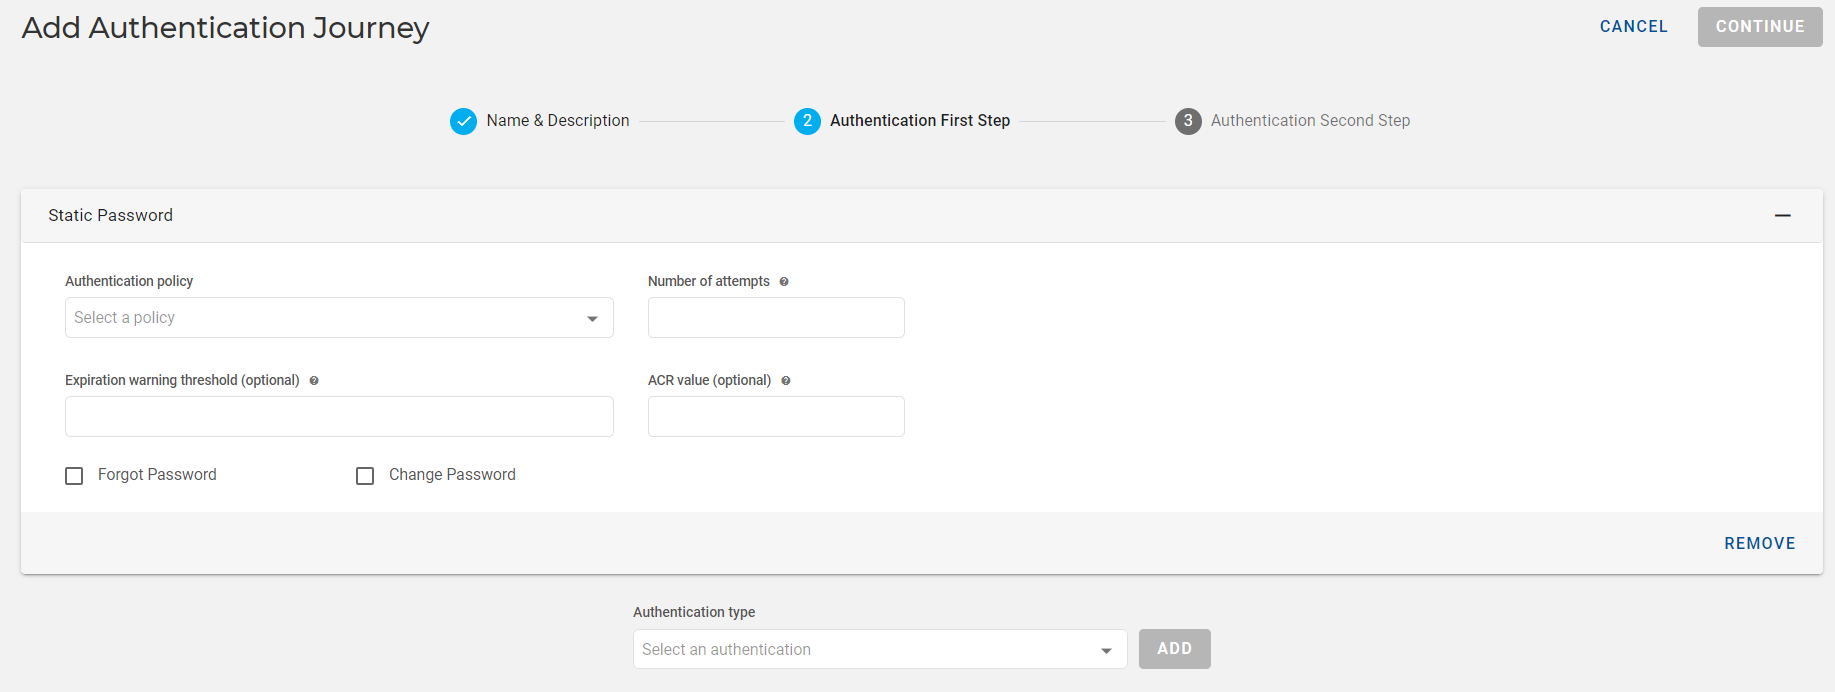
Creating Authentication Journey with Static Password
-
Choose an authentication type Static Password from the drop-down list and click ADD.
-
Enter the below details and click CONTINUE for the authentication second step.
Important: Enable the 'Forgot password' and 'Change password' toggle buttons as shown below to allow users to reset and/or change their password on the IdP login screen. If these options are not enabled here, they will not appear on the IdP login screen.Note: For details of these below shown fields, refer to Fields used in the Authentication Journey.
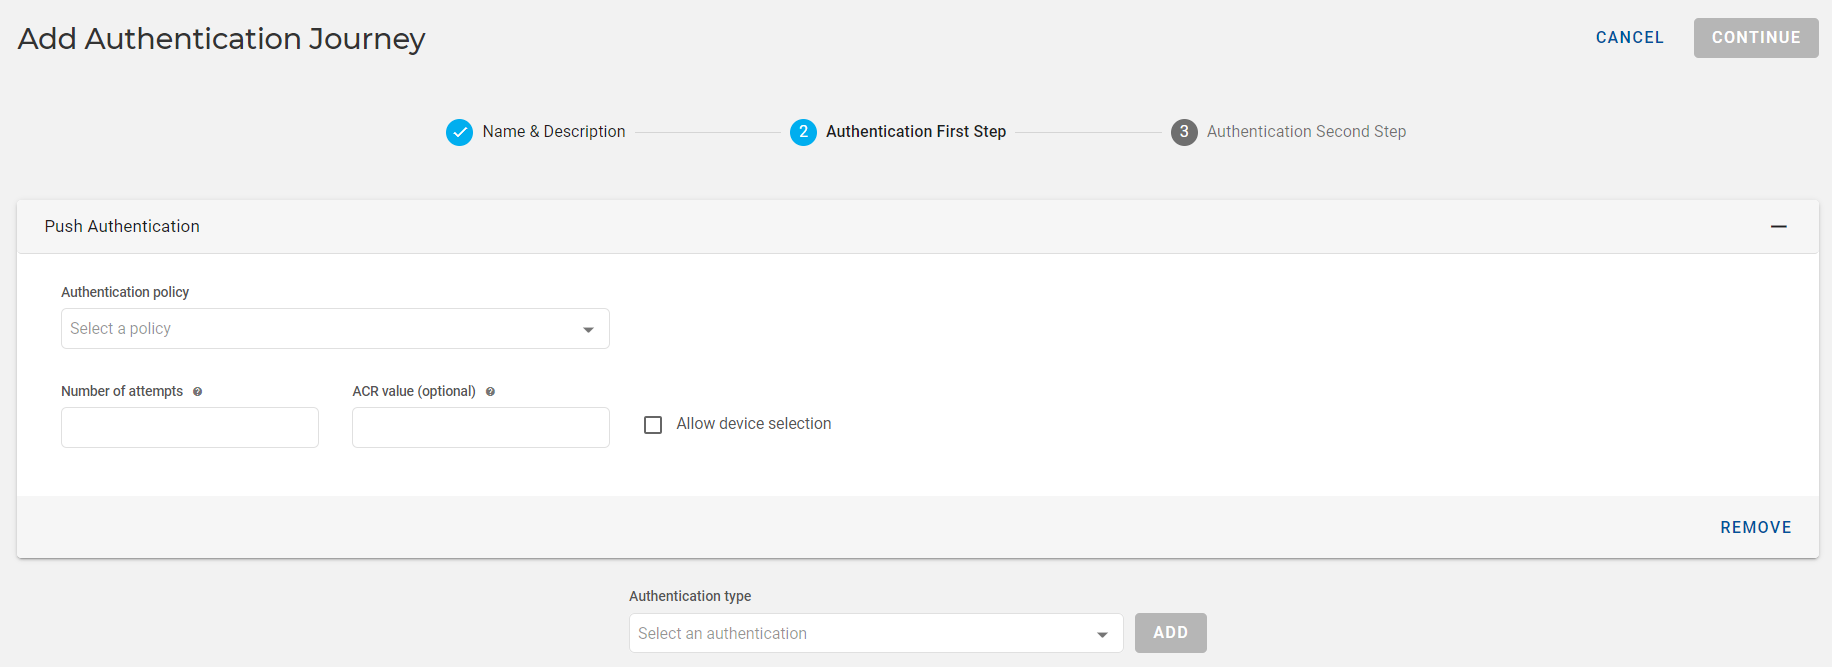
Creating Authentication Journey with Push Authentication
-
Choose an authentication type Push from the drop-down list and click ADD.
-
Enter the below details and click CONTINUE for the authentication second step.
Note: For details of these below shown fields, refer to Fields used in the Authentication Journey.
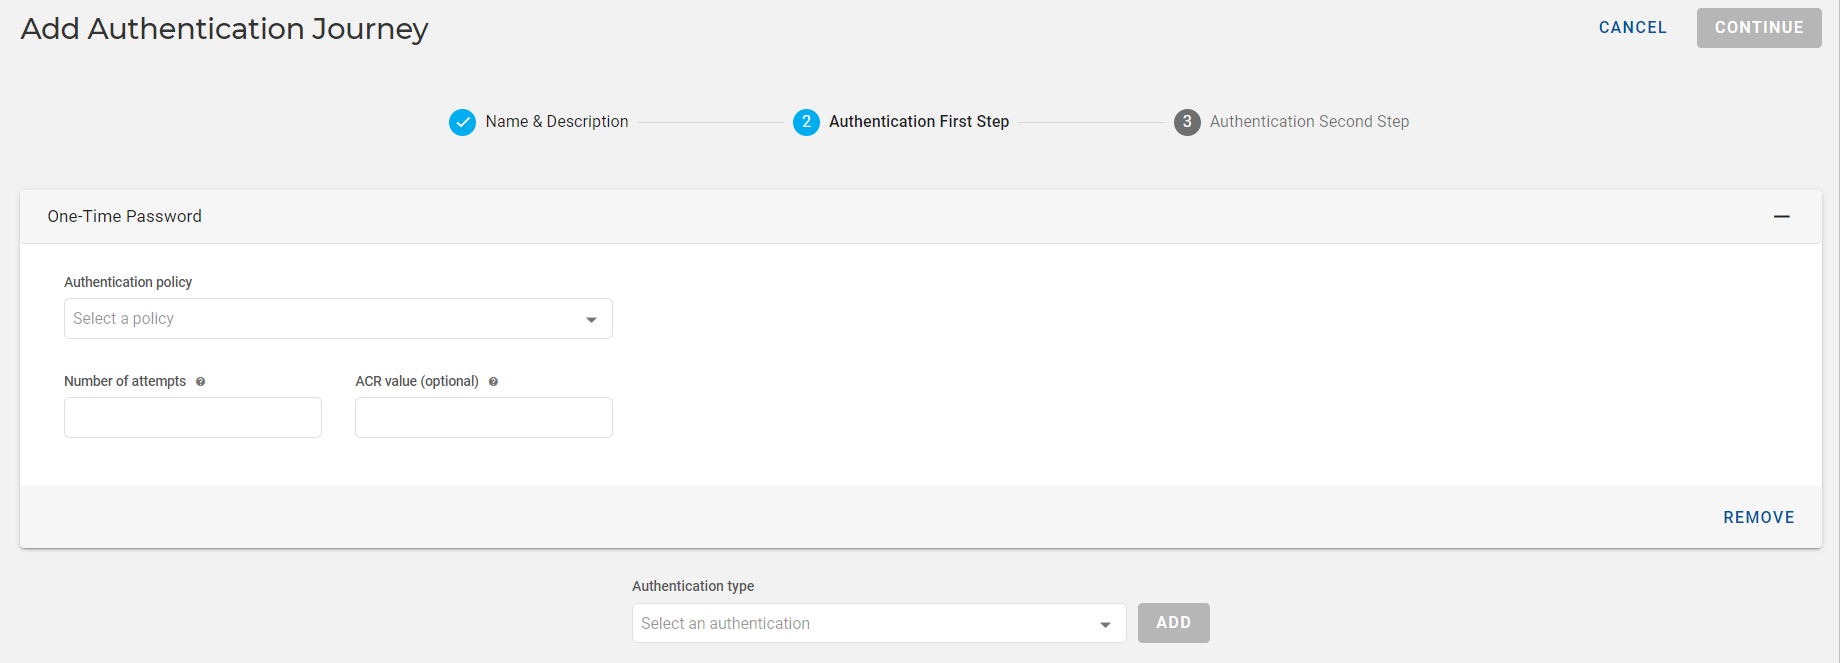
Creating Authentication Journey with One-Time Password
-
Choose an authentication type One-Time Password from the drop-down list and click ADD.
-
Enter the below details and click CONTINUE for the authentication second step.
Note: For details of these below shown fields, refer to Fields used in the Authentication Journey.
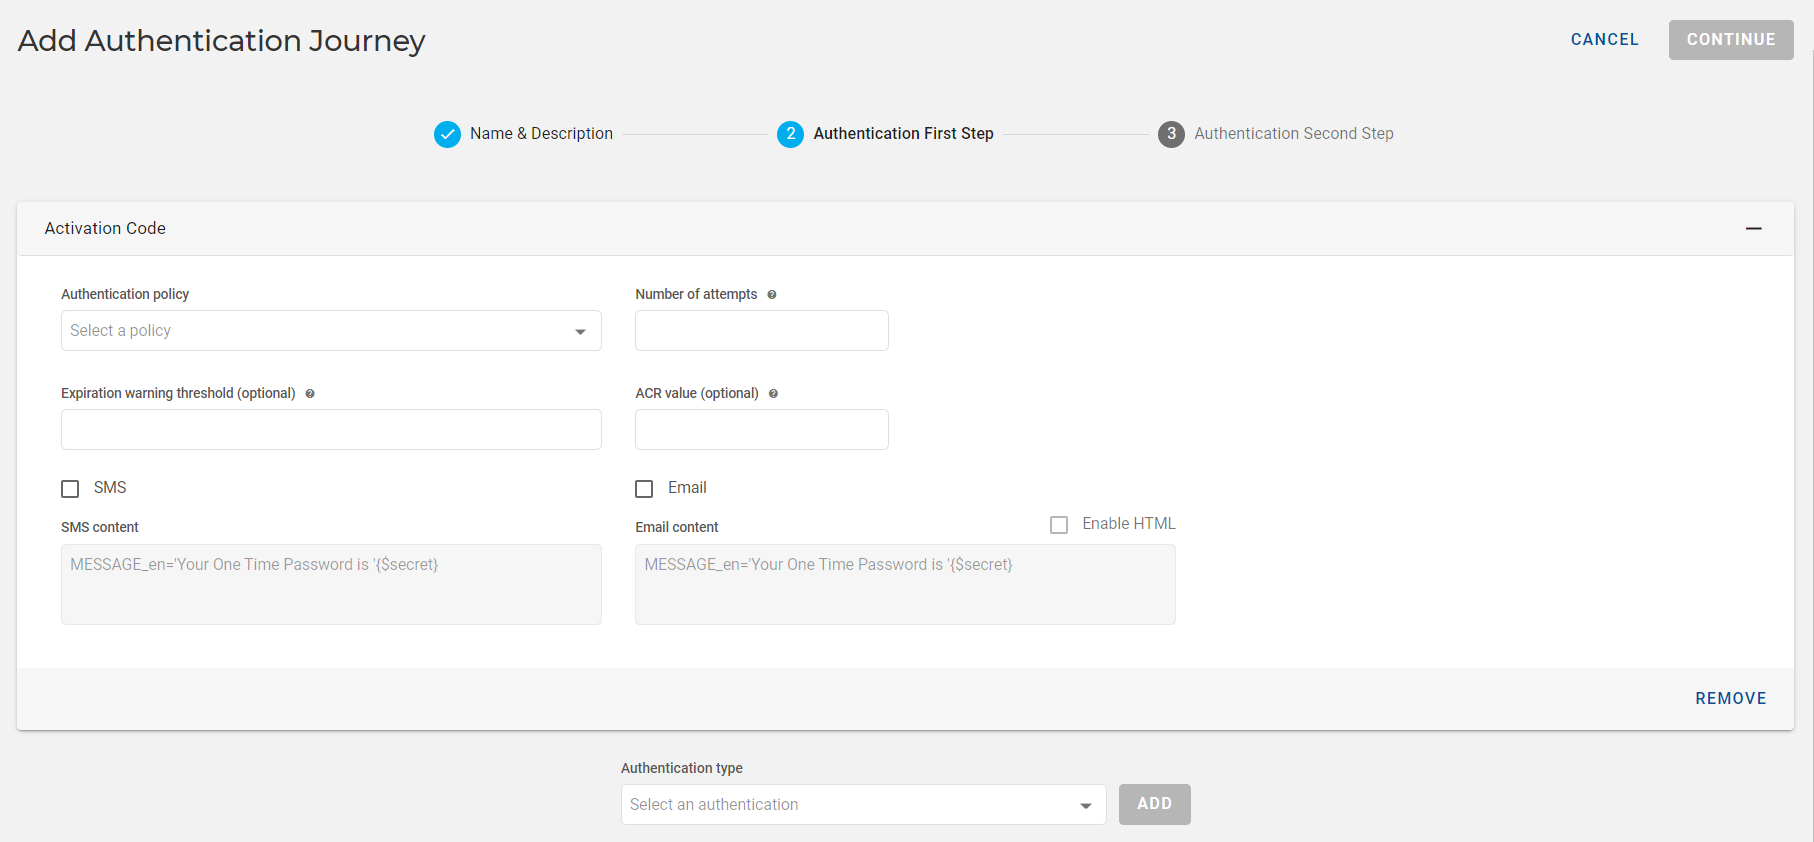
Creating Authentication Journey with Activation Code
-
Choose an authentication type Activation Code from the drop-down list and click ADD.
-
Enter the below field details.
Note: For details of these below shown fields, refer to Fields used in the Authentication Journey. -
Select SMS and/or Email to send the OTP along with the message to the end user.
Select Enable HTML for the use of HTML format contents through Email if you want to send formatted messages instead of plain text.
-
Click CONTINUE for the authentication second step.
Note:If only Activation Code is chosen in the first step, then in the second step, the One-Time Password configuration appears automatically with disabled fields except Number of attempts field, which can editable based on the requirement.
If the Activation Code is chosen in the first step along with other authentication factors, then in the second step, you can configure all the authenticator factors except the Activation Code.
Creating Authentication Journey with Out of Band
-
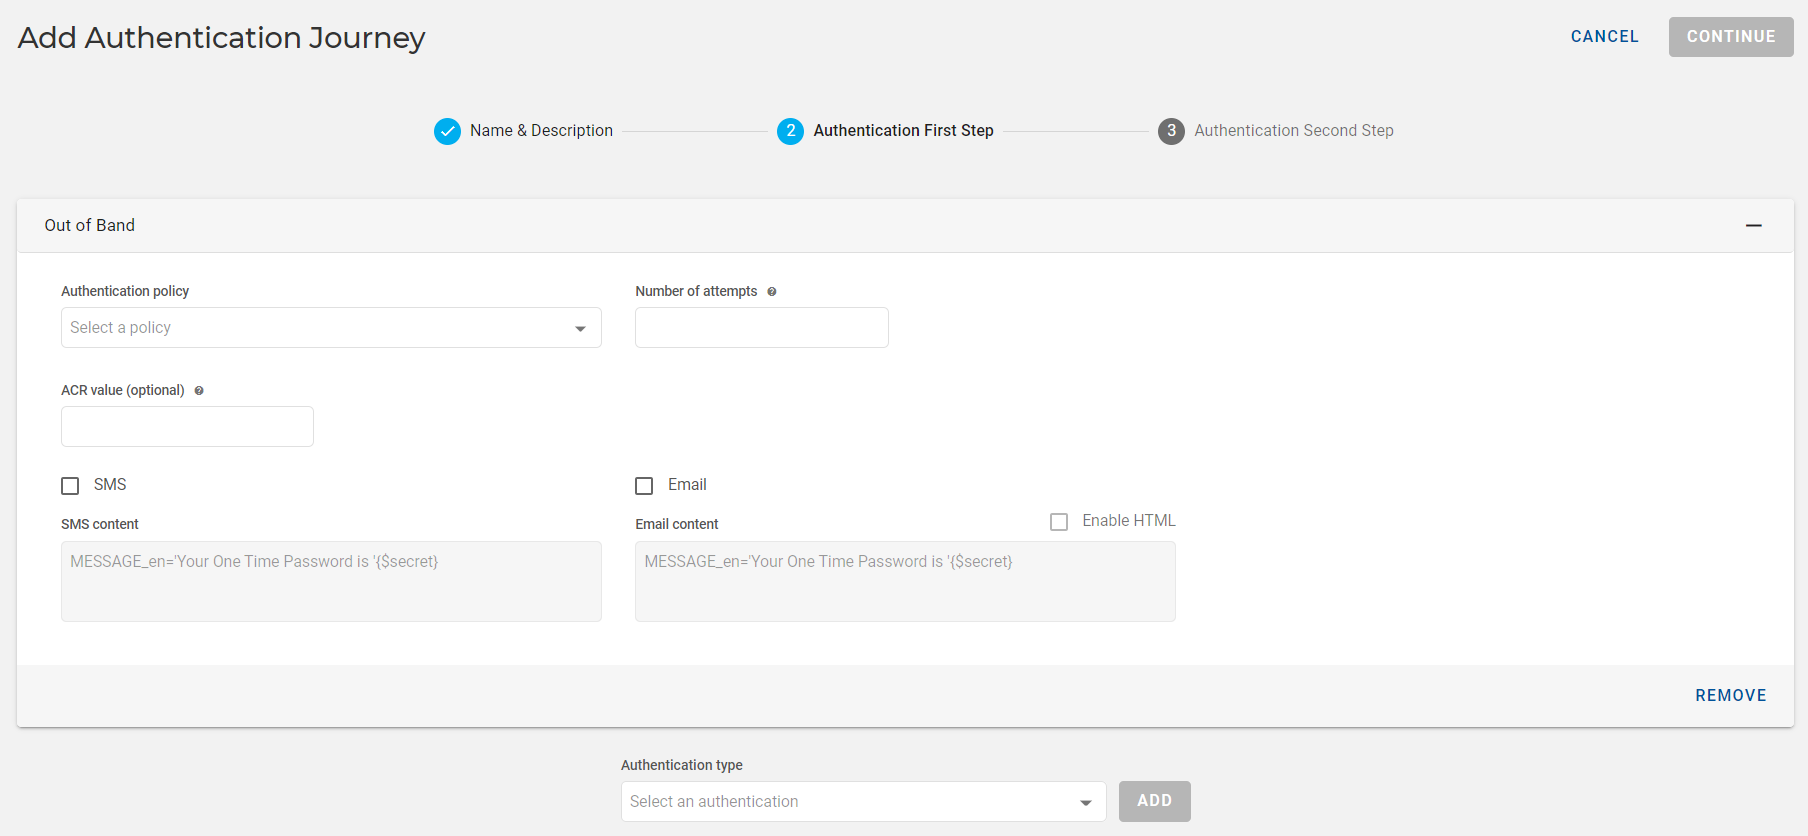
Choose an authentication type Out of Band from the drop-down list and click ADD.
-
Enter the below field details.
Note: For details of these below shown fields, refer to Fields used in the Authentication Journey. -
Select SMS and/or Email to send the OTP along with the message to the end user.
Select Enable HTML for the use of HTML format contents through Email if you want to send formatted messages instead of plain text.
-
Click CONTINUE for the authentication second step.
Creating Authentication Journey with Azure Directory Password
-
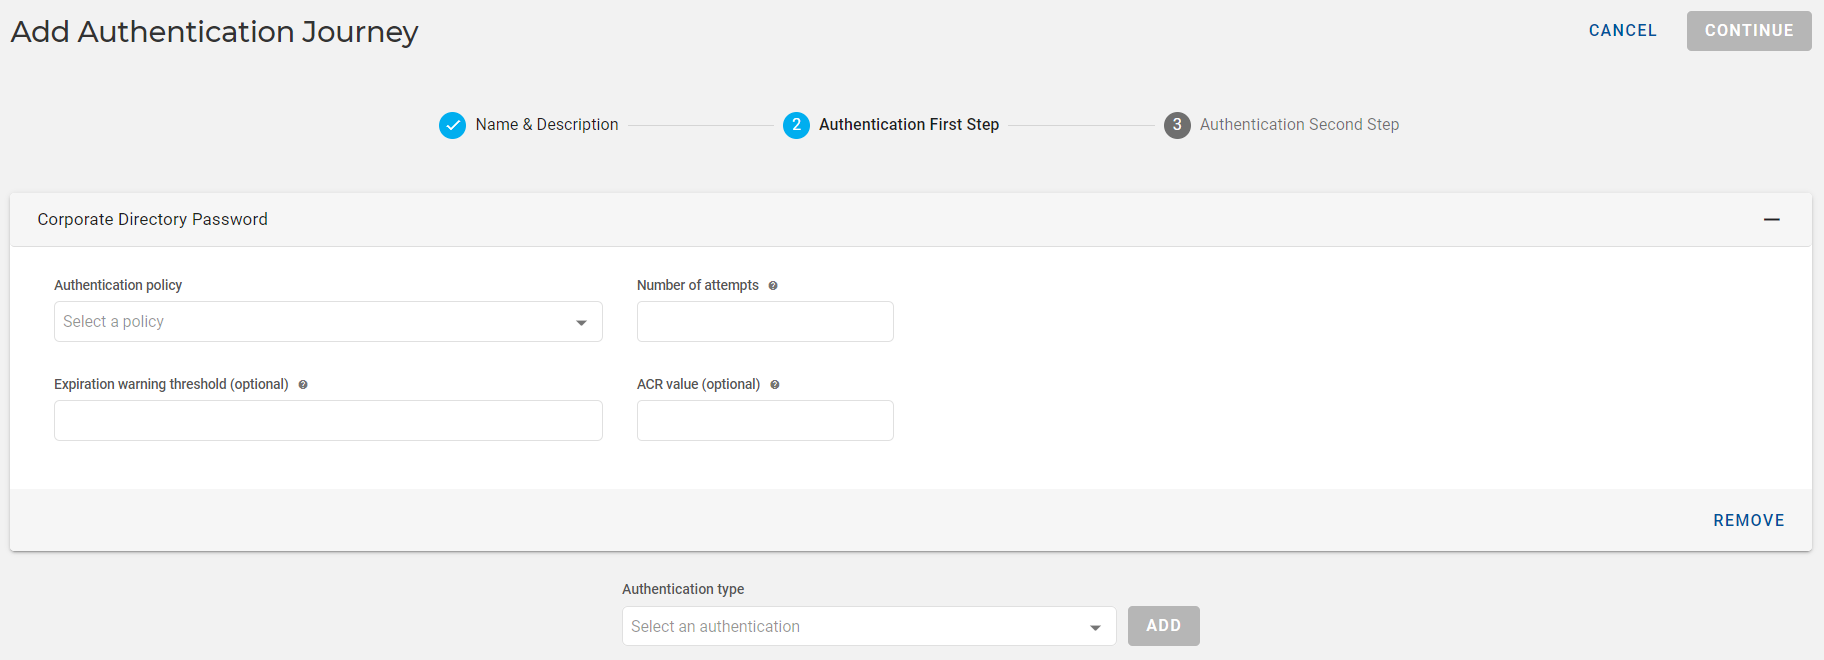
Choose an authentication type Azure Directory Password from the drop-down list and click ADD.
-
Enter the below details and click CONTINUE for the authentication second step.
Note: For details of these below shown fields, refer to Fields used in the Authentication Journey.
Creating Authentication Journey with PKI
-
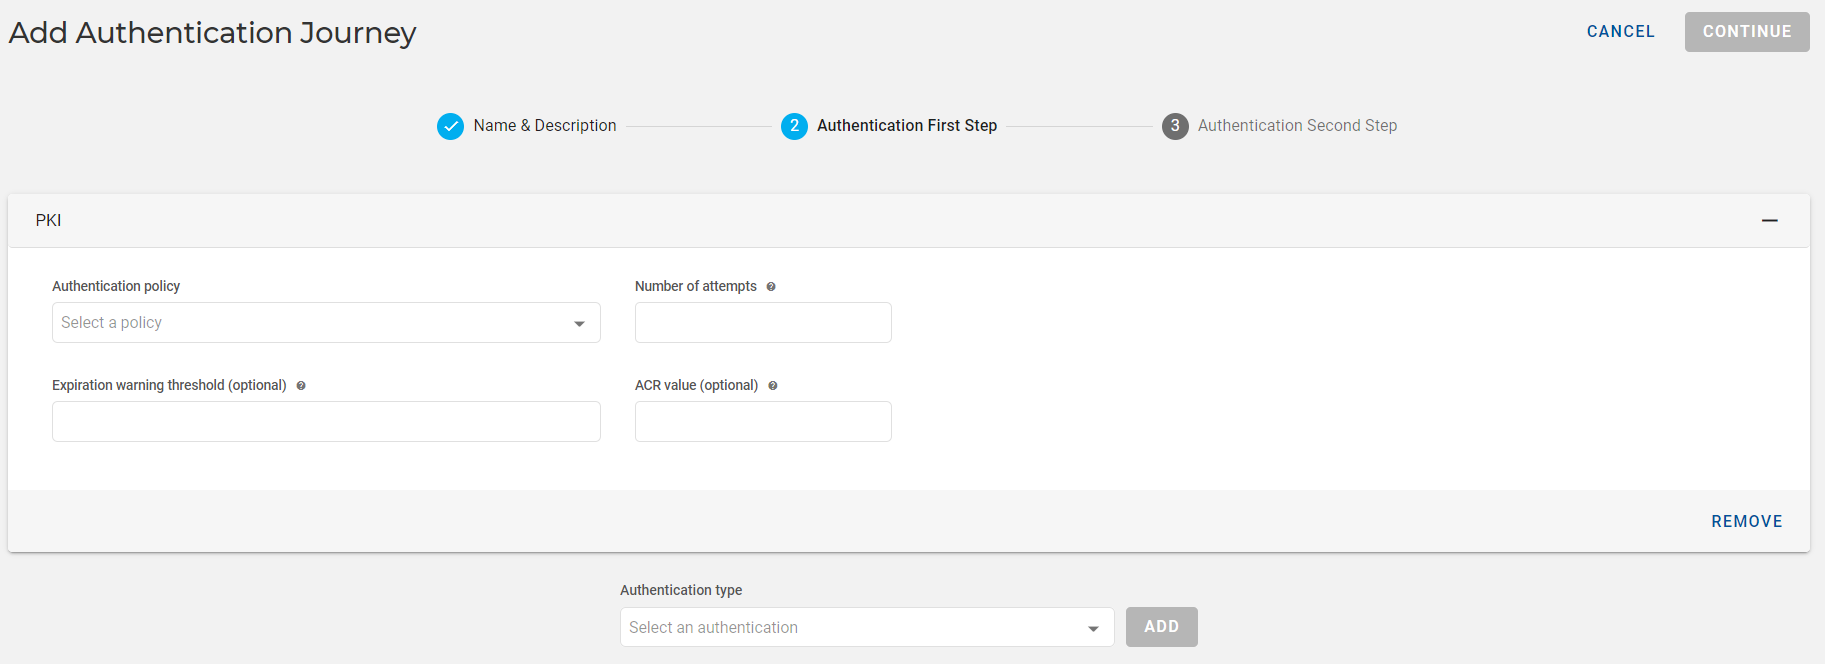
Choose an authentication type PKI from the drop-down list and click ADD.
-
Enter the below details and click CONTINUE for the authentication second step.
Note: For details of these below shown fields, refer to Fields used in the Authentication Journey.
Creating Authentication Journey with Passkey
-
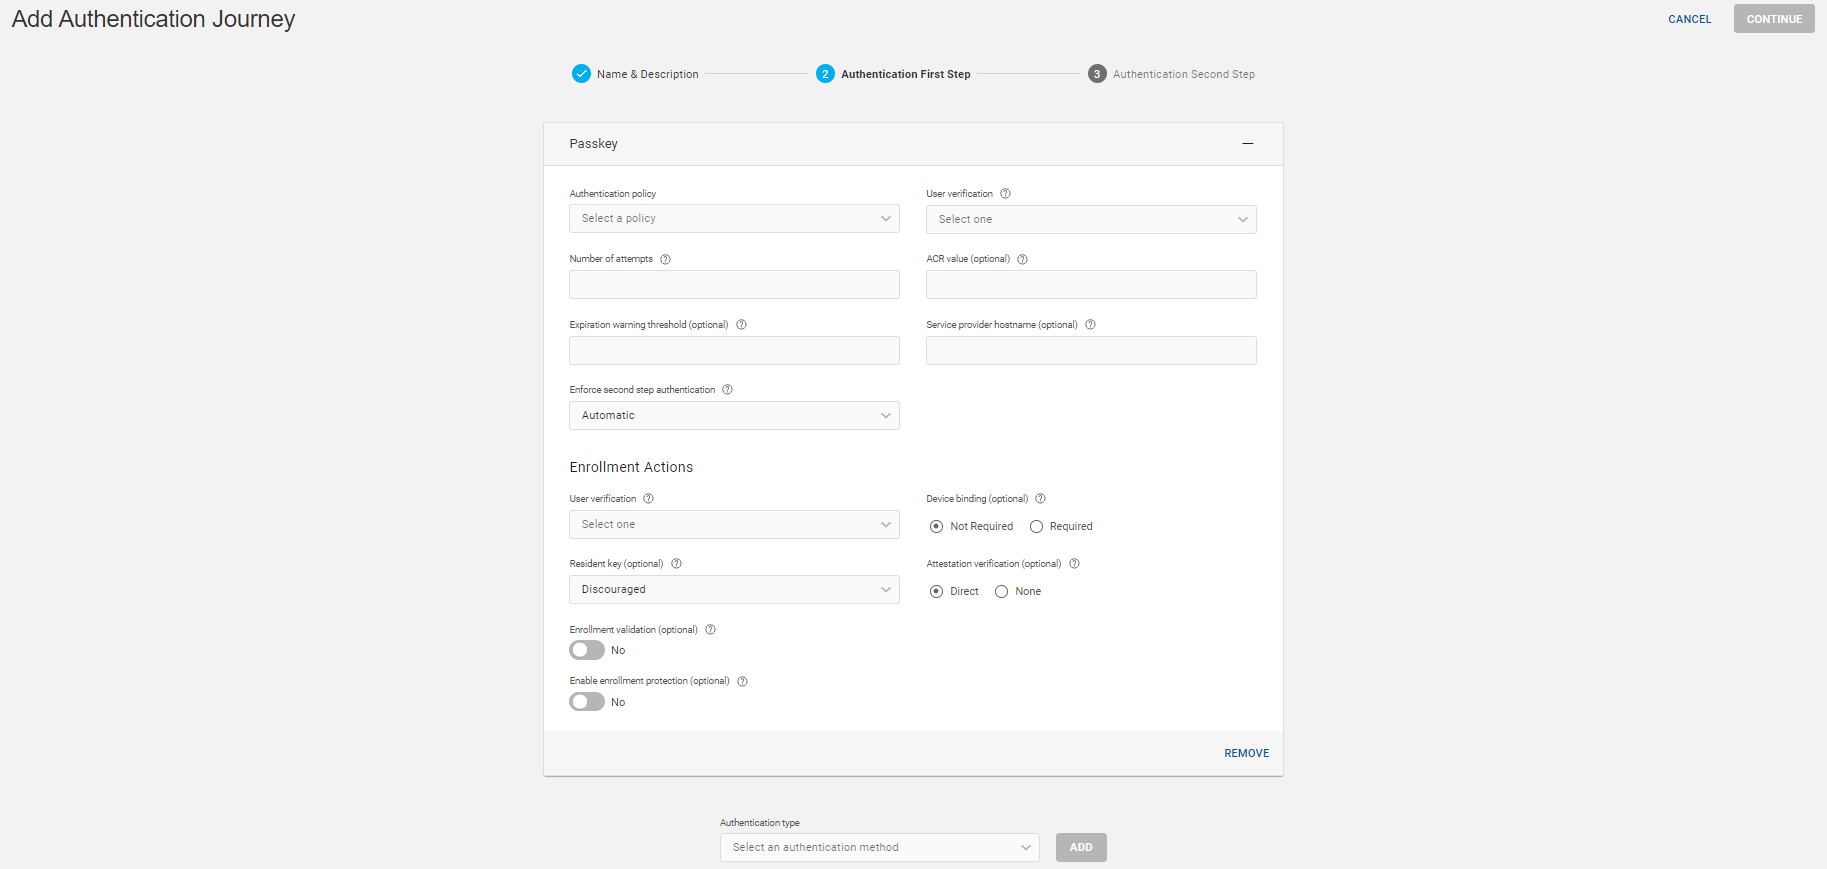
Choose an authentication type Passkey from the drop-down list and click ADD.
Note: In an authentication journey, you can choose Passkey as either first or second factor authentication, not both.Note: It is recommended that when choosing Passkey as the first factor, you enable the enrollment protection option to prevent unauthenticated Passkey enrollment. -
Enter the below details and click CONTINUE for the authentication second step.
Note: For details of these below shown fields, refer to Fields used in the Authentication Journey.
Creating Authentication Journey with Contactless Card
-
Choose an authentication type Contactless Card from the drop-down list and click ADD.
Important: If the Contactless Card is not showing in the drop-down list of authentication type, then you need to enable the contactless cards in the configuration settings. -
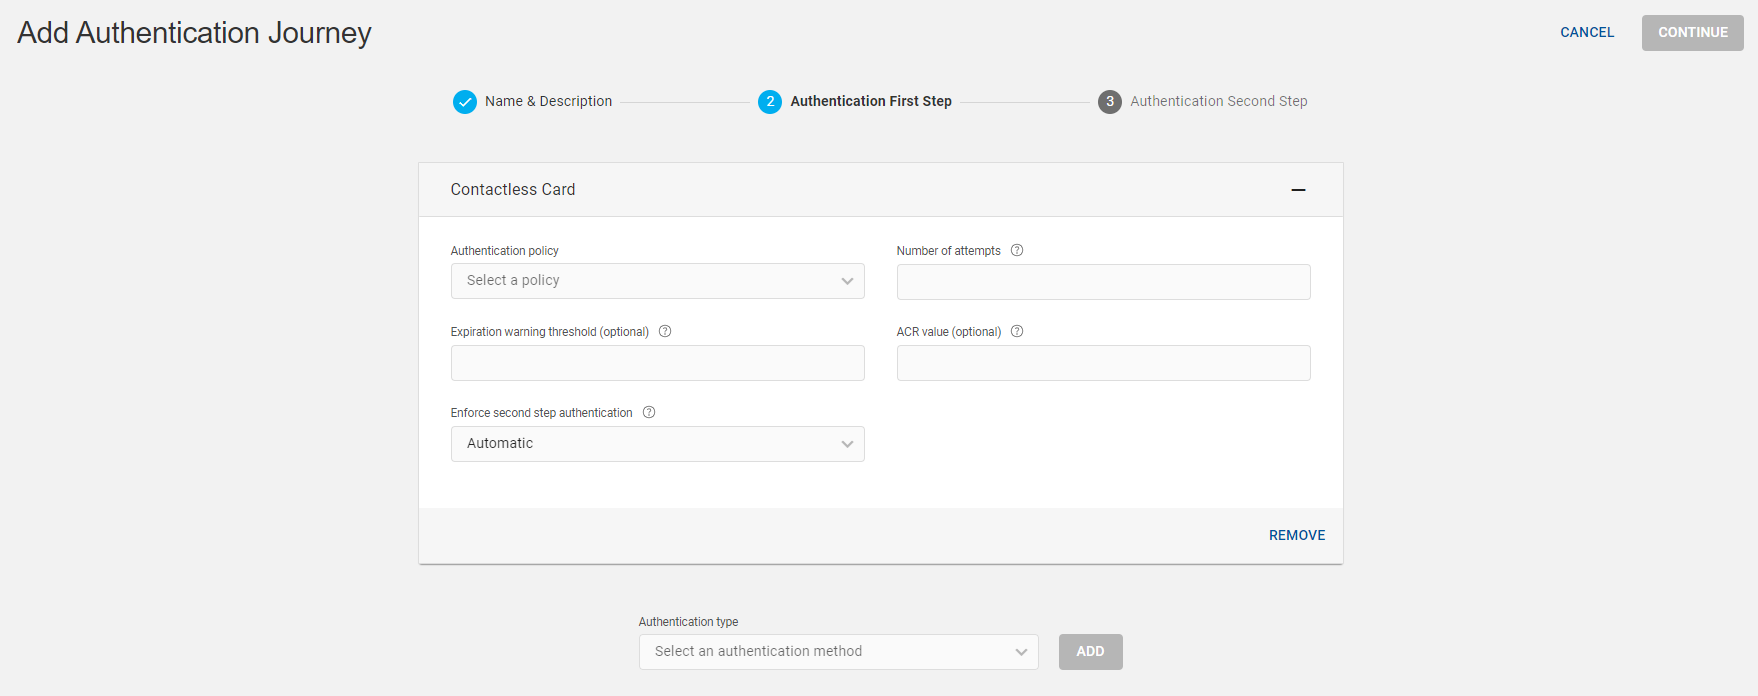
Enter the below details and click CONTINUE for the authentication second step.
Note: For details of these below shown fields, refer to Fields used in the Authentication Journey.
Creating Authentication Journey with PIN
-
Choose an authentication type PIN from the drop-down list and click ADD.
Important: If the PIN is not showing in the drop-down list of authentication type, then you need to enable the PIN in the configuration settings. -
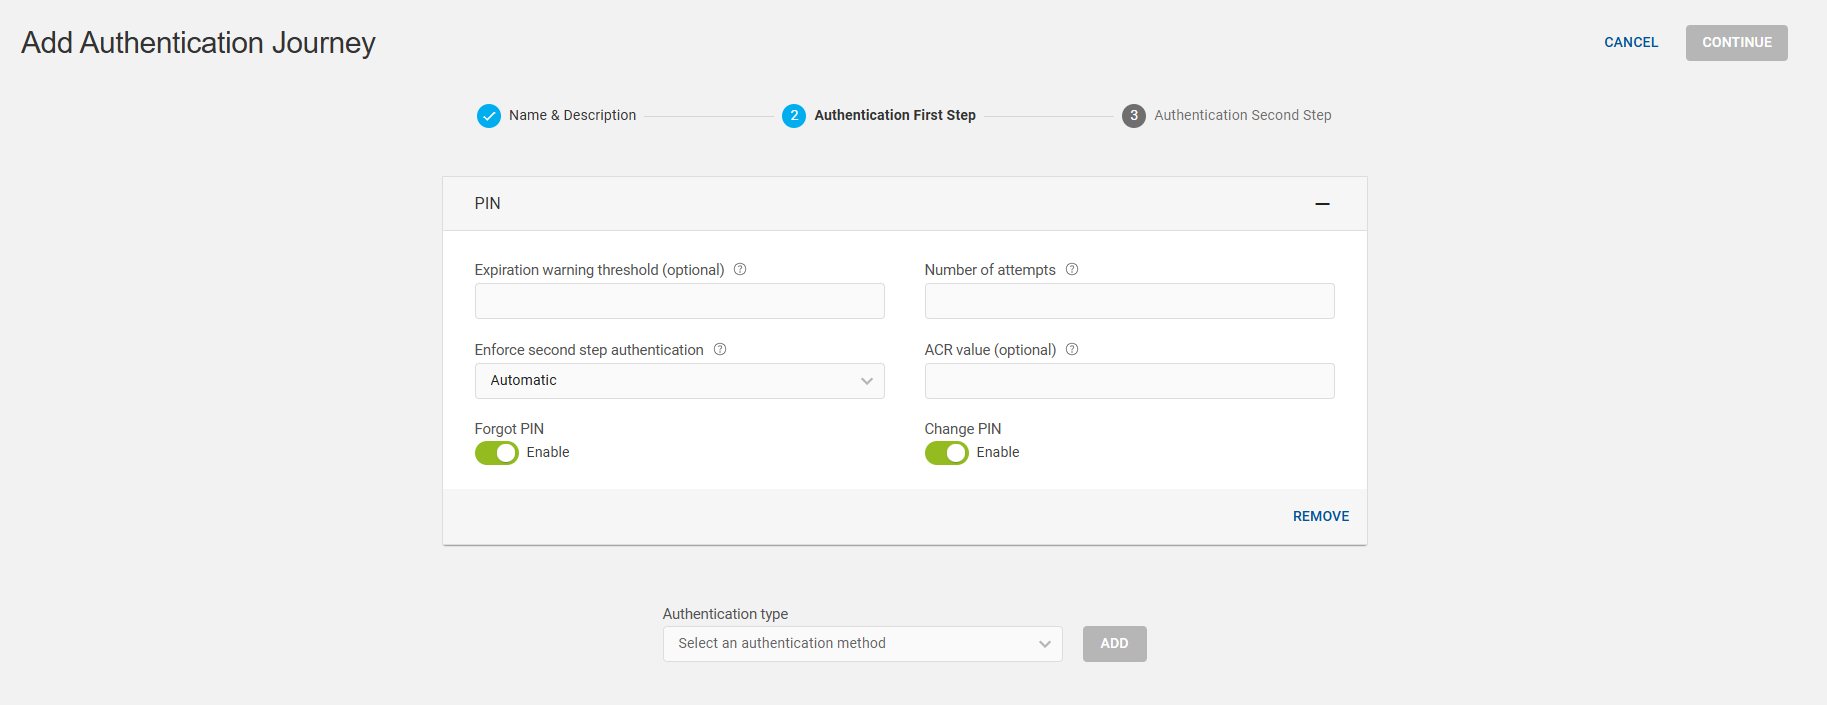
Enter the below details and click CONTINUE for the authentication second step.
Important: PIN cannot be used as a standalone authentication factor; it must always be combined with another factor for multi-factor authentication, either as a first or second factor.Important: Enable the 'Forgot PIN' and 'Change PIN' toggle buttons as shown below to allow users to reset and/or change their PIN on the IdP screen. If these options are not enabled here, they will not appear on the IdP login screen.Note: For details of these below shown fields, refer to Fields used in the Authentication Journey.

