Creating New Application
In order to create an application, the administrator needs to register one or more Re-direct URLs for the application for security purposes.
| Field | Description |
|---|---|
| Name |
A unique name to identify the Application in the authentication service. |
| Re-direct URL |
An URL for an application where authentication server redirects the user, along with the authorization code, once authentication is completed from the user. You can enter multiple URLs separated by a comma. |
|
Logout URL (Optional) |
An URL for an application where authentication server redirects the user after logging out. You can enter multiple URLs separated by a comma. |
| Client secret |
Password or JWT or mTLS certificate for Client/Application authentication. |
| Microsoft tenant ID |
This is a unique identifier associated with your Microsoft Entra ID application. Typically this ID should be in the format: xxxxxxxx-xxxx-xxxx-xxxx-xxxxxxxxxxxx |
| Authentication journey |
The Authentication journey is a feature where you can manage the authentication workflow configuration for applications. Refer to Configuring Authentication Journey for more details. |
| Brand |
You can display your brand or a custom look of your application by selecting your customized brand. Create a customized brand based on the default brand theme such as logo, background color, and background image to match your company’s branding. Refer to Customizing the Brand and Content for more details. |
| Privileged role |
The role assigned for the client/application to perform certain operations with full privileged role (RL_CLIENTIDM2M role) or least privileged role (RL_OPENIDCLIENT role).
|
| System config |
The RL_CONFIG role is assigned to OpenID clients to configure system-level settings such as authentication policies, device types, credential types, and other administrative options. Note: Not recommended for production application clients unless they are responsible for managing these settings.
|
| Refresh token (optional) | A type of token that can be used to get new access token. |
| Token duration (seconds) | The time period or validity of the refresh token. Must be between 100 and 3600 seconds. |
| Scopes |
Scope is a group of user claims which provides a way to limit the amount of access that is granted to an access token. Scopes can be customized based on customer requirement, It can include the custom attributes as well. For more details about Scopes, refer to Using OPENID Scopes. |
| Claims |
Claims allow the client to trust user attributes by supplying authenticated user details such as user group, user type, email, name, and mobile number etc upon request. For OpenID Connect, scopes can be used to request that specific sets of information be made available as Claim Values. |
|
Client ID |
An unique identifier for the client or user. Client ID is auto-generated. |
|
Discovery endpoint |
The URL of the 'Well-known' endpoint for your tenant. Discovery endpoint is auto-generated. |
To create an application (client), follow the procedure corresponding to the application type shown below.
Creating New Service API Integration Application
Service API integration applications are used for user authentication, managing the user identity lifecycle and identity information. Securely integrate your backend service or application with our API using the Client Credentials.
You can create an M2M client for secure, automated API access using the Client Credentials flow.
-
Click Applications
 in the left navigation bar to open the Applications page.
 -
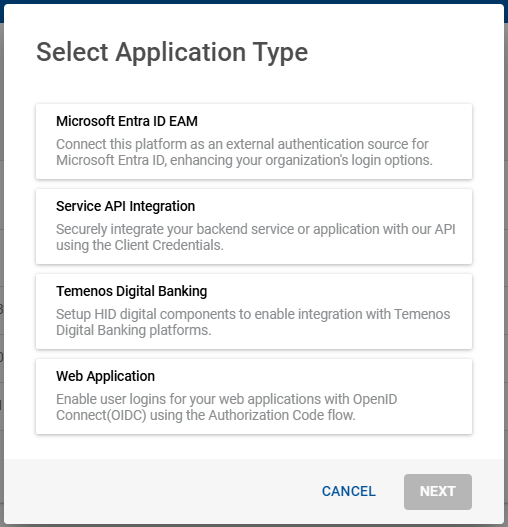
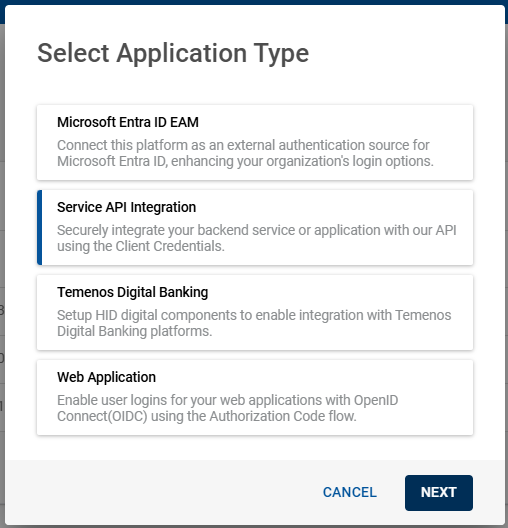
Click ADD APPLICATION, select Service API Integration option and then click NEXT.
-
Add Application page opens, enter the Name of the service API integration application.
Note: For details of these below shown fields, refer to Fields used to create an application.
-
Enable/Disable the Privileged role toggle button to assign the application with full privileged role or least privileged role.
-
Enabled: Grants full tenant management such as creating users, authenticator, devices, and authenticating users (RL_CLIENTIDM2M role).
-
Disabled (recommended): Adheres to the least privilege principle, allowing only user authentication (RL_OPENIDCLIENT role).
-
-
Enable/Disable the System config toggle button to assign the OpenID clients for configuration-level permissions (RL_CONFIG role).
Note: Not recommended for production application clients unless there is a specific requirement to perform administrative configuration tasks.-
Enabled: Grants the client the RL_CONFIG scope, allowing programmatic access to system-level settings such as authentication policies, device types, credential types, and other administrative properties.
When enabled, a confirmation pop-up will appear; click ENABLE to grant the RL_CONFIG scope.

-
Disabled (recommended): The client does not have the RL_CONFIG scope and cannot configure system-level settings.
-
-
To get the automatic new access token, enable the Refresh token toggle button. You will be prompted to enter the Token duration (must be between 100 and 3600 seconds).
-
You can select any one of the Client secret (Password/JWT/mTLS). By default, Password is selected.
If you want to use certificate for Client/Application authentication, then click JWT or mTLS radio button and upload a certificate by drag-and-drop or by browsing to local file explorer.
Note:If the certificate is not trusted, an error message is displayed “No issuer certificate for certificate in certification path found”.
In order to solve this error, upload a certificate chain as follows:
-
Import a certificate chain which includes root, intermediate, and end-entity (user) certificates. Root certificate is mandatory for mTLS and optional for JWT.
-
The certificate chain must start with root certificate and then intermediate certificate followed by end-entity certificate. The certificate chain can contain number of intermediate certificates.
-
The format of the certificate must start with -----BEGIN CERTIFICATE----- and end with -----END CERTIFICATE-----.
-
-
The HID Authentication Service push-based authentication solution (HID Approve) supports the Client Initiated Backchannel Authentication (CIBA) method for client applications to receive feedback regarding the end user’s actions.
The CIBA feedback method can be configured by setting the parameter to poll or push (callback):
-
Polling:The client retrieves the authentication result by polling the HID Authentication Service token endpoint URL using the authentication request ID.
-
Callback: Receive HID Approve authentication status updates via a callback to the specified URL.
Using the authentication request ID, HID Authentication Service sends the feedback via the CIBA callback URL defined for your OpenID client.

-
-
The Scopes allow you to control the data that is returned to your application when using OpenID endpoints. Create your Scopes for the Application configuration based on your requirements.
You may use both the default and custom attributes to configure scopes. The 'Open ID' and 'Profile' scopes are the default scopes that the HID Authentication service implicitly defines:
-
Open ID is the default scope for any OpenID endpoint.
-
Profile is to be used to fetch data about the user's profile (basically used to get an ID Token along with an access token).
For advanced scope configurations, edit the JSON using the EDIT JSON button.
Note: For more details about configuring the scopes and advanced scopes, refer to Using OPENID Scopes.
-
-
For OpenID Connect, scopes can be used to request that specific sets of information be made available as "Claim" values.
You can add claims (default and custom) to the existing scopes to meet the specific client requirements. Refer to Adding Claim in the existing Scopes for instructions on how to add claims.
If required, you can delete the already added claims by clicking delete icon (
 ).
).
-
Click CONSENT MANAGEMENT button and enable the Consent toggle button if your applications require explicit user consent to retrieve user data (claims) within the specified scopes.
If required, you can update the user prompt for Open ID and Profile scopes. Click SAVE to save the changes.

-
Click SAVE to save the new application and added into the list of applications.
Note:-
After saving the new application, view application page opens in which the Client ID is automatically generated, you can copy it using the copy
 icon.
icon. -
If Password is selected as your Client secret, an auto-generated password will be created, you can copy it using the copy
icon. -
If JWT or mTLS certificate is selected as your Client secret, you can view the details of your existing certificate by clicking VIEW CERTIFICATE.
-

Creating New Microsoft Entra ID EAM Application
The HID Authentication Service seamless integration with Microsoft® Entra ID, providing a robust External Authentication Method (EAM) for federated authentication.
Configure the authentication journey workflow with Microsoft® Entra ID EAM application to securely access protected applications from Microsoft® Windows workstations using HID authenticators, including existing contactless cards.
-
Click Applications
in the left navigation bar to open the Applications page. -
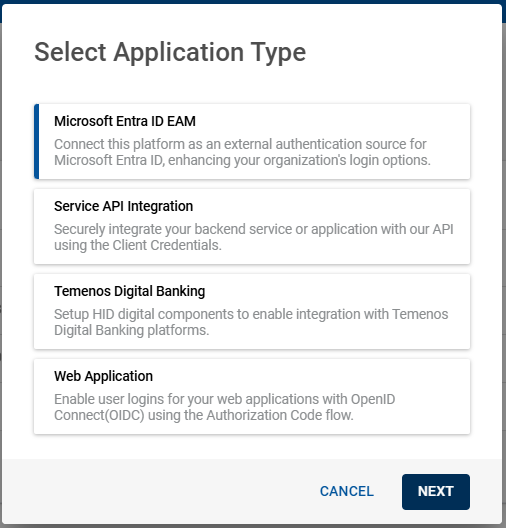
Click ADD APPLICATION, select Microsoft Entra ID EAM option and then click NEXT.
-
Add Application page opens, enter Name, Re-direct URL, and Microsoft tenant ID.
Note: For details of these below shown fields, refer to Fields used to create an application.
-
From the Authentication journey drop-down list, select an applicable workflow that uses contactless card as an authenticator. Refer to Configuring Authentication Journey for details.
-
From the Brand drop-down list, select an applicable brand configuration to apply to this application's login experience. Refer to Customizing the Brand for details.
Note: By default, the "Default" custom brand will be selected automatically. -
Click SAVE to save the new application and added into the list of applications.
Note:-
After saving the new application, please wait for a few minutes to open a pop-up Your Microsoft Entra ID Summary page, which will provide information about Client ID and Discovery endpoint.
-
The Client ID and Discovery endpoint are auto-generated, you can copy them using the copy
icon for use during integration with Microsoft Entra ID.
-
Creating New Web Application
Configure the authentication journey workflow with Web Application to authenticate the user authentication, managing the user identity lifecycle and identity information.
You can enable user logins for your web applications with OpenID Connect (OIDC) using the authorization code flow.
-
Click Applications
in the left navigation bar to open the Applications page. -
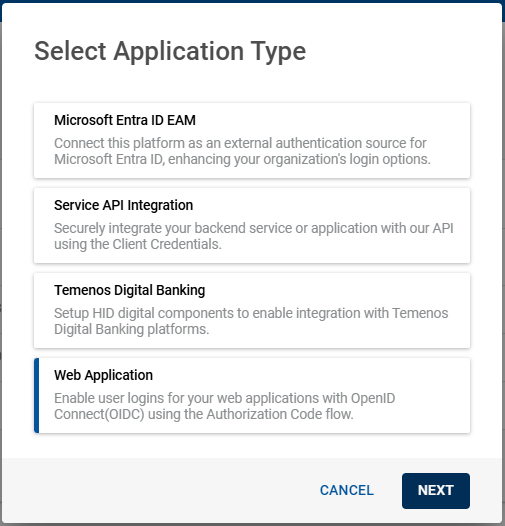
Click ADD APPLICATION, select Web Application option and then click NEXT.
-
Add Application page opens, enter Name, Re-direct URL, and Logout URL (optional).
Note: For details of these below shown fields, refer to Fields used to create an application.
-
You can select any one of the Client secret (Password/JWT/mTLS). By default, Password is selected.
If you want to use certificate for Client/Application authentication, then click JWT or mTLS radio button and upload a certificate by drag-and-drop or by browsing to local file explorer.
Note:If the certificate is not trusted, an error message is displayed “No issuer certificate for certificate in certification path found”.
In order to solve this error, upload a certificate chain as follows:
-
Import a certificate chain which includes root, intermediate, and end-entity (user) certificates. Root certificate is mandatory for mTLS and optional for JWT.
-
The certificate chain must start with root certificate and then intermediate certificate followed by end-entity certificate. The certificate chain can contain number of intermediate certificates.
-
The format of the certificate must start with -----BEGIN CERTIFICATE----- and end with -----END CERTIFICATE-----.
-
-
From the Authentication journey drop-down list, select an applicable authentication journey workflow. Refer to Configuring Authentication Journey for details.
-
From the Brand drop-down list, select an applicable brand configuration to apply to this application's login experience. Refer to Customizing the Brand for details.
Note: By default, the "Default" custom brand will be selected automatically. -
Enable/Disable the Privileged role toggle button to assign the application with full privileged role or least privileged role.
-
Enabled: Grants full tenant management such as creating users, authenticator, devices, and authenticating users (RL_CLIENTIDM2M role).
-
Disabled (recommended): Adheres to the least privilege principle, allowing only user authentication (RL_OPENIDCLIENT role).
-
-
Enable/Disable the System config toggle button to assign the OpenID clients for configuration-level permissions (RL_CONFIG role).
Note: Not recommended for production application clients unless there is a specific requirement to perform administrative configuration tasks.-
Enabled: Grants the client the RL_CONFIG scope, allowing programmatic access to system-level settings such as authentication policies, device types, credential types, and other administrative properties.
When enabled, a confirmation pop-up will appear; click ENABLE to grant the RL_CONFIG scope.
-
Disabled (recommended): The client does not have the RL_CONFIG scope and cannot configure system-level settings.
-
-
To get the automatic new access token, enable the Refresh token toggle button. You will be prompted to enter the Token duration (must be between 100 and 3600 seconds).
-
The Scopes allow you to control the data that is returned to your application when using OpenID endpoints. Create your Scopes for the application configuration based on your requirements.
You may use both the default and custom attributes to configure scopes. The 'Open ID' and 'Profile' scopes are the default scopes that the HID Authentication service implicitly defines:
-
Open ID is the default scope for any OpenID endpoint.
-
Profile is to be used to fetch data about the user's profile (basically used to get an ID Token along with an access token).
For advanced scope configurations, edit the JSON using the EDIT JSON button.
Note: For more details about configuring the scopes and advanced scopes, refer to Using OPENID Scopes.
-
-
For OpenID Connect, scopes can be used to request that specific sets of information be made available as "Claim" values.
You can add claims (default and custom) to the existing scopes to meet the specific client requirements. Refer to Adding Claim in the existing Scopes task for instructions on how to add claims.
If required, you can delete the already added claims by clicking delete icon (
).
-
Click CONSENT MANAGEMENT button and enable the Consent toggle button if your applications require explicit user consent to retrieve user data (claims) within the specified scopes.
If required, you can update the user prompt for Open ID and Profile scopes. Click SAVE to save the changes.
-
Click SAVE to save the new application and added into the list of applications.
Note:-
After saving the new application, view application page opens in which the Client ID is automatically generated, you can copy it using the copy
icon. -
If Password is selected as your Client secret, an auto-generated password will be created, you can copy it using the copy
icon. -
If JWT or mTLS certificate is selected as your Client secret, you can view the details of your existing certificate by clicking VIEW CERTIFICATE.

-
Creating New Temenos Digital Banking Application
The Temenos Digital Banking Bridge Application provides a simplified way to integrate HID Digital Components with Temenos Digital Banking. With a single enablement step, the system automatically provisions and configures the required components for secure communication between the HID Authentication Platform and Temenos Digital Banking.
This application also automatically creates the required authentication journey, ensuring that administrative access is protected by multi-factor authentication without requiring manual configuration.
-
Click Applications
in the left navigation bar to open the Applications page. -
Click ADD APPLICATION, select Temenos Digital Banking option and then click NEXT to proceed for application creation.
Important: Only one Temenos Digital Banking Bridge application can be created per environment. If a Temenos Digital Banking Bridge application already exists, then the "Temenos Digital Banking" option will not be displayed in the "Select Application Type" list.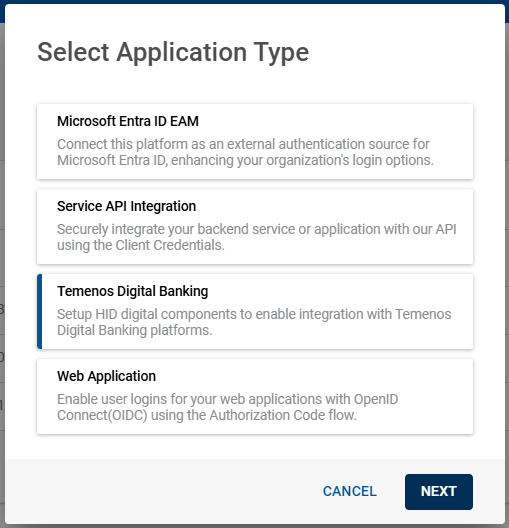
-
The system automatically creates and configures the required OIDC client. No manual configuration is required. The following values are provisioned automatically:
-
Client ID (copyable): TEMENOS-DIGITAL-COMPONENTS-CONFIG
-
Client name: Temenos Digital Banking Bridge
-
Redirect URL: http://127.0.0.1:8888/callback (default value)
Note: You can edit the Redirect URL if required. The Client ID and Client name fields are read-only and cannot be edited.Note: For details of these fields, refer to Fields used to create an application.
-
-
After the application is created, a confirmation message is displayed indicating that the Temenos Digital Banking Bridge has been enabled successfully. The newly created application is added to the application list.
Note: When the bridge is enabled, the system automatically provisions and configures all required components for secure communication between the HID Digital Components Configurer and the HID Authentication Platform, eliminating the need for manual setup.


