Topaz GemView 10 Tablet Installation and Configuration
Introduction
HID Visitor Manager integrates with Topaz GemView, the market leading Topaz Signature Capture Device for capturing high-quality biometric signatures. We recommend using Gemview 10 inch version for the optimum experience.
Steps to install the Topaz GemView Tablet
Install GemView Tablet Display Driver
-
Connect the tablet display to the PC using the USB cable. For more information about the connection, please refer to the Topaz GemView 10 user manual GemView10_Guide.pdf
-
Download and run the GemView installer from the Topaz website: www.topazsystems.com/software/download/gemview.exe
Note:You must reboot your PC after the installation completes. This software provides pen input functionality for the tablet display. For more details, refer to the user manual mentioned in step 1.
Configure Tablet Display for Pen Input
-
Open GemView Tablet Display Manager from Start Menu.
-
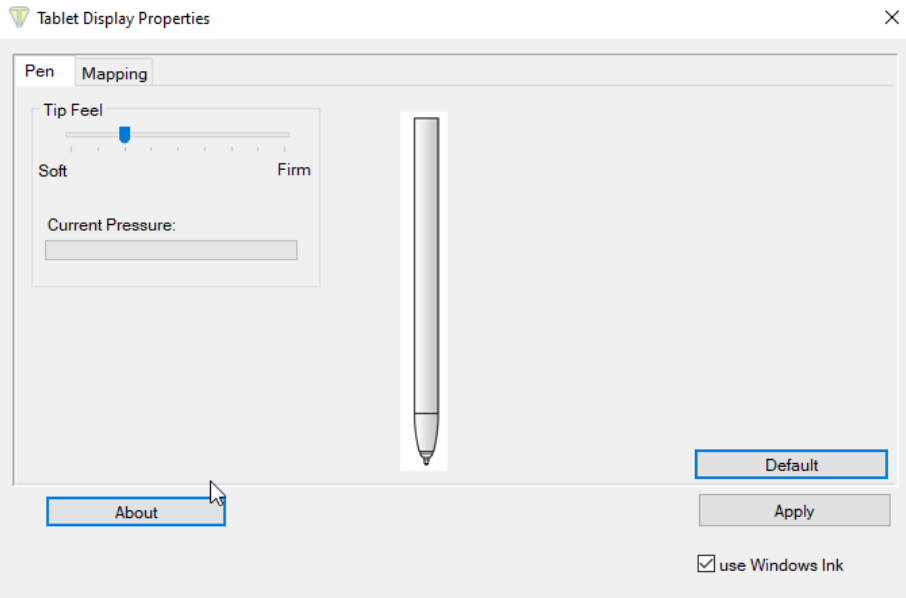
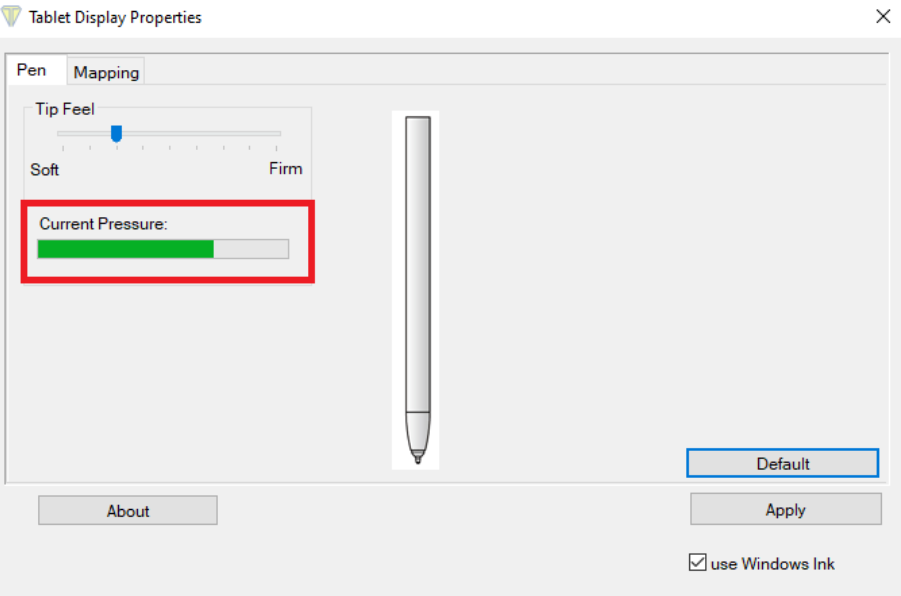
In the Tablet Display Properties window that opens, notice that the Pen tab is selected. Write on the GemView Tablet Display with the pen and the current pressure will show as a green bar. Adjust the tip feel slider between soft and firm to select the desired pressure. The default setting is recommended for standard use.
-
Click the Mapping tab to display the screen below. Select the number of the tablet display from the dropdown list. The numbering of the monitors follows that in the Windows display settings. Select Landscape or Portrait for the orientation of the tablet display. It should be the same orientation selected in the Windows display screen. Click Apply to save the changes if any.

-
Topaz Gemview Tablet should be used with the HID Visitor Manager Smart Client application. To install Smart Client, refer to Pre Requisites for Installing HID Visitor Manager Client and Installation of HID Visitor Manager Client installer.
-
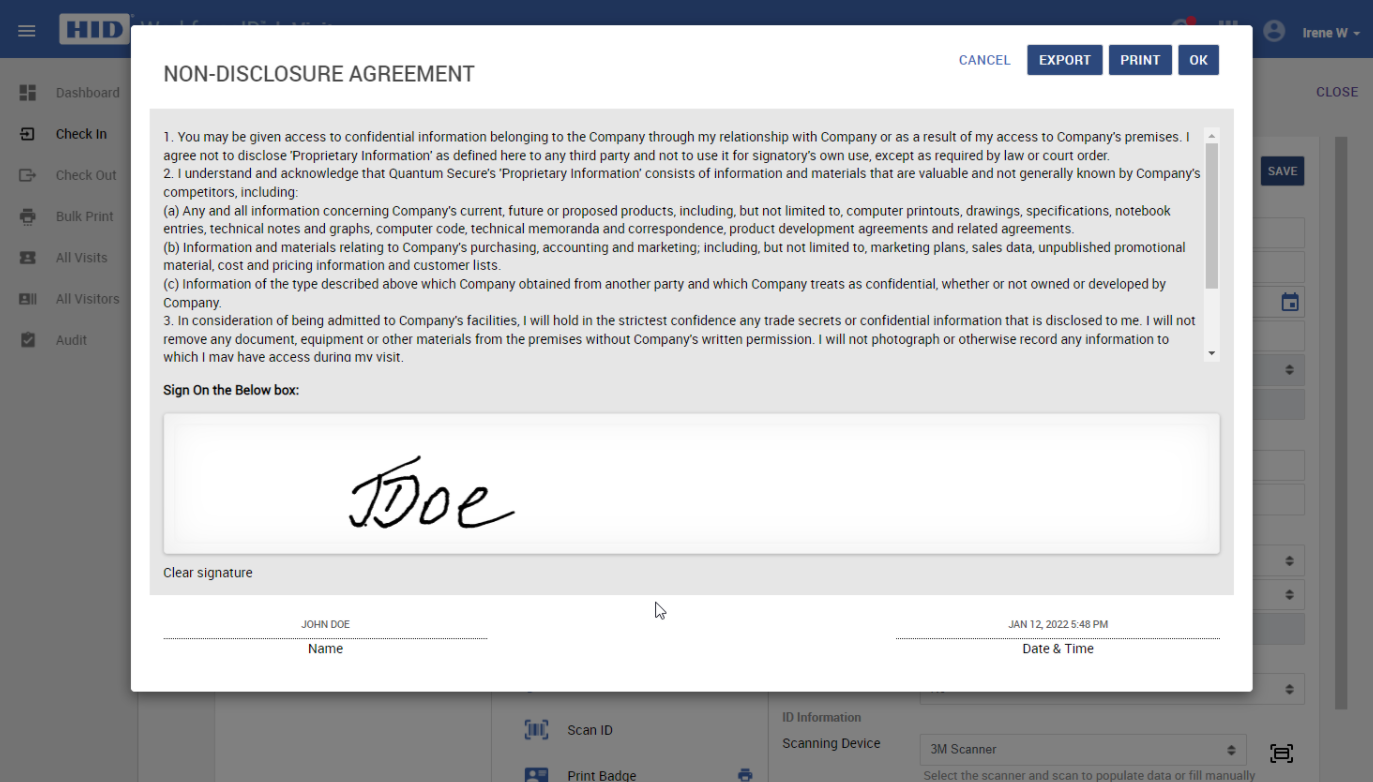
Without using the Smart Client application, the NDA agreement signature modal is displayed in the browser.
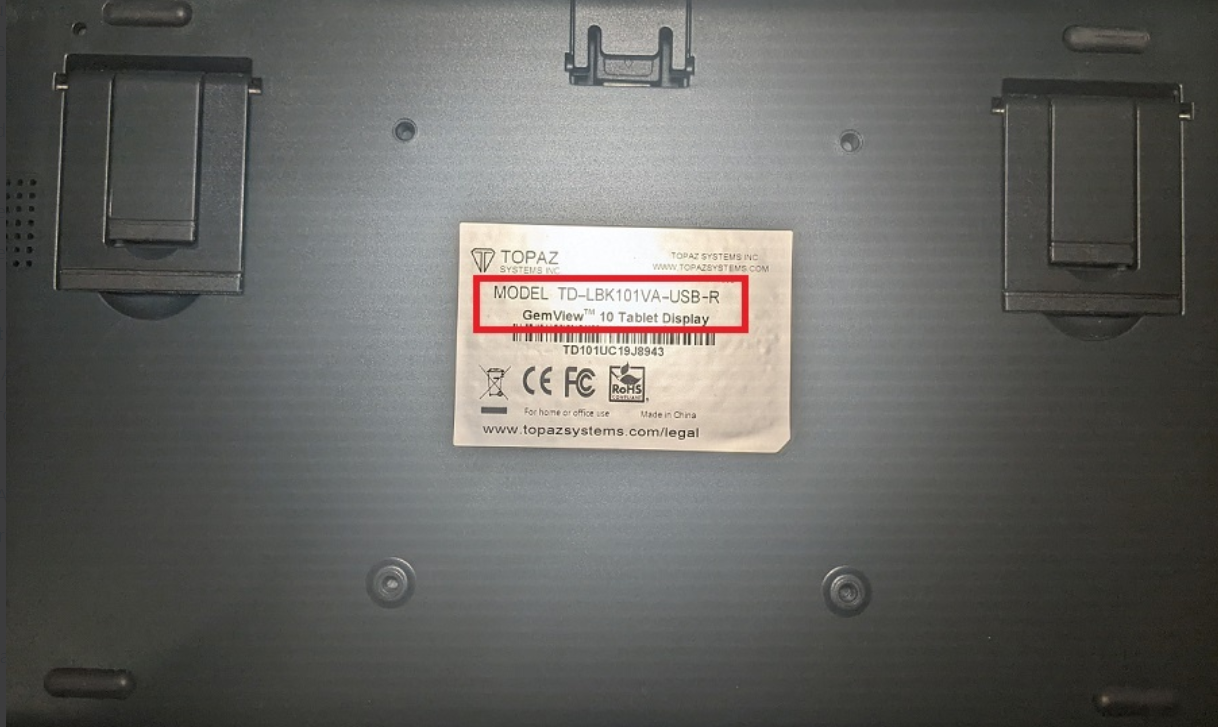
To find the signature pad model number, flip it over and read the model number on the label on the back of the tablet.
Steps to Configure the Topaz GemView Tablet
-
After the Smart client installation is completed, navigate to the installation directory. For example C:\Program Files\HID\SAFE Smart Client.
-
Right-click the SAFEClient.exe.config file and open with Notepad.
-
Add and update the following value of each parameter in the file:
-
TOPAZ_SignaturePadModelType as TD-LBK101VA.
-
TOPAZ_SignatureCaptureType as Gemview.
-
-
Save the file.
Note:Model type may vary depending on the Signature Pad Model used. More can be found here: Topaz Signature Pads.

Check-in a Visitor and Capture a Visitor's Signature
Creating and Checking-in a Walk-in Visitor
-
Launch the Smart Client application and log in to the HID Visitor Manager application as VMO. Navigate to the Visitors application > Check In screen.
-
Create a Walk-in visit.
-
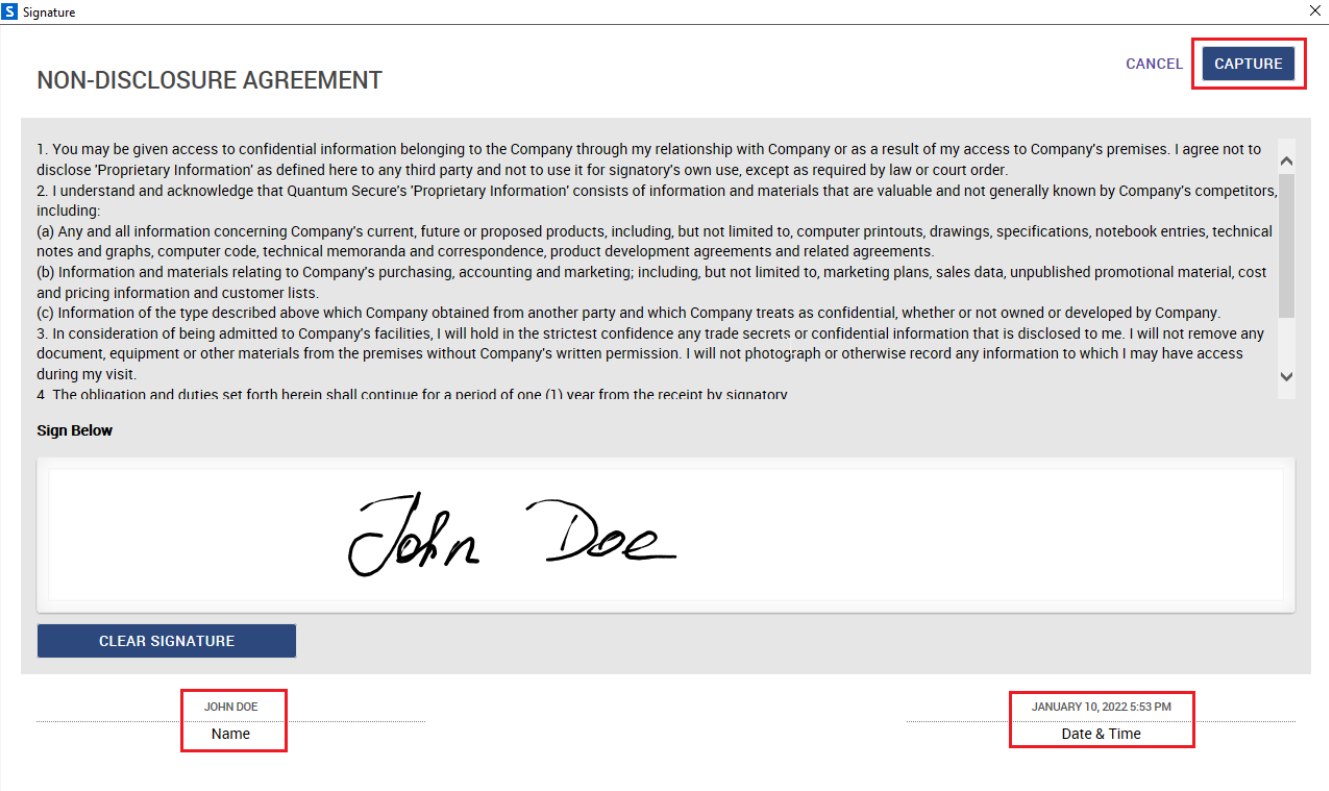
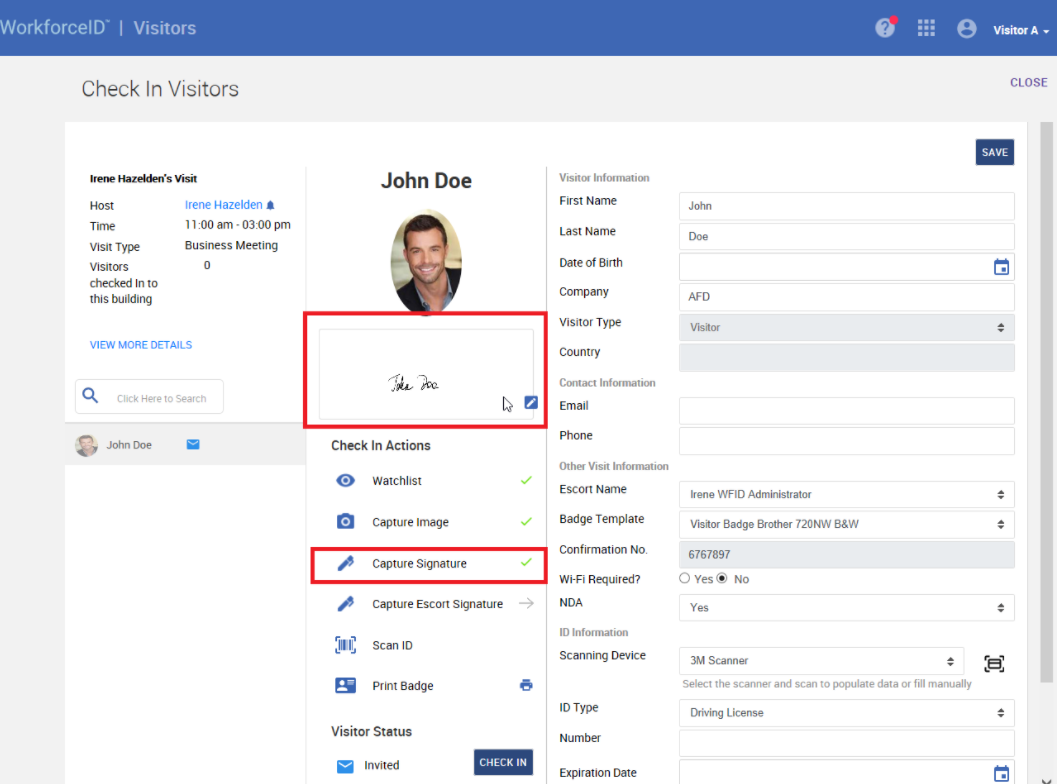
On the Check In screen, click Capture Signature to sign the NDA. The Signature Capture dialog box will appear on the Topaz tablet.
-
Use the tablet's pen to sign in the box. Press Capture to complete NDA agreement signing.
-
Complete checking in the visitor.
Creating and Checking-in a Pre-registered Visitor)
-
Launch the Smart Client application and log in to the HID Visitor Manager application as VMO. Navigate to the Visitors application > Check In screen.
-
Search for the registered visitor.
-
On the Check In screen, click Capture Signature to sign the NDA Agreement. The Signature Capture dialog box will appear on the Topaz tablet.
-
Use the tablet's pen to sign in the box. Press Capture to complete NDA agreement signing.
-
Complete checking in the visitor.
Update the Signature Captured
-
Should you need to update the captured signature, click Capture Signature again or click the pen icon in the captured signature box.
-
Complete the signing of the NDA on the tablet and click Capture.
-
Should you need to cancel the signing, press the Cancel button. Confirm that you want to cancel the signature by pressing Yes button.


