Check-in a Visitor
Preregistered Visitor
A visitor can be checked in by a Visitor Management Officer (VMO). To gain the necessary privilege, contact your system administrator.
-
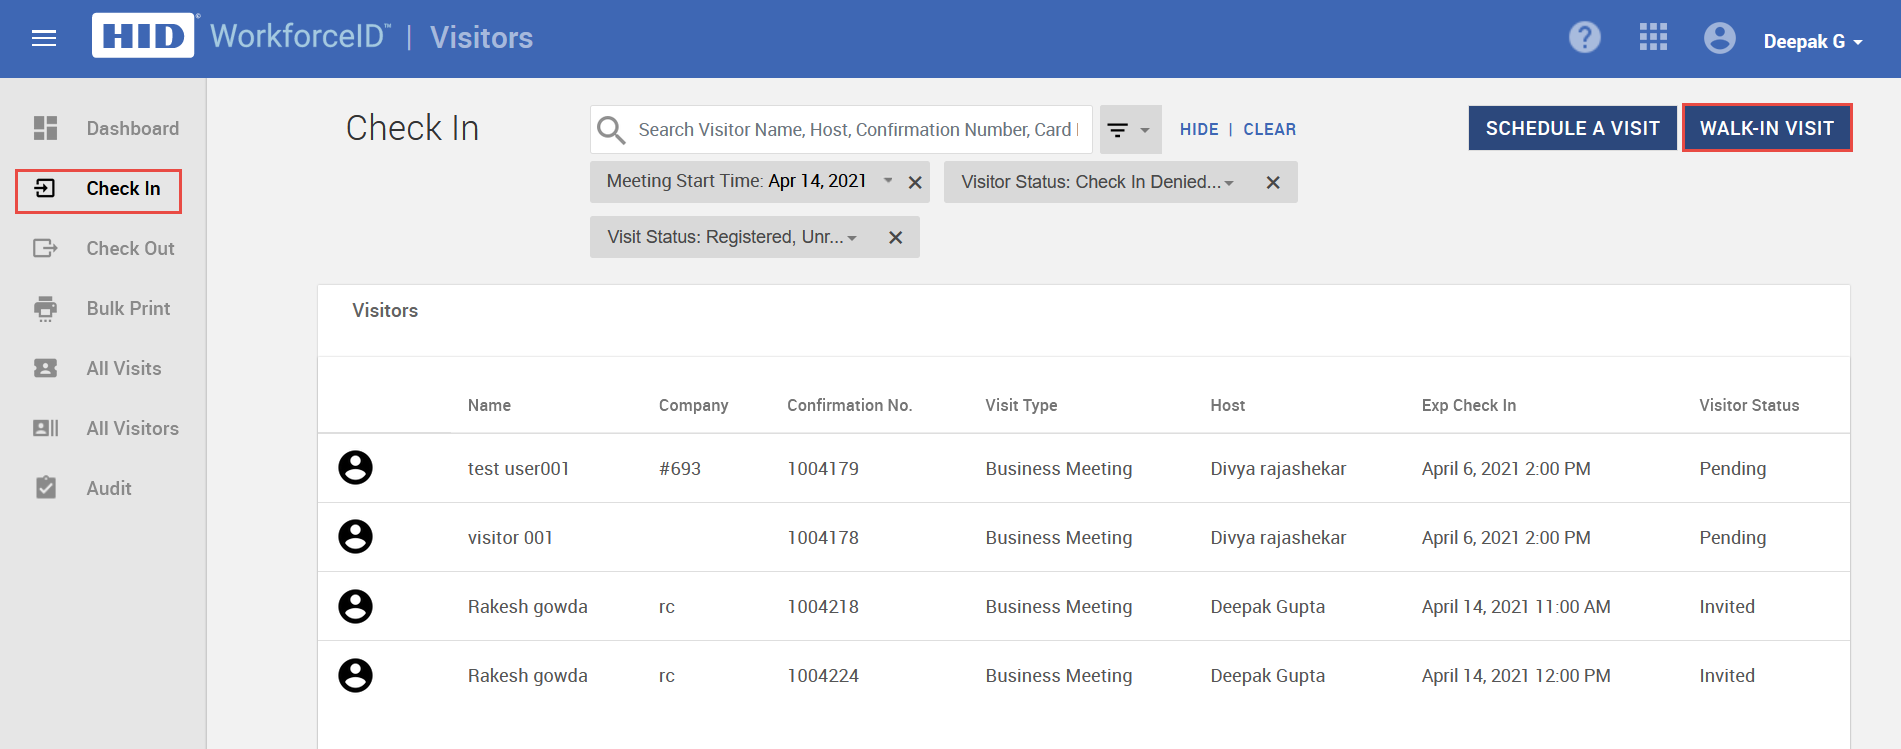
In the Visitors application, click on the Check In tab on the sidebar. The Check In screen with the list of visitors to be checked in for the day is displayed.
-
Search for the Visitor information (using visitor name, host, confirmation number, company) and open the desired visitor record.
-
Search preregistered visitor.

-
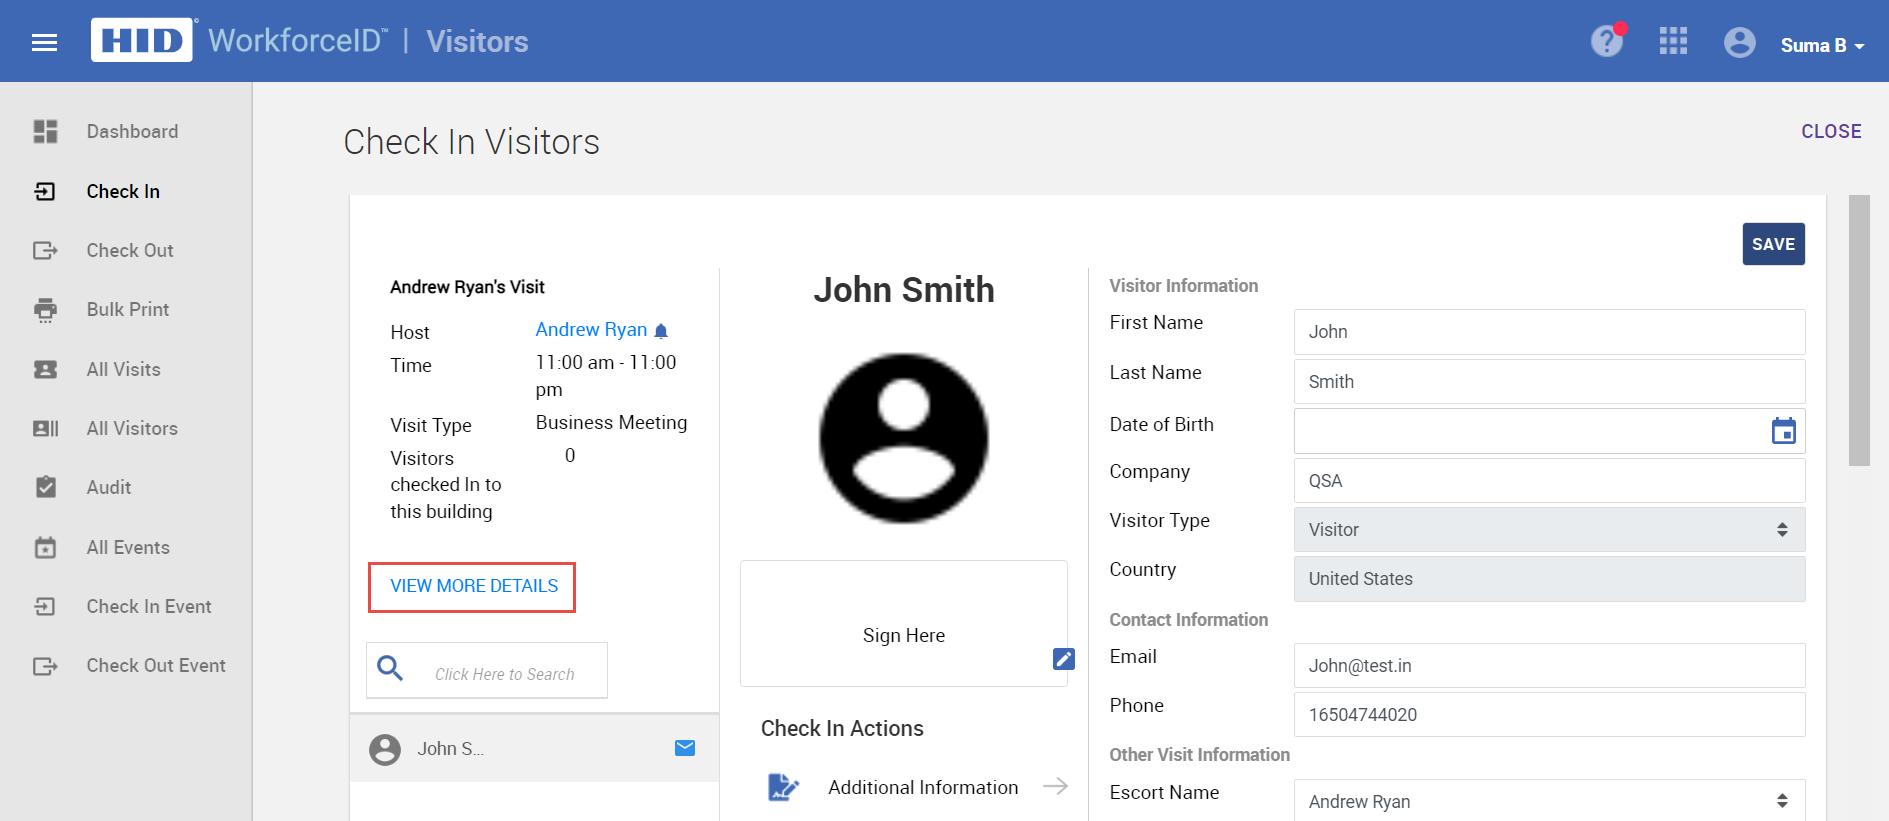
Complete all check-in steps to check-in the visitor. This includes assigning the access card, a printing badge, capturing the visitor's image and NDA signature, responding to the screening questions, and scanning the visitor's ID.
-
VMO is able to see the Location, Building and Floor/Conference Room details of the visit on the Check-In screen by clicking on VIEW MORE DETAILS link so that it will help VMO to guide the Visitor with visiting location details as shown below.
-
Once the activities are complete, click on the CHECK IN button to check-in the visitor.
-
Check in the preregistered visitor.
-
Click SAVE.
Walk-in visitor
-
If the 'Restrict Walk In Visits' option is enabled in the Settings > Visitor Manager > Pre-Registration, the Walk-In Visit button will be hidden and a Visitor Management Officer (VMO) cannot create any Walk-In Visits. Learn more here.
-
In the Visitors application, click on the Check In tab on the sidebar. The Check-In screen with the list of visitors for the day is displayed.
-
Click on the WALK-IN VISIT button on the top right corner of the page to initiate the check-in for the walk-in visitor.
-
Add Walk in Visit Check in details.
-
Search and select the host.
-
In the Create a Visit page, modify the information (Visit Information, Location Information, and Access and Approvals) as required.
-
Add the visitors to the visit. You can either search from the existing set of visitors or create a new visitor.
-
Click SUBMIT REQUEST to redirect to the check-in page.
-
Complete all check-in steps to check-in the visitor. This includes assigning the access card and a printing badge, capturing the visitor's image and NDA signature, responding to the screening questions, and scanning the visitor's ID.
-
Once the activities are complete, click on the CHECK IN button to complete the check-in.
-
VMO is able to see the Location, Building and Floor/Conference Room details of the visit on the Check-In screen by clicking on VIEW MORE DETAILS link so that it will help VMO to guide the Visitor with visiting location details as shown below.
-
Once the visitor is checked-in, the host is notified that the visitor is waiting for them at the lobby.
Related Topics:


