Configure Authentication Channels
A channel is the means by which an indirect user interacts with an organization.
For example, internet banking is a channel. A channel system, such as an internet banking server, is modeled in ActivID AS as a direct user, within one of the “systems” subgroups. When that channel system calls the API, such as in authenticating a banking customer, it passes a code that identifies the channel. This code is validated against a list of channels held in ActivID AS.
Channels are configured in ActivID AS for two purposes:
- When defining an authentication policy, you specify the default channels over which that authentication policy is valid. Valid channels can be further restricted at the level of individual authentication records.
- The audit log stores the channel through which a particular authentication or administrative function occurred. The log can be searched, filtered by channel.
ActivID AS has three types of channels:
-
Generic – the channel will be used for generic purposes (mainly service providers leveraging the ActivID Public API)
-
RADIUS – the channel will be used to handle RADIUS authentication requests and is essentially a generic channel with additional RADIUS-specific settings
A RADIUS channel for the RFE deployment defines a group of access controllers and specifies how the authentication requests should be handled. Using a policy configured for the channel, you filter the requests according to the IP address or hostname of the access controllers.
Important:If you are deploying ActivID AS in a multi-domain environment and want users from more than one domain to authenticate via the RFE solution, you must configure one channel per domain, and the channel must be configured with IP addresses that are unique to the domain.
If you want to filter users based on LDAP groups via a RADIUS channel, you must create the Check Before profile configured with the generic dictionary BEFORE creating the channel (and then select it as an existing profile).
-
SAML Service Provider – the channel will be used for SAML service providers
The ActivID AS base dataset contains predefined channels. For example, this includes:
-
A set of external (customer/employees) facing channels (that is, for Web, VPN, Citrix®, and Microsoft Terminal Services).
-
An ActivID Management Console Channel used to access the ActivID Management Console for administrative purposes.
-
A Direct channel for Direct user access to ActivID AS.
| Name | Type | Code |
|---|---|---|
| ADFS Agent | Generic | CH_ADFS |
| Business Banking Portal | Generic | CH_BBP |
| Customer Banking Portal | Generic | CH_CSTPORT |
| Customer Call Center | Generic | CH_CALL |
| Direct channel | Generic | CH_DIRECT |
| IIS Web Access Agent | RADIUS | CH_IIS |
| Interactive Voice Response System | Generic | CH_IVR |
| Management Console | SAML Service Provider | OPERATOR |
| Mobile Application update channel | Generic | CH_SMK |
| Mobile push-based Action validation channel | Generic | CH_TDS |
| Mobile push-based Logon validation channel | Generic | CH_PASA |
| Mobile Registration channel | Generic | CH_TDSPROV |
| REST Gateway Direct channel | Generic | RGW_DIRECT |
| Self Service Portal | SAML Service Provider | CH_SSP |
| Self Service Portal Direct channel | Generic | SSP_DIRECT |
| Soft Token Activation Portal | Generic | CH_STAP |
| Terminal Services | Generic | CH_TRMSVC |
| VPN Remote Access | RADIUS | CH_VPN |
Create a Channel
-
Log on to the ActivID Management Console as an ActivID Administrator.
- Select the Configuration tab and, under Policies, select Channels.
- Name – the name of the channel
- Type – the type (Generic, RADIUS or SAML Service Provider) of the channel
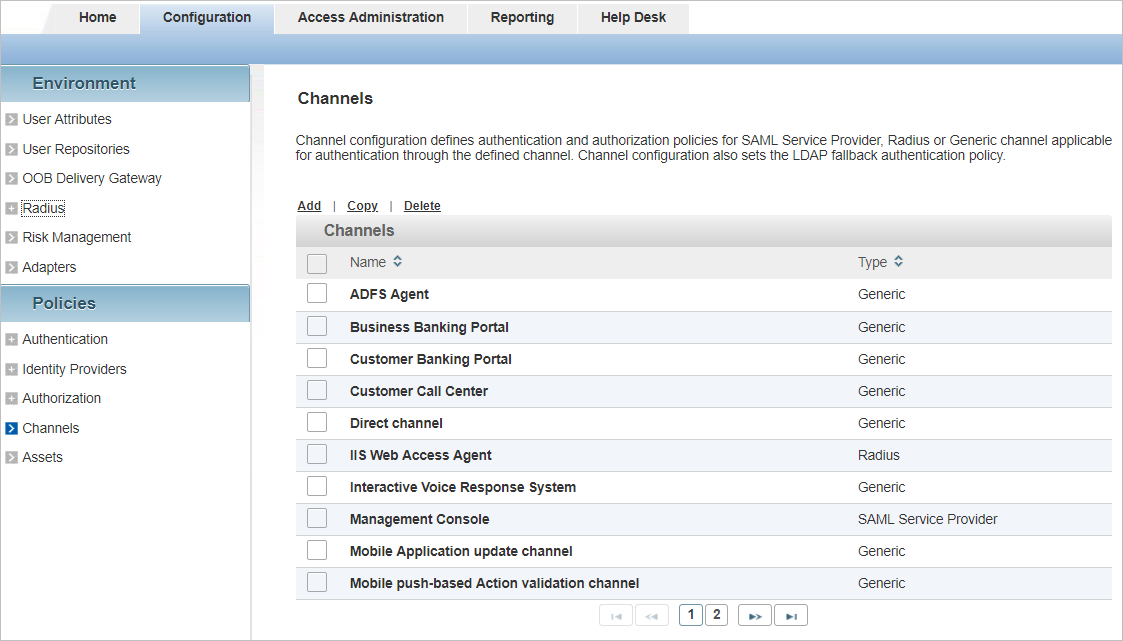
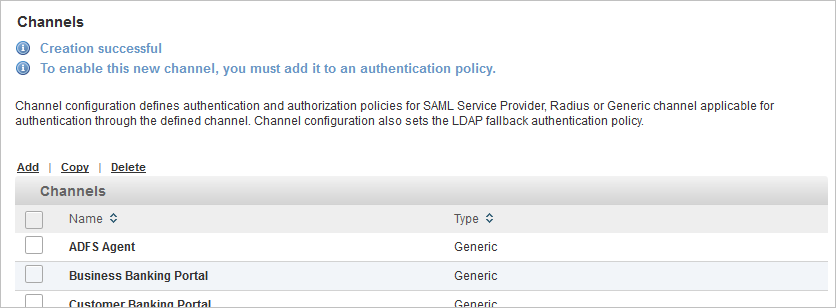
All existing channels are listed in a paged table. The total number of channels is given in the lower left corner.
Each row corresponds to a channel. It provides the following information in the different columns:
Launch the Channel Creation Wizard
-
Click Add.
- Enter the Name and, optionally, a Description, for the channel.
-
You can either accept the pre-assigned Code to identify the channel, or edit it.
-
From the Type drop-down list, select the channel type, and click Next.
-
For a Generic or RADIUS channel, proceed to Select the Trusted Identity Providers (Optional)
-
For a SAML Service Provider, proceed to Configure SAML Channels/Service Providers
-
Depending on the type of channel you want to create, the Add Channel page looks slightly different.

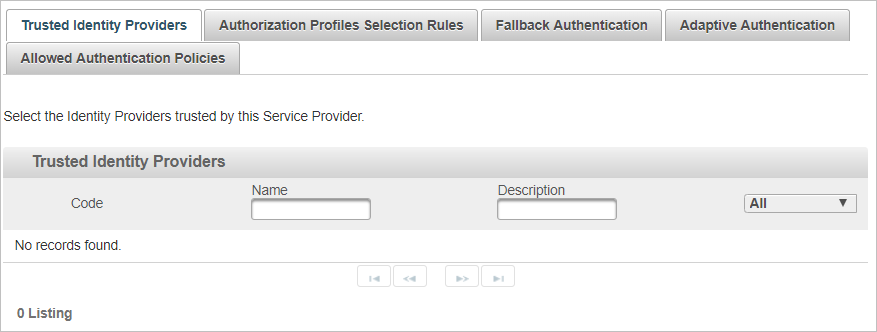
Select the Trusted Identity Providers (Optional)
When the channel trusts an External Identity Provider that has been configured in the ActivID AS, the trusted Identity Provider can be enabled for the channel as described below.
-
From the drop-down list, select Available or All to view the possible trusted IdPs.
-
Select the check box(es) for the required trusted IdP, click Next and proceed to Define the Authorization Profiles Selection Rules (Optional).
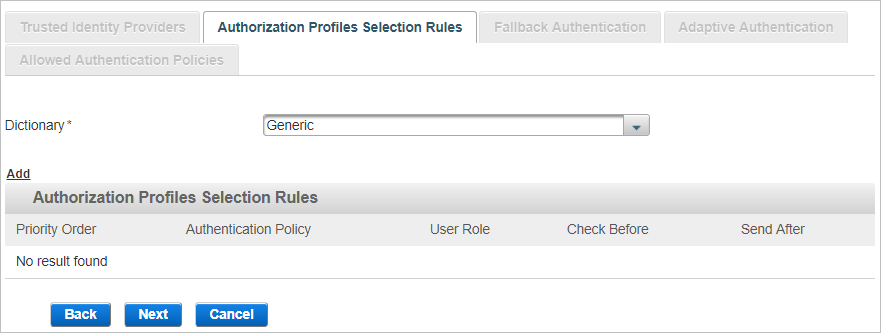
Define the Authorization Profiles Selection Rules (Optional)
An Authorization Profile Selection Rule is selected based on the role and Authentication Policy to be used for the user (dynamic authentication) and the roles granted to the user.
Each rule specifies the following conditions to control access:
Each condition is independent, so the console does not check if the selected Authentication Policy is eligible for the selected User Role:
- Authentication Policy only – the user must belong to an LDAP group enabled with the specified policy.
- User Role only – the user must be assigned the specified role. Users of each role should use different RADIUS IP addresses.
- Authentication Policy AND User Role − both conditions are applied in conjunction.
Adds additional constraints on user access (restricts role depending on defined static RADIUS values and or an LDAP user attributes). The success conditions are:
- The authentication request does not contain the Check Before attribute.
- If a static value is required, the value matches that of the Check Before attribute.
- If an LDAP value is required, the user LDAP value exists and the value matches that of the Check Before attribute.
There are also two automatic conditions:
- Check Before always succeeds (automatic success condition)
- Check Before always fails (automatic fail condition)
Check Before profiles can be generic or RADIUS-specific (to filter users based on LDAP attributes) by selecting the corresponding dictionary. Only the profiles configured with the same dictionary as selected in the Authorization Profile Selection Rule tab can be applied to the rule.
Specifies attributes name/value pairs to return to the service provider.
Send After profiles can be generic or RADIUS-specific by selecting the corresponding dictionary. Only the profiles configured with the same dictionary as selected in the Authorization Profile Selection Rule tab can be applied to the rule.
-
Select the Dictionary from the available list (filtered by the type of channel you are creating).
- The attributes in this dictionary correspond to ActivID AS user attributes.
- Dictionaries are text files of attributes to which you can add entries.
-
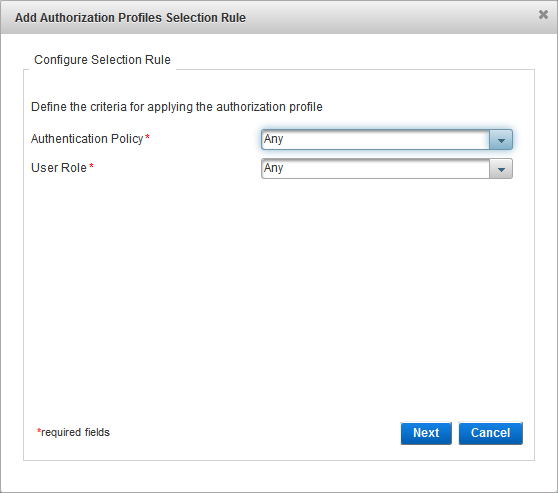
Click Add to add authorization profiles selection rules.
-
From the Authentication Policy drop-down list, select the authentication policy that must be enabled for the user’s group.
-
From the User Role drop-down list, select the role that must be assigned to the user, click Next and proceed to Configure the Check Before Rule.
Configure the Check Before Rule
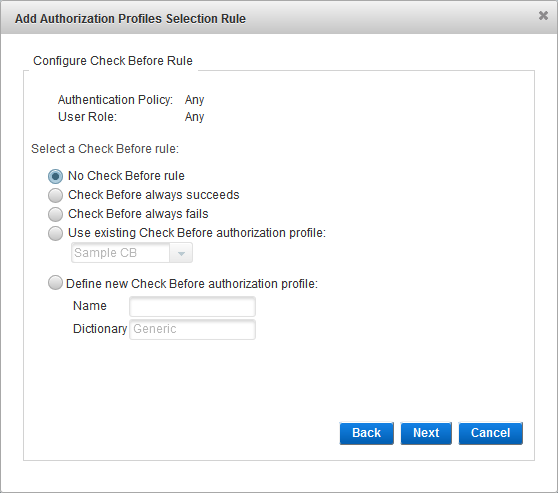
-
Select the Check Before rule option and click Next:
- No Check Before rule - no checks are performed before the authentication request is processed.
- Check Before always succeeds - if the user role and authentication policy match those defined in the selection rule, and the provided credentials are valid, the authentication always succeeds.
- Check Before always fails - if the user role and authentication policy match those defined in the selection rule, the authentication always fails (even if the provided credentials are valid).
- Use existing Check Before authorization profile - from the drop-down list, select the existing profile.
- Define new Check Before authorization profile - enter a Name for the new profile. You cannot modify the Dictionary selection.
- The subsequent steps depend on the selected option:
- If you selected no rule or an existing profile, proceed to Configure the Send After Rule.
- If you selected to define a new profile, Create a Check Before Profile.
Configure the Send After Rule
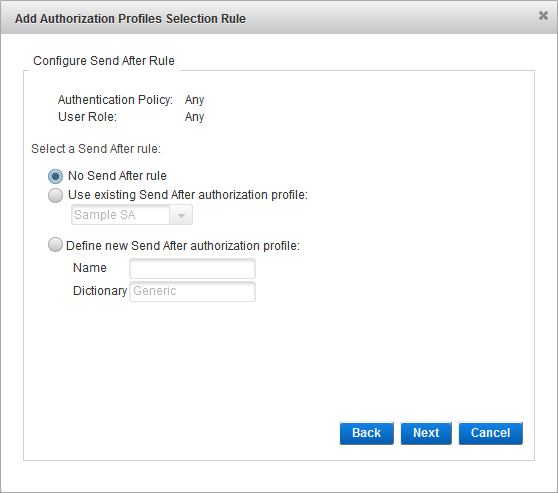
- Select the Send After rule:
- No Send After rule
- Use existing Send After Authorization profile - from the drop-down list, select the existing profile.
- Define new Send After Authorization profile - enter a Name for the new profile. You cannot modify the Dictionary selection.
- If you did not configure a Check Before profile, then you must create/select a Send After profile (that is, the No Send After Authorization profile option is not available).
- If there are no existing profiles, the Select Send After Authorization profile option is not displayed.
- The subsequent steps depend on the selected option:
- If you selected no rule or an existing profile, proceed to the next step.
- If you selected to define a new profile, Create a Send After Profile.
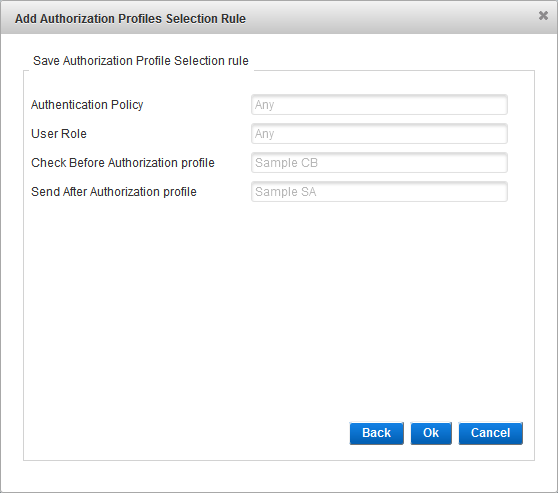
-
- Click OK to save the selection rule, and then click Close when the success message appears. You return to the Add channel page.
- Click Back to edit the rule.
-
You can create multiple rules for the channel and define the order in which they should be applied by ActivID AS.
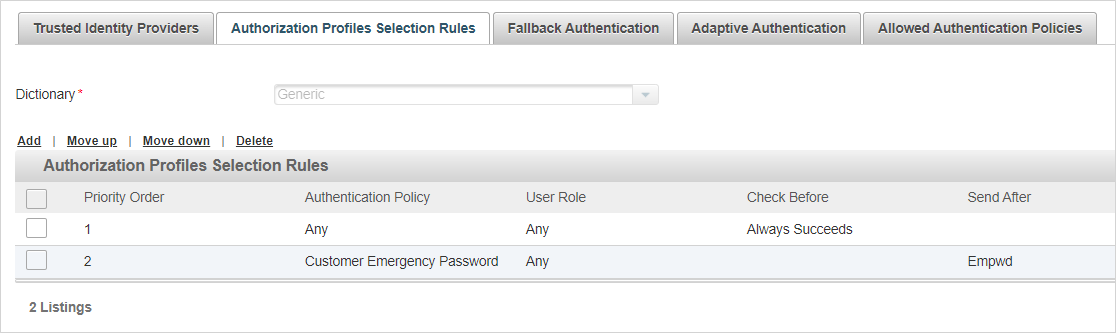
Select the rule and move it to the required position in the Priority Order column using the Move up and Move down options.
Important: When using a Send After profile on a RADIUS channel for push-based authentication, the corresponding rule must be first (1) in the Priority Order.
-
-
For a generic channel, Configure Fallback Authentication (Optional)
- For a RADIUS channel, Configure the Channel Policy (RADIUS Only)
-
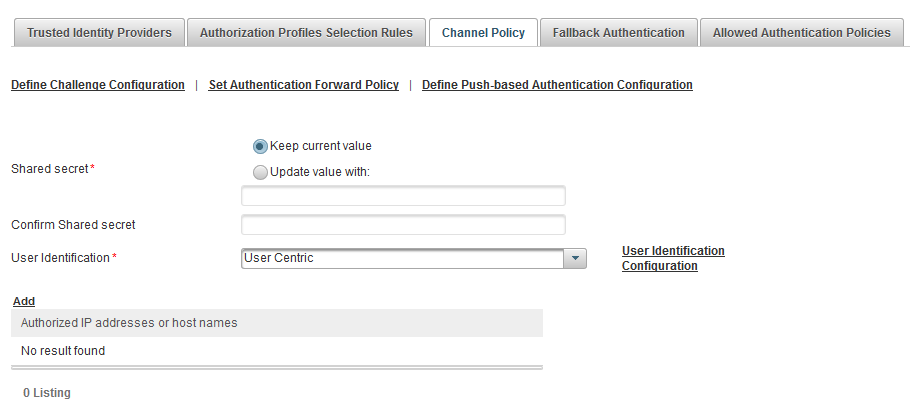
Configure the Channel Policy (RADIUS Only)

- Enter and confirm the Shared secret.
- To configure the User Identification settings, select either:
- User Centric to use the username for logon.
- Device Centric to use the device serial number for logon.
ActivID AS looks up the user based on the serial number entered by the authenticating user.
- Click User Identification Configuration to define how the username or serial number is handled:
The Shared secret encrypts the information exchanges between the ActivID AS server(s) and the access controllers. The secret must be the same for each controller configured in the Channel policy. The secret must not exceed 40 characters.
User Centric configuration
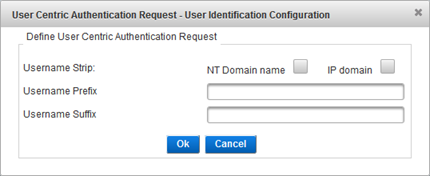
- For the Username Strip setting, select NT Domain name and/or the IP domain to remove a domain prefix or suffix.
- The system uses the NT Domain name to prevent authentication problems with a Microsoft RAS client. In the absence of specific domain settings in the Microsoft RAS client, the Microsoft RAS client inserts the domain name in front of the logon. For example, “DOMAIN\user1” will be stripped to “user1”.
- The system uses the IP domain with realms when your architecture is based on a multiple authentication server backbone. A proxy redirects authentication requests according to the @domain name. ActivID AS removes the <@domain> and validates user identity without changing the architecture.
- To add a Username Prefix or Suffix, enter the required text in the corresponding field.
- Click Ok to apply the settings.
Note: In User Centric mode, you do not need to specify the Authentication Type as it is either specified in the RFE configuration file (User_centic_auth_type_code) and applied to all channels, or automatically selected by ActivID Authentication server for the given user using dynamic authentication policy selection.
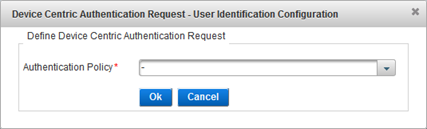
Select the Authentication Policy to apply and click OK.
- To configure the access controllers that are authorized to use the channel for authentication, click Add.
- Select either:
- Host name and enter the name of the machine hosting the access controller.
- IP address and enter the address and range of the access controller.
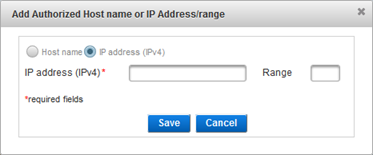 Important: It is recommended that you use IP address rather than Host name. If the host name cannot be translated by the DNS, the RFE might not restart.
 - Click Save.
- If necessary, repeat the steps to authorize access for additional controllers.
- A maximum of 10 authorized IP hosts (IP addresses) can be configured on the RADIUS Channel policy.
- Make sure that each access controller is configured with the Shared secret you specified for the channel.
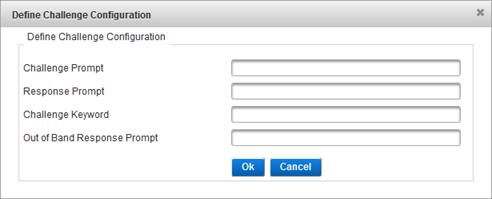
- If users will authenticate using challenge/response, configure the challenge settings by clicking Define Challenge Configuration.
- In the Challenge Promptfield, specify the prompt to display immediately before the challenge.
- In the Response Prompt field, specify the keyword to display immediately before response.
- In the Challenge Keyword field, specify the keyword to send to the authentication server requesting that it send a challenge back. ActivID AS uses this keyword (string) to generate a challenge. If you change it, be sure that you update your NAS and/or client.
- In the Out of Band Response Prompt field, specify the text sent to the NAS (RADIUS client) when using the Activation code.
- Click OK.
- If you want ActivID AS to redirect an authentication request to another authentication system, click Set Authentication Forward Policy.
- Reason Codes Authentications − reason codes for the authentication failure to forward.
- Reason Codes Challenge − reason codes for challenge failure to forward.
- Reason Codes ERROR − error code to forward.
- To activate RADIUS push-based user authentication on this channel, click Define Push-based Authentication Configuration.
- In the Push Authentication Policy Code field, enter the authentication policy that will be used by the HID Approve mobile application to validate the logon requests.
- In the Push Keyword field, enter the keyword that the user will have to enter in the RADIUS client application (for example, a VPN client application) as the password to trigger the push-based authentication.
- In the Logon Request Message field, enter the message that will be displayed to the user by the HID Approve mobile application and click Ok.
- In the Channel Policy tab, click Next and proceed to Configure Fallback Authentication (Optional).

The access controller is displayed in the channel page and is now authorized to use the channel for authentication requests.
This is helpful for failed authentication requests (for example, if a user cannot be located in the LDAP directory). Conditional routing enables the system to route a user’s request directly to an external RADIUS authentication server.
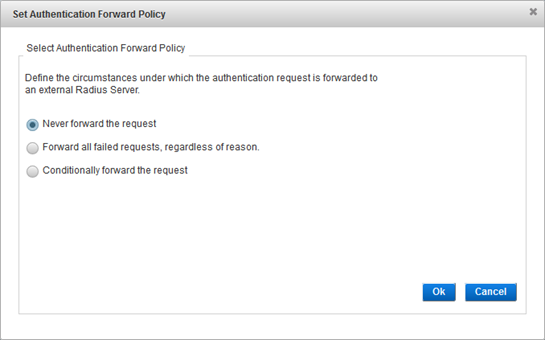
To define how failed authentication requests are handled, select one of the following options:
Proceed to the next step.
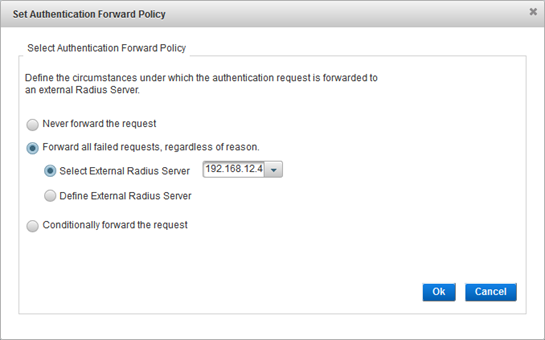
Either Select an existing external RADIUS server or Define a new one.
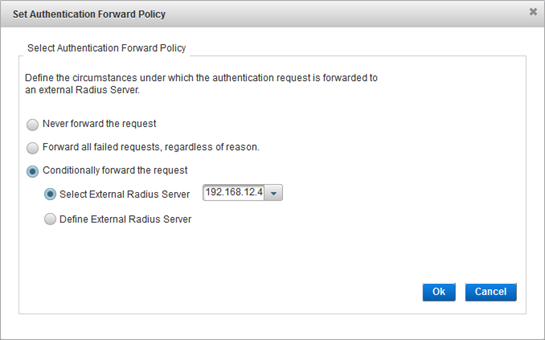
To view these conditions (and codes), open the activid_server.properties properties file in the <ACTIVID_AS_HOME>/applications/resources/srv directory.
There are three reasons to forward the request:
Either Select an existing external RADIUS server or Define a new one.
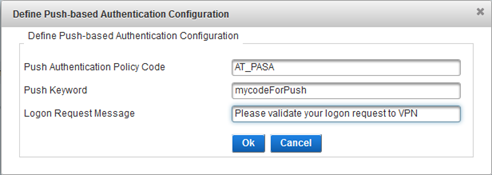
For the default push-based configuration, use the AT_PASA authentication policy (Mobile push-based Logon Validation).
Configure Fallback Authentication (Optional)
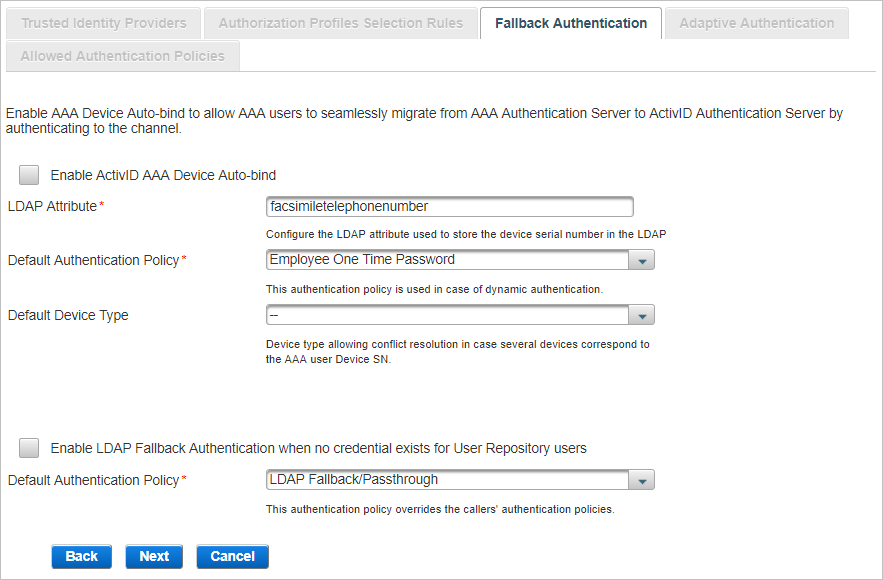
Select one or both of the Fallback authentications available and click Next:
AAA Device Auto-bind enables AAA users to be automatically authenticated using OTP generated by their device in the context of AAA user migration to ActivID AS.
Following the user’s authentication on the channel, a Device authenticator will be created for the user, and the device will be bound to the user.
When the user enters an incorrect OTP, the authentication process will fail. However, a Device authenticator is created for the user, and the device will be bound to the user. The failed authentication attempt will be recorded.
The .sds files corresponding to the AAA users’ devices have been exported from AAA and imported into ActivID AS.
To make sure that the devices will be synchronized when imported into ActivID AS, you must update the AAA administration database with the credentials of all devices used for synchronous authentication prior to the export. This is done through the AAA console “/Tools/Retrieve Device Credentials” option.
The LDAP attribute used to store the devices’ serial numbers has been mapped to one of the user attributes in the User Repositories.
AAA user device serial numbers are stored in each user’s appropriate LDAP attribute (for example, facsimileTelephoneNumber) as defined in the AAA Server configuration. For more information, refer to ActivID AAA documentation.
The User Repository has been enabled for a User Type and an Admin Group.
-
In the Fallback Authentication tab, select Enable AAA Device Auto-bind.
-
If the LDAP attribute used to store the Device SN is different from facsimileTelephoneNumber, enter the correct value in the LDAP Attribute field.
-
Select the Default Authentication Policy that will be created for the AAA user upon authentication with a device on this channel. The default value is Employee One Time Password.
-
Optionally, select the Device Type to be bound to the user.
You must ensure that the following attributes are set for the specific device types:
- Soft PIN position – set to Either.
- Default PIN applied on import – leave it blank. Otherwise, the soft PIN of the devices will be changed to the new default values.
- Soft PIN Minimum length – set according to the AAA device.
- Soft PIN Maximum length – set according to the AAA device.
You must set these attributes for the following device types:
- Mini Token (OT) + PIN
- Mini Token (OE) + PIN
- Mini Token (AT) + PIN
- Mini Token (AE) + PIN
LDAP Fallback enables users to be automatically authenticated using their static LDAP password until another method of authentication is specifically assigned to them.
- This setting is channel-specific.
- By default, an LDAP Fallback/Passthrough authenticator will be created for the LDAP users upon authentication to ActivID AS. Once the user’s authenticator has been created using one of ActivID AS authentication policies, the LDAP Fallback/Passthrough authenticator will no longer be used.
- By default, the LDAP Fallback/Passthrough authentication policy is not assigned with any user permissions in the ActivID Management Console. To enable privileges for the LDAP user when they log on using their LDAP static password, the LDAP Fallback/Passthrough authentication policy must be assigned with the relevant permissions.
-
Select Enable LDAP Fallback Authentication when no credential exists for User Repository users.
-
Select the Default Authentication Policy that will be created for the LDAP user upon authentication on this channel. The default value is LDAP Fallback/Passthrough.
When both the Device Auto-bind and LDAP Fallback Authentication options are enabled, both AAA users awaiting their devices to be bound and LDAP users awaiting their authenticators can authenticate with their LDAP password.
- Select both Enable AAA Device Auto-bind and Enable LDAP Fallback Authentication ....
-
Customize settings as described in the previous sections.
Click Next and proceed to:
-
For a generic channel, Configure Adaptive Authentication Settings (Optional, Generic Only)
-
For a RADIUS channel, View the Allowed Authentication Policies
Configure Adaptive Authentication Settings (Optional, Generic Only)
The Adaptive Authentication settings are used in the HID Risk Management Solution (RMS) to bind an RMS source to the required channel. For further information, refer to the HID Risk Management Solution Integration Guide available from the ActivID Customer Portal.
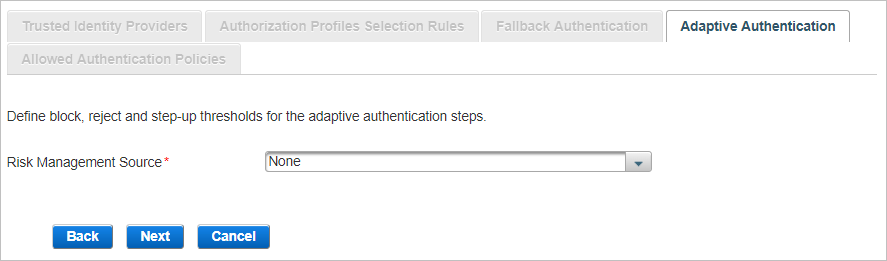
Click Next and proceed to View the Allowed Authentication Policies.
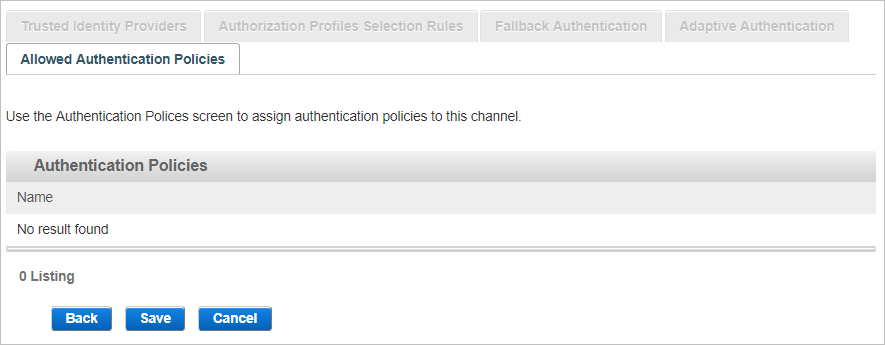
View the Allowed Authentication Policies
The Allowed Authentication Policies tab lists the policies assigned to the channel. As this is a new channel, there are no policies currently assigned when the channel is created.
-
Click Save to apply the channel settings.
- Add this channel to the required authentication policy(ies).
Edit a Channel
-
Log on to the ActivID Management Console as an ActivID Administrator.
- Select the Configuration tab and, under Policies, select Channels.
-
Edit the channel settings as required in each tab.
All the tabs are accessible and all settings can be modified except the Code.
-
Click Save to apply your changes.
If you want to cancel the operation, click Back to List.
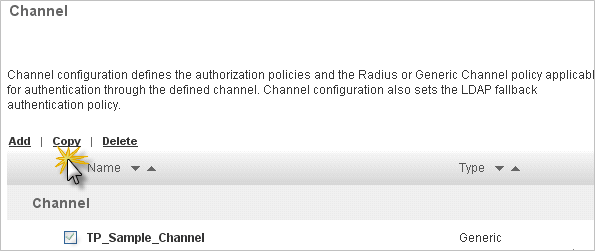
Copy a Channel
-
Log on to the ActivID Management Console as an ActivID Administrator.
- Select the Configuration tab and, under Policies, select Channels.
-
Select the check box of the channel that you want to copy.
-
Click Copy.
- Edit the channel settings as required.
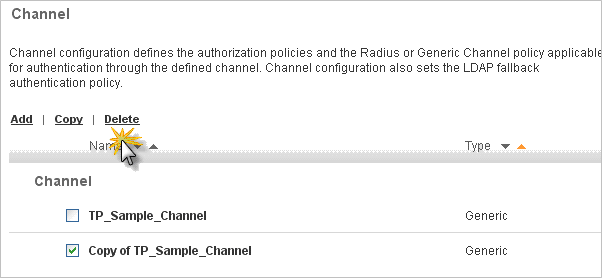
Delete a Channel
Make sure the channel is not linked to one or more authentication policies. You will not be able delete the channel if it is still in use.
-
Log on to the ActivID Management Console as an ActivID Administrator.
- Select the Configuration tab and, under Policies, select Channels.
-
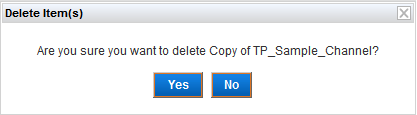
Select the check box of the channel that you want to delete and click Delete.
-
When prompted, click Yes.
See also:


