Brother QL-820NWB Label Printer - Wired Setup
This article will assist with connecting your Brother QL-820NWB Label Printer using the direct wired network connection method.
-
Badge Printing via Wired connection only works with the browser application (not with SAFE Mobile app 5.0).
Prerequisites
-
Ensure you are logged in to the workstation with administrator rights.
-
Use a static IP address to connect the printer to a wired LAN connection.
-
Badge Print setting should be enabled at Settings app > Visitor Manager tab > Check-In sub-tab.
-
Ensure that the Enable Print Badge On Visitor Check-In setting should be enabled at the Location record > Kiosk Preferences tab.
Printing badges via Wired connection
-
After the installer starts, continue with the setup wizard until you see the below screen. Select the bluetooth connection type and click Next.
-
Download the printer driver and P-touch Editor from the [Downloads] section of this website.
-
Start the printer driver installer.
-
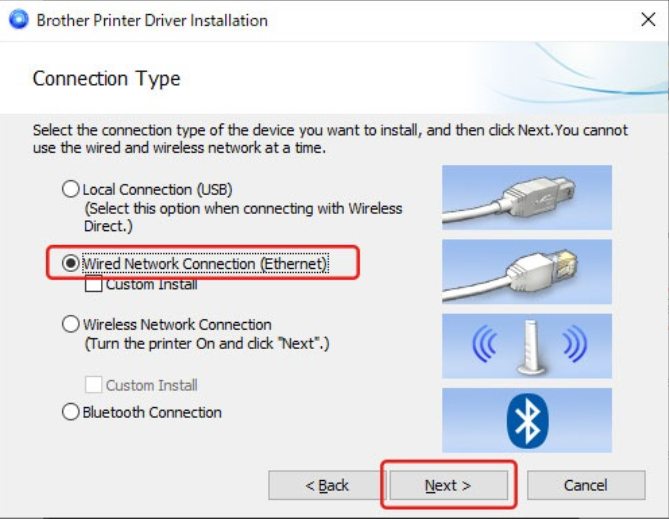
When the [Connection Type] dialog box appears, select Wired Network Connection (Ethernet), then click Next and follow the instructions to complete the installation.

-
Before connecting the LAN cable, ensure that the printer is turned off.
-
Connect the LAN cable to the LAN Port on the back of the printer.
-
Connect the LAN cable to an active LAN Port on the network.
-
Turn on the printer.
Configure the Printing Parameters
This section is only applicable for Windows workstations.
Once the printer setup is done, the next step is to configure the Printing parameters in Smart Client Installer. Refer to Configuration of Printing Parameters for more details.
Once the Printer setup and printing parameters configuration is done, check in the visitors using the below articles.
Related Articles:


