Provision a Pending Request
Have a valid license for the FIDO Provisioning service
To purchase new licenses or renew existing ones, contact your HID Account Manager.
Have the Administrator or Device Service Administrator role, or at least the Provision Now privilege
Install the FIDO Provisioning Application
Note: You must have administrator rights to install and use the application on the workstation.For manual provisioning, you have:
Have the devices available for provisioning
Connected a smart card reader to the workstation
For automatic provisioning, you have:
Set up the printer
Loaded the cards into the printer's hopper, making sure there are enough cards to provision all the users in the request
Note: Depending on the printer's capacity, you might need to reload the hopper during the provisioning process.
Launch the Provisioning Request
-
Expand Passkey Management
 in the left menu and select Provisioning.
 -
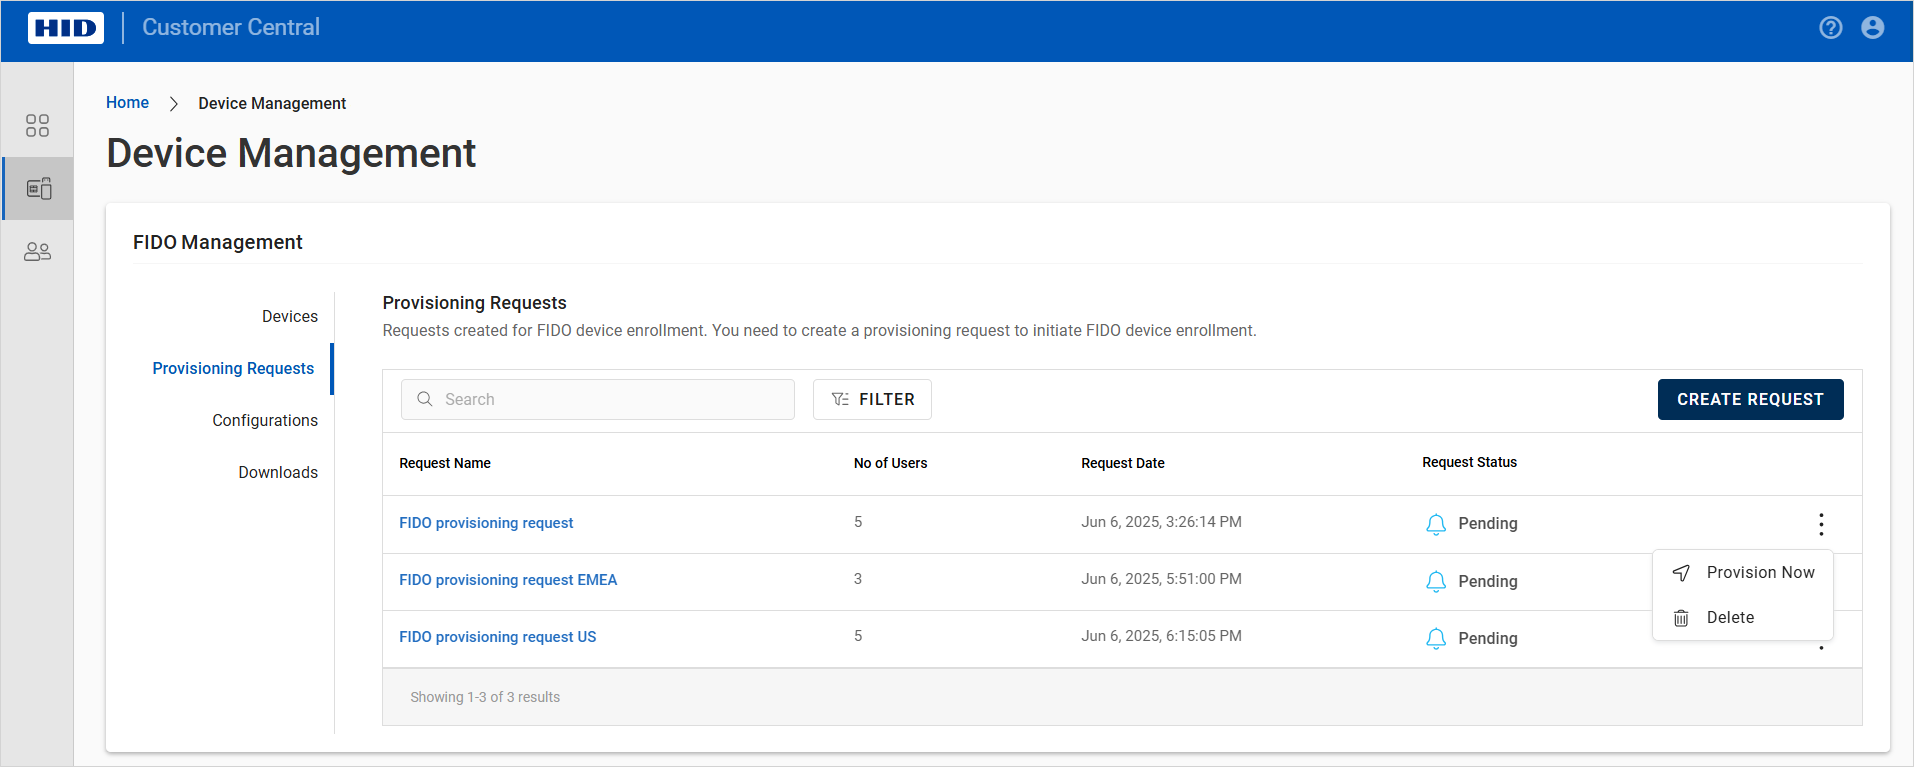
In the list of requests, click the menu icon
 for the request and select Provision Now.
-
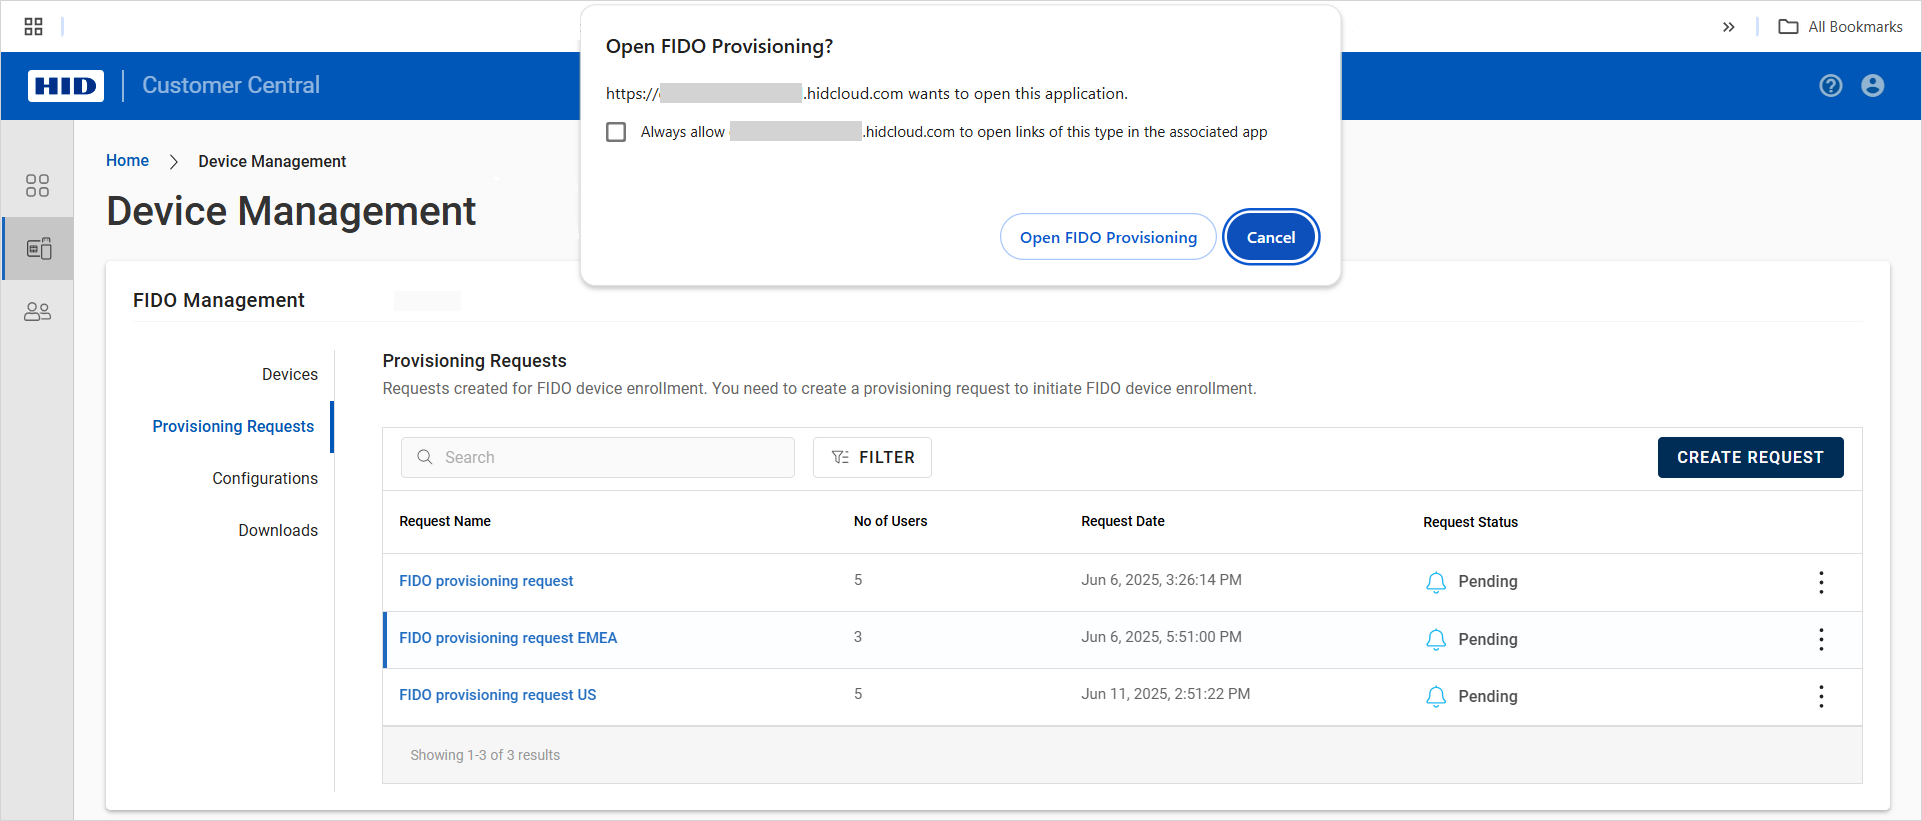
When prompted, click Open FIDO Provisioning to launch the application and enroll devices for your users.
Note:If the prompt does not display, verify that the application is correctly installed and then Provision a Pending Request
As the application requires administration rights, you might be prompted to allow the required permissions on your machine
-
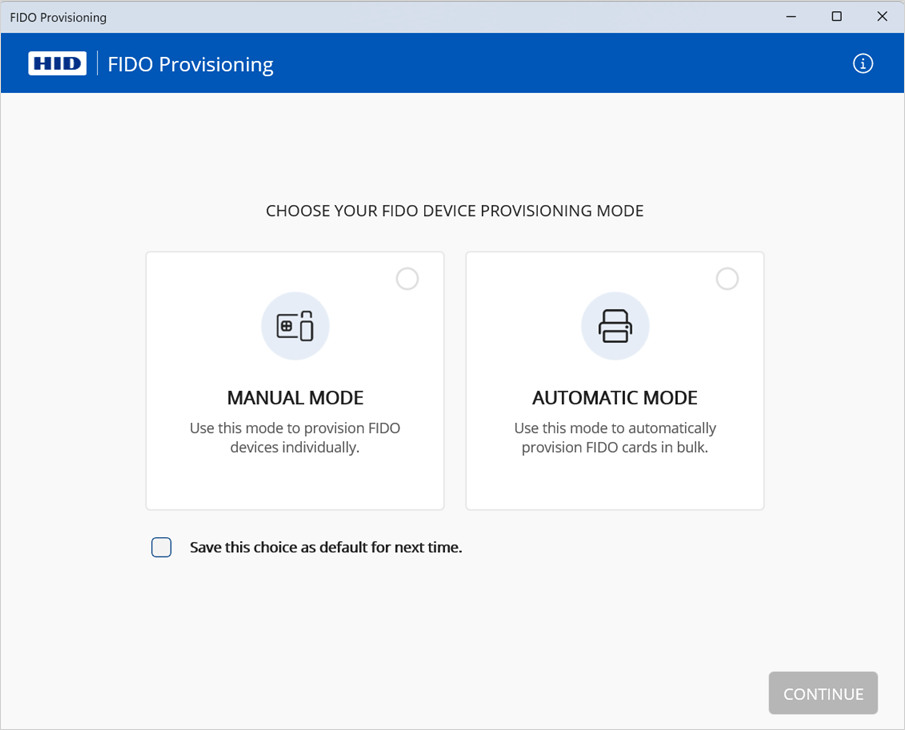
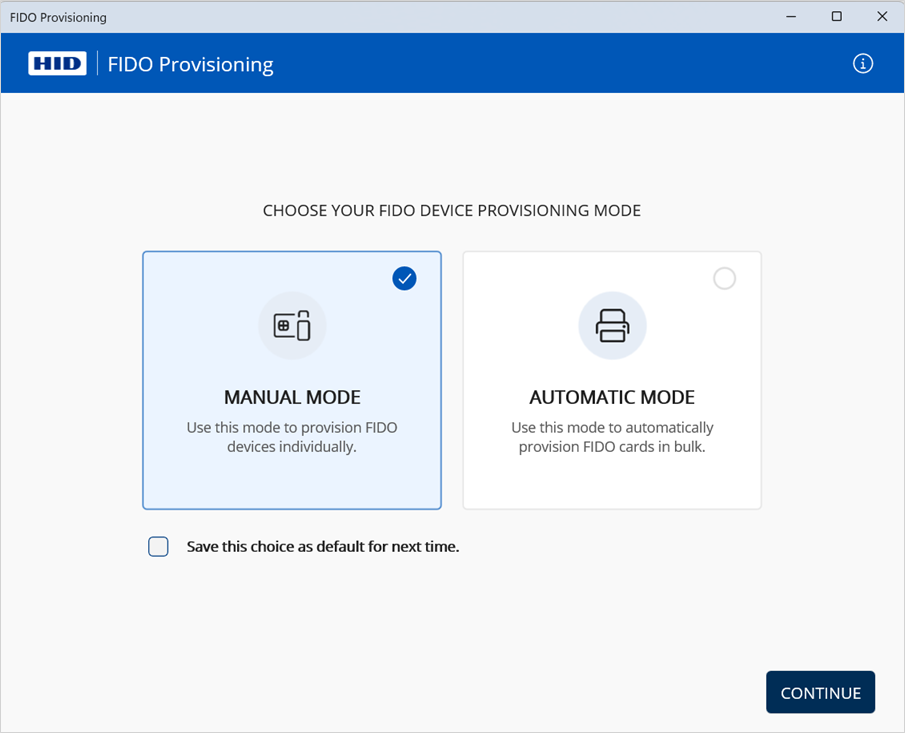
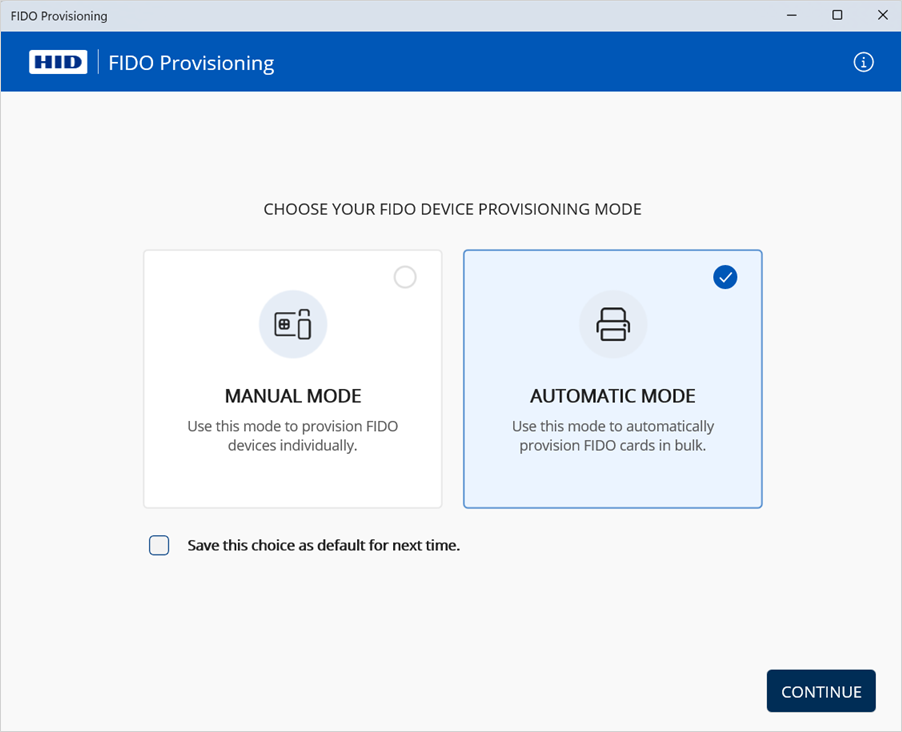
Select the mode and click CONTINUE:
-
Manual:
Proceed to manual provisioning.
-
Automatic:
Proceed to automatic provisioning.
-
Provision Devices Manually
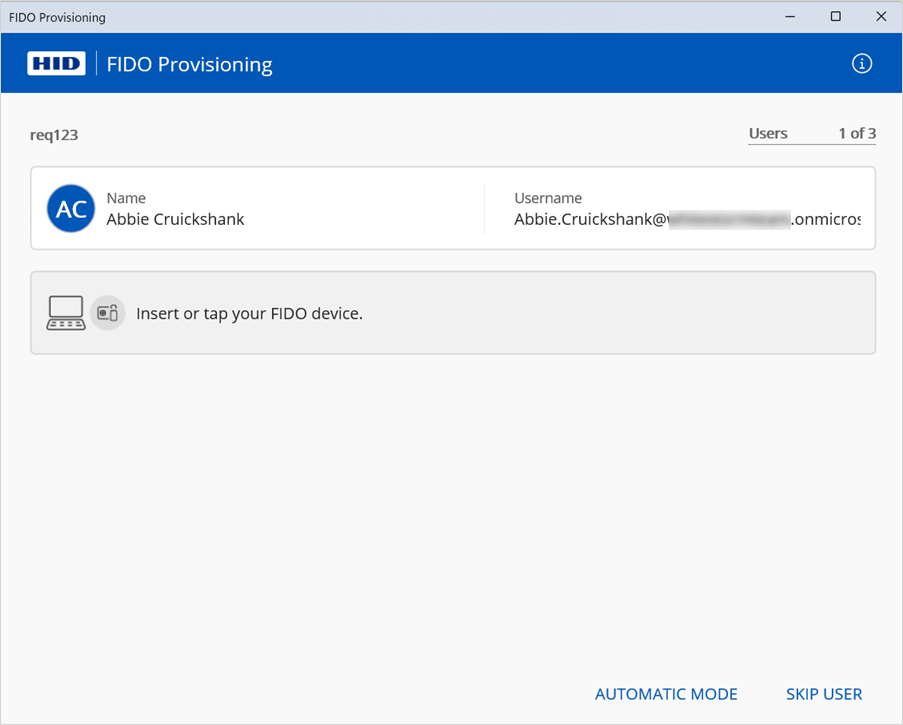
The application loads the required user information and displays the details of the first user detected in the request.
-
Insert the FIDO device into the machine's USB port or place/insert the FIDO smart card into the reader.
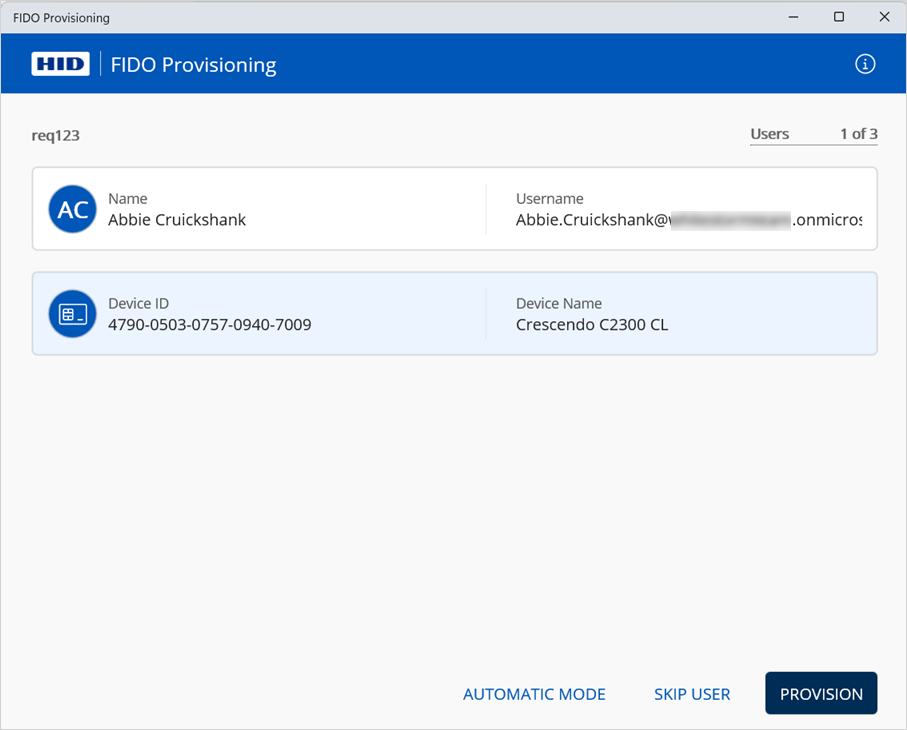
The application detects the device and displays the information.
Note: The application only manages one device at a time (the last device detected) even if multiple devices are connected. -
Verify that the provisioning information is correct for the user and device.
If necessary, you can also:
-
Click SKIP USER to proceed to the next user in the provisioning request
-
Remove the device from the reader or USB port and select another device for the currently selected user
-
-
Click PROVISION.
Note: If you are provisioning a Crescendo Key in USB mode, press the button (flashing orange) to validate the operation. -
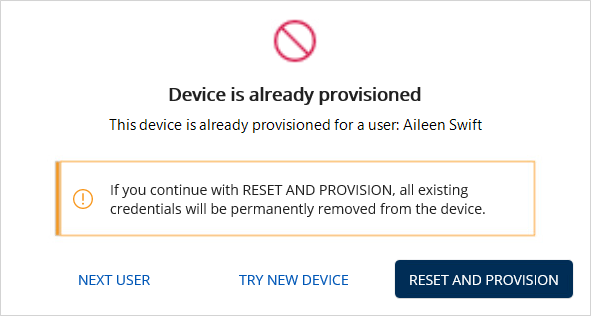
If the application detects that the device is already provisioned, click one of the following options:
-
NEXT USER - proceed to the next user in the provisioning request
-
TRY NEW DEVICE - select another device to provision to the currently selected user
-
RESET AND PROVISION - reset the device and provision it to the currently selected user
Important:Before resetting the device, confirm that any stored credentials are no longer needed, as they will be permanently deleted
You cannot reset a FIDO device if its PIN is locked
If the reset does not work, remove device from the reader and then re-insert or tap again
You can only reset a Crescendo Key in USB mode and you must press the button (flashing orange) to validate the reset and provisioning operations
Reset is not supported in contactless mode.
-
-
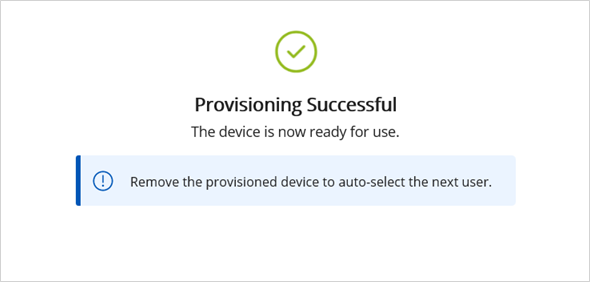
After the success message is displayed, remove the device from the reader or USB port.
The application proceeds to the provisioning for the next user in the request.
-
Repeat the above steps for all the users.
When the final user is provisioned, the completed message is displayed.
-
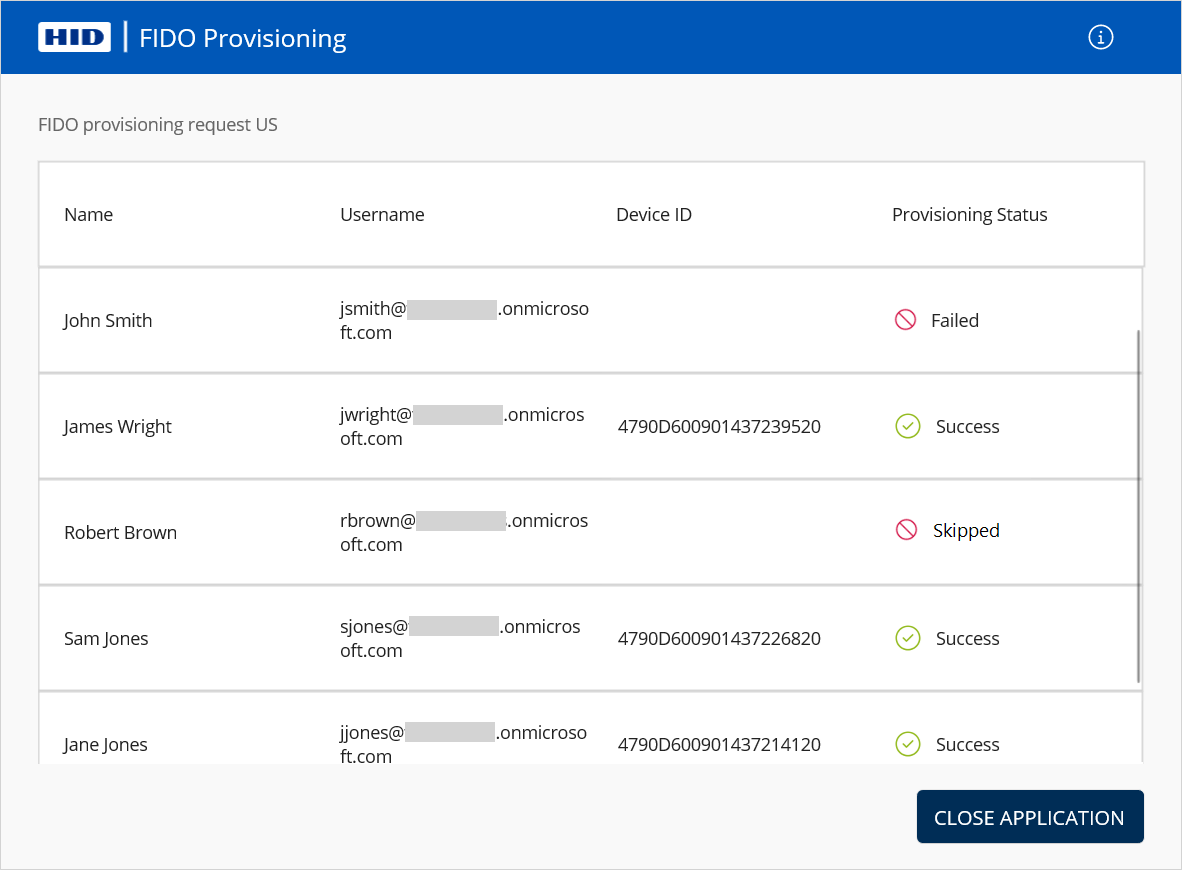
Click VIEW SUMMARY to review the request details.
Category Description Failed
The provisioning attempt failed due to an error during this session
-
Download the report for the provisioning request and review the reason for the failure.
-
If required, create a new provisioning request for the pending users.
Skipped
The provisioning attempt was not made as the user was skipped
Run the provisioning request again.
-
-
Then click CLOSE APPLICATION.
Provision Devices Automatically
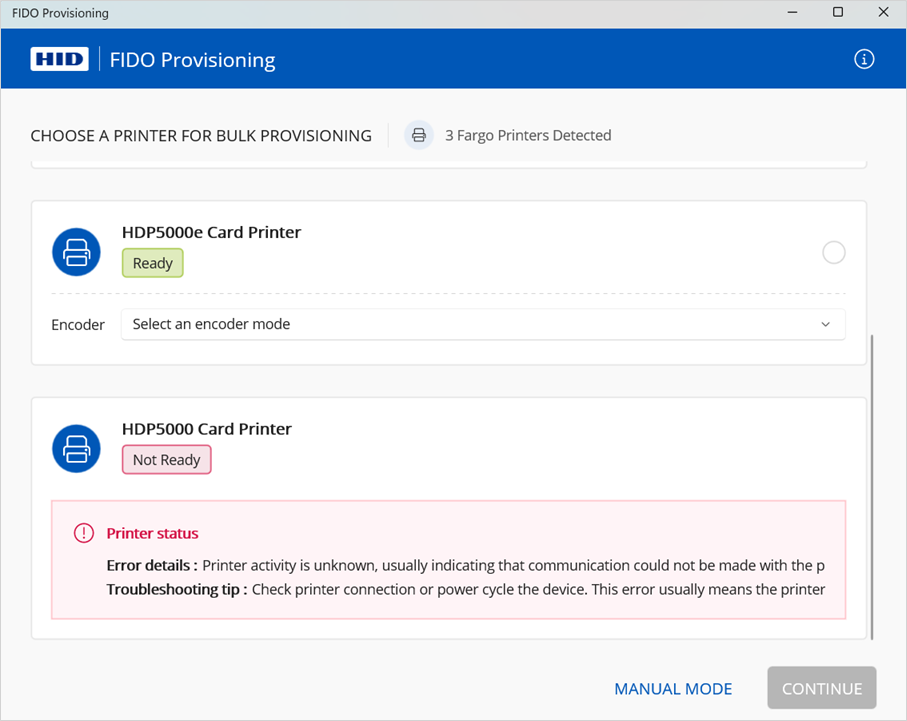
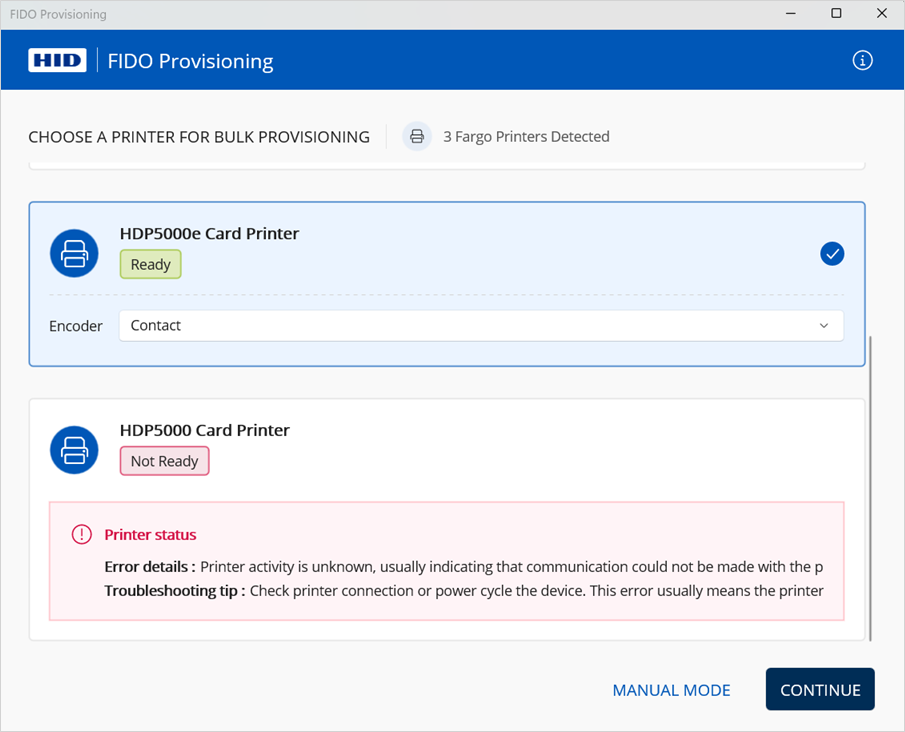
The application displays the details of the detected printers:
-
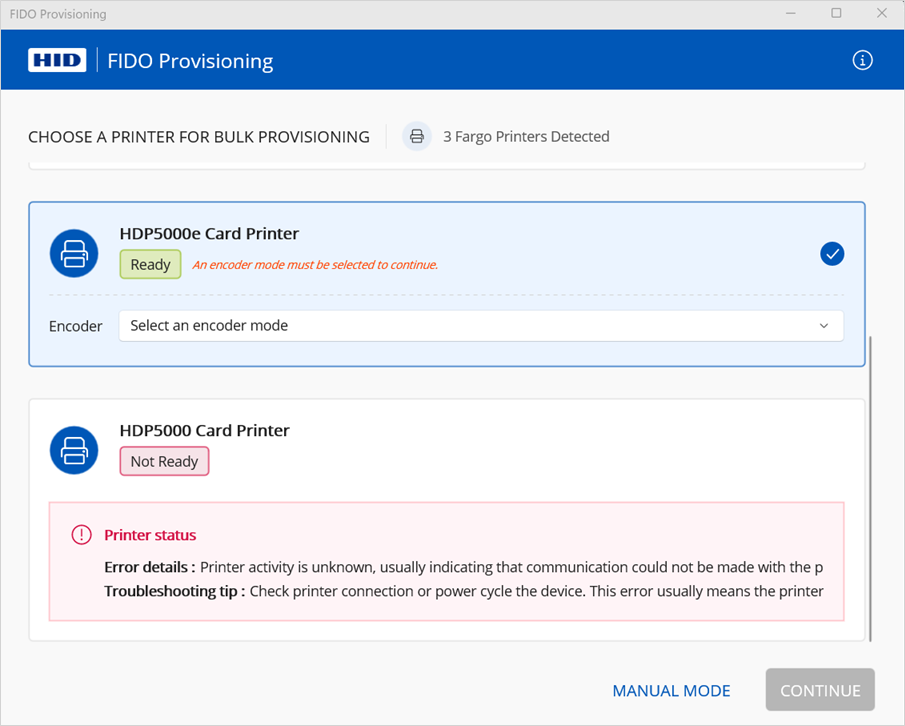
Select the required printer.
-
Select the Encoder mode:
-
Contact
-
Contactless
Note: The available encoder options depend on the configuration of the detected printer. If you are unsure which mode to use, select Contact.For further information, refer to the corresponding user guide for the printer available from the HID Document Library.
-
-
Click CONTINUE.
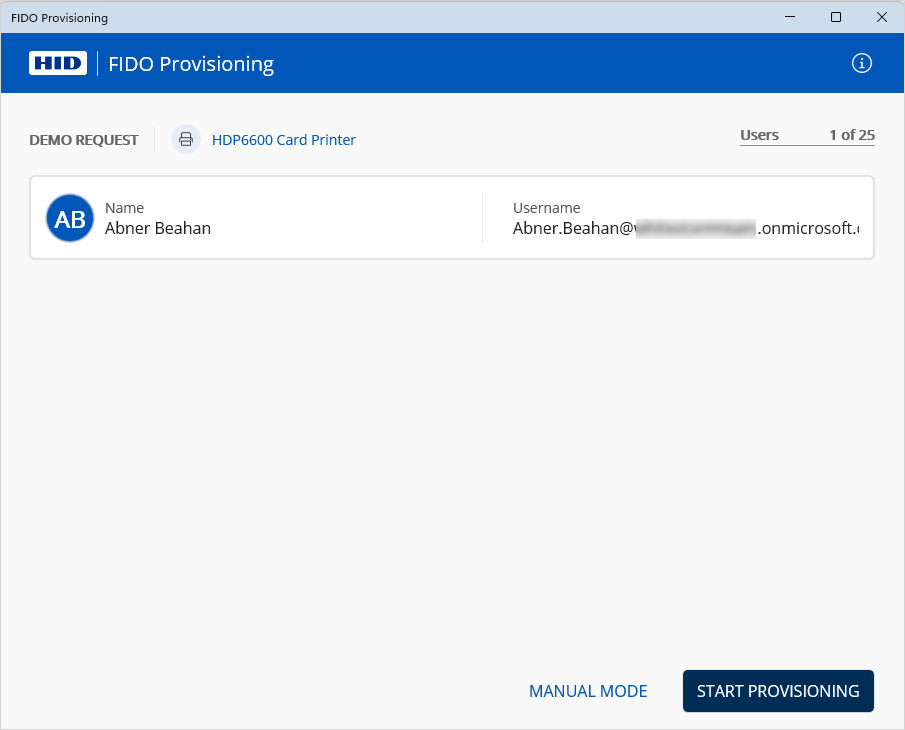
The application loads the required user information and displays the details of the first user detected in the request.
-
Verify that the provisioning information is correct for the user.
-
Click START PROVISIONING.
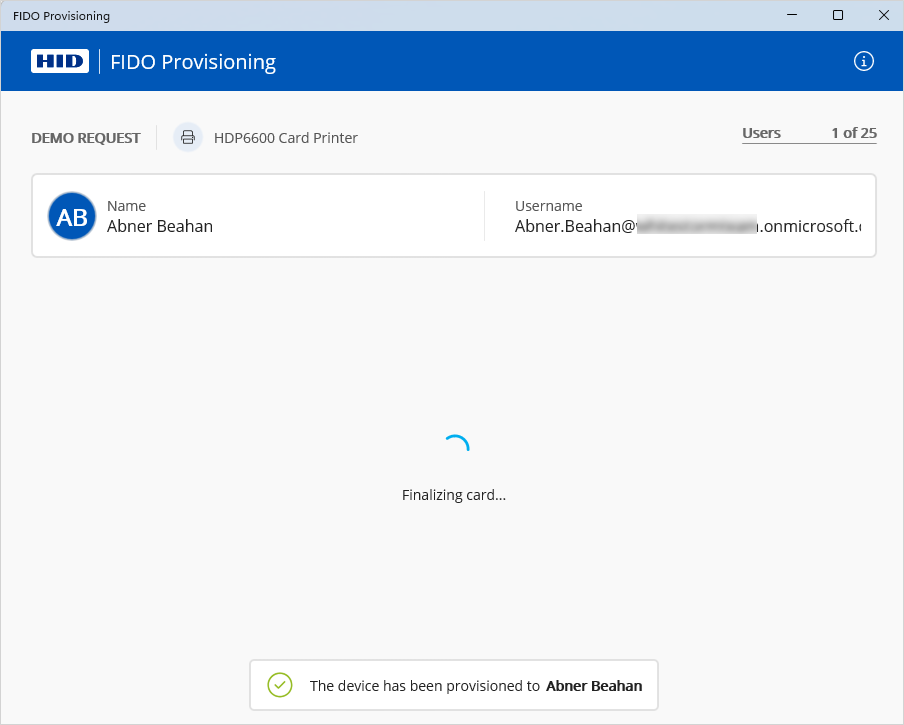
Important: Do not connect any other devices to your workstation during the provisioning to avoid process interruptions or failures.The application displays the status of the device provisioning for the user before proceeding to the next user in the request.
Note: If an error occurs, a notification is displayed. For example:
For further details and resolution suggestions, see Troubleshooting.
When the final user is provisioned, the completed message is displayed.
The provisioned card is ejected by the printer.
-
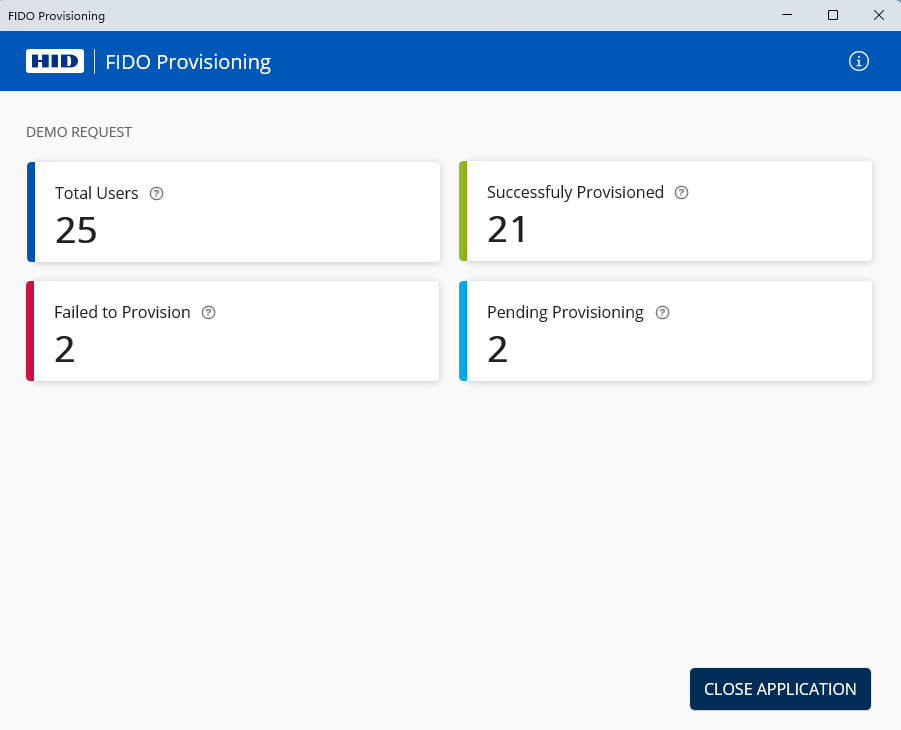
Click VIEW SUMMARY to review the request details.
Category Description Total Users The total number of users from the Provisioning Request Successfully Provisioned The number of users successfully provisioned during this session Failed
The number of users that were attempted but failed to provision due to an error during this session
-
Download the report for the provisioning request and review the reason for the failure.
-
If required, create a new provisioning request for the remaining users.
Pending
The total number of users not yet provisioned because the job was halted due to an error
Unlike failed provisioning, these user accounts have not been attempted
Run the provisioning request again. If the error persists, contact HID Technical Support.
-
-
Then click CLOSE APPLICATION.
Verify the Device Enrollment
Microsoft Entra ID Users
-
Log on to the Microsoft Entra admin center (https://entra.microsoft.com/#home) and, if necessary, switch to the required directory.
-
Expand Identity in the left menu and select Applications.
-
Select Enterprise applications and then your Passkey Management application.
-
Under Manage, select Users and groups.
-
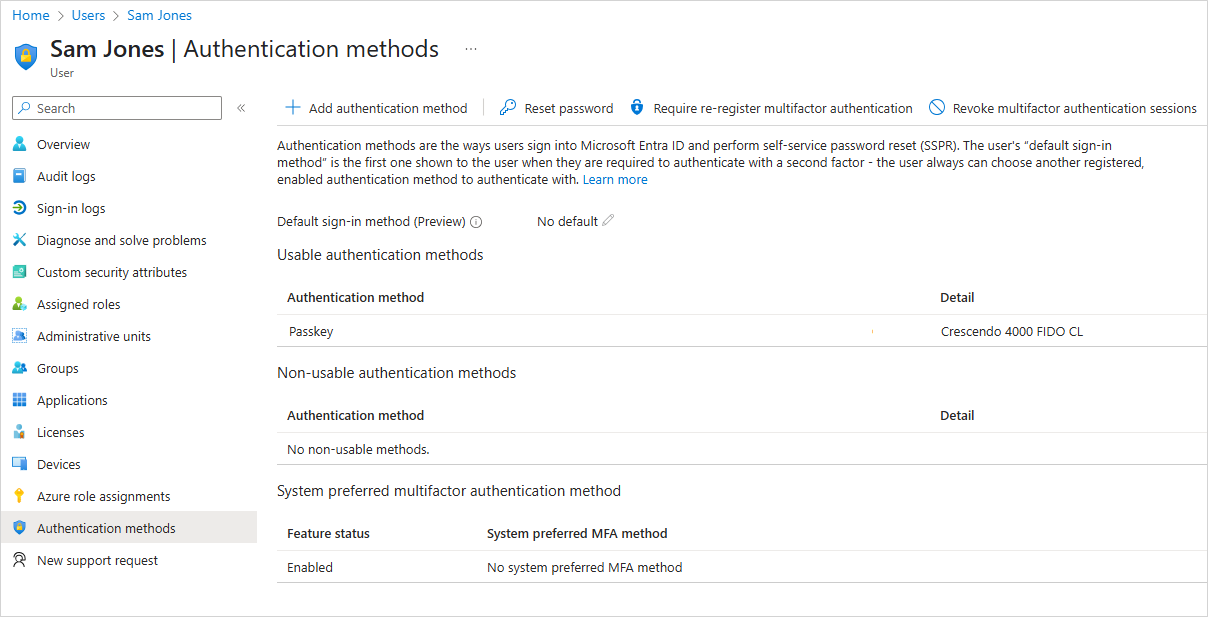
Search for the users or groups for which you provisioned the devices and verify that the FIDO device is correctly registered as a credential.
For example:
PingOne Users
-
Log on to the PingIdentity console as an administrator for your PingOne environment.
-
Expand Directory in the left menu and select Users.
-
Search for the users or groups for which you provisioned the devices.
-
Select a user and from the Services drop-down menu, select Authentication.
-
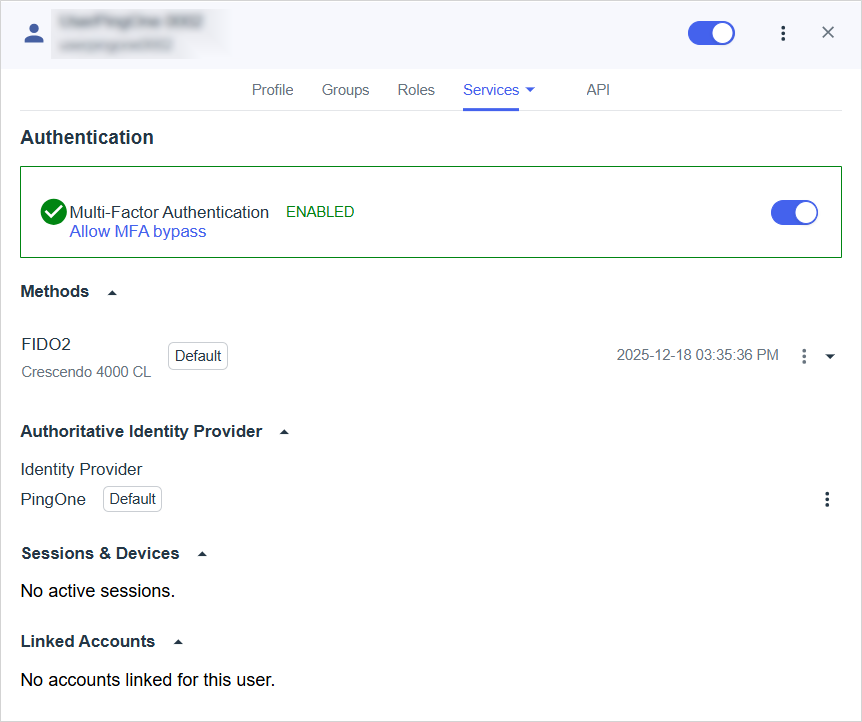
Verify that the FIDO device is correctly registered as a credential.
For example:
